Exportação para Sony IMX500 com Ultralytics YOLO11
Este guia aborda a exportação e a implantação dos modelos Ultralytics YOLOv8n e YOLO11n em Raspberry Pi AI Cameras com o sensor Sony IMX500.
Implantar modelos de visão computacional em dispositivos com capacidade computacional limitada, como a Raspberry Pi AI Camera, pode ser complicado. Usar um formato de modelo otimizado para oferecer maior velocidade faz uma grande diferença.
O formato de modelo IMX500 foi projetado para consumir o mínimo de energia e, ao mesmo tempo, oferecer alto desempenho para redes neurais. Ele permite otimizar seus modelos Ultralytics YOLO11 para inferência de alta velocidade e baixo consumo de energia. Este guia mostra como exportar seus modelos para o formato IMX500 e implantá-los na Raspberry Pi AI Camera.
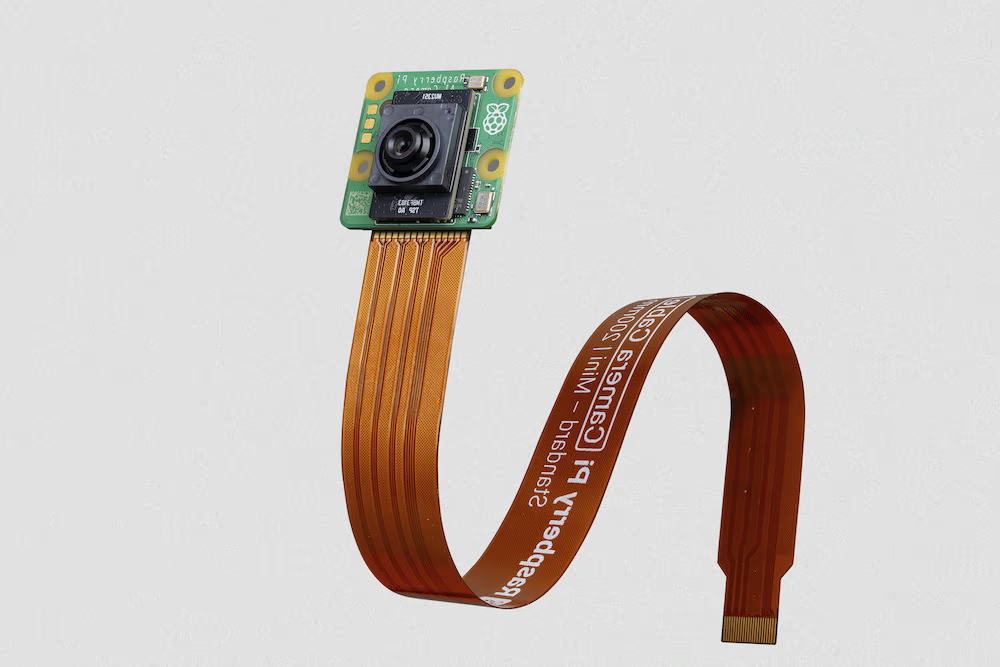
Por que exportar para IMX500?#
O sensor de visão inteligente IMX500 da Sony executa o processamento de IA no próprio sensor, algo que a Sony descreve como uma estreia mundial para um sensor de visão inteligente. Ele ajuda a superar desafios comuns de IA na borda, incluindo gargalos no processamento de dados, questões de privacidade e limitações de desempenho. Enquanto os sensores convencionais apenas transmitem imagens e quadros, o IMX500 interpreta o que captura, permitindo que os dispositivos gerem insights em tempo real.
Exportação da Sony IMX500 para modelos YOLO11#
O IMX500 foi projetado para processar dados diretamente no sensor, sem enviá-los à nuvem para processamento.
O IMX500 é compatível com modelos quantizados. A quantização torna os modelos menores e mais rápidos sem perder muita precisão. Ela é adequada aos recursos limitados da computação de borda, permitindo que as aplicações respondam rapidamente ao reduzir a latência e possibilitar o processamento local rápido dos dados, sem depender da nuvem. O processamento local também mantém os dados dos usuários privados e seguros, pois eles não são enviados a um servidor remoto.
Principais recursos do IMX500:
- Saída de metadados: Em vez de transmitir apenas imagens, o IMX500 pode gerar tanto imagens quanto metadados (resultados da inferência), ou somente metadados para minimizar o tamanho dos dados, reduzir o uso de largura de banda e diminuir os custos.
- Aborda questões de privacidade: ao processar dados no dispositivo, o IMX500 responde a questões de privacidade, sendo adequado a aplicações centradas nas pessoas, como contagem de pessoas e monitoramento de ocupação.
- Processamento em tempo real: o processamento rápido no sensor viabiliza decisões em tempo real para aplicações de IA de borda, como sistemas autônomos.
Antes de começar: para obter os melhores resultados, prepare seu modelo YOLO11 para exportação seguindo nosso Guia de treinamento de modelos, a Visão geral dos conjuntos de dados e o Guia de ajuste de hiperparâmetros.
Tarefas suportadas#
A exportação para IMX500 oferece suporte a quatro das sete tarefas da Ultralytics e somente para YOLOv8n e YOLO11n: outras famílias de modelos, escalas e arquiteturas não são compatíveis, e a exportação de um modelo de segmentação semântica, OBB ou estimativa de profundidade gera um erro.
| Tarefa | YOLOv8 | YOLO11 | YOLO26 |
|---|---|---|---|
| Detetar | ✅ | ✅ | ❌ |
| Segmentar | ✅ | ✅ | ❌ |
| Semântica | ❌ | ❌ | ❌ |
| Profundidade | ❌ | ❌ | ❌ |
| Classificar | ✅ | ✅ | ❌ |
| Pose | ✅ | ✅ | ❌ |
| OBB | ❌ | ❌ | ❌ |
Exemplos de uso#
Exporte um modelo Ultralytics YOLO11 para o formato IMX500 e execute inferências com o modelo exportado.
O formato IMX500 é compatível com os modos Exportar, Prever e Validar. A inferência e a validação do Ultralytics executam o model_imx.onnx exportado na CPU do host.
A inferência aqui serve apenas para confirmar que o modelo exportado funciona conforme esperado antes de implantá-lo na Raspberry Pi AI Camera.
from ultralytics import YOLO

# Carrega um modelo YOLO11n PyTorch
model = YOLO("yolo11n.pt")

# Exporta o modelo
model.export(format="imx", data="coco8.yaml")  # exporta com quantização PTQ por padrão

# Carrega o modelo exportado
imx_model = YOLO("yolo11n_imx_model")

# Executar inferência
results = imx_model("https://ultralytics.com/images/bus.jpg")from ultralytics import YOLO
# Carrega um modelo YOLO11n-pose PyTorch
model = YOLO("yolo11n-pose.pt")
# Exporta o modelo
model.export(format="imx", data="coco8-pose.yaml") # exporta com quantização PTQ por padrão
# Carrega o modelo exportado
imx_model = YOLO("yolo11n-pose_imx_model")
# Executar inferência
results = imx_model("https://ultralytics.com/images/bus.jpg")from ultralytics import YOLO
# Carrega um modelo YOLO11n-cls PyTorch
model = YOLO("yolo11n-cls.pt")
# Exporta o modelo
model.export(format="imx", data="imagenet10") # exporta com quantização PTQ por padrão
# Carrega o modelo exportado
imx_model = YOLO("yolo11n-cls_imx_model")
# Executar inferência
results = imx_model("https://ultralytics.com/images/bus.jpg", imgsz=224)from ultralytics import YOLO
# Carrega um modelo YOLO11n-seg PyTorch
model = YOLO("yolo11n-seg.pt")
# Exporta o modelo
model.export(format="imx", data="coco8-seg.yaml") # exporta com quantização PTQ por padrão
# Carrega o modelo exportado
imx_model = YOLO("yolo11n-seg_imx_model")
# Executar inferência
results = imx_model("https://ultralytics.com/images/bus.jpg")from ultralytics import YOLO
# Carrega o modelo IMX500 exportado
model = YOLO("yolo11n_imx_model")
# Validar a precisão no conjunto de dados COCO8
metrics = model.val(data="coco8.yaml")A exportação para IMX só é compatível com Linux com Python 3.10–3.12 e requer Java 17 ou posterior. O pacote Ultralytics instala dependências adicionais de exportação durante a execução. Na primeira vez que executares o comando de exportação, talvez precises de reiniciar a consola para garantir que funciona corretamente.
Argumentos de exportação#
| Argumento | Tipo | Padrão | Descrição |
|---|---|---|---|
format | str | 'imx' | Formato de destino do modelo exportado, que define a compatibilidade com vários ambientes de implantação. |
imgsz | int ou tuple | 640 | Tamanho de imagem desejado para a entrada do modelo. Pode ser um inteiro para imagens quadradas ou uma tupla (height, width) para dimensões específicas. |
quantize | int ou str | 8/auto | Precisão da quantização. 8 (INT8/PTQ) é obrigatório e ativado automaticamente para IMX500. A exportação somente em FP32 e FP16 não é compatível. Substitui as flags obsoletas half/int8. |
data | str | None | Caminho para o YAML do conjunto de dados, essencial para a quantização; para classificação, use um diretório de conjunto de dados ou o nome de um conjunto de dados integrado. Se omitido, a Ultralytics seleciona o conjunto de dados de calibração padrão para a tarefa do modelo. |
fraction | float, int ou list | 1.0 | Subconjunto de calibração como proporção, número de imagens ou proporções/contagens [train, val, test]. Listas de dois itens deixam test completo, enquanto 0 o ignora. |
nms | bool, opcional | None | Selecione a saída bruta (None, padrão), NMS integrado (True) ou a cabeça sem NMS (False). Para detecção, segmentação e pose, o IMX exige nms=True e o seleciona automaticamente. |
device | str | None | Especifica o dispositivo para exportação: GPU (device=0), CPU (device=cpu). |
Para mais detalhes sobre o processo de exportação, visita a página da documentação da Ultralytics sobre exportação.
O processo de exportação cria um diretório chamado <model-name>_imx_model. Esse diretório contém model_imx.onnx para validar a quantização e o arquivo packerOut.zip, essencial para empacotar o modelo para implantação no hardware IMX500. Além disso, a pasta <model-name>_imx_model conterá um arquivo de texto (labels.txt) com todos os rótulos associados ao modelo.
yolo11n_imx_model
├── dnnParams.xml
├── labels.txt
├── packerOut.zip
├── model_imx.onnx
├── model_imx_MemoryReport.json
└── model_imx.pbtxt
Usar a exportação IMX500 na implantação#
Depois de exportar um modelo Ultralytics YOLO11n para o formato IMX500, você pode implantá-lo na Raspberry Pi AI Camera para inferência.
Requisitos de hardware#
Certifique-se de ter o seguinte hardware:
- Raspberry Pi 5 ou Raspberry Pi 4 Model B
- Câmera AI do Raspberry Pi
Conecte a Raspberry Pi AI Camera ao conector MIPI CSI de 15 pinos da Raspberry Pi e ligue a Raspberry Pi.
Requisitos de software#
Este guia foi testado com o Raspberry Pi OS Bookworm executado em uma Raspberry Pi 5.
Etapa 1: Abra uma janela do terminal e execute os seguintes comandos para atualizar o software da Raspberry Pi para a versão mais recente.
sudo apt update && sudo apt full-upgradeEtapa 2: Instale o firmware IMX500, necessário para operar o sensor IMX500.
sudo apt install imx500-allEtapa 3: reinicie a Raspberry Pi para que as alterações entrem em vigor.
sudo rebootEtapa 4: instale a biblioteca do módulo de aplicação AITRIOS para Raspberry Pi
pip install git+https://github.com/SonySemiconductorSolutions/aitrios-rpi-application-module-library.gitEtapa 5: execute a detecção de objetos, a estimativa de pose, a classificação e a segmentação com YOLO11 usando os scripts a seguir, disponíveis nos exemplos da biblioteca aitrios-rpi-application-module-library.
Antes de executar esses scripts, substitua os diretórios model_file e labels.txt pelos diretórios adequados ao seu ambiente.
import numpy as np
from modlib.apps import Annotator
from modlib.devices import AiCamera
from modlib.models import COLOR_FORMAT, MODEL_TYPE, Model
from modlib.models.post_processors import pp_od_yolo_ultralytics

class YOLO(Model):
    """YOLO model for IMX500 deployment."""

    def __init__(self):
        """Initialize the YOLO model for IMX500 deployment."""
        super().__init__(
            model_file="yolo11n_imx_model/packerOut.zip",  # replace with proper directory
            model_type=MODEL_TYPE.CONVERTED,
            color_format=COLOR_FORMAT.RGB,
            preserve_aspect_ratio=False,
        )

        self.labels = np.genfromtxt(
            "yolo11n_imx_model/labels.txt",  # replace with proper directory
            dtype=str,
            delimiter="\n",
        )

    def post_process(self, output_tensors):
        """Post-process the output tensors for object detection."""
        return pp_od_yolo_ultralytics(output_tensors)

device = AiCamera(frame_rate=16)  # Optimal frame rate for maximum FPS of the YOLO model running on the AI Camera
model = YOLO()
device.deploy(model)

annotator = Annotator()

with device as stream:
    for frame in stream:
        detections = frame.detections[frame.detections.confidence > 0.55]
        labels = [f"{model.labels[class_id]}: {score:0.2f}" for _, score, class_id, _ in detections]

        annotator.annotate_boxes(frame, detections, labels=labels, alpha=0.3, corner_radius=10)
frame.display()Benchmarks#
Os benchmarks abaixo de YOLOv8n, YOLO11n, YOLOv8n-pose, YOLO11n-pose, YOLOv8n-cls e YOLO11n-cls foram executados pela equipe Ultralytics na Raspberry Pi AI Camera, usando o formato de modelo imx para medir velocidade e precisão.
| Modelo | Formato | Tamanho (pixels) | Tamanho de packerOut.zip (MB) | mAP50-95(B) | Tempo de inferência (ms/im) |
|---|---|---|---|---|---|
| YOLOv8n | imx | 640 | 2.1 | 0.470 | 58.79 |
| YOLO11n | imx | 640 | 2.2 | 0.517 | 58.82 |
| YOLOv8n-pose | imx | 640 | 2.0 | 0.687 | 58.79 |
| YOLO11n-pose | imx | 640 | 2.1 | 0.788 | 62.50 |
| Modelo | Formato | Tamanho (pixels) | Tamanho de packerOut.zip (MB) | acc (top1) | acc (top5) | Tempo de inferência (ms/im) |
|---|---|---|---|---|---|---|
| YOLOv8n-cls | imx | 224 | 2.3 | 0.25 | 0.5 | 33.31 |
| YOLO11n-cls | imx | 224 | 2.3 | 0.25 | 0.417 | 33.31 |
A validação dos benchmarks acima foi feita usando o conjunto de dados COCO128 para modelos de detecção, o conjunto de dados COCO8-Pose para modelos de estimativa de pose e o ImageNet10 para modelos de classificação.
O que há por dentro?#

Kit de ferramentas de compressão de modelos da Sony (MCT)#
O Model Compression Toolkit (MCT) da Sony é um kit de ferramentas para otimizar modelos de deep learning por meio de quantização e poda. Ele oferece suporte a vários métodos de quantização e algoritmos avançados para reduzir o tamanho e a complexidade computacional dos modelos sem comprometer significativamente a precisão. O MCT é especialmente útil para implantar modelos em dispositivos com recursos limitados, permitindo inferência eficiente e menor latência.
Funcionalidades compatíveis com o MCT#
O MCT da Sony oferece diversos recursos criados para otimizar modelos de redes neurais:
- Otimizações de grafos: transforma os modelos em versões mais eficientes, incorporando camadas como a normalização em lotes às camadas anteriores.
- Pesquisa de parâmetros de quantização: minimiza o ruído de quantização usando métricas como erro quadrático médio, sem clipping e erro médio absoluto.
- Algoritmos avançados de quantização:
- Correção de deslocamento negativo: resolve problemas de desempenho causados pela quantização simétrica das ativações.
- Filtragem de valores atípicos: usa o z-score para detetar e remover valores atípicos.
- Agrupamento: usa grades de quantização não uniforme para melhor correspondência da distribuição.
- Pesquisa de precisão mista: atribui larguras de bits de quantização diferentes a cada camada, com base na sensibilidade.
- Visualização: usa o TensorBoard para observar informações sobre o desempenho do modelo, as fases de quantização e as configurações de largura de bits.
Quantização#
O MCT suporta vários métodos de quantização para reduzir o tamanho dos modelos e melhorar a velocidade de inferência:
- Quantização pós-treino (PTQ):
- Disponível através das APIs Keras e PyTorch.
- Complexidade: baixa
- Custo computacional: baixo (minutos de CPU)
- Quantização pós-treino baseada em gradientes (GPTQ):
- Disponível através das APIs Keras e PyTorch.
- Complexidade: média
- Custo computacional: moderado (2 a 3 horas de GPU)
- Treinamento consciente da quantização (QAT):
- Complexidade: alta
- Custo computacional: alto (12 a 36 horas de GPU)
O MCT também suporta vários esquemas de quantização para pesos e ativações:
- Potência de dois (compatível com hardware)
- Simétrica
- Uniforme
Poda estruturada#
O MCT introduz poda de modelos estruturada e consciente do hardware, projetada para arquiteturas de hardware específicas. Essa técnica aproveita os recursos SIMD (instrução única, múltiplos dados) da plataforma de destino por meio da poda de grupos SIMD. Isso reduz o tamanho e a complexidade do modelo e otimiza a utilização dos canais, em consonância com a arquitetura SIMD para direcionar a utilização dos recursos de ocupação da memória dos pesos. Disponível por meio das APIs Keras e PyTorch.
Ferramenta de conversão IMX500 (compilador)#
A ferramenta conversora IMX500 é parte essencial do conjunto de ferramentas IMX500 e permite compilar modelos para implantação no sensor IMX500 da Sony (por exemplo, em Raspberry Pi AI Cameras). Ela compila modelos Ultralytics YOLO11 quantizados em um formato que é executado com eficiência no hardware de destino. Após a quantização, a exportação gera arquivos binários que contêm os dados do modelo e a configuração específica do dispositivo necessária para a implantação na Raspberry Pi AI Camera.
Casos de uso no mundo real#
A exportação para o formato IMX500 tem uma ampla aplicabilidade em vários setores. Eis alguns exemplos:
- IA de edge e IoT: permite a deteção de objetos em drones ou câmaras de segurança, onde o processamento em tempo real em dispositivos de baixo consumo é essencial.
- Dispositivos vestíveis: implementa modelos otimizados para processamento de IA em pequena escala em dispositivos vestíveis de monitorização da saúde.
- Cidades inteligentes: utiliza modelos YOLO11 exportados para IMX500 na monitorização do trânsito e na análise de segurança, com processamento mais rápido e latência mínima.
- Análise de retalho: melhora a monitorização nas lojas através da implementação de modelos otimizados em sistemas de ponto de venda ou prateleiras inteligentes.
Conclusão#
Exportar modelos Ultralytics YOLO11 para o formato IMX500 da Sony permite implantá-los para inferência eficiente em câmeras baseadas no IMX500. A quantização reduz o tamanho do modelo e melhora a velocidade de inferência, com uma pequena perda de precisão.
Para mais informações e orientações detalhadas, consulta o site IMX500 da Sony.
Perguntas frequentes#
Para exportar um modelo YOLO11 para o formato IMX500, usa a API Python ou o comando CLI:
from ultralytics import YOLO

model = YOLO("yolo11n.pt")
model.export(format="imx")  # Exporta com quantização PTQ por predefinição
O processo de exportação cria um diretório que contém os ficheiros necessários para a implementação, incluindo
packerOut.zip.O formato IMX500 oferece várias vantagens importantes para a implementação de edge:
- O processamento de IA no chip reduz a latência e o consumo de energia
- Gera imagens e metadados (resultado da inferência), em vez de apenas imagens
- Maior privacidade, graças ao processamento local dos dados sem dependência da cloud
- Capacidade de processamento em tempo real, ideal para aplicações sensíveis ao tempo
- Quantização otimizada para uma implementação eficiente de modelos em dispositivos com recursos limitados
Para implementar modelos IMX500, precisas de:
Hardware:
- Raspberry Pi 5 ou Raspberry Pi 4 Model B
- Raspberry Pi AI Camera com sensor IMX500
Software:
- Raspberry Pi OS Bookworm
- Firmware e ferramentas IMX500 (
sudo apt install imx500-all)
Com base nos benchmarks da Ultralytics na Raspberry Pi AI Camera:
- O YOLO11n atinge um tempo de inferência de 58,82 ms por imagem
- mAP50-95 de 0.517 no conjunto de dados COCO128
- Tamanho do modelo de apenas 2,2 MB após a quantização
Isto demonstra que o formato IMX500 permite uma inferência eficiente em tempo real, mantendo uma boa precisão para aplicações de IA de edge.


Comentários86
Faz uma pergunta, partilha os teus resultados ou ajuda alguém.
 Chad Walsh
where is the best place to get support on the IMX500. I am running into multiple issues: i. my first yolo11n model built fine and exported to imx500, no problem, but my second model with a LOT more training images build fine but crashed the imx500 export. ii. the output of the imx500 during inference is giving a lot of none outputs between solid recognitions. it seems like there is something interfering with or disrupting the inference outputs (e.g., good output, none, none, none, none, good output, ...). where is the best place to get help with these issues?
 Glenn JocherUltralytics
Please continue the discussion here so the Ultralytics team can help; for the export crash, share the exact export command, full text traceback, and output from
yolo checks, and for intermittentNoneresults include a minimal inference script, confidence threshold, and a short reproducible input sample. Note that IMX export uses the calibration dataset specified bydataand defaults to the full dataset, so testing a smallerfractionmay help isolate resource-related failures.
leeprevost
I've made considerable progress by moving conducting this model compression process with a Container using dtcooper/raspberrypi-os:python3.11 after considerable problems with dependencies. Now getting a container most of the way through the process of compressing my yolov11s model and its trained best.pt weights.
At the end of the process - I get a simple "killed" after the Calculation of quantization parameters step. I see memory spiking close to 100% on top and think I'm hitting OOM with my pi4 8gb.
root@a5e132f6b333:/app# yolo export model=./models/yolov11/best.pt data='Billfish-Breeds-1/data.yaml' format=imx verbos>
Ultralytics 8.3.221 🚀 Python-3.11.14 torch-2.9.0+cpu CPU (aarch64)
WARNING ⚠️ IMX export requires nms=True, setting nms=True.
YOLO11s summary (fused): 100 layers, 9,413,187 parameters, 0 gradients, 21.3 GFLOPs

PyTorch: starting from 'models/yolov11/best.pt' with input shape (1, 3, 640, 640) BCHW and output shape(s) ((1, 8400, 4>
IMX: collecting INT8 calibration images from 'data=Billfish-Breeds-1/data.yaml'
Fast image access ✅ (ping: 0.1±0.0 ms, read: 16.1±2.7 MB/s, size: 16.4 KB)
Scanning /app/Billfish-Breeds-1/valid/labels.cache... 268 images, 0 backgrounds, 0 corrupt: 100% ━━━━━━━━━━━━ 268/268 1>
WARNING ⚠️ IMX: >300 images recommended for INT8 calibration, found 268 images.

IMX: starting export with model_compression_toolkit 2.4.4...
representative_data_gen generates a batch size of 1 which can be slow for optimization: consider increasing the batch s>
WARNING:Model Compression Toolkit:OperatorSetNames.DEPTHWISE_CONV is not in model.
Statistics Collection: 268it [1:01:26, 13.76s/it]
Calculating quantization parameters: 100%|█████████████████████████████████████████████████████| 294/294 [12:44<00:00, >
Killed
Would appreciate any suggestion around this but think it probably pushes me over the edge to order my pi5? Or do I try to train on the yolov8 or yolov11n? I've not had very good success with the nano models. I've convinced myself the tradeoffs to the small is well worth it but that may be incompatible with this process?
@glenn-jocher am I posting at the right place? Put this in issues on gh?
- Glenn JocherUltralytics
@leeprevost you’re in the right place for discussion, but the OOM during IMX export is a new issue—please open a new issue for visibility. In the issue, include: the exact export command and full log,
yolo checksoutput (orultralytics.utils.checks.collect_system_info()), Java version (java --version), and the versions of IMX toolchain (pip freeze | grep -E "imx500|model-compression|sony-custom"). As immediate workarounds: export on a Linux x86_64 machine with more RAM, target YOLO11n/YOLOv8n (the IMX path is tuned for “n” models), and reduce calibration load withfraction(e.g., 0.25). Example:yolo export model=best.pt format=imx data=your.yaml imgsz=640 fraction=0.25IMX-specific knobs are summarized in the IMX500 export arguments here: Sony IMX500 export guide – Export arguments, and the exporter function requirements here: export_imx reference.
Thank you. I'll dig into the logs and see if I can add anything before opening new issue.
a few more questions and I will open an issue:
- Note that I was using a model trained on yolov11s rather than n as I've seen large degradation in the number of false positives in my model.
- I assume by "full log" you mean the output from the yolo export command with verbose at default (true). In other words, what I posted above?
- For some reason, I thought I read int he docs that i had to perform the model compression on the target machine. for me, the ultimate target is RpiZero2 but no way the model will export on that footprint . so, I went to the largest pi I have which is a Rpi4 -- that resulted in the OOM. So, am unsure by your guidance pointing me to the larger x86 linux machine. How will the process know the device limits if I perform it on that?
Trying to read these guides as best I can. I have not spent much time on the Sony site yet. If you'll point me, I don't want to start an issue that isn't an issue.
I opened an issue: https://github.com/ultralytics/ultralytics/issues/22512
Just tried the export again with the fraction=0.25 argument and got to "Optimal Solution Found" with objective measure of 0.94, then died with error:
Error x IMX: export failure 12662.7s: No module named 'onnxscript'
https://github.com/pytorch/pytorch/issues/166352 -- adding to my requirements.txt pointed to by Containerfile.
- Glenn JocherUltralytics(editado)
@leeprevost great progress. IMX export/quantization does not need to run on the target; it cross-compiles for IMX500, so doing it on a larger Linux host is recommended. “Full log” means the complete stdout/stderr from the export run.
The “No module named 'onnxscript'” failure is a missing dependency. Current Ultralytics installs the IMX toolchain (including
imx500-converterandmodel-compression-toolkit) itself, so upgrade withpip install -U ultralyticsand re-run the export rather than pinning old versions by hand. Let’s continue the deep-dive in the issue you opened for traceability. Ok -- @glenn-jocher: am moving this to my opened issue. Still trying this on my pi4 but can move to my dev machine with plenty of RAM + Cuda. Got further but still died with a torch error -- will post there.
- Glenn JocherUltralytics
Thanks—let’s continue in the issue for traceability. On the larger Linux host, try GPU-assisted export to reduce RAM pressure and speed up calibration; if needed, temporarily lower
imgszto validate the pipeline:yolo export model=path/to/best.pt format=imx data=path/to/data.yaml device=0 imgsz=640 # if memory is still tight during calibration yolo export model=path/to/best.pt format=imx data=path/to/data.yaml device=0 imgsz=512For a concise list of export options and behavior, see the Export mode docs at Ultralytics YOLO — Export.
Much thanks for posting this guide. Thank you.
I am having very solid success running the standard detection models right out of the box on the RpiZero 2 which is my target platform. I'm actually amazed at the power draw (ran detection/streaming for about 175 minutes on a 4400mahr battery using about 60% of its capacity). Also, very solid top/htop scores showing less than 1/8 of CPU utilization. Memory is still such a problem on a rpiz2 but not any more so than what is being used with streaming only on the pi. Still have about 50% of memory left over as I recall. I've got screen shots of top screens if needed.
But, I need to get a trained model working on my RpiZ2 and am running into problems. As the guide seemed to indicate (or perhaps Sony's), I need to do most of the quantization on my target platform. I assumed that meant my zero. I have a very good model trained with yolov11m or large. I've tried to reduce that to a nano but I'm getting too much loss of MAP scores and too much false positive rates. So, am now trying to get a yolov11s to work. On my quantization process (it was not clear how to do this with a custom model) but am first loading the yolov11s.pt and then loading my best.pt on top of that. Ultralytics successfully loads my data, gives me a warning prompt about my 290 images (< 300 not ideal) and then another about processing speed with 1 batch. The program then goes off the rails with no UI messages. I assume I'm running out of memory on the piz2. So, my next steps seem to be either:
- Start over and try with nano model.
- Do my quantization on a larger pi (i've got a spare pi4).
I guess another option would be to spend more time understanding Sony's under the hood tools to optimize those settings?
Would appreciate some guidance here down the right path.
One thing that would be very helpful is to show how to do this on something other than the target platform. i'm trying to get a small detection model to run on a rpi zero2 and hate to have to download all of my training data to the zero to do the quantization.
Idea: Have a step that allows collection of the "target_platform_capabilities" information using Sony's model compression toolkit you are using under the hood, pickle it, and then use that object to drive the model compression on a larger machine.
I could probably dig in and try to follow your code and follow the "imx" part of your export process...
bohlebots
Wie schaffe ich es, dass das Modell im Speicher des IMX500 bleibt? Die PICAM wurde ja angepriesen mit der Aussage, dass sie selbst an einem Pi zero-2 mit gleicher Geschwindigkeit läuft und in der Tat, das täte sie, aber das Modell muss jedes Mal neu aufgeladen werden, und das dauert beim Pi Zero ewig, ja selbst mit einem Pi5 dauert es Minuten. Grundsätzlich muss die imx500 aber ein Modell auch bei ausgeschaltetem Strom im Speicher halten können, so dass nach dem Anschalten das letzte Modell direkt zur Verfügung steht. Wie bekomme ich das hin?
Gruß Roland
Teo-treny
Hello ! When running object detection (step 5), I get the following error :
Exception in thread Thread-2 (_process_requests_func):
Traceback (most recent call last):
  File "/home/pi/.pyenv/versions/3.11.9/lib/python3.11/threading.py", line 1045, in _bootstrap_inner
    self.run()
  File "/home/pi/.pyenv/versions/3.11.9/lib/python3.11/threading.py", line 982, in run
    self._target(*self._args, **self._kwargs)
  File "/home/pi/Desktop/imx_test/venv/lib/python3.11/site-packages/modlib/devices/ai_camera/ai_camera.py", line 193, in _process_requests_func
    callback()
  File "/home/pi/Desktop/imx_test/venv/lib/python3.11/site-packages/modlib/devices/ai_camera/ai_camera.py", line 207, in _process_requests
    self._parse_request(req)
  File "/home/pi/Desktop/imx_test/venv/lib/python3.11/site-packages/modlib/devices/ai_camera/ai_camera.py", line 256, in _parse_request
    detections = self.model.post_process(outputs)
                 ^^^^^^^^^^^^^^^^^^^^^^^^^^^^^^^^
  File "/home/pi/Desktop/imx_test/Test_1.py", line 23, in post_process
    return pp_od_yolo_ultralytics(output_tensors)
           ^^^^^^^^^^^^^^^^^^^^^^^^^^^^^^^^^^^^^^
  File "/home/pi/Desktop/imx_test/venv/lib/python3.11/site-packages/modlib/models/post_processors/post_processors.py", line 129, in pp_od_yolo_ultralytics
    n_detections = int(output_tensors[3])
                   ^^^^^^^^^^^^^^^^^^^^^^
TypeError: only length-1 arrays can be converted to Python scalars
I'm running Python 3.11.9 and installed all the dependencies following the guide. My Raspberry PI is a 3B+ model with Bookworm 64 bits and is up to date.
aytacsekmen
In the official IMX500 documentation provided by Sony (https://developer.sony.com/tinyml-23/developer-tools/documentation/imx500-evaluation-kit-user-guide?version=2023-11-28&progLang=), they describe the process of generating the network.fpk and network_info.txt files that will be used to deploy the model to IMX500, using the Packager.sh script. However, when I attempt to apply the same procedure to the packerOut.zip file I created by following the tutorial on https://docs.ultralytics.com/integrations/sony-imx500, I am unable to run the model on the IMX500. Also I couldn't run your implementation because it says that some packages are not found which I believe is related to the version of the OS. Currently I use the Pi OS that is provided by SONY for compatibility issues. I could run some other deep learning models following the steps in the (https://developer.sony.com/tinyml-23/developer-tools/documentation/imx500-evaluation-kit-user-guide?version=2023-11-28&progLang=), but I believe, there must be something different related to the creation of packerOut.zip file.
Could you assist in resolving this issue with the conversion process? @glenn-jocher
HelloCigar
Hello, per picamera2 docs, creating apps with "a camera window embedded into the GUI is through Qt", is there no other way to embed the video feed in other GUI frameworks?
skim-sony
Hi, I followed the steps in this page to convert the yolov8n model with imx500 converter and tested it with raspberry ai camera. But I get 29.5 ms for the inference time with 640x640 input tensor size. So I wonder why my inference time is better than your result (58.82ms). Which version of imx500 converter did you use?
Also, how did you measure the inference time? Did you use imx500.get_kpi_info(metadata) or calculate the elapsed time of picam2.capture_metadata()?
- Glenn JocherUltralytics(editado)
@skim-sony congratulations on the faster result! Our documented figure (58.82 ms for YOLO11n, see the Benchmarks) was measured by the Ultralytics team on a Raspberry Pi AI Camera with the
imxformat. Differences can come from the converter version, firmware, hardware (Pi 5 vs Pi 4) or how the time is measured. Would you mind sharing which converter version and Raspberry Pi model you're using? This could help other community members. Hi, I have used Pi5 and tried both 3.14.3 and 3.16.1 for imx500-converter. And both produces 29.5ms for inference time. It seems like you also use Pi5, so I wonder why our results are different. I'd like to reproduce your results 58.82 ms to learn what improves the inference time. So it would be helpful if you could share some info how to sync with your environment. Thanks!
- Glenn JocherUltralytics(editado)
@skim-sony that's interesting you're seeing better performance! The discrepancy could be due to several factors:
- Measurement methodology: end-to-end time (pre/post-processing + inference) differs from model-only inference time
- Firmware and converter versions
- Image resolution and resizing
- Test conditions: background processes, temperature, and power settings
Our published numbers are in the Benchmarks. If you'd like to share more details about your implementation, the community would certainly benefit.
fracipriano
Hello, I'm trying to run the standard YOLOv8n model on a Raspberry Pi AI Camera. I followed the exemple in the documentation
from ultralytics import YOLO

# Load a YOLOv8n PyTorch model
model = YOLO("yolov8n.pt")

# Export the model
model.export(format="imx", data="coco8.yaml")  # exports with PTQ quantization by default

# Load the exported model
imx_model = YOLO("yolov8n_imx_model")

# Run inference
results = imx_model("https://ultralytics.com/images/bus.jpg")
I got a bunch of warnings during the execution (export_log.txt), but the imx_model seemed to work properly in the end.
I then packaged it via IMX500 Packager and test it using the imx500_object_detection_demo.py. The Network Firmware gets uploaded, the application starts, but I get no detection. I tried to lower the detection threshold, but it didn't help. Any idea on what could be the problem? Any suggestion would be much appreciated.
- Glenn JocherUltralytics
Thank you for the detailed issue. Let's troubleshoot step by step. First, ensure your Raspberry Pi AI Camera is correctly connected and recognized by running
libcamera-helloin the terminal. If the camera works, verify that thelabels.txtpath in your demo command matches the exported file. You can also try inference on a static image first withimx_model.predict("test.jpg")to isolate live feed issues. For further assistance, please share the full export log and a screenshot of your camera output.For additional guidance, refer to the Sony IMX500 and AITRIOS integration blog post which demonstrates successful deployment steps.
Hello @glenn-jocher,
libcamera-hello works fine as does the imx500_object_detection_demo.py when using the default model ("/usr/share/imx500-models/imx500_network_ssd_mobilenetv2_fpnlite_320x320_pp.rpk").
There seems to be no problem with the labels.txt file as, if a run the imx500_object_detection_demo.py specifying the path to my label.txt, it works fine.
The imx_model also works fine before the packaging.
Here a screenshot of the camera output:
You can find the full export log file in my first post. Do you think any of the errors and/or warnings there could cause any problem with the packaging process via the IMX500-Packager?
- Glenn JocherUltralytics
Thank you for sharing these details. The warnings in your export log about "No BN layers to fold" and quantization parameters are normal during IMX conversion and shouldn't affect packaging. Since your camera feed works with the default model but not your custom export, please verify:
- Your
imx500-packagecommand uses the exactpackerOut.zipfromyolov8n_imx_model - The input tensor shape in your exported model matches IMX500 expectations (640x640 by default)
If issues persist, we recommend trying the IMX500 conversion process with our pretrained YOLOv8n model from https://github.com/ultralytics/assets/releases as a validation step.
- Your
Hello @glenn-jocher , thank you for your answer.
- Yes, I'm the one specifying the packerOut.zip path when running imx500-package
- I think so. Here is the content of the dnnParams.xml file generated by the export function
<?xml version="1.0" encoding="UTF-8" standalone="yes"?>
<dnnParams>
    <networks>
        <network name="yolov8n_new_imx" ordinal="0" type="">
            <inputTensors>
                <inputTensor persistency="0" ordinal="0" name="Placeholder.input.uid1:0" l2Offset="260480" numOfDimensions="3" bitsPerElement="8" shift="0" scale="0.00390625" format="unsigned">
                    <dimensions>
                        <dimension size="3" serializationOrder="2" ordinal="0" padding="0"/>
                        <dimension size="640" serializationOrder="1" ordinal="1" padding="0"/>
                        <dimension size="640" serializationOrder="0" ordinal="2" padding="0"/>
                    </dimensions>
                </inputTensor>
            </inputTensors>
            <outputTensors>
                <outputTensor ordinal="1" name="transform-83-/MultiClassNMS:0" l2Offset="281984" numOfDimensions="1" bitsPerElement="8" shift="0" scale="0.00390625" format="unsigned">
                    <dimensions>
                        <dimension size="300" serializationOrder="0" ordinal="0" padding="0"/>
                    </dimensions>
                </outputTensor>
                <outputTensor ordinal="2" name="transform-84-/MultiClassNMS:0" l2Offset="280960" numOfDimensions="1" bitsPerElement="16" shift="0" scale="1.0" format="signed">
                    <dimensions>
                        <dimension size="300" serializationOrder="0" ordinal="0" padding="0"/>
                    </dimensions>
                </outputTensor>
                <outputTensor ordinal="3" name="transform-85-/MultiClassNMS:0" l2Offset="279936" numOfDimensions="1" bitsPerElement="16" shift="0" scale="1.0" format="signed">
                    <dimensions>
                        <dimension size="1" serializationOrder="0" ordinal="0" padding="0"/>
                    </dimensions>
                </outputTensor>
                <outputTensor ordinal="0" name="transform-86-/MultiClassNMS:0" l2Offset="260480" numOfDimensions="2" bitsPerElement="16" shift="0" scale="0.03125" format="signed">
                    <dimensions>
                        <dimension size="300" serializationOrder="0" ordinal="0" padding="0"/>
                        <dimension size="4" serializationOrder="1" ordinal="1" padding="0"/>
                    </dimensions>
                </outputTensor>
            </outputTensors>
        </network>
    </networks>
    <l2memory totalSize="8388480" coefficientsSize="2604544" reservedMemorySize="1024" networksRuntimeSize="5523456"/>
</dnnParams>
I downloaded the yolov8n.pt file from the Sep 29, 2024 Release and repeated the process from the beginning. Same result.
I'm adding here the terminal outputs I get when running the imx500-package: imx500-package_log.txt
- Glenn JocherUltralytics(editado)
Thanks for sharing the details. The
dnnParams.xmlshows correct 640x640 input dimensions. Since the default Mobilenet model works but your YOLOv8 export doesn't, please verify that your output tensor dimensions and ordering match the demo's expectations. YOLO IMX exports have a different output layout from Mobilenet, so the demo's post-processing must match. The deployment section of the IMX500 guide uses thepp_od_yolo_ultralyticspost-processor from the AITRIOS module library for Ultralytics YOLO IMX exports. Okay. So the problem was actually related to the output. The ordering is fine, as the scores and the classes. The problem are the bboxes. The values that I obtain are completely out of scale.
Example:
detection label: cup (0.56)
detection box: (396100, 107520, 0, 0)
whereas I would expect something like this:
detection label: cup (0.56)
detection box: (39, 459, 440, 177)
I'm not sure how to interpret this results. Is (396100, 107520, 0, 0) supposed to be the raw output of YOLOv8n? Also, in the dnnParams.xml posted above, I see that there is a scale="0.00390625" associated with the component of the output tensor relative to the bboxes. Should I renormalize my output using this factor?
Thank you for any insight you can provide.
- Glenn JocherUltralytics(editado)
The raw IMX500 outputs are quantized and need post-processing. Rather than decoding them by hand, use the
pp_od_yolo_ultralyticspost-processor shown in the deployment section of the IMX500 guide. Hello @glenn-jocher, a code snippet would be much appreciated for double-checking. Also, I can't find the documentation you mentioned—could you link it to me, please?
- Glenn JocherUltralytics(editado)
The IMX500 outputs are decoded for you by the AITRIOS module library, as shown in the deployment section of the IMX500 guide:
from modlib.models.post_processors import pp_od_yolo_ultralytics


def post_process(self, output_tensors):
    return pp_od_yolo_ultralytics(output_tensors)
Let us know if this resolves the coordinate scaling issue!
I think there’s been a misunderstanding. I thought there were other changes to be made besides rescaling. Scaling alone cannot be the solution since (396100, 107520, 0, 0) cannot become (39, 459, 440, 177) just by a scalar multiplication.
Also, I cannot find the "What's Under the Hood?" section anywhere here https://developer.sony.com/imx500. Could you be more precise about where I should look?
- Glenn JocherUltralytics(editado)
The "What's Under the Hood?" section refers to our Ultralytics IMX500 documentation, not Sony's site, but it describes the quantization and conversion toolchain, not output decoding. For box decoding use the post-processor from the deployment section:
from modlib.models.post_processors import pp_od_yolo_ultralytics def post_process(self, output_tensors): return pp_od_yolo_ultralytics(output_tensors) Hi @glenn-jocher , thank you very much for all the support. It finally works! There was no need to rescale the boxes by 0.03125. I was missing the --bbox-normalization flag when launching the script.
Once I added the flag, everything worked fine.
- Glenn JocherUltralytics(editado)
Great to hear you resolved it! For the current deployment workflow, including post-processing of the model outputs, see the IMX500 deployment guide. Happy detecting with your Raspberry Pi setup! 🚀