Export Sony IMX500 pour Ultralytics YOLO11
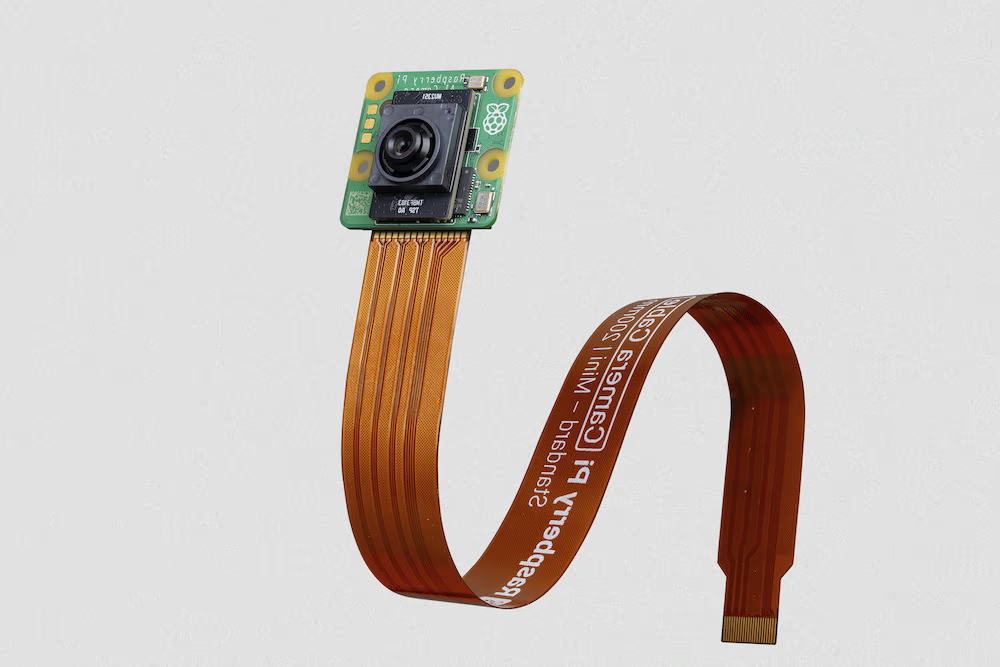
Ce guide explique comment exporter et déployer les modèles Ultralytics YOLOv8n et YOLO11n sur les Raspberry Pi AI Cameras équipées du capteur Sony IMX500.
Le déploiement de modèles de vision par ordinateur sur des appareils à puissance de calcul limitée, tels que la Raspberry Pi AI Camera, peut s’avérer délicat. L’utilisation d’un format de modèle optimisé pour accélérer l’exécution fait une grande différence.
Le format de modèle IMX500 est conçu pour consommer peu d’énergie tout en offrant des performances rapides pour les réseaux neuronaux. Il te permet d’optimiser tes modèles Ultralytics YOLO11 afin d’effectuer des inférences rapides et peu énergivores. Ce guide t’explique comment exporter tes modèles au format IMX500 et les déployer sur la Raspberry Pi AI Camera.
Pourquoi exporter au format IMX500 ?#
Le capteur de vision intelligent IMX500 de Sony effectue le traitement de l’IA directement sur le capteur, ce que Sony décrit comme une première mondiale pour un capteur de vision intelligent. Il contribue à surmonter les difficultés courantes de l’IA en périphérie, notamment les goulots d’étranglement du traitement des données, les problèmes de confidentialité et les limites de performance. Alors que les capteurs classiques ne font que transmettre des images et des trames, l’IMX500 interprète ce qu’il capture, ce qui permet aux appareils de générer des informations en temps réel.
Export Sony IMX500 pour les modèles YOLO11#
L’IMX500 est conçu pour traiter les données directement sur le capteur, sans les envoyer vers le cloud pour traitement.
L’IMX500 fonctionne avec des modèles quantifiés. La quantification réduit la taille des modèles et accélère leur exécution sans perte importante de précision. Elle est adaptée aux ressources limitées de l’informatique en périphérie et permet aux applications de répondre rapidement en réduisant la latence et en traitant vite les données localement, sans dépendre du cloud. Le traitement local protège également la confidentialité et la sécurité des données utilisateur, puisqu’elles ne sont pas envoyées à un serveur distant.
Principales fonctionnalités de l’IMX500 :
- Sortie de métadonnées : au lieu de transmettre uniquement des images, l’IMX500 peut produire à la fois l’image et les métadonnées (résultat de l’inférence), ou uniquement les métadonnées afin de réduire la taille des données, la bande passante nécessaire et les coûts.
- Protection de la confidentialité : en traitant les données sur l’appareil, l’IMX500 répond aux préoccupations liées à la confidentialité et convient parfaitement aux applications centrées sur les personnes, comme le comptage des personnes et le suivi de l’occupation.
- Traitement en temps réel : le traitement rapide sur le capteur permet de prendre des décisions en temps réel pour les applications d’IA en périphérie, comme les systèmes autonomes.
Avant de commencer : pour obtenir les meilleurs résultats, veille à bien préparer ton modèle YOLO11 pour l’export en suivant notre guide d’entraînement des modèles, notre aperçu des jeux de données et notre guide de réglage des hyperparamètres.
Tâches prises en charge#
L’exportation IMX500 prend en charge quatre des sept tâches Ultralytics, uniquement pour YOLOv8n et YOLO11n : les autres familles, tailles et architectures de modèles ne sont pas prises en charge, et l’exportation d’un modèle de segmentation sémantique, OBB ou d’estimation de profondeur génère une erreur.
| Tâche | YOLOv8 | YOLO11 | YOLO26 |
|---|---|---|---|
| Détecter | ✅ | ✅ | ❌ |
| Segmenter | ✅ | ✅ | ❌ |
| Sémantique | ❌ | ❌ | ❌ |
| Profondeur | ❌ | ❌ | ❌ |
| Classifier | ✅ | ✅ | ❌ |
| Pose | ✅ | ✅ | ❌ |
| OBB | ❌ | ❌ | ❌ |
Exemples d'utilisation#
Exporte un modèle Ultralytics YOLO11 au format IMX500 et lance l’inférence avec le modèle exporté.
Le format IMX500 prend en charge les modes Export, Prédire et Valider. L'inférence et la validation Ultralytics exécutent le fichier exporté model_imx.onnx sur le CPU de l'hôte.
L’inférence sert ici uniquement à vérifier que le modèle exporté fonctionne comme prévu avant de le déployer sur la Raspberry Pi AI Camera.
from ultralytics import YOLO

# Charger un modèle YOLO11n PyTorch
model = YOLO("yolo11n.pt")

# Exporter le modèle
model.export(format="imx", data="coco8.yaml")  # les exportations utilisent la quantification PTQ par défaut

# Charger le modèle exporté
imx_model = YOLO("yolo11n_imx_model")

# Exécuter l’inférence
results = imx_model("https://ultralytics.com/images/bus.jpg")from ultralytics import YOLO
# Charger un modèle YOLO11n-pose PyTorch
model = YOLO("yolo11n-pose.pt")
# Exporter le modèle
model.export(format="imx", data="coco8-pose.yaml") # les exportations utilisent la quantification PTQ par défaut
# Charger le modèle exporté
imx_model = YOLO("yolo11n-pose_imx_model")
# Exécuter l’inférence
results = imx_model("https://ultralytics.com/images/bus.jpg")from ultralytics import YOLO
# Charger un modèle YOLO11n-cls PyTorch
model = YOLO("yolo11n-cls.pt")
# Exporter le modèle
model.export(format="imx", data="imagenet10") # les exportations utilisent la quantification PTQ par défaut
# Charger le modèle exporté
imx_model = YOLO("yolo11n-cls_imx_model")
# Exécuter l’inférence
results = imx_model("https://ultralytics.com/images/bus.jpg", imgsz=224)from ultralytics import YOLO
# Charger un modèle YOLO11n-seg PyTorch
model = YOLO("yolo11n-seg.pt")
# Exporter le modèle
model.export(format="imx", data="coco8-seg.yaml") # les exportations utilisent la quantification PTQ par défaut
# Charger le modèle exporté
imx_model = YOLO("yolo11n-seg_imx_model")
# Exécuter l’inférence
results = imx_model("https://ultralytics.com/images/bus.jpg")from ultralytics import YOLO
# Charger le modèle IMX500 exporté
model = YOLO("yolo11n_imx_model")
# Valider la précision sur le jeu de données COCO8
metrics = model.val(data="coco8.yaml")L’exportation IMX est uniquement prise en charge sous Linux avec Python 3.10–3.12 et nécessite Java 17 ou une version ultérieure. Le package Ultralytics installe des dépendances supplémentaires pour l’exportation au moment de l’exécution. La première fois que tu exécutes la commande d’exportation, tu devras peut-être redémarrer ta console pour t’assurer qu’elle fonctionne correctement.
Arguments d’exportation#
| Argument | Type | Valeur par défaut | Description |
|---|---|---|---|
format | str | 'imx' | Format cible du modèle exporté, qui définit sa compatibilité avec différents environnements de déploiement. |
imgsz | int ou tuple | 640 | Taille d’image souhaitée pour l’entrée du modèle. Peut être un entier pour les images carrées ou un tuple (height, width) pour définir des dimensions spécifiques. |
quantize | int ou str | 8/auto | Précision de quantification. 8 (INT8/PTQ) est requis et activé automatiquement pour IMX500. L’exportation en FP32 ou FP16 uniquement n’est pas prise en charge. Remplace les options obsolètes half/int8. |
data | str | None | Chemin d’accès au fichier YAML du jeu de données, indispensable pour la quantification ; pour la classification, il faut plutôt fournir un répertoire de jeu de données ou le nom d’un jeu de données intégré. Si cette valeur est omise, Ultralytics sélectionne le jeu de données d’étalonnage par défaut pour la tâche du modèle. |
fraction | float, int ou list | 1.0 | Sous-ensemble de calibration exprimé en ratio, en nombre d’images ou en listes [train, val, test] de ratios/de nombres. Les listes de deux éléments laissent test complet, tandis que 0 l’ignore. |
nms | bool, facultatif | None | Sélectionne la sortie brute (None, par défaut), la NMS intégrée (True) ou la tête sans NMS (False). IMX nécessite nms=True pour la détection, la segmentation et l’estimation de pose, et sélectionne cette option automatiquement. |
device | str | None | Indique l'appareil utilisé pour l'exportation : GPU (device=0), CPU (device=cpu). |
Pour en savoir plus sur le processus d’export, consulte la page de la documentation Ultralytics consacrée à l’export.
Le processus d’export crée un répertoire nommé <model-name>_imx_model. Ce répertoire contient model_imx.onnx pour valider la quantification, ainsi que le fichier packerOut.zip, indispensable pour empaqueter le modèle en vue de son déploiement sur le matériel IMX500. De plus, le dossier <model-name>_imx_model contient un fichier texte (labels.txt) répertoriant toutes les étiquettes associées au modèle.
yolo11n_imx_model
├── dnnParams.xml
├── labels.txt
├── packerOut.zip
├── model_imx.onnx
├── model_imx_MemoryReport.json
└── model_imx.pbtxt
Utiliser l’exportation IMX500 pour le déploiement#
Après avoir exporté un modèle Ultralytics YOLO11n au format IMX500, tu peux le déployer sur la Raspberry Pi AI Camera pour effectuer des inférences.
Prérequis matériels#
Vérifie que tu disposes du matériel suivant :
- Raspberry Pi 5 ou Raspberry Pi 4 Model B
- Caméra AI Raspberry Pi
Connecte la Raspberry Pi AI Camera au connecteur MIPI CSI à 15 broches de la Raspberry Pi, puis allume la Raspberry Pi.
Prérequis logiciels#
Ce guide a été testé avec Raspberry Pi OS Bookworm exécuté sur une Raspberry Pi 5.
Étape 1 : ouvre une fenêtre de terminal et exécute les commandes suivantes pour mettre à jour le logiciel Raspberry Pi vers la version la plus récente.
sudo apt update && sudo apt full-upgradeÉtape 2 : installe le micrologiciel IMX500 nécessaire au fonctionnement du capteur IMX500.
sudo apt install imx500-allÉtape 3 : redémarre la Raspberry Pi pour que les modifications prennent effet.
sudo rebootÉtape 4 : installe la bibliothèque de modules d’application AITRIOS pour Raspberry Pi
pip install git+https://github.com/SonySemiconductorSolutions/aitrios-rpi-application-module-library.gitÉtape 5 : exécute la détection d’objets, l’estimation de pose, la classification et la segmentation avec YOLO11 à l’aide des scripts suivants, disponibles dans les exemples de la bibliothèque de modules d’application aitrios-rpi.
Avant d’exécuter ces scripts, veille à remplacer les répertoires model_file et labels.txt par ceux qui correspondent à ton environnement.
import numpy as np
from modlib.apps import Annotator
from modlib.devices import AiCamera
from modlib.models import COLOR_FORMAT, MODEL_TYPE, Model
from modlib.models.post_processors import pp_od_yolo_ultralytics

class YOLO(Model):
    """YOLO model for IMX500 deployment."""

    def __init__(self):
        """Initialize the YOLO model for IMX500 deployment."""
        super().__init__(
            model_file="yolo11n_imx_model/packerOut.zip",  # replace with proper directory
            model_type=MODEL_TYPE.CONVERTED,
            color_format=COLOR_FORMAT.RGB,
            preserve_aspect_ratio=False,
        )

        self.labels = np.genfromtxt(
            "yolo11n_imx_model/labels.txt",  # replace with proper directory
            dtype=str,
            delimiter="\n",
        )

    def post_process(self, output_tensors):
        """Post-process the output tensors for object detection."""
        return pp_od_yolo_ultralytics(output_tensors)

device = AiCamera(frame_rate=16)  # Optimal frame rate for maximum FPS of the YOLO model running on the AI Camera
model = YOLO()
device.deploy(model)

annotator = Annotator()

with device as stream:
    for frame in stream:
        detections = frame.detections[frame.detections.confidence > 0.55]
        labels = [f"{model.labels[class_id]}: {score:0.2f}" for _, score, class_id, _ in detections]

        annotator.annotate_boxes(frame, detections, labels=labels, alpha=0.3, corner_radius=10)
frame.display()Benchmarks#
Les benchmarks ci-dessous pour YOLOv8n, YOLO11n, YOLOv8n-pose, YOLO11n-pose, YOLOv8n-cls et YOLO11n-cls ont été réalisés par l’équipe Ultralytics sur la Raspberry Pi AI Camera, au format de modèle imx, afin de mesurer la vitesse et la précision.
| Modèle | Format | Taille (pixels) | Taille de packerOut.zip (Mo) | mAP50-95(B) | Temps d’inférence (ms/im) |
|---|---|---|---|---|---|
| YOLOv8n | imx | 640 | 2.1 | 0.470 | 58.79 |
| YOLO11n | imx | 640 | 2.2 | 0.517 | 58.82 |
| YOLOv8n-pose | imx | 640 | 2.0 | 0.687 | 58.79 |
| YOLO11n-pose | imx | 640 | 2.1 | 0.788 | 62.50 |
| Modèle | Format | Taille (pixels) | Taille de packerOut.zip (Mo) | précision (top1) | précision (top5) | Temps d’inférence (ms/im) |
|---|---|---|---|---|---|---|
| YOLOv8n-cls | imx | 224 | 2.3 | 0.25 | 0.5 | 33.31 |
| YOLO11n-cls | imx | 224 | 2.3 | 0.25 | 0.417 | 33.31 |
Les résultats des benchmarks ci-dessus ont été validés à l’aide du jeu de données COCO128 pour les modèles de détection, du jeu de données COCO8-Pose pour les modèles d’estimation de pose et d’ImageNet10 pour les modèles de classification.
Qu’y a-t-il sous le capot ?#

Sony Model Compression Toolkit (MCT)#
Le kit d’outils de compression de modèles (MCT) de Sony permet d’optimiser les modèles d’apprentissage profond grâce à la quantification et à l’élagage. Il prend en charge diverses méthodes de quantification et propose des algorithmes avancés pour réduire la taille des modèles et leur complexité de calcul sans sacrifier considérablement la précision. MCT est particulièrement utile pour déployer des modèles sur des appareils aux ressources limitées, où il permet d’effectuer des inférences efficaces et de réduire la latence.
Fonctionnalités prises en charge par MCT#
Le MCT de Sony propose différentes fonctionnalités conçues pour optimiser les modèles de réseaux neuronaux :
- Optimisations du graphe : transforme les modèles en versions plus efficaces en fusionnant des couches, par exemple en intégrant la normalisation par lots aux couches précédentes.
- Recherche des paramètres de quantification : minimise le bruit de quantification à l’aide de métriques comme l’erreur quadratique moyenne, l’absence d’écrêtage et l’erreur absolue moyenne.
- Algorithmes de quantification avancés :
- Correction des décalages négatifs : corrige les problèmes de performances dus à la quantification symétrique des activations.
- Filtrage des valeurs aberrantes : utilise le score z pour détecter et supprimer les valeurs aberrantes.
- Regroupement : utilise des grilles de quantification non uniformes pour mieux faire correspondre les distributions.
- Recherche à précision mixte : attribue différents nombres de bits de quantification à chaque couche en fonction de sa sensibilité.
- Visualisation : utilise TensorBoard pour examiner les informations sur les performances du modèle, les phases de quantification et les configurations du nombre de bits.
Quantification#
MCT prend en charge plusieurs méthodes de quantification pour réduire la taille des modèles et accélérer l’inférence :
- Quantification après entraînement (PTQ) :
- Disponible via les API Keras et PyTorch.
- Complexité : faible
- Coût de calcul : faible (quelques minutes sur CPU)
- Quantification après entraînement basée sur le gradient (GPTQ) :
- Disponible via les API Keras et PyTorch.
- Complexité : moyenne
- Coût de calcul : modéré (2 à 3 heures sur GPU)
- Entraînement tenant compte de la quantification (QAT) :
- Complexité : élevée
- Coût de calcul : élevé (12 à 36 heures sur GPU)
MCT prend également en charge divers schémas de quantification des poids et des activations :
- Puissances de deux (adapté au matériel)
- Symétrique
- Uniforme
Élagage structuré#
MCT introduit un élagage de modèles structuré et adapté au matériel, conçu pour des architectures matérielles spécifiques. Cette technique exploite les capacités SIMD (Single Instruction, Multiple Data) de la plateforme cible en élaguant des groupes SIMD. Elle réduit la taille et la complexité du modèle tout en optimisant l’utilisation des canaux, conformément à l’architecture SIMD et à l’utilisation ciblée de l’empreinte mémoire des poids. Disponible via les API Keras et PyTorch.
Outil de conversion IMX500 (compilateur)#
L’outil de conversion IMX500 est un élément essentiel de la suite d’outils IMX500. Il permet de compiler des modèles pour les déployer sur le capteur IMX500 de Sony (par exemple, les Raspberry Pi AI Cameras). Il compile les modèles Ultralytics YOLO11 quantifiés dans un format qui s’exécute efficacement sur le matériel cible. Après la quantification, l’export génère des fichiers binaires contenant les données du modèle et la configuration propre à l’appareil nécessaires au déploiement sur la Raspberry Pi AI Camera.
Cas d'utilisation concrets#
L’exportation au format IMX500 est largement applicable dans de nombreux secteurs. En voici quelques exemples :
- IA en périphérie et IoT : active la détection d’objets sur des drones ou des caméras de sécurité, où le traitement en temps réel sur des appareils à faible consommation est essentiel.
- Appareils portables : déploie des modèles optimisés pour le traitement de l’IA à petite échelle sur des appareils portables de suivi de la santé.
- Villes intelligentes : utilise des modèles YOLO11 exportés au format IMX500 pour surveiller le trafic et analyser la sécurité, avec un traitement plus rapide et une latence minimale.
- Analyse du commerce de détail : améliore la surveillance en magasin en déployant des modèles optimisés dans des systèmes de point de vente ou des rayons intelligents.
Conclusion#
L’export des modèles Ultralytics YOLO11 au format IMX500 de Sony te permet de les déployer sur des caméras basées sur IMX500 pour effectuer des inférences efficaces. La quantification réduit la taille du modèle et accélère l’inférence, avec une faible perte de précision.
Pour en savoir plus et consulter des instructions détaillées, rends-toi sur le site Web IMX500 de Sony.
FAQ#
Pour exporter un modèle YOLO11 au format IMX500, utilise l’API Python ou la commande CLI :
from ultralytics import YOLO

model = YOLO("yolo11n.pt")
model.export(format="imx")  # Exporte avec la quantification PTQ par défaut
Le processus d’exportation créera un répertoire contenant les fichiers nécessaires au déploiement, notamment
packerOut.zip.Le format IMX500 présente plusieurs avantages importants pour le déploiement en périphérie :
- Le traitement de l’IA sur puce réduit la latence et la consommation d’énergie
- Produit à la fois l’image et les métadonnées (résultat de l’inférence), et pas uniquement l’image
- Renforce la confidentialité en traitant les données localement, sans dépendre du cloud
- Capacités de traitement en temps réel, idéales pour les applications sensibles au facteur temps
- Quantification optimisée pour un déploiement efficace des modèles sur des appareils aux ressources limitées
Pour déployer des modèles IMX500, tu auras besoin de :
Matériel :
- Raspberry Pi 5 ou Raspberry Pi 4 Model B
- Raspberry Pi AI Camera avec capteur IMX500
Logiciel :
- Raspberry Pi OS Bookworm
- Micrologiciel et outils IMX500 (
sudo apt install imx500-all)
D’après les benchmarks Ultralytics sur Raspberry Pi AI Camera :
- YOLO11n atteint un temps d’inférence de 58.82 ms par image
- mAP50-95 de 0.517 sur le jeu de données COCO128
- Taille du modèle de seulement 2.2 MB après quantification
Cela montre que le format IMX500 permet une inférence efficace en temps réel tout en conservant une bonne précision pour les applications d’IA en périphérie.


Commentaires86
Pose une question, partage tes résultats ou aide quelqu’un d’autre.
 Chad Walsh
where is the best place to get support on the IMX500. I am running into multiple issues: i. my first yolo11n model built fine and exported to imx500, no problem, but my second model with a LOT more training images build fine but crashed the imx500 export. ii. the output of the imx500 during inference is giving a lot of none outputs between solid recognitions. it seems like there is something interfering with or disrupting the inference outputs (e.g., good output, none, none, none, none, good output, ...). where is the best place to get help with these issues?
 Glenn JocherUltralytics
Please continue the discussion here so the Ultralytics team can help; for the export crash, share the exact export command, full text traceback, and output from
yolo checks, and for intermittentNoneresults include a minimal inference script, confidence threshold, and a short reproducible input sample. Note that IMX export uses the calibration dataset specified bydataand defaults to the full dataset, so testing a smallerfractionmay help isolate resource-related failures.
leeprevost
I've made considerable progress by moving conducting this model compression process with a Container using dtcooper/raspberrypi-os:python3.11 after considerable problems with dependencies. Now getting a container most of the way through the process of compressing my yolov11s model and its trained best.pt weights.
At the end of the process - I get a simple "killed" after the Calculation of quantization parameters step. I see memory spiking close to 100% on top and think I'm hitting OOM with my pi4 8gb.
root@a5e132f6b333:/app# yolo export model=./models/yolov11/best.pt data='Billfish-Breeds-1/data.yaml' format=imx verbos>
Ultralytics 8.3.221 🚀 Python-3.11.14 torch-2.9.0+cpu CPU (aarch64)
WARNING ⚠️ IMX export requires nms=True, setting nms=True.
YOLO11s summary (fused): 100 layers, 9,413,187 parameters, 0 gradients, 21.3 GFLOPs

PyTorch: starting from 'models/yolov11/best.pt' with input shape (1, 3, 640, 640) BCHW and output shape(s) ((1, 8400, 4>
IMX: collecting INT8 calibration images from 'data=Billfish-Breeds-1/data.yaml'
Fast image access ✅ (ping: 0.1±0.0 ms, read: 16.1±2.7 MB/s, size: 16.4 KB)
Scanning /app/Billfish-Breeds-1/valid/labels.cache... 268 images, 0 backgrounds, 0 corrupt: 100% ━━━━━━━━━━━━ 268/268 1>
WARNING ⚠️ IMX: >300 images recommended for INT8 calibration, found 268 images.

IMX: starting export with model_compression_toolkit 2.4.4...
representative_data_gen generates a batch size of 1 which can be slow for optimization: consider increasing the batch s>
WARNING:Model Compression Toolkit:OperatorSetNames.DEPTHWISE_CONV is not in model.
Statistics Collection: 268it [1:01:26, 13.76s/it]
Calculating quantization parameters: 100%|█████████████████████████████████████████████████████| 294/294 [12:44<00:00, >
Killed
Would appreciate any suggestion around this but think it probably pushes me over the edge to order my pi5? Or do I try to train on the yolov8 or yolov11n? I've not had very good success with the nano models. I've convinced myself the tradeoffs to the small is well worth it but that may be incompatible with this process?
@glenn-jocher am I posting at the right place? Put this in issues on gh?
- Glenn JocherUltralytics
@leeprevost you’re in the right place for discussion, but the OOM during IMX export is a new issue—please open a new issue for visibility. In the issue, include: the exact export command and full log,
yolo checksoutput (orultralytics.utils.checks.collect_system_info()), Java version (java --version), and the versions of IMX toolchain (pip freeze | grep -E "imx500|model-compression|sony-custom"). As immediate workarounds: export on a Linux x86_64 machine with more RAM, target YOLO11n/YOLOv8n (the IMX path is tuned for “n” models), and reduce calibration load withfraction(e.g., 0.25). Example:yolo export model=best.pt format=imx data=your.yaml imgsz=640 fraction=0.25IMX-specific knobs are summarized in the IMX500 export arguments here: Sony IMX500 export guide – Export arguments, and the exporter function requirements here: export_imx reference.
Thank you. I'll dig into the logs and see if I can add anything before opening new issue.
a few more questions and I will open an issue:
- Note that I was using a model trained on yolov11s rather than n as I've seen large degradation in the number of false positives in my model.
- I assume by "full log" you mean the output from the yolo export command with verbose at default (true). In other words, what I posted above?
- For some reason, I thought I read int he docs that i had to perform the model compression on the target machine. for me, the ultimate target is RpiZero2 but no way the model will export on that footprint . so, I went to the largest pi I have which is a Rpi4 -- that resulted in the OOM. So, am unsure by your guidance pointing me to the larger x86 linux machine. How will the process know the device limits if I perform it on that?
Trying to read these guides as best I can. I have not spent much time on the Sony site yet. If you'll point me, I don't want to start an issue that isn't an issue.
I opened an issue: https://github.com/ultralytics/ultralytics/issues/22512
Just tried the export again with the fraction=0.25 argument and got to "Optimal Solution Found" with objective measure of 0.94, then died with error:
Error x IMX: export failure 12662.7s: No module named 'onnxscript'
https://github.com/pytorch/pytorch/issues/166352 -- adding to my requirements.txt pointed to by Containerfile.
- Glenn JocherUltralytics(modifié)
@leeprevost great progress. IMX export/quantization does not need to run on the target; it cross-compiles for IMX500, so doing it on a larger Linux host is recommended. “Full log” means the complete stdout/stderr from the export run.
The “No module named 'onnxscript'” failure is a missing dependency. Current Ultralytics installs the IMX toolchain (including
imx500-converterandmodel-compression-toolkit) itself, so upgrade withpip install -U ultralyticsand re-run the export rather than pinning old versions by hand. Let’s continue the deep-dive in the issue you opened for traceability. Ok -- @glenn-jocher: am moving this to my opened issue. Still trying this on my pi4 but can move to my dev machine with plenty of RAM + Cuda. Got further but still died with a torch error -- will post there.
- Glenn JocherUltralytics
Thanks—let’s continue in the issue for traceability. On the larger Linux host, try GPU-assisted export to reduce RAM pressure and speed up calibration; if needed, temporarily lower
imgszto validate the pipeline:yolo export model=path/to/best.pt format=imx data=path/to/data.yaml device=0 imgsz=640 # if memory is still tight during calibration yolo export model=path/to/best.pt format=imx data=path/to/data.yaml device=0 imgsz=512For a concise list of export options and behavior, see the Export mode docs at Ultralytics YOLO — Export.
Much thanks for posting this guide. Thank you.
I am having very solid success running the standard detection models right out of the box on the RpiZero 2 which is my target platform. I'm actually amazed at the power draw (ran detection/streaming for about 175 minutes on a 4400mahr battery using about 60% of its capacity). Also, very solid top/htop scores showing less than 1/8 of CPU utilization. Memory is still such a problem on a rpiz2 but not any more so than what is being used with streaming only on the pi. Still have about 50% of memory left over as I recall. I've got screen shots of top screens if needed.
But, I need to get a trained model working on my RpiZ2 and am running into problems. As the guide seemed to indicate (or perhaps Sony's), I need to do most of the quantization on my target platform. I assumed that meant my zero. I have a very good model trained with yolov11m or large. I've tried to reduce that to a nano but I'm getting too much loss of MAP scores and too much false positive rates. So, am now trying to get a yolov11s to work. On my quantization process (it was not clear how to do this with a custom model) but am first loading the yolov11s.pt and then loading my best.pt on top of that. Ultralytics successfully loads my data, gives me a warning prompt about my 290 images (< 300 not ideal) and then another about processing speed with 1 batch. The program then goes off the rails with no UI messages. I assume I'm running out of memory on the piz2. So, my next steps seem to be either:
- Start over and try with nano model.
- Do my quantization on a larger pi (i've got a spare pi4).
I guess another option would be to spend more time understanding Sony's under the hood tools to optimize those settings?
Would appreciate some guidance here down the right path.
One thing that would be very helpful is to show how to do this on something other than the target platform. i'm trying to get a small detection model to run on a rpi zero2 and hate to have to download all of my training data to the zero to do the quantization.
Idea: Have a step that allows collection of the "target_platform_capabilities" information using Sony's model compression toolkit you are using under the hood, pickle it, and then use that object to drive the model compression on a larger machine.
I could probably dig in and try to follow your code and follow the "imx" part of your export process...
bohlebots
Wie schaffe ich es, dass das Modell im Speicher des IMX500 bleibt? Die PICAM wurde ja angepriesen mit der Aussage, dass sie selbst an einem Pi zero-2 mit gleicher Geschwindigkeit läuft und in der Tat, das täte sie, aber das Modell muss jedes Mal neu aufgeladen werden, und das dauert beim Pi Zero ewig, ja selbst mit einem Pi5 dauert es Minuten. Grundsätzlich muss die imx500 aber ein Modell auch bei ausgeschaltetem Strom im Speicher halten können, so dass nach dem Anschalten das letzte Modell direkt zur Verfügung steht. Wie bekomme ich das hin?
Gruß Roland
Teo-treny
Hello ! When running object detection (step 5), I get the following error :
Exception in thread Thread-2 (_process_requests_func):
Traceback (most recent call last):
  File "/home/pi/.pyenv/versions/3.11.9/lib/python3.11/threading.py", line 1045, in _bootstrap_inner
    self.run()
  File "/home/pi/.pyenv/versions/3.11.9/lib/python3.11/threading.py", line 982, in run
    self._target(*self._args, **self._kwargs)
  File "/home/pi/Desktop/imx_test/venv/lib/python3.11/site-packages/modlib/devices/ai_camera/ai_camera.py", line 193, in _process_requests_func
    callback()
  File "/home/pi/Desktop/imx_test/venv/lib/python3.11/site-packages/modlib/devices/ai_camera/ai_camera.py", line 207, in _process_requests
    self._parse_request(req)
  File "/home/pi/Desktop/imx_test/venv/lib/python3.11/site-packages/modlib/devices/ai_camera/ai_camera.py", line 256, in _parse_request
    detections = self.model.post_process(outputs)
                 ^^^^^^^^^^^^^^^^^^^^^^^^^^^^^^^^
  File "/home/pi/Desktop/imx_test/Test_1.py", line 23, in post_process
    return pp_od_yolo_ultralytics(output_tensors)
           ^^^^^^^^^^^^^^^^^^^^^^^^^^^^^^^^^^^^^^
  File "/home/pi/Desktop/imx_test/venv/lib/python3.11/site-packages/modlib/models/post_processors/post_processors.py", line 129, in pp_od_yolo_ultralytics
    n_detections = int(output_tensors[3])
                   ^^^^^^^^^^^^^^^^^^^^^^
TypeError: only length-1 arrays can be converted to Python scalars
I'm running Python 3.11.9 and installed all the dependencies following the guide. My Raspberry PI is a 3B+ model with Bookworm 64 bits and is up to date.
aytacsekmen
In the official IMX500 documentation provided by Sony (https://developer.sony.com/tinyml-23/developer-tools/documentation/imx500-evaluation-kit-user-guide?version=2023-11-28&progLang=), they describe the process of generating the network.fpk and network_info.txt files that will be used to deploy the model to IMX500, using the Packager.sh script. However, when I attempt to apply the same procedure to the packerOut.zip file I created by following the tutorial on https://docs.ultralytics.com/integrations/sony-imx500, I am unable to run the model on the IMX500. Also I couldn't run your implementation because it says that some packages are not found which I believe is related to the version of the OS. Currently I use the Pi OS that is provided by SONY for compatibility issues. I could run some other deep learning models following the steps in the (https://developer.sony.com/tinyml-23/developer-tools/documentation/imx500-evaluation-kit-user-guide?version=2023-11-28&progLang=), but I believe, there must be something different related to the creation of packerOut.zip file.
Could you assist in resolving this issue with the conversion process? @glenn-jocher
HelloCigar
Hello, per picamera2 docs, creating apps with "a camera window embedded into the GUI is through Qt", is there no other way to embed the video feed in other GUI frameworks?
skim-sony
Hi, I followed the steps in this page to convert the yolov8n model with imx500 converter and tested it with raspberry ai camera. But I get 29.5 ms for the inference time with 640x640 input tensor size. So I wonder why my inference time is better than your result (58.82ms). Which version of imx500 converter did you use?
Also, how did you measure the inference time? Did you use imx500.get_kpi_info(metadata) or calculate the elapsed time of picam2.capture_metadata()?
- Glenn JocherUltralytics(modifié)
@skim-sony congratulations on the faster result! Our documented figure (58.82 ms for YOLO11n, see the Benchmarks) was measured by the Ultralytics team on a Raspberry Pi AI Camera with the
imxformat. Differences can come from the converter version, firmware, hardware (Pi 5 vs Pi 4) or how the time is measured. Would you mind sharing which converter version and Raspberry Pi model you're using? This could help other community members. Hi, I have used Pi5 and tried both 3.14.3 and 3.16.1 for imx500-converter. And both produces 29.5ms for inference time. It seems like you also use Pi5, so I wonder why our results are different. I'd like to reproduce your results 58.82 ms to learn what improves the inference time. So it would be helpful if you could share some info how to sync with your environment. Thanks!
- Glenn JocherUltralytics(modifié)
@skim-sony that's interesting you're seeing better performance! The discrepancy could be due to several factors:
- Measurement methodology: end-to-end time (pre/post-processing + inference) differs from model-only inference time
- Firmware and converter versions
- Image resolution and resizing
- Test conditions: background processes, temperature, and power settings
Our published numbers are in the Benchmarks. If you'd like to share more details about your implementation, the community would certainly benefit.
fracipriano
Hello, I'm trying to run the standard YOLOv8n model on a Raspberry Pi AI Camera. I followed the exemple in the documentation
from ultralytics import YOLO

# Load a YOLOv8n PyTorch model
model = YOLO("yolov8n.pt")

# Export the model
model.export(format="imx", data="coco8.yaml")  # exports with PTQ quantization by default

# Load the exported model
imx_model = YOLO("yolov8n_imx_model")

# Run inference
results = imx_model("https://ultralytics.com/images/bus.jpg")
I got a bunch of warnings during the execution (export_log.txt), but the imx_model seemed to work properly in the end.
I then packaged it via IMX500 Packager and test it using the imx500_object_detection_demo.py. The Network Firmware gets uploaded, the application starts, but I get no detection. I tried to lower the detection threshold, but it didn't help. Any idea on what could be the problem? Any suggestion would be much appreciated.
- Glenn JocherUltralytics
Thank you for the detailed issue. Let's troubleshoot step by step. First, ensure your Raspberry Pi AI Camera is correctly connected and recognized by running
libcamera-helloin the terminal. If the camera works, verify that thelabels.txtpath in your demo command matches the exported file. You can also try inference on a static image first withimx_model.predict("test.jpg")to isolate live feed issues. For further assistance, please share the full export log and a screenshot of your camera output.For additional guidance, refer to the Sony IMX500 and AITRIOS integration blog post which demonstrates successful deployment steps.
Hello @glenn-jocher,
libcamera-hello works fine as does the imx500_object_detection_demo.py when using the default model ("/usr/share/imx500-models/imx500_network_ssd_mobilenetv2_fpnlite_320x320_pp.rpk").
There seems to be no problem with the labels.txt file as, if a run the imx500_object_detection_demo.py specifying the path to my label.txt, it works fine.
The imx_model also works fine before the packaging.
Here a screenshot of the camera output:
You can find the full export log file in my first post. Do you think any of the errors and/or warnings there could cause any problem with the packaging process via the IMX500-Packager?
- Glenn JocherUltralytics
Thank you for sharing these details. The warnings in your export log about "No BN layers to fold" and quantization parameters are normal during IMX conversion and shouldn't affect packaging. Since your camera feed works with the default model but not your custom export, please verify:
- Your
imx500-packagecommand uses the exactpackerOut.zipfromyolov8n_imx_model - The input tensor shape in your exported model matches IMX500 expectations (640x640 by default)
If issues persist, we recommend trying the IMX500 conversion process with our pretrained YOLOv8n model from https://github.com/ultralytics/assets/releases as a validation step.
- Your
Hello @glenn-jocher , thank you for your answer.
- Yes, I'm the one specifying the packerOut.zip path when running imx500-package
- I think so. Here is the content of the dnnParams.xml file generated by the export function
<?xml version="1.0" encoding="UTF-8" standalone="yes"?>
<dnnParams>
    <networks>
        <network name="yolov8n_new_imx" ordinal="0" type="">
            <inputTensors>
                <inputTensor persistency="0" ordinal="0" name="Placeholder.input.uid1:0" l2Offset="260480" numOfDimensions="3" bitsPerElement="8" shift="0" scale="0.00390625" format="unsigned">
                    <dimensions>
                        <dimension size="3" serializationOrder="2" ordinal="0" padding="0"/>
                        <dimension size="640" serializationOrder="1" ordinal="1" padding="0"/>
                        <dimension size="640" serializationOrder="0" ordinal="2" padding="0"/>
                    </dimensions>
                </inputTensor>
            </inputTensors>
            <outputTensors>
                <outputTensor ordinal="1" name="transform-83-/MultiClassNMS:0" l2Offset="281984" numOfDimensions="1" bitsPerElement="8" shift="0" scale="0.00390625" format="unsigned">
                    <dimensions>
                        <dimension size="300" serializationOrder="0" ordinal="0" padding="0"/>
                    </dimensions>
                </outputTensor>
                <outputTensor ordinal="2" name="transform-84-/MultiClassNMS:0" l2Offset="280960" numOfDimensions="1" bitsPerElement="16" shift="0" scale="1.0" format="signed">
                    <dimensions>
                        <dimension size="300" serializationOrder="0" ordinal="0" padding="0"/>
                    </dimensions>
                </outputTensor>
                <outputTensor ordinal="3" name="transform-85-/MultiClassNMS:0" l2Offset="279936" numOfDimensions="1" bitsPerElement="16" shift="0" scale="1.0" format="signed">
                    <dimensions>
                        <dimension size="1" serializationOrder="0" ordinal="0" padding="0"/>
                    </dimensions>
                </outputTensor>
                <outputTensor ordinal="0" name="transform-86-/MultiClassNMS:0" l2Offset="260480" numOfDimensions="2" bitsPerElement="16" shift="0" scale="0.03125" format="signed">
                    <dimensions>
                        <dimension size="300" serializationOrder="0" ordinal="0" padding="0"/>
                        <dimension size="4" serializationOrder="1" ordinal="1" padding="0"/>
                    </dimensions>
                </outputTensor>
            </outputTensors>
        </network>
    </networks>
    <l2memory totalSize="8388480" coefficientsSize="2604544" reservedMemorySize="1024" networksRuntimeSize="5523456"/>
</dnnParams>
I downloaded the yolov8n.pt file from the Sep 29, 2024 Release and repeated the process from the beginning. Same result.
I'm adding here the terminal outputs I get when running the imx500-package: imx500-package_log.txt
- Glenn JocherUltralytics(modifié)
Thanks for sharing the details. The
dnnParams.xmlshows correct 640x640 input dimensions. Since the default Mobilenet model works but your YOLOv8 export doesn't, please verify that your output tensor dimensions and ordering match the demo's expectations. YOLO IMX exports have a different output layout from Mobilenet, so the demo's post-processing must match. The deployment section of the IMX500 guide uses thepp_od_yolo_ultralyticspost-processor from the AITRIOS module library for Ultralytics YOLO IMX exports. Okay. So the problem was actually related to the output. The ordering is fine, as the scores and the classes. The problem are the bboxes. The values that I obtain are completely out of scale.
Example:
detection label: cup (0.56)
detection box: (396100, 107520, 0, 0)
whereas I would expect something like this:
detection label: cup (0.56)
detection box: (39, 459, 440, 177)
I'm not sure how to interpret this results. Is (396100, 107520, 0, 0) supposed to be the raw output of YOLOv8n? Also, in the dnnParams.xml posted above, I see that there is a scale="0.00390625" associated with the component of the output tensor relative to the bboxes. Should I renormalize my output using this factor?
Thank you for any insight you can provide.
- Glenn JocherUltralytics(modifié)
The raw IMX500 outputs are quantized and need post-processing. Rather than decoding them by hand, use the
pp_od_yolo_ultralyticspost-processor shown in the deployment section of the IMX500 guide. Hello @glenn-jocher, a code snippet would be much appreciated for double-checking. Also, I can't find the documentation you mentioned—could you link it to me, please?
- Glenn JocherUltralytics(modifié)
The IMX500 outputs are decoded for you by the AITRIOS module library, as shown in the deployment section of the IMX500 guide:
from modlib.models.post_processors import pp_od_yolo_ultralytics


def post_process(self, output_tensors):
    return pp_od_yolo_ultralytics(output_tensors)
Let us know if this resolves the coordinate scaling issue!
I think there’s been a misunderstanding. I thought there were other changes to be made besides rescaling. Scaling alone cannot be the solution since (396100, 107520, 0, 0) cannot become (39, 459, 440, 177) just by a scalar multiplication.
Also, I cannot find the "What's Under the Hood?" section anywhere here https://developer.sony.com/imx500. Could you be more precise about where I should look?
- Glenn JocherUltralytics(modifié)
The "What's Under the Hood?" section refers to our Ultralytics IMX500 documentation, not Sony's site, but it describes the quantization and conversion toolchain, not output decoding. For box decoding use the post-processor from the deployment section:
from modlib.models.post_processors import pp_od_yolo_ultralytics def post_process(self, output_tensors): return pp_od_yolo_ultralytics(output_tensors) Hi @glenn-jocher , thank you very much for all the support. It finally works! There was no need to rescale the boxes by 0.03125. I was missing the --bbox-normalization flag when launching the script.
Once I added the flag, everything worked fine.
- Glenn JocherUltralytics(modifié)
Great to hear you resolved it! For the current deployment workflow, including post-processing of the model outputs, see the IMX500 deployment guide. Happy detecting with your Raspberry Pi setup! 🚀