Panoramica dei dataset di riquadri di delimitazione orientati (OBB)
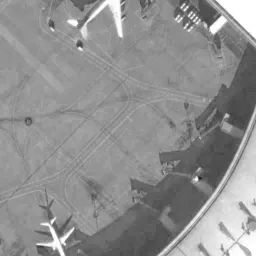
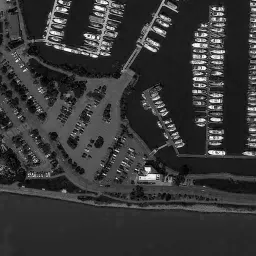
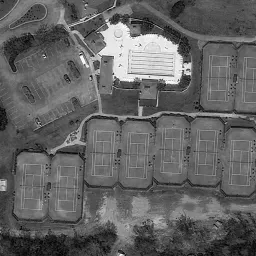
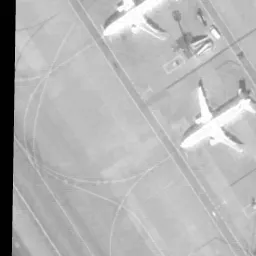
Per addestrare un modello preciso di rilevamento degli oggetti con riquadri di delimitazione orientati (OBB) serve un dataset completo. Questa guida illustra i vari formati di dataset OBB compatibili con i modelli Ultralytics YOLO e ne descrive la struttura, le applicazioni e i metodi di conversione dei formati.
Formati di dataset OBB supportati#
Formato YOLO OBB#
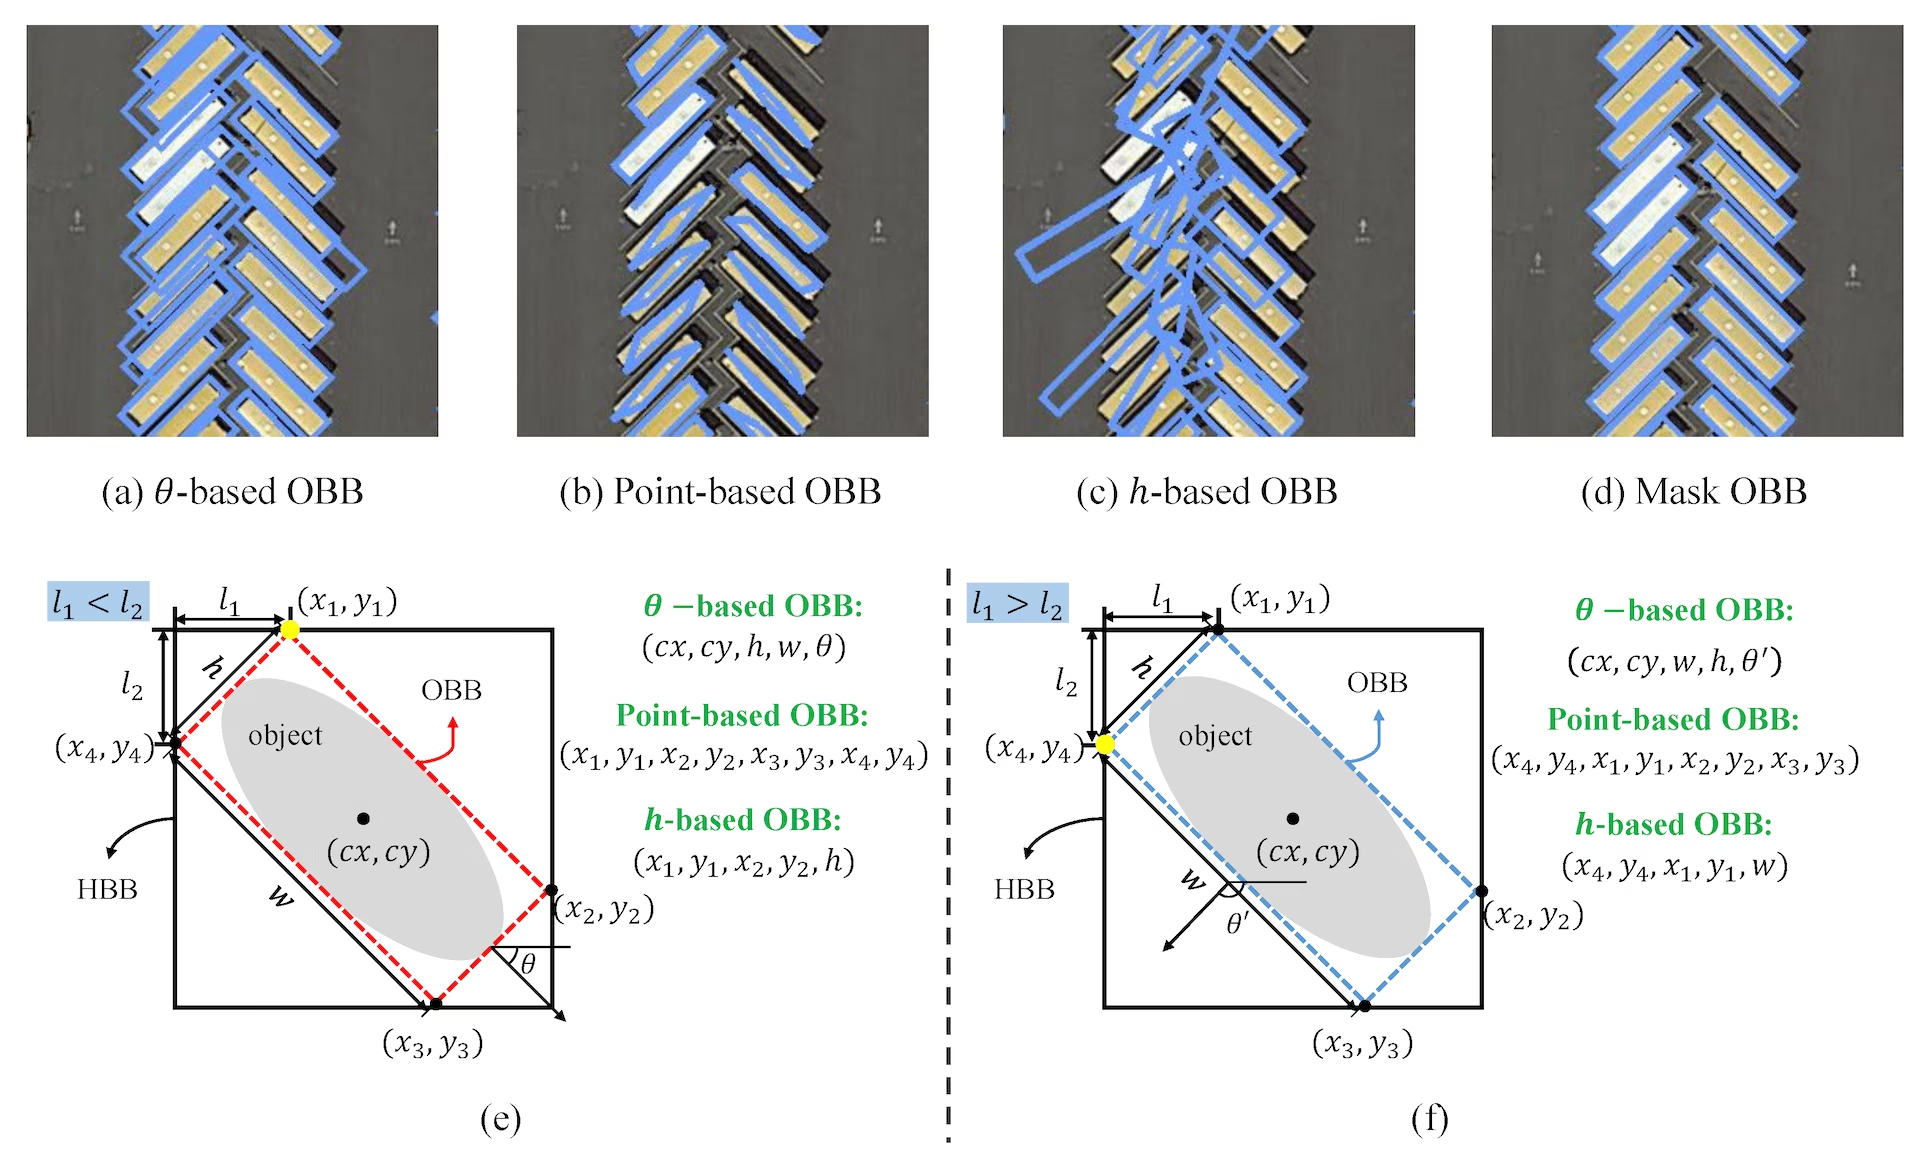
Il formato YOLO OBB definisce i riquadri di delimitazione tramite i quattro punti d'angolo, con coordinate normalizzate tra 0 e 1. Il formato è il seguente:
class_index x1 y1 x2 y2 x3 y3 x4 y4Internamente, YOLO gestisce le perdite e gli output nel formato xywhr, che rappresenta il punto centrale (xy), la larghezza, l'altezza e la rotazione del riquadro.
Un file di etichette *.txt per l'immagine qui sopra, che contiene un oggetto della classe 0 in formato OBB, potrebbe avere questo aspetto:
0 0.780811 0.743961 0.782371 0.74686 0.777691 0.752174 0.776131 0.749758Formato YAML del dataset#
Il framework Ultralytics usa il formato di file YAML per definire il dataset e la configurazione del modello durante l'addestramento dei modelli OBB. Ecco un esempio del formato YAML usato per definire un dataset OBB:
# Ultralytics 🚀 AGPL-3.0 License - https://ultralytics.com/license

# DOTA8 dataset (8 images from the DOTAv1 split) by Ultralytics
# Documentation: https://docs.ultralytics.com/datasets/obb/dota8
# Example usage: yolo train model=yolov8n-obb.pt data=dota8.yaml
# parent
# ├── ultralytics
# └── datasets
#     └── dota8 ← downloads here (1 MB)

# Train/val/test sets as 1) dir: path/to/imgs, 2) file: path/to/imgs.txt, or 3) list: [path/to/imgs1, path/to/imgs2, ..]
path: dota8 # dataset root dir
train: images/train # train images (relative to 'path') 4 images
val: images/val # val images (relative to 'path') 4 images

# Classes for DOTA 1.0
names:
  0: plane
  1: ship
  2: storage tank
  3: baseball diamond
  4: tennis court
  5: basketball court
  6: ground track field
  7: harbor
  8: bridge
  9: large vehicle
  10: small vehicle
  11: helicopter
  12: roundabout
  13: soccer ball field
  14: swimming pool

# Download script/URL (optional)
download: https://github.com/ultralytics/assets/releases/download/v0.0.0/dota8.zip
Ognuno tra train, val e test accetta una directory, un file immagine, un elenco di directory o file immagine oppure un file *.txt UTF-8 che elenca un percorso immagine per riga (i percorsi che iniziano con ./ vengono risolti relativamente al file *.txt). Un file *.txt è utile per addestrare su un sottoinsieme di una directory, ignorare le immagini senza etichette o combinare immagini provenienti da più fonti in un'unica suddivisione.
path: datasets/dota8 # dataset root
train: train.txt # a directory, an image, a list e.g. [images/a, images/b], or a *.txt file
val: val.txt
names:
0: planeUtilizzo#
Per addestrare un modello usando questi formati OBB:
from ultralytics import YOLO

# Carica un modello YOLO26n-OBB preaddestrato
model = YOLO("yolo26n-obb.pt")

# Addestra il modello sul dataset DOTAv1
results = model.train(data="DOTAv1.yaml", epochs=100, imgsz=1024)
Dataset supportati#
Attualmente sono supportati i seguenti dataset con riquadri di delimitazione orientati. La maggior parte è disponibile anche su Ultralytics Platform, dove puoi sfogliare le immagini e le annotazioni, visualizzare le statistiche dei dataset e clonarli per l'addestramento nel cloud.
- DOTA-v1: la prima versione del dataset DOTA, che offre un insieme completo di immagini aeree con riquadri di delimitazione orientati per il rilevamento degli oggetti.
- DOTA-v1.5: una versione intermedia del dataset DOTA, che offre annotazioni aggiuntive e miglioramenti rispetto a DOTA-v1 per potenziare le attività di rilevamento degli oggetti.
- DOTA-v2: versione 2 di DOTA (un dataset su larga scala per il rilevamento di oggetti in immagini aeree), che si concentra sul rilevamento da prospettive aeree e contiene riquadri di delimitazione orientati per 1,7 milioni di istanze in 11.268 immagini.
- DOTA8: un piccolo sottoinsieme di 8 immagini del dataset DOTA completo, adatto a testare i flussi di lavoro e a verificare l'integrazione continua (CI) dell'addestramento OBB nel repository
ultralytics. - DOTA8 Multispectral: un sottoinsieme di 8 immagini TIFF a 10 canali per testare l'addestramento OBB multispettrale su Ultralytics Platform.
- DOTA128: un sottoinsieme del dataset DOTA composto da 128 immagini, tutte nella cartella train (usata sia per train sia per val), che offre un buon equilibrio tra dimensioni e diversità per testare i modelli OBB.
- Testo in scena: un dataset di 65.325 immagini che combina COCO-Text e HierText, con 1,29 milioni di poligoni di parole leggibili per l'addestramento OBB sul testo in scena.
Integrare il tuo dataset OBB#
Se vuoi integrare i tuoi dataset con riquadri di delimitazione orientati, assicurati che siano compatibili con il "formato YOLO OBB" descritto sopra. Converti le annotazioni nel formato richiesto e specifica percorsi, classi e nomi delle classi in un file di configurazione YAML corrispondente.
Convertire i formati delle etichette#
Convertire il formato del dataset DOTA nel formato YOLO OBB#
Per convertire le etichette dal formato del dataset DOTA al formato YOLO OBB, puoi usare questo script:
from ultralytics.data.converter import convert_dota_to_yolo_obb

convert_dota_to_yolo_obb("path/to/DOTA")
Questa conversione rende i dataset in formato DOTA compatibili con il formato OBB di Ultralytics YOLO.
Prima dell'addestramento, verifica che il dataset convertito rispetti le convenzioni del formato YOLO OBB; una struttura corretta è essenziale per addestrare modelli precisi di rilevamento degli oggetti con riquadri di delimitazione orientati.
Domande frequenti#
I riquadri di delimitazione orientati (OBB) sono annotazioni in cui il riquadro può essere ruotato per allinearsi meglio all'oggetto rilevato, anziché essere allineato agli assi. Sono particolarmente utili nelle immagini aeree o satellitari, in cui gli oggetti potrebbero non essere allineati agli assi dell'immagine. Nei modelli Ultralytics YOLO, gli OBB sono rappresentati dai quattro punti degli angoli nel formato YOLO OBB. Ciò consente un rilevamento degli oggetti più preciso, poiché i riquadri di delimitazione possono ruotare per adattarsi meglio agli oggetti.
Puoi convertire le etichette del dataset DOTA nel formato YOLO OBB usando la funzione
convert_dota_to_yolo_obbdi Ultralytics. Questa conversione rende le etichette compatibili con i modelli Ultralytics YOLO OBB. Ecco un breve esempio:from ultralytics.data.converter import convert_dota_to_yolo_obb convert_dota_to_yolo_obb("path/to/DOTA")Questo script riformatta le annotazioni DOTA nel formato compatibile con YOLO.
Per addestrare un modello YOLO26 con OBB, assicurati che il dataset sia nel formato YOLO OBB, quindi usa l'API Ultralytics per addestrare il modello. Ecco un esempio sia in Python sia con la CLI:
Esempiofrom ultralytics import YOLO # Crea da zero un nuovo modello YOLO26n-OBB model = YOLO("yolo26n-obb.yaml") # Addestra il modello sul dataset personalizzato results = model.train(data="your_dataset.yaml", epochs=100, imgsz=640)L'addestramento con annotazioni OBB consente al modello di adattarsi meglio agli oggetti ruotati, migliorando l'accuratezza del rilevamento.
Attualmente, Ultralytics supporta i seguenti dataset per l'addestramento OBB:
- DOTA-v1: la prima versione del dataset DOTA, che offre un insieme completo di immagini aeree con riquadri di delimitazione orientati per il rilevamento degli oggetti.
- DOTA-v1.5: una versione intermedia del dataset DOTA, che offre annotazioni aggiuntive e miglioramenti rispetto a DOTA-v1 per potenziare le attività di rilevamento degli oggetti.
- DOTA-v2: questo dataset include 1,7 milioni di istanze con riquadri di delimitazione orientati e 11.268 immagini, ed è incentrato principalmente sul rilevamento di oggetti aerei.
- DOTA8: un sottoinsieme più piccolo, composto da 8 immagini del dataset DOTA, usato per i test e le verifiche di integrazione continua (CI).
- DOTA128: un sottoinsieme di 128 immagini, tutte nella cartella train (usate sia per train sia per val), che offre maggiore varietà rispetto a DOTA8 pur restando gestibile per lo sviluppo e la sperimentazione iniziali di modelli OBB.
- Testo in scena: COCO-Text e HierText combinati in un dataset a classe singola per il testo in scena, con annotazioni di parole ruotate e multi-punto.
Questi dataset sono pensati per scenari in cui gli OBB offrono un vantaggio significativo, come le immagini aeree e l'analisi di immagini satellitari.
Sì, puoi usare un tuo dataset con riquadri di delimitazione orientati per addestrare YOLO26. Assicurati di convertire le annotazioni del dataset nel formato YOLO OBB, che prevede di definire i riquadri di delimitazione tramite i quattro punti angolari. Puoi quindi creare un file di configurazione YAML che specifichi i percorsi del dataset, le classi e gli altri dettagli necessari. Per ulteriori informazioni sulla creazione e configurazione dei dataset, consulta la sezione Dataset supportati.


Commenti129
Fai una domanda, condividi i tuoi risultati o aiuta qualcun altro.
hodat2608
Hi everyone! i have a question. As we know, when i use labelimg obb to labeling images, it will export xywhr coordinates, example : 0 88.000000 101.000000 141.785406 14.314282 89.065522 0 477.548407 102.450004 140.874897 13.174511 -89.889658 0 218.000000 102.500000 140.785539 14.297973 89.065522
but if i use this format for training it gives error, can not train, i think i need to convert this xywhr format to xyxyxyxy format. So I need to consult everyone, how to convert this format. thanks *note: we need to pay attention to the angle during labeling, because when we use label img obb, the angle will be output as negative and positive, which means if it is less than 90 degrees it is negative, if it is greater than 90 degrees it is positive. However, in YOLOv8 it will not be shown like that, it will output the result always positive, **for example : label img obb : -89 degrees < 90 degrees < 89 degrees yolov8 : 89 degrees < 90 degrees < 91 degrees i use this source : https://github.com/heshameraqi/labelImg_OBB
1Chen-chang-yu
Hi, I used roLabelImg-master to label and the output is xml file. Here is my convert code( from xml (xywhr fotmat) -> txt (xyxyxyxy format) ). For your reference.
import math import xml.etree.ElementTree as ET import os
def rotate_point(x, y, angle): """ Rotate point (x, y) by angle around origin (0, 0). """ x_rot = x * math.cos(angle) - y * math.sin(angle) y_rot = x * math.sin(angle) + y * math.cos(angle) return x_rot, y_rot
def convert_to_xyxyxyxy(cx, cy, w, h, angle): """ Convert rotated bounding box to xyxyxyxy format. """ # Half width and height half_w = w / 2 half_h = h / 2
# Corner points relative to center
corners = [
    (-half_w, -half_h),
    (half_w, -half_h),
    (half_w, half_h),
    (-half_w, half_h)
]

# Rotate corners and translate
rotated_corners = []
for corner in corners:
    x_rot, y_rot = rotate_point(corner[0], corner[1], angle)
    rotated_corners.append((cx + x_rot, cy + y_rot))

# Format as xyxyxyxy
xyxyxyxy = " ".join([f"{int(round(x))},{int(round(y))}" for x, y in rotated_corners])
return xyxyxyxy
def convert_annotation(xml_file_path, output_dir): tree = ET.parse(xml_file_path) root = tree.getroot()
# Get image dimensions
size = root.find('size')
if size is None:
    raise ValueError("Size element not found in XML")

width = int(size.find('width').text)
height = int(size.find('height').text)

class_id = int(root.find('segmented').text)

# Create output file path
base_name = os.path.splitext(os.path.basename(xml_file_path))[0]
txt_file_path = os.path.join(output_dir, f"{base_name}.txt")

with open(txt_file_path, 'w') as txt_file:
    for obj in root.findall('object'):
        robndbox = obj.find('robndbox')

        if robndbox is not None:
            cx = float(robndbox.find('cx').text)
            cy = float(robndbox.find('cy').text)
            w = float(robndbox.find('w').text)
            h = float(robndbox.find('h').text)
            angle = float(robndbox.find('angle').text)

            # Convert to OBB format
            result = convert_to_xyxyxyxy(cx, cy, w, h, angle)

            result = result.replace(",", " ")
            # print(len(result))

            # 分割字符串,去掉逗号并转换为浮点数,除以1024
            normalized_results = [float(x) / 1024 for x in result.split()]
            print(normalized_results)

            # 将列表转换为字符串,元素用逗号和空格分隔
            result_str = ' '.join(map(str, normalized_results))

            # Write to file
            txt_file.write(f"{class_id} {result_str}\n")

# print(f"Converted {xml_file_path} to {txt_file_path}")
Example usage
xml_dir = r'C:\Users\datasets_HTC\xmllabels' output_dir = r'C:\Users\datasets_HTC\labels_OBB_format'
Ensure the output directory exists
os.makedirs(output_dir, exist_ok=True)
Convert all XML files in the directory
for xml_file in os.listdir(xml_dir): if xml_file.endswith('.xml'): convert_annotation( xml_file_path=os.path.join(xml_dir, xml_file), output_dir=output_dir, )
1luo-ross
No matter what annotation software you use for annotation, in the end, you only need to focus on xywhr. If it's detect, focus on xywh. If it's obb, then focus on xywhr. With this data, you can directly use the encapsulated methods provided in ultralytics. utilities
from ultralytics.utils import ops
For example, ops. xywhr 2xyxyxy (xywhr)
You don't need to repeatedly make wheels and do so much work.
Thank you so such. I will try your way and get back to you soon.
For appropriation, here is ready-made code, hoping it will be helpful to you
from ultralytics import YOLO import time import torch import math import cv2 import numpy as np import ultralytics
from ultralytics.utils import ops
img=cv2.imread(r"yourfilename.png")
#4 points x1y1=[550.0,400.0] x2y2=[450.0,400.0] x3y3=[450.0,600.0] x4y4=[550.0,600.0]
Example bbox with rotation at 45 degrees (converted to radians if needed)
r1=0 * np.pi / 180 r2=-45 * np.pi / 180 bbox = [500, 500, 200, 100, r1] # Convert degrees to radians xyxyxyxy =ops. xywhr2xyxyxyxy(torch.tensor(bbox)) xywhr=ops.xyxyxyxy2xywhr(xyxyxyxy.reshape(1,-1,2))
rotate=xywhr[:,4]*180/np.pi #clockwise xywhr1=ops.xyxyxyxy2xywhr(torch.tensor([[x1y1,x2y2,x3y3,x4y4]])) xywhr2=ops.xyxyxyxy2xywhr(torch.tensor([[x2y2,x3y3,x4y4,x1y1]])) xywhr3=ops.xyxyxyxy2xywhr(torch.tensor([[x3y3,x4y4,x1y1,x2y2]])) xywhr4=ops.xyxyxyxy2xywhr(torch.tensor([[x4y4,x1y1,x2y2,x3y3]]))
#anticlockwise xywhr5=ops.xyxyxyxy2xywhr(torch.tensor([[x1y1,x4y4,x3y3,x2y2]])) xywhr6=ops.xyxyxyxy2xywhr(torch.tensor([[x4y4,x3y3,x2y2,x1y1]])) xywhr7=ops.xyxyxyxy2xywhr(torch.tensor([[x3y3,x2y2,x1y1,x4y4]])) xywhr8=ops.xyxyxyxy2xywhr(torch.tensor([[x2y2,x1y1,x4y4,x3y3]]))
r=[xywhr1[:,4],xywhr2[:,4],xywhr3[:,4],xywhr4[:,4],xywhr5[:,4],xywhr6[:,4],xywhr7[:,4],xywhr8[:,4]]
#xyxyxyxy=ops.xywhr2xyxyxyxy(torch.tensor([161,152,100,170,math.radians(0)]))
data_array=xyxyxyxy.to(torch.int32).cpu().numpy() cv2.drawContours(img, [data_array], -1, (255, 0, 0), 2)
x=data_array[0][0] y=data_array[0][1] x1y1=[data_array[0][0], data_array[0][1]] x2y2=[data_array[1][0], data_array[1][1]] x3y3=[data_array[2][0], data_array[2][1]] x4y4=[data_array[3][0], data_array[3][1]]
xywhr=ops.xyxyxyxy2xywhr(torch.tensor([[x1y1, x2y2,x3y3, x4y4]]).to(torch.float32))
cv2.line(img, (x - 10, y), (x + 10, y), (0, 255, 0), 2) cv2.line(img, (x, y - 10), (x, y + 10), (0, 255, 0), 2)
cv2.putText(img, "1", (data_array[0][0],data_array[0][1]), cv2.FONT_HERSHEY_SIMPLEX, 1, (0, 0, 255), 1, lineType=cv2.LINE_AA) cv2.putText(img, "2", (data_array[1][0],data_array[1][1]), cv2.FONT_HERSHEY_SIMPLEX, 1, (0, 0, 255), 1, lineType=cv2.LINE_AA) cv2.putText(img, "3", (data_array[2][0],data_array[2][1]), cv2.FONT_HERSHEY_SIMPLEX, 1, (0, 0, 255), 1, lineType=cv2.LINE_AA) cv2.putText(img, "4", (data_array[3][0],data_array[3][1]), cv2.FONT_HERSHEY_SIMPLEX, 1, (0, 0, 255), 1, lineType=cv2.LINE_AA) cv2.imshow('Rectangle', img) cv2.waitKey(0)
#[tensor([1.5708]), tensor([1.5708]), tensor([1.5708]), tensor([1.5708]), tensor([1.5708]), tensor([1.5708]), tensor([1.5708]), tensor([1.5708])]
sd2=ops.xywhr2xyxyxyxy(torch.tensor([500,500,200,100,math.radians(-90)]))
sd3=ops.xywhr2xyxyxyxy(torch.tensor([500,500,200,100,math.radians(180)])) sd4=ops.xywhr2xyxyxyxy(torch.tensor([500,500,200,100,math.radians(270)])) sd5=ops.xywhr2xyxyxyxy(torch.tensor([500,500,200,100,math.radians(360)]))
sd6=ops.xywhr2xyxyxyxy(torch.tensor([500,500,200,100,math.radians(45)]))
radians=math.radians(-90)
test1=ops.xyxyxyxy2xywhr(torch.tensor([[100, 100, 100, 461.999104, 911.0016, 272.999424, 1066.99776, 527.0016]])) test2=ops.xyxyxyxy2xywhr(torch.tensor([[ 640.999424, 461.999104, 911.0016, 272.999424, 1066.99776, 527.0016,797.999104, 706.999296]])) test3=ops.xyxyxyxy2xywhr(torch.tensor([[ 461.999104, 911.0016, 272.999424, 1066.99776, 527.0016,797.999104, 706.999296, 640.999424]])) test4=ops.xyxyxyxy2xywhr(torch.tensor([[706.999296, 640.999424,461.999104, 911.0016, 272.999424, 1066.99776, 527.0016,797.999104 ]]))
I have another question? I want to train with higher imgsz, so what size is best for practice? 832 or 1280 ?
@hodat2608 Unless your application scenario is microscopic, such as those captured under a microscope, requiring recognition of cells or bacteria, and requires precision at the pixel level. So when you train, you need to ensure the size of the image. For example, if a 2448 * 2048 size image is scaled to 640 * 640, it may not be able to recognize the target well. So you can use larger training sizes, such as twice, three times, or four times 640, or ensure that the size is a multiple of 2 for better results. Of course, the larger the size, the lower the efficiency. You need to use GPU for training and prediction.
 Glenn JocherUltralytics
The best image size depends on your specific use case and hardware capabilities. Generally, larger sizes like 1280 can improve accuracy but require more computational resources. If you're limited by hardware, 832 might be a more practical choice.
DeekshithaDPrakash
Hi everyone! i have a question. As we know, when i use labelimg obb to labeling images, it will export xywhr coordinates, example : 0 88.000000 101.000000 141.785406 14.314282 89.065522 0 477.548407 102.450004 140.874897 13.174511 -89.889658 0 218.000000 102.500000 140.785539 14.297973 89.065522
but if i use this format for training it gives error, can not train, i think i need to convert this xywhr format to xyxyxyxy format. So I need to consult everyone, how to convert this format. thanks *note: we need to pay attention to the angle during labeling, because when we use label img obb, the angle will be output as negative and positive, which means if it is less than 90 degrees it is negative, if it is greater than 90 degrees it is positive. However, in YOLOv8 it will not be shown like that, it will output the result always positive, **for example : label img obb : -89 degrees < 90 degrees < 89 degrees yolov8 : 89 degrees < 90 degrees < 91 degrees i use this source : https://github.com/heshameraqi/labelImg_OBB
@hodat2608 Did you solve this issue and train yolo model for OBB ? It would be of great help if you could share relevant materials
luckg6
Hello Ultralytics team,
I have a question regarding YOLO OBB (Oriented Bounding Box) object detection. I noticed that for predicted bounding boxes, the angle can be obtained via obb.xywhr. However, it seems that there is no direct way to get the angle of the ground-truth boxes in the dataset.
Does this mean that if I want to calculate the angle error, I must manually compute it by converting the 8-point coordinates of the ground-truth boxes into an angle?
Thank you for your clarification!
- Glenn JocherUltralytics
GT labels in YOLO OBB are stored as 8 normalized corner coords (
class x1 y1 ... x4 y4), so there’s no explicit angle field in the*.txt; if you want an angle/error metric, convert the GT corners toxywhrusing the same helper Ultralytics uses internally viaxyxyxyxy2xywhr(angle returned in radians), which matches howresults[0].obb.xywhris defined in theOBBresults API and follows the OBB conventions noted in the OBB task docs.import cv2 import math import torch from ultralytics.utils.ops import xyxyxyxy2xywhr img = cv2.imread("path/to/image.png") h, w = img.shape[:2] # label line: cls x1 y1 x2 y2 x3 y3 x4 y4 (all coords normalized 0-1) parts = open("path/to/label.txt").read().strip().split() pts = torch.tensor([float(x) for x in parts[1:]], dtype=torch.float32).view(1, 4, 2) pts[..., 0] *= w pts[..., 1] *= h gt_xywhr = xyxyxyxy2xywhr(pts.view(1, 8)) gt_theta = gt_xywhr[0, 4].item() # radians def angle_diff_rad(pred_theta, gt_theta): # smallest signed diff considering 90-degree periodicity used by OBB return (pred_theta - gt_theta + math.pi / 2) % math.pi - math.pi / 2If you have follow-ups on the exact angle convention for your evaluation, drop them here in this discussion so the team can see the context.
ahrendsen
Is it true that the YOLO implementation of OBB would report an identical result for objects that are rotated 180 degrees from each other? For example, if I wanted to detect planes flying through the air and wanted to determine the direction they were flying with the angle of the OBB, YOLO OBB would not be able to distinguish between the front and the back of the plane?
msocode
I work with coffee bean classification. Until now, I was using yolov8-seg. However, I wanted some way to combine yolov11-obb + seg. Is there any way to run both processes together? Or would I have to do obb and then train the seg based on the previous result?
- Glenn JocherUltralytics(modificato)
Great question—YOLO26 doesn’t currently provide a single multitask head that outputs OBB and masks together; OBB and Seg are separate tasks. The simplest way to get both is to run a YOLO26 segmentation model and derive an OBB per instance mask with OpenCV’s
minAreaRect(one model, both outputs):from ultralytics import YOLO import numpy as np, cv2 seg = YOLO("yolo26s-seg.pt") results = seg("image.jpg")[0] for poly in results.masks.xy: # list of Nx2 polygons rect = cv2.minAreaRect(np.array(poly, dtype=np.float32)) # (cx,cy),(w,h),angle box = cv2.boxPoints(rect) # 4x2 OBB corners # use box or rect as your OBBIf you must use OBB first, a two-stage pipeline is fine: run
yolo26*-obb.pt, crop/rotate ROIs, then run ayolo26*-seg.ptmodel on each ROI. See the Segmentation task guide and YOLO26 model variants in the docs: Segmentation docs and YOLO26 models.1
eorroot
Hello, have you considered adding a new UAV Bounding Box (OBB) Datasets, CODrone (https://github.com/AHideoKuzeA/CODrone-A-Comprehensive-Oriented-Object-Detection-benchmark-for-UAV)?
UltralyticsAssistantUltralytics
👋 Olá, obrigado pelo seu interesse nos modelos Ultralytics 🚀! Recomendamos uma visita à Documentação para novos utilizadores, onde pode encontrar vários exemplos de uso em Python e na CLI, além de respostas para as perguntas mais frequentes.
Se este for um 🐛 Relatório de Bug, por favor forneça um exemplo mínimo reproduzível para nos ajudar a depurá-lo.
Se for uma dúvida sobre treinamento personalizado ❓, forneça o máximo de informações possível, incluindo exemplos do conjunto de dados e logs de treinamento, e verifique se está seguindo as nossas Dicas para Melhores Resultados de Treinamento.
Junte-se à comunidade Ultralytics onde preferir. Para conversas em tempo real, visite o Discord 🎧. Para discussões mais detalhadas, consulte o Discourse. Ou participe de discussões na nossa Subreddit para compartilhar conhecimento com outros membros.
Atualização
Atualize para a versão mais recente do pacote
ultralytics, incluindo todos os requisitos, em um ambiente Python>=3.8 com PyTorch>=1.8, para verificar se o problema já não foi resolvido:pip install -U ultralyticsAmbientes
O YOLO pode ser executado em qualquer um dos seguintes ambientes atualizados e verificados (com todas as dependências, incluindo CUDA/CUDNN, Python e PyTorch pré-instalados):
- Notebooks com GPU gratuita:


- Google Cloud Deep Learning VM. Veja o Guia de Início Rápido no GCP
- Amazon Deep Learning AMI. Veja o Guia de Início Rápido na AWS
- Imagem Docker. Veja o Guia de Início Rápido no Docker
Status

Se este badge estiver verde, todos os testes do Ultralytics CI estão a passar. Os testes CI verificam a operação correta de todos os Modos e Tarefas do YOLO em macOS, Windows e Ubuntu a cada 24 horas e a cada commit.
Este é um comentário automatizado 🤖, mas um engenheiro da Ultralytics irá responder em breve para ajudar mais!
- Notebooks com GPU gratuita:
jorgemarquesferreirajunior
Thank you so much! This article was very helpful for me. The OBB code works very well. Last year, I was trying to detect objects of my custom dataset and draw each oriented bounding box using OpenCV. It worked, but there were some issues with overlapping items. Using OBB perfomed by YOLO, my problems were solved.
r-isr
Hi, I'm working on reproducing MAP scores for YOLO OBB on DOTA 1.0 dataset. Despite experimenting with various batch sizes and nominal batch sizes on my 11GB GPU, the model's performance plateaus around MAP 60 on validation. The model:
Training Configuration:
- Used convert_dota_to_yolo_obb script for data preparation
- Model: yolov8n-obb.yaml
- Parameters:
- Initial training: 20 epochs
- Multiple additional 10-epoch iterations
- image size: 1024
- confidence threshold: 0.25
- fraction: 0.5
Despite trying different batch configurations and extending training through multiple iterations, the validation MAP consistently stalls at 60, well below the expected test score of 80.
Questions:
- Are these results expected for validation performance?
- Would class balancing improve the results?
- Are my hardware limitations (11GB GPU) affecting performance?
- What's a reasonable MAP score to expect on the validation set?
- Glenn JocherUltralytics(modificato)
@r-isr thank you for your detailed question. Here's a concise response:
- Validation vs Test Scores: DOTA validation scores often trail test scores due to different splits and evaluation protocols. Ensure you're using the official DOTA evaluation tools for comparable metrics (DOTA Dataset Guide).
- Epochs: Extend training to 100 epochs as shown in our DOTA training example - shorter runs may underfit.
- Hardware: While 11GB GPUs work, larger batch sizes (via
batch=-1for auto-scaling) often help stabilize training. - Class Balance: DOTA's inherent class imbalance can impact results. Consider oversampling rare classes.
For precise benchmarking, compare against the DOTAv1 results listed on the OBB task page using identical settings (those are test-set scores, reproduced with
yolo obb val data=DOTAv1.yaml split=test nms=False save_json=Trueand the DOTA evaluation server). Let us know if you still observe discrepancies! 🚀
fcndata
With so much tools like SAM that allow us to better label, is it possible to train our model with polygons without transforming it into Bounding Boxes?
- Glenn JocherUltralytics
@fcndata currently, YOLO models require annotations to follow specific formats like the YOLO OBB format for training. While SAM and similar tools can assist in creating precise polygon-based labels, these would need to be converted to bounding box formats (e.g., OBB) for YOLO compatibility. For details on conversion, please refer to the OBB Dataset Guide.
I trust your expertise, but I came across a tutorial where they used polygon-based labels to train the model and the perform a comparison within different annotations formats on YOLOv8:
On this analysis, they also present the overall coding here:
In the tutorial, they use the following code snippet:
!yolo task=detect mode=train model=yolov8n.yaml data={polygon_dataset.location}/data.yaml epochs=80 imgsz=640
I reviewed the training dataset, and it follows the format of a dataset typically used for segmentation, where each annotation is structured as:
...
Having said that, how do the they train the model with polygons.
Thanks!
- Glenn JocherUltralytics
Thank you for sharing the references. The tutorial you mentioned likely uses a segmentation dataset with polygon annotations converted to bounding boxes or masks during preprocessing. YOLO models, including YOLOv8 and YOLO11, require annotations in specific formats (e.g., standard bounding boxes or YOLO OBB format) for training. For polygon data, you would need to preprocess and transform the annotations into an appropriate format like bounding boxes or masks. If you'd like to explore polygon-based tasks further, tools like SAM can assist with segmentation tasks, but adaptation for YOLO training is still necessary. Let me know if you need more guidance!
rihablahouar
Issue with Incorrect Predictions from Quantized YOLOv8m-obb Model (TFLite) in TensorFlow Framework
I have exported my YOLOv8m-obb model to TFLite format with INT8 quantization enabled, using an image size of 640x640 and a data.yaml for my dataset. When I use the quantized model for inference with the Ultralytics framework (Oriented Bounding Boxes), the predictions are correct. However, when I use the same model in the TensorFlow framework, I encounter several issues with the output:
Confidence scores are greater than 1, which is incorrect.
The class_id is either -1 or 0, but it should be 0 or 1 since I have only two classes.
The x and y coordinates have values of -1, which is wrong.
I suspect there might be an issue with how the quantization parameters (scale and zero-point) are being applied in TensorFlow, or possibly with the way I'm handling the model's output or the way I exported the model. I would appreciate guidance on how to correctly handle the quantized model in TensorFlow and resolve the issues with incorrect predictions.
- Glenn JocherUltralytics
@rihablahouar the issue likely arises due to differences in how TensorFlow interprets or handles the quantized TFLite model's outputs. Ensure that the post-processing operations (like decoding bounding boxes, confidence scores, and class indices) align with the model's export format and scale/zero-point quantization parameters. Additionally, verify the TensorFlow inference pipeline against the Ultralytics implementation for any discrepancies. For further debugging, you may find it useful to test the unquantized TFLite model in TensorFlow to isolate the quantization's impact.
