VisDrone Veri Kümesi
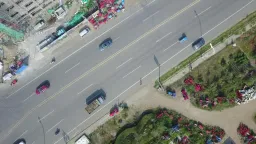
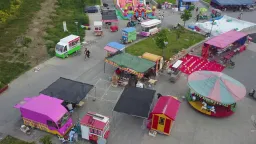
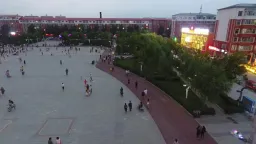
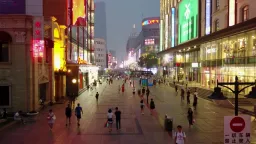
VisDrone Veri Kümesi, büyük ölçekli bir drone görüntüleri kıyaslama veri kümesidir. Tespit alt kümesi (VisDrone2019-DET), nesne tespiti için 10 nesne sınıfıyla etiketlenmiş 8.629 hava görüntüsü sunar: 6.471 eğitim, 548 doğrulama ve 1.610 test-dev görüntüsü. Veri kümesi, Çin'in Tianjin Üniversitesi'ndeki Makine Öğrenimi ve Veri Madenciliği Laboratuvarı bünyesindeki AISKYEYE ekibi tarafından oluşturulmuştur.
İzle: Ultralytics YOLO VisDrone Veri Kümesinde Nasıl Eğitilir | Havadan Algılama | Eksiksiz Eğitim 🚀
VisDrone kıyaslama veri kümesinin tamamı; Çin'in 14 farklı şehrinde drone kameralarıyla çekilmiş, kentsel ve kırsal ortamları, seyrek ve kalabalık sahneleri, ayrıca çeşitli hava ve ışık koşullarını kapsayan 288 video klipten (261.908 kare) ve 10.209 durağan görüntüden oluşur. Karelerde, sahne görünürlüğü, nesne sınıfı ve örtülme gibi ek özniteliklerle birlikte 2,6 milyondan fazla elle etiketlenmiş sınırlayıcı kutu bulunur. Ultralytics VisDrone.yaml yapılandırması, bu kıyaslama veri kümesinin VisDrone2019-DET durağan görüntü alt kümesini kullanır.
Temel Özellikler#
- Küçük ve yoğun nesneler: Hava görüntülerindeki bakış açısı hedefleri küçük ve sıkışık hâle getirir; yalnızca 548 doğrulama görüntüsünde bile toplam 38.759 etiketli kutu, yani görüntü başına ortalama yaklaşık 70 nesne bulunur.
- Sahne çeşitliliği: Çin'in 14 şehrinden gelen görüntüler kentsel ve kırsal bölgeleri, gündüz ve gece koşullarını, ayrıca farklı hava koşullarını kapsar.
- Zengin açıklamalar: Kıyaslama veri kümesinin tamamında, örtülme ve görünürlük öznitelikleriyle birlikte 2,6 milyondan fazla kutu bulunur.
- Önceden tanımlanmış bölümler: Tutarlı değerlendirme için sabit eğitim / doğrulama / test-dev bölümleri (6.471 / 548 / 1.610 görüntü).
Veri Kümesi Yapısı#
Ultralytics VisDrone yapılandırması, VisDrone2019-DET görüntü alt kümesini üç bölüme ayırarak kapsar:
| Bölüm | Görüntüler | Açıklama |
|---|---|---|
| Eğit | 6,471 | Algılayıcıyı eğitmek için kullanılan etiketli hava görüntüleri |
| Doğrulama | 548 | Geliştirme sırasında değerlendirme için kullanılan görüntüler |
| Test-dev | 1,610 | Eğitilmiş modelin son değerlendirmesi için ayrılmış görüntüler |
Dördüncü bir bölüm olan test-challenge (1.580 görüntü), VisDrone yarışması için ayrılmıştır ve indirilmez; bu nedenle DET kümesinin tamamı 10.209 görüntüden oluşur.
Veri kümesinde 10 nesne sınıfı etiketlenmiştir: yaya, insanlar, bisiklet, otomobil, minibüs, kamyon, üç tekerlekli bisiklet, tenteli üç tekerlekli bisiklet, otobüs ve motosiklet. VisDrone, yaya sınıfını (ayakta duran veya yürüyen kişi) insanlar sınıfından (başka herhangi bir duruşta bulunan kişi) ayrı tutar.
İlk kullanımda indirme betiği, özgün VisDrone açıklamalarını YOLO biçimine dönüştürür ve yok sayılacak olarak işaretlenmiş bölgeleri atlar (kullanılmayan "others" kategorisi de böylece dışarıda kalır).
Uygulamalar#
VisDrone'un yoğun sahneleri ve küçük hedefleri, hava görüntülerinde küçük nesne algılama için onu standart bir kıyaslama hâline getirir. Yaygın drone bilgisayarlı görü uygulamaları şunlardır:
- İHA'larla trafik izleme ve araç sayımı
- Kalabalık analizi ve kamu güvenliği gözetimi
- Altyapı ve inşaat sahası denetimi
- Karmaşık sahnelerde küçük nesneleri tespit etmeye yönelik bilgisayarlı görü araştırmaları
Diğer hava görüntüsü kıyaslama veri kümeleri için uydu görüntülerine odaklanan xView veri kümesine veya yönlendirilmiş kutular içeren DOTA-v2 veri kümesine bak.
Veri Kümesi YAML Dosyası#
VisDrone.yaml dosyası; veri kümesi yollarını, sınıf adlarını ve otomatik indirme-dönüştürme betiğini içeren veri kümesi yapılandırmasını tanımlar. Dosya, Ultralytics deposunda https://github.com/ultralytics/ultralytics/blob/main/ultralytics/cfg/datasets/VisDrone.yaml konumunda tutulur.
# Ultralytics 🚀 AGPL-3.0 License - https://ultralytics.com/license

# VisDrone2019-DET dataset https://github.com/VisDrone/VisDrone-Dataset by Tianjin University
# Documentation: https://docs.ultralytics.com/datasets/detect/visdrone
# Example usage: yolo train data=VisDrone.yaml
# parent
# ├── ultralytics
# └── datasets
#     └── VisDrone ← downloads here (~2 GB)

# Train/val/test sets as 1) dir: path/to/imgs, 2) file: path/to/imgs.txt, or 3) list: [path/to/imgs1, path/to/imgs2, ..]
path: VisDrone # dataset root dir
train: images/train # train images (relative to 'path') 6471 images
val: images/val # val images (relative to 'path') 548 images
test: images/test # test-dev images (optional) 1610 images

# Classes
names:
  0: pedestrian
  1: people
  2: bicycle
  3: car
  4: van
  5: truck
  6: tricycle
  7: awning-tricycle
  8: bus
  9: motor

# Download script/URL (optional) ---------------------------------------------------------------------------------------
download: |
  import os
  from pathlib import Path
  import shutil

  from ultralytics.utils.downloads import download
  from ultralytics.utils import ASSETS_URL, TQDM

  def visdrone2yolo(dir, split, source_name=None):
      """Convert VisDrone annotations to YOLO format with images/{split} and labels/{split} structure."""
      from PIL import Image

      source_dir = dir / (source_name or f"VisDrone2019-DET-{split}")
      images_dir = dir / "images" / split
      labels_dir = dir / "labels" / split
      labels_dir.mkdir(parents=True, exist_ok=True)

      # Move images to new structure
      if (source_images_dir := source_dir / "images").exists():
          images_dir.mkdir(parents=True, exist_ok=True)
          for img in source_images_dir.glob("*.jpg"):
              img.rename(images_dir / img.name)

      for f in TQDM((source_dir / "annotations").glob("*.txt"), desc=f"Converting {split}"):
          img_size = Image.open(images_dir / f.with_suffix(".jpg").name).size
          dw, dh = 1.0 / img_size[0], 1.0 / img_size[1]
          lines = []

          with open(f, encoding="utf-8") as file:
              for row in [x.split(",") for x in file.read().strip().splitlines()]:
                  if row[4] != "0":  # Skip ignored regions
                      x, y, w, h = map(int, row[:4])
                      cls = int(row[5]) - 1
                      # Convert to YOLO format
                      x_center, y_center = (x + w / 2) * dw, (y + h / 2) * dh
                      w_norm, h_norm = w * dw, h * dh
                      lines.append(f"{cls} {x_center:.6f} {y_center:.6f} {w_norm:.6f} {h_norm:.6f}\n")

          (labels_dir / f.name).write_text("".join(lines), encoding="utf-8")

  # Download (ignores test-challenge split)
  dir = Path(yaml["path"])  # dataset root dir
  urls = [
      f"{ASSETS_URL}/VisDrone2019-DET-train.zip",
      f"{ASSETS_URL}/VisDrone2019-DET-val.zip",
      f"{ASSETS_URL}/VisDrone2019-DET-test-dev.zip",
      # f"{ASSETS_URL}/VisDrone2019-DET-test-challenge.zip",
  ]
  download(urls, dir=dir, threads=4)

  # Convert
  splits = {"VisDrone2019-DET-train": "train", "VisDrone2019-DET-val": "val", "VisDrone2019-DET-test-dev": "test"}
  for folder, split in splits.items():
      visdrone2yolo(dir, split, folder)  # convert VisDrone annotations to YOLO labels
shutil.rmtree(dir / folder) # cleanup original directoryKullanım#
VisDrone, ilk eğitim yaptığında otomatik olarak indirilir; toplam boyutu yaklaşık 2 GB olan üç arşiv indirir ve çıkarma ile dönüştürme sırasında yaklaşık 4 GB boş disk alanı gerekir.
VisDrone veri kümesinde 640 görüntü boyutuyla 100 epoch boyunca bir YOLO26n modelini eğitmek için aşağıdaki kod parçacıklarını kullanabilirsin.
from ultralytics import YOLO

# Bir model yükle
model = YOLO("yolo26n.pt")  # Önceden eğitilmiş bir model yükle (eğitim için önerilir)

# Modeli eğit — veri kümesi ilk çalıştırmada otomatik indirilir
results = model.train(data="VisDrone.yaml", epochs=100, imgsz=640)
Ek hava görüntülerini etiketlemek ve VisDrone eğitim çalışmalarını tarayıcında yönetmek için Ultralytics Platform kullan.
Örnek Veriler ve Açıklamalar#
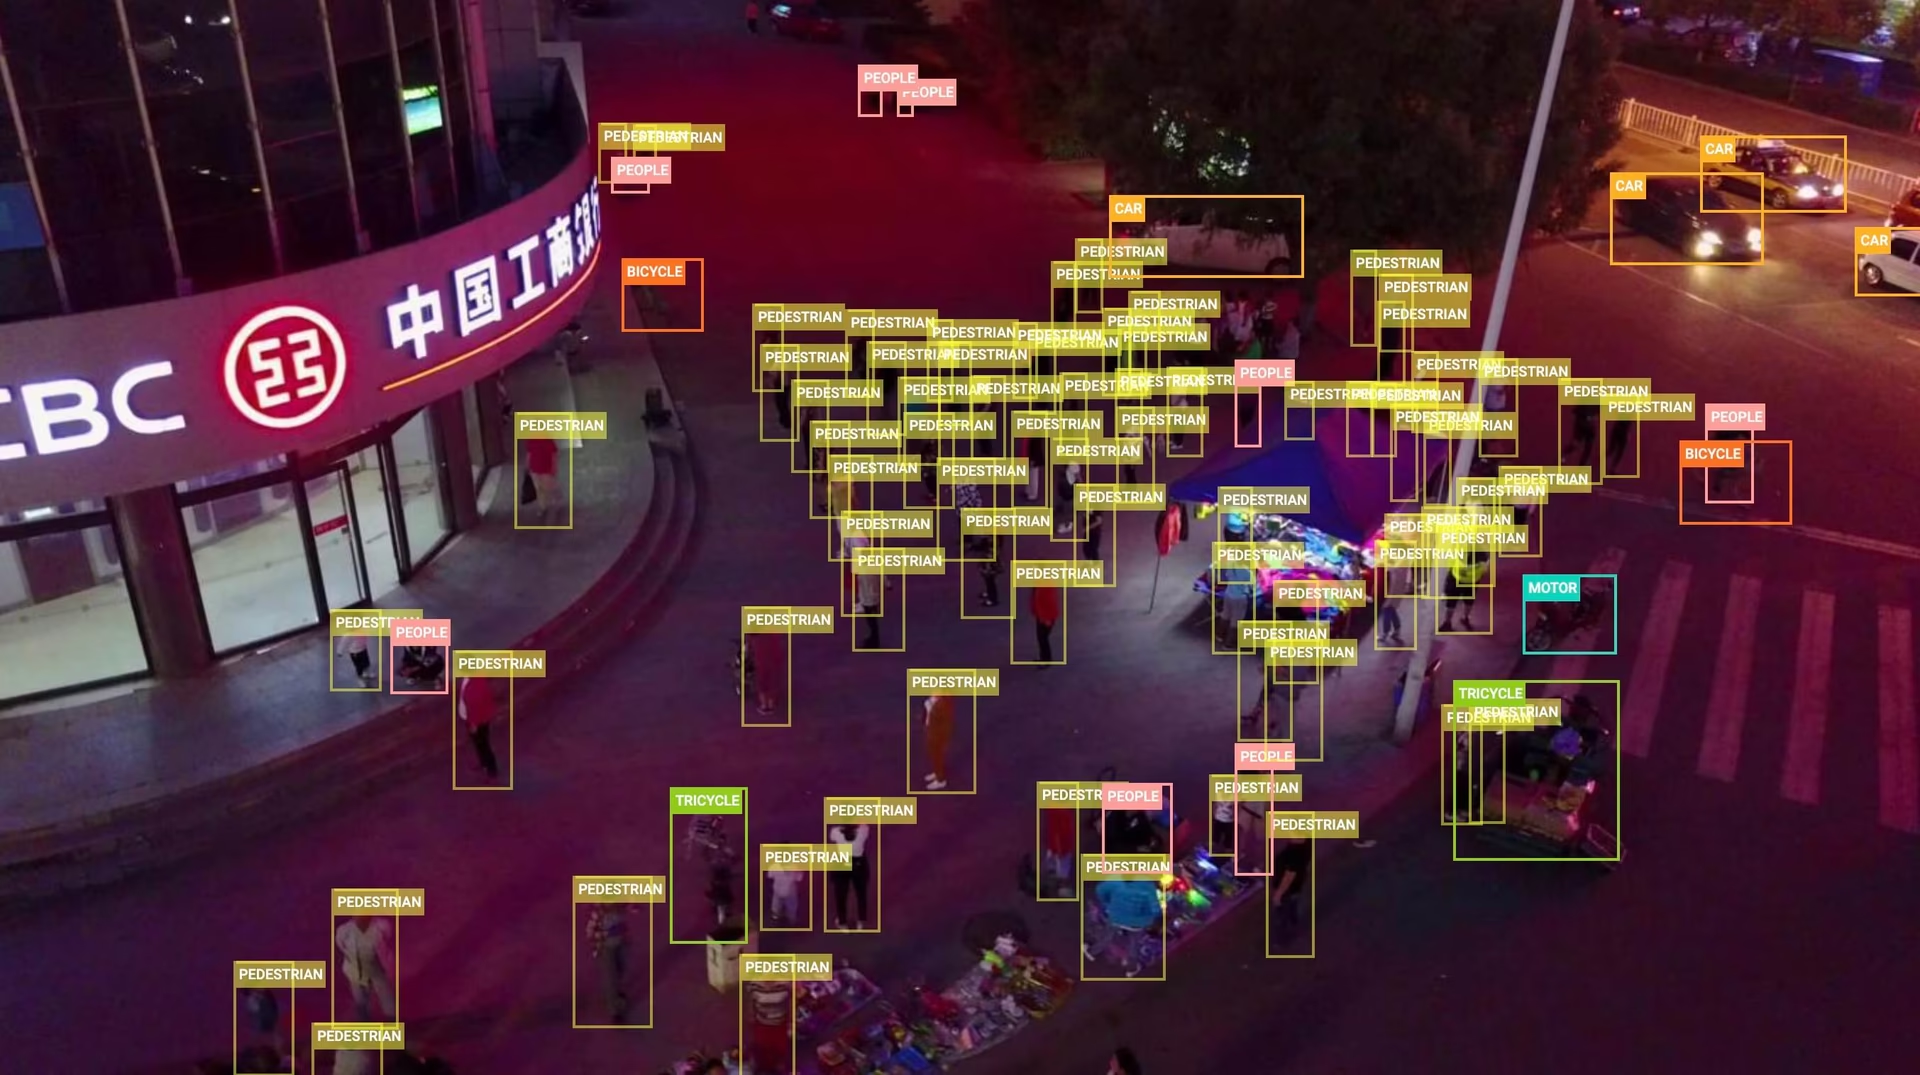
Aşağıdaki örnek, tipik bir VisDrone sahnesini gösterir: Yoğun bir yolun havadan görünümü; yayalar ve araçlar küçük, sıkışık hedefler olarak görünür ve birçoğu diğer nesneler tarafından kısmen kapatılmıştır.
Atıflar ve Teşekkürler#
VisDrone veri kümesini araştırma veya geliştirme çalışmalarında kullanıyorsan lütfen aşağıdaki makaleye atıfta bulun:
@ARTICLE{9573394,
  author={Zhu, Pengfei and Wen, Longyin and Du, Dawei and Bian, Xiao and Fan, Heng and Hu, Qinghua and Ling, Haibin},
  journal={IEEE Transactions on Pattern Analysis and Machine Intelligence},
  title={Detection and Tracking Meet Drones Challenge},
  year={2022},
  volume={44},
  number={11},
  pages={7380-7399},
  doi={10.1109/TPAMI.2021.3119563}}
VisDrone veri kümesini oluşturup sürdürdükleri için Çin'deki Tianjin Üniversitesi Makine Öğrenimi ve Veri Madenciliği Laboratuvarı bünyesindeki AISKYEYE ekibine teşekkür ederiz. Daha fazla bilgi için VisDrone Veri Kümesi GitHub deposunu ziyaret et.
Sık Sorulan Sorular#
VisDrone, nesnelerin küçük ve yoğun olduğu, yukarıdan görüldüğü drone görüntüleri üzerinde algılayıcıları eğitmek ve kıyaslamak için kullanılır. Hava görüntülerini, kalabalık sahneleri ve çeşitli koşulları bir araya getirmesi; veri kümesini İHA tabanlı trafik izleme, kalabalık analizi ve küçük nesne tespiti araştırmaları için standart bir test ortamı hâline getirir.
Ultralytics VisDrone yapılandırmasında 8.629 görüntü bulunur: eğitim için 6.471, doğrulama için 548 ve test için 1.610 (test-dev) görüntü. Tüm bölümlerde aynı 10 sınıf kullanılır: yaya, insanlar, bisiklet, otomobil, minibüs, kamyon, üç tekerlekli bisiklet, tenteli üç tekerlekli bisiklet, otobüs ve motosiklet. Ayrıntılı dağılım için Veri Kümesi Yapısı bölümüne bak.
data="VisDrone.yaml"ile ilk kez eğitim yaptığında VisDrone otomatik olarak indirilir; elle işlem yapman gerekmez. Betik, Ultralytics GitHub sürüm varlıklarından üç arşiv (yaklaşık 2 GB) indirir ve açıklamaları YOLO biçimine dönüştürür. Yarışma için ayrılmış test-challenge bölümü dâhil değildir.VisDrone üzerinde 640 görüntü boyutuyla 100 epoch boyunca YOLO26n modeli eğit:
Eğitim Örneğifrom ultralytics import YOLO # Bir model yükle model = YOLO("yolo26n.pt") # Önceden eğitilmiş bir model yükle (eğitim için önerilir) # Modeli eğit results = model.train(data="VisDrone.yaml", epochs=100, imgsz=640)Ayrıntılı yapılandırmalar için Eğitim sayfasına ve model eğitimi ipuçları sayfasına bak.
VisDrone'daki nesneler kareye göre küçüktür — çoğu zaman yalnızca birkaç düzine piksel boyutundadır — ve yoğun, büyük ölçüde örtüşen gruplar hâlinde görünür; bu durum, yer seviyesinden çekilmiş fotoğraflar üzerinde ayarlanan dedektörleri zorlar. Daha yüksek çözünürlükte eğitim yapmak ve tahmin yürütmek (örneğin, daha küçük bir batch ile
imgsz=1280kullanmak) küçük hedefleri yakalamayı sağlar; yüksek çözünürlüklü döşeme ise büyük görüntüleri dilimleyerek küçük nesnelerin her çıkarım penceresinin daha büyük bir bölümünü kaplamasını sağlar.VisDrone kıyaslama veri kümesinin tamamı beş görevi kapsar: görüntülerde nesne tespiti, videolarda nesne tespiti, tek nesne takibi, çoklu nesne takibi ve kalabalık sayımı. Veri kümesinde 288 video klip ve 10.209 durağan görüntü bulunur. Ultralytics
VisDrone.yamlyapılandırması yalnızca görüntüde tespit görevini (VisDrone2019-DET) kapsar ve 6.471 eğitim, 548 doğrulama ve 1.610 test-dev görüntüsünü indirir."Detection and Tracking Meet Drones Challenge" makalesine (IEEE TPAMI, cilt 44, sayı 11, 2022, DOI 10.1109/TPAMI.2021.3119563) atıfta bulun; BibTeX kaydının tamamı yukarıdaki Atıflar ve Teşekkürler bölümündedir.


Yorumlar24
Bir soru sor, sonuçlarını paylaş veya başka birine yardım et.
arpithavkhanapur1226-collab
Thank you for the suggestions. I’ve tried the recommended changes and checked the dataset, including removing the degenerate bounding box, but I’m still facing the NaN issue around epoch 30. The best mAP I’m getting is only around 33.2%, which is far below the expected performance. I’ve tried several approaches already, but I’m not able to figure out what is causing the instability. Could you please help me identify what might be going wrong or suggest what I should specifically check next? ,I have attached my code and result below ,I would really appreciate your guidance.
visdrone2.ipynb
 Paula DerrengerUltralytics
Please rerun a clean baseline with the official
VisDrone.yaml, pretrained weights, and defaults; after correcting annotations, delete all*.cachefiles in the dataset’slabelsdirectories, and restart the notebook kernel if Ultralytics was upgraded. If NaNs persist, share the complete text training log/traceback, exactmodel.train(...)arguments, Ultralytics version, and output fromyolo checks; also try a smaller learning rate and higherimgszsuch as1280, since VisDrone contains many tiny objects.
I’m training YOLOv12 on the VisDrone dataset, but I faced NaN losses after around epoch 29. I found a degenerate bounding box with zero height and removed it, but the NaN issue still occurred. I then tried DDPNet on VisDrone, but the validation performance started plateauing around epoch 14. Training is also very slow on a T4 (~4 hours for 12 epochs). Could you suggest what I should check or change to improve the training performance?
- Paula DerrengerUltralytics
After correcting every invalid/non-finite label and ensuring normalized boxes have positive width/height, delete all
*.cachefiles inside thelabelsdirectories before retraining. Establish a baseline with a pretrained Ultralytics model atimgsz=640; then inspectresults.png, per-class AP, and the confusion matrix before changing augmentation or resolution. VisDrone contains many tiny, dense objects, so higher resolution may improve accuracy but will substantially slow a T4; use ann/smodel and the largest stable batch first. If NaNs persist, please share the exact training command, complete text logs around the first NaN, Ultralytics version, andyolo checksoutput; see the VisDrone training guide and fine-tuning troubleshooting.
mslabdelhak29
Hello can you offre a pretrained model i need it and i dont have source to entrain for 100 epochs
 Glenn JocherUltralytics(düzenlendi)
Hi, we don’t currently provide an official YOLO model pretrained specifically on VisDrone, so the usual workflow is to start from a generic checkpoint like
yolo26n.ptand fine‑tune it on VisDrone; you can safely reduceepochs(e.g. 10–20) or train on a subset of the data in Colab to keep compute low, and the YOLO train mode docs show how to adjust these arguments.
ysharvit
I am looking for drone photos in desert area ( in order to develop rescue detection system (I volunteer in SAR unit)) Can I filter only desert BG pictures in your dataset?
- Glenn JocherUltralytics(düzenlendi)
VisDrone doesn’t include scene/terrain metadata like “desert” (it’s largely urban/traffic), so there’s no built‑in way to filter for desert backgrounds; for SAR you’ll want to gather desert drone imagery and fine‑tune a COCO‑pretrained YOLO26 using the dataset setup in the Datasets Overview or manage it end‑to‑end with Ultralytics Platform datasets.
fardinabbasi
It would be very useful if someone could provide a list of pretrained YOLO models for the VisDrone dataset that are compatible with Ultralytics.
- Glenn JocherUltralytics(düzenlendi)
Ultralytics doesn’t currently maintain an official list of VisDrone‑trained checkpoints; the recommended path is to fine‑tune a COCO‑pretrained YOLO26 variant (e.g.,
yolo26s.pt)—see the available base weights on the YOLO26 models page.
lawyeh
Hello, the example and the yaml file pull from the object detection in images dataset (task 1). How can I train the model for object detection in video (task )?
- Glenn JocherUltralytics
For video object detection (Task 2) with VisDrone, you'll use the same YOLO training process but process video frames as individual images. Ensure your dataset paths in VisDrone.yaml point to the video task's frame sequences (organized as images), then train normally. Video inference can be done with
model.predict(source='video.mp4')after training. For video-specific annotations, verify they're converted to YOLO format per frame.1
SudhanshuBlaze
I trained yolov10x on VisDrone dataset with the below parameters, but I got the final
box_lossof1.97. I feel that model performed very poorly, do you know what might be the issue? Or what hyperparameters should I use?from ultralytics import YOLO # Load a model model = YOLO("yolov10x.pt") # load a pretrained model (recommended for training) # Train the model results = model.train(data="VisDrone.yaml", epochs=1000, imgsz=640, patience=250, project='visdrone', name='train', batch=-1)- Glenn JocherUltralytics
@SudhanshuBlaze it sounds like your model might be struggling with the complexity of the VisDrone dataset. First, ensure you're using the latest version of the Ultralytics package. You might also want to experiment with different learning rates, batch sizes, and augmentation techniques. Sometimes, reducing the learning rate or increasing the batch size can help stabilize training. Additionally, consider using early stopping to prevent overfitting. If the issue persists, reviewing the dataset for any inconsistencies or mislabeled data could also be beneficial. For more detailed guidance, you can refer to the VisDrone documentation.
mariem158
quelles sont les étapes pour télécharger roboflow100 sur google colab. je veux utiliser ce dataset pour faire la détection précise des véhicules filmés par des caméras ?
- Paula DerrengerUltralytics(düzenlendi)
@mariem158 bonjour!
Pour télécharger et utiliser le dataset Roboflow100 sur Google Colab pour la détection précise des véhicules, vous pouvez suivre les étapes ci-dessous. Cependant, il semble que vous ayez mentionné le dataset VisDrone dans votre commentaire, donc je vais également inclure des informations sur ce dataset.
Étapes pour télécharger Roboflow100 sur Google Colab
-
Installer les dépendances nécessaires:
!pip install roboflow -
Importer et configurer Roboflow:
from roboflow import Roboflow rf = Roboflow(api_key="YOUR_API_KEY") project = rf.workspace().project("roboflow100") dataset = project.version("1").download("yolov8") -
Configurer le dataset pour l'entraînement:
from ultralytics import YOLO

# Charger un modèle pré-entraîné
model = YOLO("yolo26n.pt")

# Entraîner le modèle
results = model.train(data=dataset.location + "/data.yaml", epochs=100, imgsz=640)
Utilisation du dataset VisDrone
Le dataset VisDrone est une excellente ressource pour la détection d'objets, le suivi d'objets et le comptage de foules dans des images et vidéos capturées par des drones. Voici comment vous pouvez l'utiliser avec YOLO26:
-
Télécharger et configurer le dataset VisDrone:
from ultralytics import YOLO # Charger un modèle pré-entraîné model = YOLO("yolo26n.pt") # Entraîner le modèle results = model.train(data="VisDrone.yaml", epochs=100, imgsz=640) -
YAML de configuration pour VisDrone:
# Ultralytics YOLO 🚀, AGPL-3.0 license
# VisDrone2019-DET dataset https://github.com/VisDrone/VisDrone-Dataset by Tianjin University
path: ../datasets/VisDrone
train: VisDrone2019-DET-train/images
val: VisDrone2019-DET-val/images
test: VisDrone2019-DET-test-dev/images
names:
  0: pedestrian
  1: people
  2: bicycle
  3: car
  4: van
  5: truck
  6: tricycle
  7: awning-tricycle
  8: bus
  9: motor
Pour plus de détails sur l'utilisation du dataset VisDrone, vous pouvez consulter la documentation complète ici : VisDrone Dataset Documentation.
N'hésitez pas à revenir vers nous si vous avez d'autres questions! 😊
Cordialement, L'équipe Ultralytics
-
comment intégrer visdataset sur google colab et l'intégrer dans mon code qui détecte seulement des véhicules par des drones situé verticalement au dessus de la route.
- Paula DerrengerUltralytics(düzenlendi)
Bonjour,
Merci pour votre question ! Pour intégrer le dataset VisDrone dans Google Colab et l'utiliser pour détecter uniquement des véhicules capturés par des drones, voici les étapes à suivre :
-
Configurer Google Colab:
- Assurez-vous d'avoir accès à un GPU pour accélérer l'entraînement. Allez dans
Runtime>Change runtime typeet sélectionnezGPU.
- Assurez-vous d'avoir accès à un GPU pour accélérer l'entraînement. Allez dans
-
Installer les dépendances:
- Installez les bibliothèques nécessaires, notamment
ultralyticspour YOLO26.
- Installez les bibliothèques nécessaires, notamment
-
Télécharger et préparer le dataset VisDrone:
- Utilisez le script de téléchargement et de conversion fourni dans le fichier
VisDrone.yaml.
- Utilisez le script de téléchargement et de conversion fourni dans le fichier
-
Entraîner le modèle:
- Chargez un modèle pré-entraîné YOLO26 et entraînez-le sur le dataset VisDrone en filtrant uniquement les classes de véhicules.
Voici un exemple de code pour chaque étape :
# Installer les dépendances
!pip install ultralytics

# Importer les bibliothèques nécessaires
from ultralytics import YOLO
import os
from pathlib import Path

# Télécharger et préparer le dataset VisDrone
def download_visdrone():
    from ultralytics.utils.downloads import download

    def visdrone2yolo(dir):
        from PIL import Image
        from tqdm import tqdm

        def convert_box(size, box):
            dw = 1. / size[0]
            dh = 1. / size[1]
            return (box[0] + box[2] / 2) * dw, (box[1] + box[3] / 2) * dh, box[2] * dw, box[3] * dh

        (dir / 'labels').mkdir(parents=True, exist_ok=True)
        pbar = tqdm((dir / 'annotations').glob('*.txt'), desc=f'Converting {dir}')
        for f in pbar:
            img_size = Image.open((dir / 'images' / f.name).with_suffix('.jpg')).size
            lines = []
            with open(f, 'r') as file:
                for row in [x.split(',') for x in file.read().strip().splitlines()]:
                    if row[4] == '0':
                        continue
                    cls = int(row[5]) - 1
                    box = convert_box(img_size, tuple(map(int, row[:4])))
                    lines.append(f"{cls} {' '.join(f'{x:.6f}' for x in box)}\n")
                with open(str(f).replace(f'{os.sep}annotations{os.sep}', f'{os.sep}labels{os.sep}'), 'w') as fl:
                    fl.writelines(lines)

    dir = Path('../datasets/VisDrone')
    urls = [
        'https://github.com/ultralytics/yolov5/releases/download/v1.0/VisDrone2019-DET-train.zip',
        'https://github.com/ultralytics/yolov5/releases/download/v1.0/VisDrone2019-DET-val.zip',
        'https://github.com/ultralytics/yolov5/releases/download/v1.0/VisDrone2019-DET-test-dev.zip',
        'https://github.com/ultralytics/yolov5/releases/download/v1.0/VisDrone2019-DET-test-challenge.zip'
    ]
    download(urls, dir=dir, curl=True, threads=4)
    for d in ['VisDrone2019-DET-train', 'VisDrone2019-DET-val', 'VisDrone2019-DET-test-dev']:
        visdrone2yolo(dir / d)

download_visdrone()

# Entraîner le modèle YOLO26 sur le dataset VisDrone
model = YOLO("yolo26n.pt")  # Charger un modèle pré-entraîné
results = model.train(data="VisDrone.yaml", epochs=100, imgsz=640)
Pour plus de détails sur la configuration du dataset et les options d'entraînement, vous pouvez consulter la documentation complète ici.
N'hésitez pas à revenir vers nous si vous avez d'autres questions. Bonne chance avec votre projet ! 🚀
Cordialement, L'équipe Ultralytics
-
comment je peux utiliser les modèles de visdrone et faire l'appel à ce dataset dans mon code pour faire la détection des véhicules par mon drone?
- Paula DerrengerUltralytics(düzenlendi)
Bonjour,
Merci pour votre question ! Pour utiliser le dataset VisDrone et détecter uniquement les véhicules capturés par des drones, voici comment procéder sur Google Colab :
-
Configurer Google Colab:
- Assurez-vous d'avoir accès à un GPU pour accélérer l'entraînement. Allez dans
Runtime>Change runtime typeet sélectionnezGPU.
- Assurez-vous d'avoir accès à un GPU pour accélérer l'entraînement. Allez dans
-
Installer les dépendances:
- Installez les bibliothèques nécessaires, notamment
ultralyticspour YOLO26.
- Installez les bibliothèques nécessaires, notamment
-
Télécharger et préparer le dataset VisDrone:
- Utilisez le script de téléchargement et de conversion fourni dans le fichier
VisDrone.yaml.
- Utilisez le script de téléchargement et de conversion fourni dans le fichier
-
Entraîner le modèle:
- Chargez un modèle pré-entraîné YOLO26 et entraînez-le sur le dataset VisDrone en filtrant uniquement les classes de véhicules.
Voici un exemple de code pour chaque étape :
# Installer les dépendances
!pip install ultralytics

# Importer les bibliothèques nécessaires
from ultralytics import YOLO
import os
from pathlib import Path

# Télécharger et préparer le dataset VisDrone
def download_visdrone():
    from ultralytics.utils.downloads import download

    def visdrone2yolo(dir):
        from PIL import Image
        from tqdm import tqdm

        def convert_box(size, box):
            dw = 1. / size[0]
            dh = 1. / size[1]
            return (box[0] + box[2] / 2) * dw, (box[1] + box[3] / 2) * dh, box[2] * dw, box[3] * dh

        (dir / 'labels').mkdir(parents=True, exist_ok=True)
        pbar = tqdm((dir / 'annotations').glob('*.txt'), desc=f'Converting {dir}')
        for f in pbar:
            img_size = Image.open((dir / 'images' / f.name).with_suffix('.jpg')).size
            lines = []
            with open(f, 'r') as file:
                for row in [x.split(',') for x in file.read().strip().splitlines()]:
                    if row[4] == '0':
                        continue
                    cls = int(row[5]) - 1
                    box = convert_box(img_size, tuple(map(int, row[:4])))
                    lines.append(f"{cls} {' '.join(f'{x:.6f}' for x in box)}\n")
                with open(str(f).replace(f'{os.sep}annotations{os.sep}', f'{os.sep}labels{os.sep}'), 'w') as fl:
                    fl.writelines(lines)

    dir = Path('../datasets/VisDrone')
    urls = [
        'https://github.com/ultralytics/yolov5/releases/download/v1.0/VisDrone2019-DET-train.zip',
        'https://github.com/ultralytics/yolov5/releases/download/v1.0/VisDrone2019-DET-val.zip',
        'https://github.com/ultralytics/yolov5/releases/download/v1.0/VisDrone2019-DET-test-dev.zip',
        'https://github.com/ultralytics/yolov5/releases/download/v1.0/VisDrone2019-DET-test-challenge.zip'
    ]
    download(urls, dir=dir, curl=True, threads=4)
    for d in ['VisDrone2019-DET-train', 'VisDrone2019-DET-val', 'VisDrone2019-DET-test-dev']:
        visdrone2yolo(dir / d)

download_visdrone()

# Entraîner le modèle YOLO26 sur le dataset VisDrone
model = YOLO("yolo26n.pt")  # Charger un modèle pré-entraîné
results = model.train(data="VisDrone.yaml", epochs=100, imgsz=640)
Pour plus de détails sur la configuration du dataset et les options d'entraînement, vous pouvez consulter la documentation complète ici.
N'hésitez pas à revenir vers nous si vous avez d'autres questions. Bonne chance avec votre projet ! 🚀
Cordialement, L'équipe Ultralytics
-
Elvis-Kiilu2
This is nice, but what's next after the detection? How do we send/retrieve the data to a given database? What further insights can we draw from the detected data? What other technologies can we intergrate to this to draw meaningful inferences??
- Paula DerrengerUltralytics(düzenlendi)
After detection, you have a few options to extend the functionality:
-
Data Storage: To send and store detections on a database:
import sqlite3 from datetime import datetime from ultralytics import YOLO # Connect to SQLite database connection = sqlite3.connect('my_detections.db') cursor = connection.cursor() # Create table cursor.execute('''CREATE TABLE IF NOT EXISTS detections (timestamp DATETIME, class TEXT, confidence REAL, x REAL, y REAL, width REAL, height REAL)''') # Example insertion from detection results = YOLO("yolo26n.pt")("image.jpg")[0] names = results.names timestamp = datetime.now().isoformat() for det in results.boxes: cursor.execute('''INSERT INTO detections (timestamp, class, confidence, x, y, width, height) VALUES (?, ?, ?, ?, ?, ?, ?)''', (timestamp, names[int(det.cls)], float(det.conf), *det.xywh[0].tolist())) connection.commit() connection.close() -
Further Analysis: Analyze the time series of detections to observe trends, detect anomalies, or aggregate counts over time.
-
Integration with Other Technologies: Integrate with IoT platforms for real-time alerts or incorporate AI-based services for enhanced image analysis and decision-making processes.
These steps help bridge the gap between raw detection outputs and actionable insights or responses in real-world applications.
-
Thanks @pderrenger for the reply. I wanted to implement this for my next project. Your insights are a good starting point. My aim is to extract/read data from the detected class/boxes. Then compare and match the read data with with those in a database that in a cloud data warehouse, Bigquery to be specific.
- Paula DerrengerUltralytics
Hey there! It's great to hear you're planning to use YOLOv8 for your project. To extract and compare data from detected objects with your BigQuery database, you can follow these steps:
-
Extract Data: After detection, extract the necessary details from each detection (like class, confidence, and bounding box coordinates).
-
Format Data: Convert this data into a suitable format (like JSON or CSV) that can be easily ingested into BigQuery.
-
Upload to BigQuery: Use the BigQuery API to upload your formatted data. Here’s a small Python snippet using
google-cloud-bigquery:from google.cloud import bigquery # Construct a BigQuery client object. client = bigquery.Client() # Define your table ID (dataset.table) table_id = "your-project.your_dataset.your_table" # Define the data to be inserted rows_to_insert = [ {u"class": detected_class, u"confidence": confidence, u"x_min": x_min, u"y_min": y_min, u"width": width, u"height": height} ] # Insert data into BigQuery errors = client.insert_rows_json(table_id, rows_to_insert) if errors == []: print("New rows have been added.") -
Query and Analyze: Once your data is in BigQuery, you can use SQL queries to compare, analyze, and draw insights based on your specific needs.
This workflow will help you leverage the power of cloud computing to analyze large datasets efficiently. If you need further assistance or have more specific requirements, feel free to ask! 🚀
-