Conjunto de datos Tiger-Pose
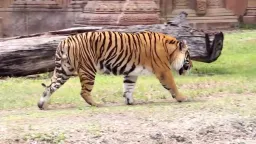
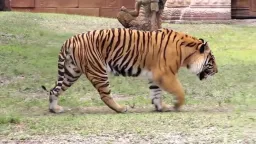
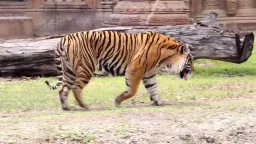
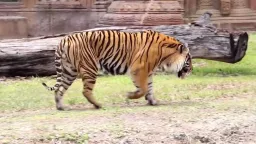
Introducción#
El conjunto de datos Tiger-Pose de Ultralytics es un pequeño conjunto de datos de estimación de pose con 12 puntos clave anotados por tigre. Consta de 263 imágenes obtenidas de un vídeo de YouTube: 210 imágenes para entrenamiento y 53 para validación. Es idóneo para probar y depurar algoritmos de estimación de pose.
A pesar de que su partición de entrenamiento, de 210 imágenes, es manejable, el conjunto de datos Tiger-Pose ofrece diversidad, por lo que resulta adecuado para evaluar flujos de entrenamiento, identificar posibles errores y servir como primer paso antes de trabajar con conjuntos de datos de estimación de pose más grandes.
Cuando el flujo de trabajo se entrene sin problemas con este conjunto pequeño, sustitúyelo por tus propios puntos clave de animales u objetos y amplía el entrenamiento en Ultralytics Platform sin salir del navegador.
Estructura del conjunto de datos#
- Imágenes totales: 263 (210 de entrenamiento / 53 de validación).
- Puntos clave: 12 por tigre (sin indicador de visibilidad).
- Tamaño de descarga: ~49.8 MB.
- Estructura de directorios: puntos clave en formato YOLO almacenados en
labels/{train,val}junto a los directoriosimages/{train,val}.
Ver: Entrena un modelo de pose de Ultralytics YOLO con el conjunto de datos Tiger-Pose
YAML del conjunto de datos#
El archivo tiger-pose.yaml define la configuración del conjunto de datos, incluidas las rutas de los archivos, las definiciones de las clases y los ajustes de los puntos clave.
# Ultralytics 🚀 AGPL-3.0 License - https://ultralytics.com/license

# Tiger Pose dataset by Ultralytics
# Documentation: https://docs.ultralytics.com/datasets/pose/tiger-pose
# Example usage: yolo train data=tiger-pose.yaml
# parent
# ├── ultralytics
# └── datasets
#     └── tiger-pose ← downloads here (49.8 MB)

# Train/val/test sets as 1) dir: path/to/imgs, 2) file: path/to/imgs.txt, or 3) list: [path/to/imgs1, path/to/imgs2, ..]
path: tiger-pose # dataset root dir
train: images/train # train images (relative to 'path') 210 images
val: images/val # val images (relative to 'path') 53 images

# Keypoints
kpt_shape: [12, 2] # number of keypoints, number of dims (2 for x,y or 3 for x,y,visible)
flip_idx: [0, 1, 2, 3, 7, 6, 5, 4, 10, 11, 8, 9]

# Classes
names:
  0: tiger

# Keypoint names per class
kpt_names:
  0:
    - nose
    - head
    - withers
    - tail_base
    - right_hind_hock
    - right_hind_paw
    - left_hind_paw
    - left_hind_hock
    - right_front_wrist
    - right_front_paw
    - left_front_wrist
    - left_front_paw

# Download script/URL (optional)
download: https://github.com/ultralytics/assets/releases/download/v0.0.0/tiger-pose.zipUso#
Para entrenar un modelo YOLO26n-pose con el conjunto de datos Tiger-Pose durante 100 épocas y con un tamaño de imagen de 640, puedes usar los siguientes fragmentos de código.
from ultralytics import YOLO

# Cargar un modelo
model = YOLO("yolo26n-pose.pt")  # Carga un modelo preentrenado (recomendado para el entrenamiento)

# Entrenar el modelo
results = model.train(data="tiger-pose.yaml", epochs=100, imgsz=640)
Imágenes de muestra y anotaciones#
Aquí tienes algunos ejemplos de imágenes del conjunto de datos Tiger-Pose, junto con sus anotaciones correspondientes:
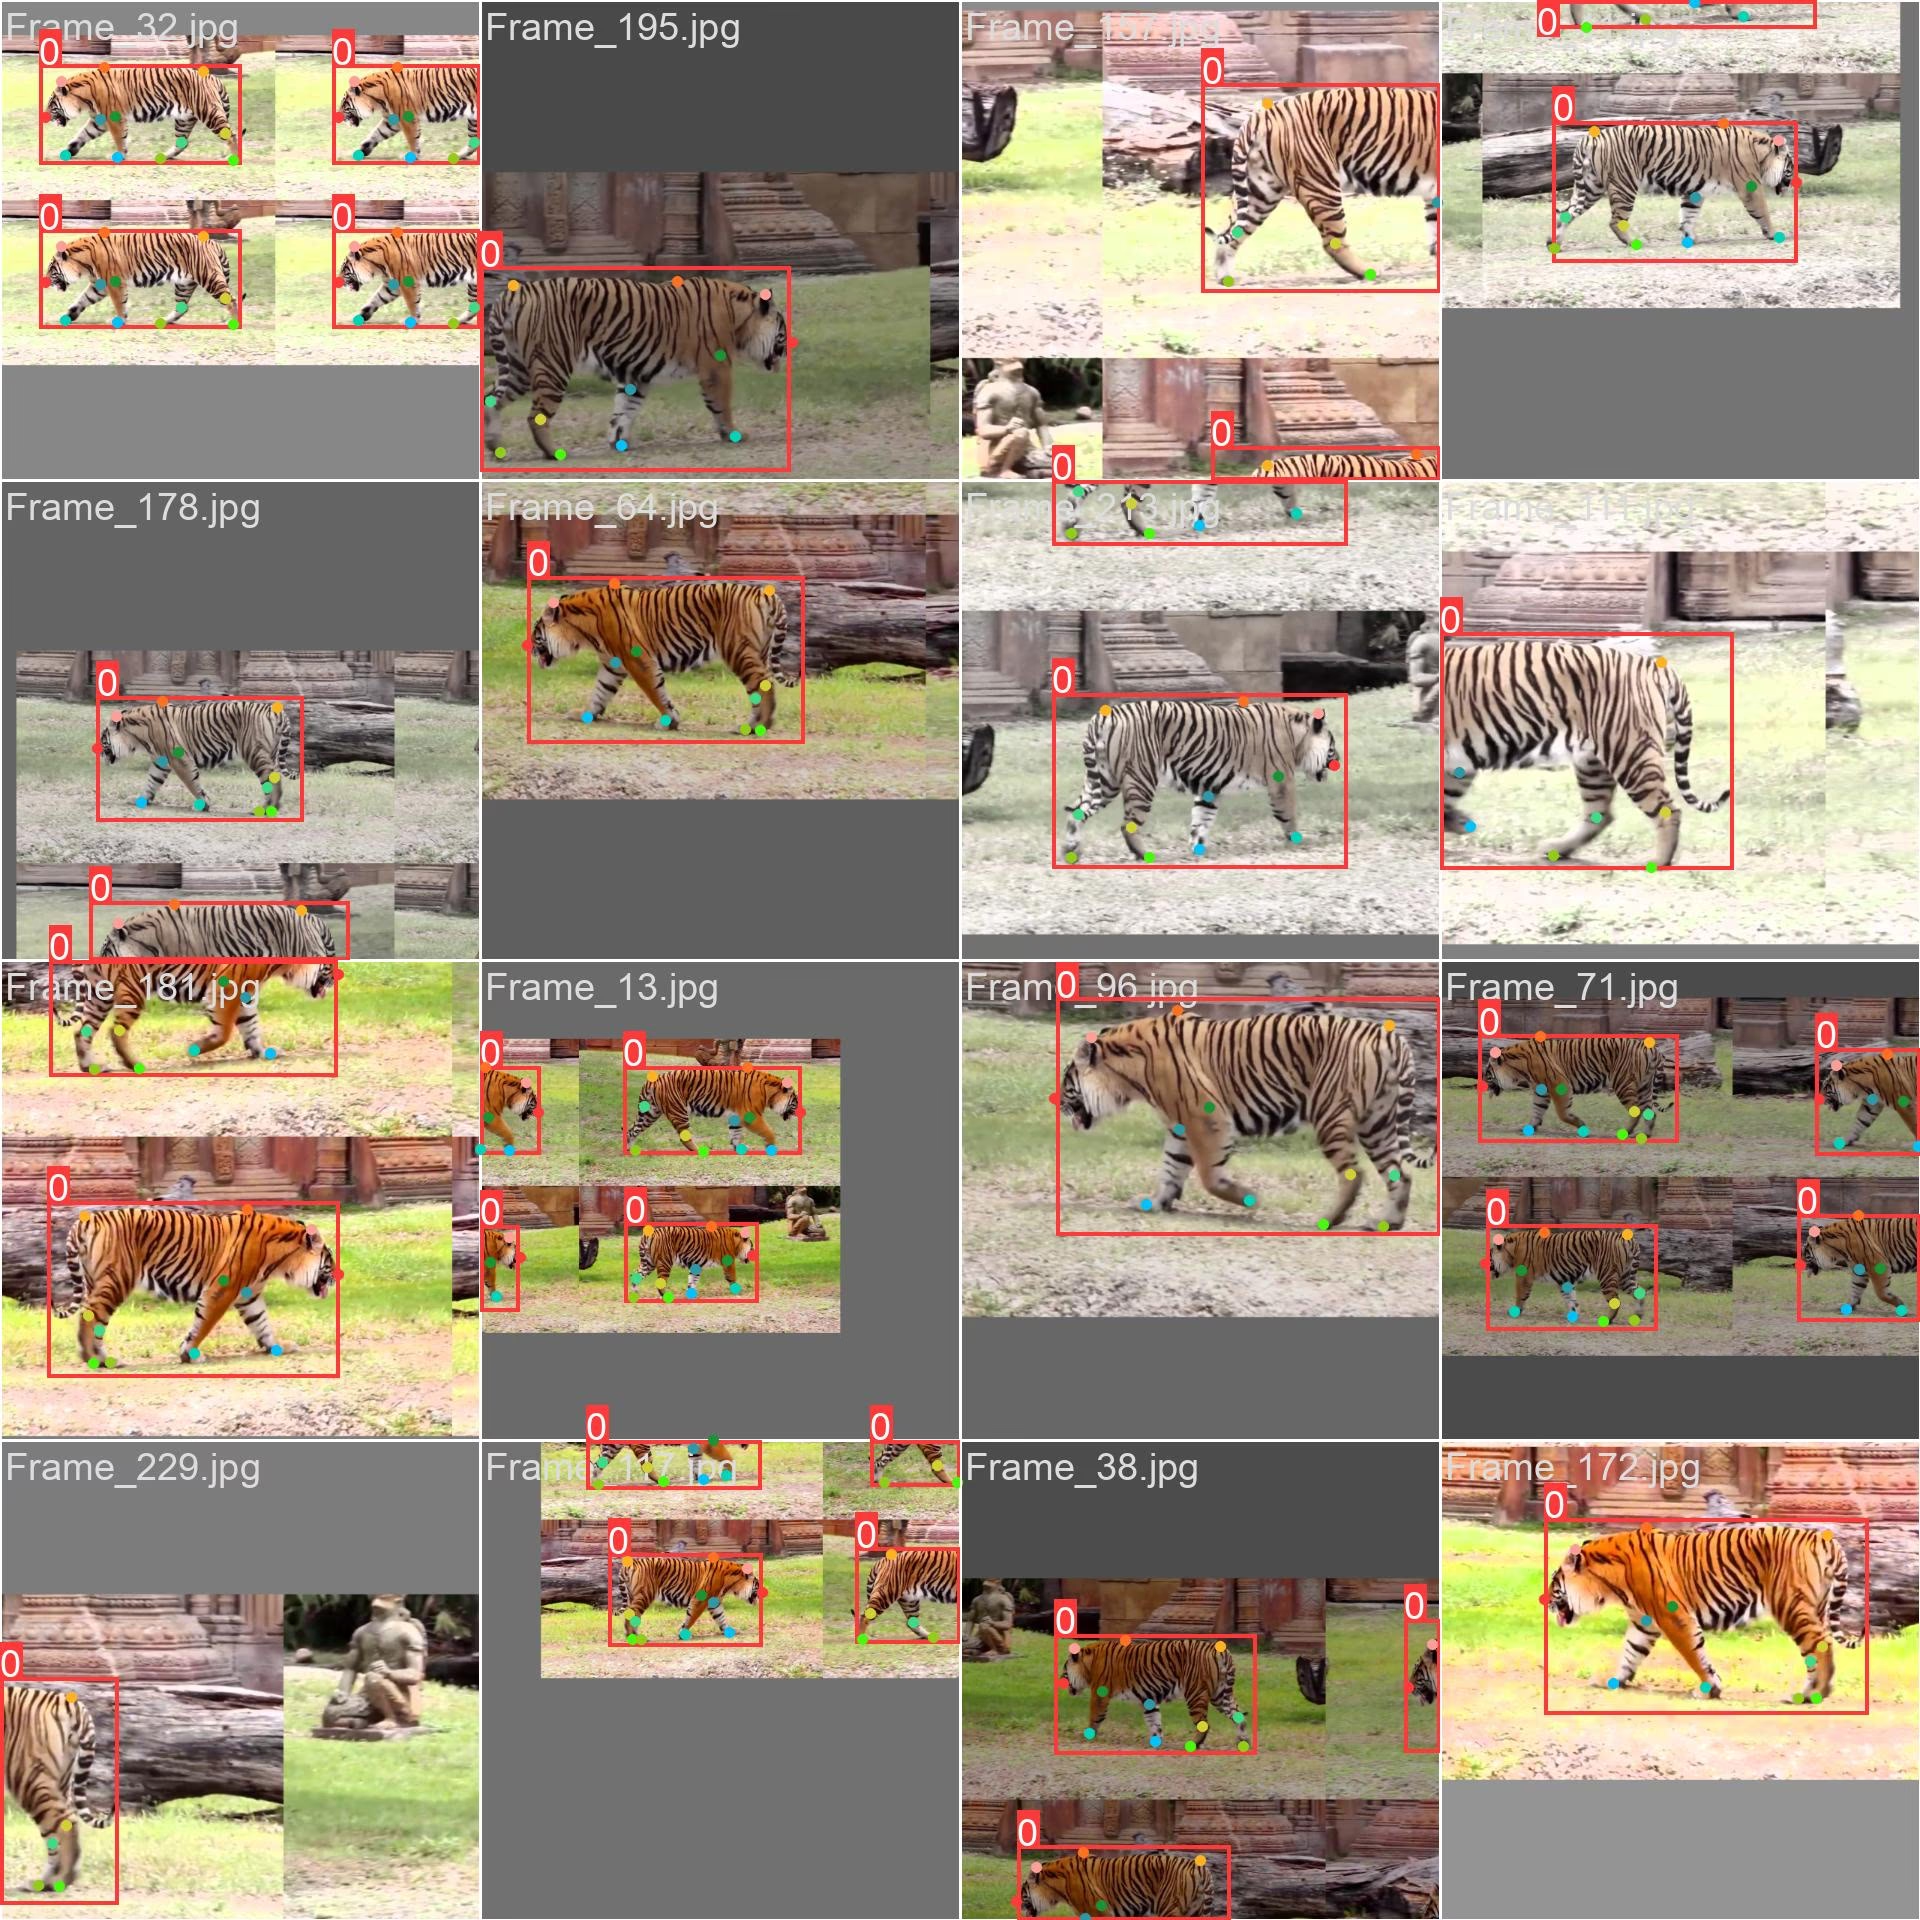
- Imagen en mosaico: Esta imagen muestra un lote de entrenamiento compuesto por imágenes del conjunto de datos dispuestas en mosaico. El mosaico es una técnica que se utiliza durante el entrenamiento para combinar varias imágenes en una sola y aumentar la variedad de objetos y escenas de cada lote de entrenamiento. Esto ayuda a mejorar la capacidad del modelo para generalizar a distintos tamaños de objetos, relaciones de aspecto y contextos.
El ejemplo muestra la variedad y complejidad de las imágenes del conjunto de datos Tiger-Pose, así como las ventajas de utilizar mosaicos durante el entrenamiento.
Ejemplo de inferencia#
Una vez finalizado el entrenamiento, carga tu mejor punto de control y ejecuta la inferencia en imágenes o vídeos nuevos; consulta la página de Predicción para ver la lista completa de argumentos.
from ultralytics import YOLO

# Cargar un modelo
model = YOLO("path/to/best.pt")  # cargar un modelo entrenado con tiger-pose

# Ejecutar inferencia
results = model.predict(source="https://youtu.be/Gc6K5eKrTNQ", show=True)
Citas y agradecimientos#
Ultralytics publica las anotaciones del conjunto de datos Tiger-Pose bajo la Licencia AGPL-3.0. El vídeo original sigue sujeto a sus condiciones originales, que debes revisar antes de utilizar o redistribuir los fotogramas extraídos.
Preguntas frecuentes#
El conjunto de datos Tiger-Pose de Ultralytics está diseñado para tareas de estimación de pose y consta de 263 imágenes extraídas de un vídeo de YouTube. El conjunto de datos se divide en 210 imágenes de entrenamiento y 53 de validación, por lo que es idóneo para probar, entrenar y perfeccionar algoritmos de estimación de pose.
Carga
yolo26n-pose.pty llama amodel.train(data="tiger-pose.yaml", epochs=100, imgsz=640); consulta el Ejemplo de entrenamiento anterior para ver los fragmentos completos de Python y CLI, y la página de Entrenamiento para consultar la lista completa de argumentos.El archivo
tiger-pose.yamldefine la ruta del conjunto de datos, los directorios de imágenes de entrenamiento y validación, una única clase (tiger) ykpt_shape: [12, 2]: 12 puntos clave por instancia sin indicador de visibilidad. Consulta el Archivo de configuración del conjunto de datos Tiger-Pose de Ultralytics para ver la configuración exacta.Carga el punto de control entrenado (por ejemplo,
path/to/best.pt) y llama amodel.predict(source=..., show=True); consulta el Ejemplo de inferencia anterior para ver los fragmentos completos de Python y CLI, y la página de Predicción para consultar la lista completa de argumentos.Con 263 imágenes en total (210 de entrenamiento / 53 de validación), 1 clase, 12 puntos clave por instancia y una descarga de ~49.8 MB, Tiger-Pose es lo bastante pequeño como para gestionarlo rápidamente y lo bastante diverso como para comprobar el funcionamiento de un flujo de entrenamiento de pose y detectar errores antes de trabajar con conjuntos de datos más grandes.


Comentarios17
Haz una pregunta, comparte tus resultados o ayuda a otra persona.
wcy7788
@glenn-jocherWhere should I go to Ultralytics to find the code for this?
 Glenn JocherUltralytics
You can find the code for the Tiger-Pose dataset in the
ultralytics/cfg/datasets/tiger-pose.yamlfile. For more details, please visit the Tiger-Pose documentation.
What software should be used for the training of fish key points,I should mark a few key points?
- Glenn JocherUltralytics(editado)
@wcy7788 for training fish keypoints, you can use the YOLO26-pose model. Annotate your dataset with keypoints and follow the training process similar to the Tiger-Pose example. For more details, refer to the Ultralytics documentation.
PedroPiana
In my dataset, do I necessarily need to have the Bounding Boxes?
- Glenn JocherUltralytics(editado)
Yes, for pose estimation tasks like those using the Tiger-Pose dataset, each label row includes a bounding box followed by the keypoints:
<class-index> <x> <y> <width> <height> <px1> <py1> .... The bounding box (normalized center x, y, width, height) is part of the pose label format, so annotate both the box and the keypoints for each object. 🐅For more details on setting up your dataset for pose estimation, you can refer to the Tiger-Pose dataset documentation and the pose dataset format.
teengineer
Hello, when i executed the predict code, i took a warning 'WARNING ⚠️ Environment does not support cv2.imshow() or PIL Image.show() google colab'. I worked on Google Colab. How can i see the results?
- Glenn JocherUltralytics(editado)
@teengineer hello! 😊 It seems you're facing an issue with displaying images in Google Colab due to its environment limitations. To view your results in Colab, you can use the following approach to display images directly in the notebook:
from pathlib import Path

from IPython.display import Image, display
from ultralytics import YOLO

# Load your model
model = YOLO('yolo26n.pt')  # or your custom model

# Run prediction (ensure 'save' is True to save output images)
results = model.predict(source='path/to/your/image.jpg', save=True)

# Display the saved image
display(Image(f"{results[0].save_dir}/{Path(results[0].path).name}"))  # saved output in the predict run folder
This method saves the output image and then uses IPython's display capabilities to show the image within your notebook. Hope this helps you see your results! Let us know if you have any more questions.
1 Thank you @glenn-jocher, i forgot the 'save' parameter on predict func.
Hi, I want to show prediction result on video but it throw an warning, is there a way for showing? This warning is 'WARNING ⚠️ Environment does not support cv2.imshow() or PIL Image.show()'
- Glenn JocherUltralytics(editado)
Hey there! 😊 It looks like you're trying to display video predictions in an environment that doesn't support
cv2.imshow()orPIL Image.show(), such as Google Colab. No worries, you can still view your video predictions by saving the output and then displaying it directly in the notebook. Here's a quick example on how you could modify your code to save the video predictions and then useIPython.displayto show the video:from ultralytics import YOLO from pathlib import Path from IPython.display import FileLink, display # Load your model model = YOLO('yolo26n.pt') # or your custom model # Run prediction on your video and save the output results = model.predict(source='path/to/your/video.mp4', save=True) # The output is saved in the predict run folder (results[0].save_dir), named after the source file # (.mp4 on macOS, .avi on Windows/Linux) # Generate a link to download the video file output_video_path = next(Path(results[0].save_dir).glob('*.*')) display(FileLink(output_video_path))This code will provide a link to download the video file with the predictions. Just replace
'path/to/your/video.mp4'with your actual video path. Hope this helps you view your prediction results! Let me know if there's anything else I can assist you with.1 Thank you for your time.
- Glenn JocherUltralytics
Hey there! 😊 If you're encountering the 'WARNING ⚠️ Environment does not support cv2.imshow() or PIL Image.show()' message while trying to display video predictions in Google Colab, you can save the predictions to a video file and then display it directly in the notebook. Here's a quick example on how to do it:
from ultralytics import YOLO

# Load your model
model = YOLO('yolov8n.pt')  # or your custom model

# Run prediction on your video and save the output
results = model.predict(source='path/to/your/video.mp4', save=True)

# Use the 'files.download()' function from Google Colab to download the result video
from google.colab import files
files.download('path/to/saved/video.mp4')  # Adjust the path to your saved video
This way, you can view the video with predictions by downloading it. Hope this helps! Let me know if you have any more questions.
1
Hi, can yolov8-pose make classifications such as tiger standing, tiger lying down?
- Glenn JocherUltralytics
@teengineer hey there! 🐯 YOLOv8-pose can indeed classify different tiger poses like standing or lying down, but it primarily focuses on pose estimation rather than direct classification. You'd typically train the model to recognize various keypoints on the tiger, and based on the keypoints' positions, you could infer the pose.
For example, after training with the Tiger-Pose dataset, you could analyze the keypoints to determine the pose:
from ultralytics import YOLO

# Load your trained model
model = YOLO('path/to/your/trained_model.pt')

# Run inference
results = model.predict(source='path/to/your/image.jpg')

# Analyze keypoints for pose classification
keypoints = results[0].keypoints
# Here you'd implement your logic to classify poses based on keypoints
This approach gives you the flexibility to define what constitutes a "standing" or "lying down" pose based on the keypoints' arrangement. Hope this helps! Let us know if you have more questions.
Thank you.
- Glenn JocherUltralytics
Hey there! 🐅 Absolutely, YOLOv8-pose can be tailored to classify specific tiger poses by analyzing the keypoints' arrangement. While it's primarily designed for pose estimation, you can infer poses like standing or lying down based on the keypoints. Here's a quick example using the Tiger-Pose dataset:
from ultralytics import YOLO

# Load your trained model
model = YOLO('path/to/your/trained_model.pt')

# Run inference on an image
results = model.predict(source='path/to/your/image.jpg')

# Analyze keypoints for pose classification
keypoints = results[0].keypoints
# Implement your logic here to classify poses based on keypoints
This way, you can classify the tiger's pose by examining the positions of detected keypoints. Hope this helps, and feel free to reach out if you have more questions! 🚀
2