Ultralytics Docker クイックスタートガイド
このガイドでは、Ultralyticsプロジェクト向けにDocker環境をセットアップする方法を説明します。Dockerは、アプリケーションの開発、配布、実行を行うためのプラットフォームです。アプリケーションをコンテナ内で実行することで、デプロイ先にかかわらず同じように動作します。


このガイドで学べること#
- NVIDIA サポートを有効にした Docker のセットアップ
- Ultralytics Docker イメージのインストール
- CPU または GPU を使用して Docker コンテナ内で Ultralytics を実行する
- Docker でディスプレイサーバーを使用して Ultralytics の検出結果を表示する
- ローカルディレクトリをコンテナにマウントする
視聴: Docker の始め方 | Docker 内で Ultralytics Python パッケージを使うライブデモ 🎉
前提条件#
- システムに Docker がインストールされていることを確認してください。インストールされていない場合は、Docker のウェブサイトからダウンロードしてインストールできます。
- GPU アクセラレーションを利用するには、システムに NVIDIA GPU とNVIDIA ドライバーがインストールされていることを確認してください。CPU イメージには NVIDIA ハードウェアは必要ありません。
- NVIDIA Jetson デバイスを使用する場合は、適切なバージョンの JetPack がインストールされていることを確認してください。詳細については、NVIDIA Jetson ガイドをご覧ください。
NVIDIA サポートを有効にした Docker のセットアップ(任意)#
まず、次のコマンドを実行して、NVIDIA ドライバーが正しくインストールされていることを確認します。
nvidia-smiNVIDIA Container Toolkit のインストール#
DockerコンテナでGPUサポートを有効にするには、NVIDIA Container Toolkitをインストールします。
curl -fsSL https://nvidia.github.io/libnvidia-container/gpgkey | sudo gpg --dearmor -o /usr/share/keyrings/nvidia-container-toolkit-keyring.gpg \
  && curl -s -L https://nvidia.github.io/libnvidia-container/stable/deb/nvidia-container-toolkit.list \
  | sed 's#deb https://#deb [signed-by=/usr/share/keyrings/nvidia-container-toolkit-keyring.gpg] https://#g' \
    | sudo tee /etc/apt/sources.list.d/nvidia-container-toolkit.list
パッケージリストを更新し、NVIDIA Container Toolkit をインストールします。
sudo apt-get updatesudo apt-get install -y nvidia-container-toolkitDocker で CDI デバイスを確認する#
nvidia-ctk cdi list を実行して、GPU の CDI デバイスが利用可能であることを確認します(ツールキットの nvidia-cdi-refresh サービスは、ツールキット >= 1.18 で仕様を自動的に生成、管理します)。
nvidia-ctk cdi listnvidia.com/gpu=0 や nvidia.com/gpu=all などのエントリが表示されます。検出された CDI デバイスは docker info にも表示されます。
Ultralytics Docker イメージのインストール#
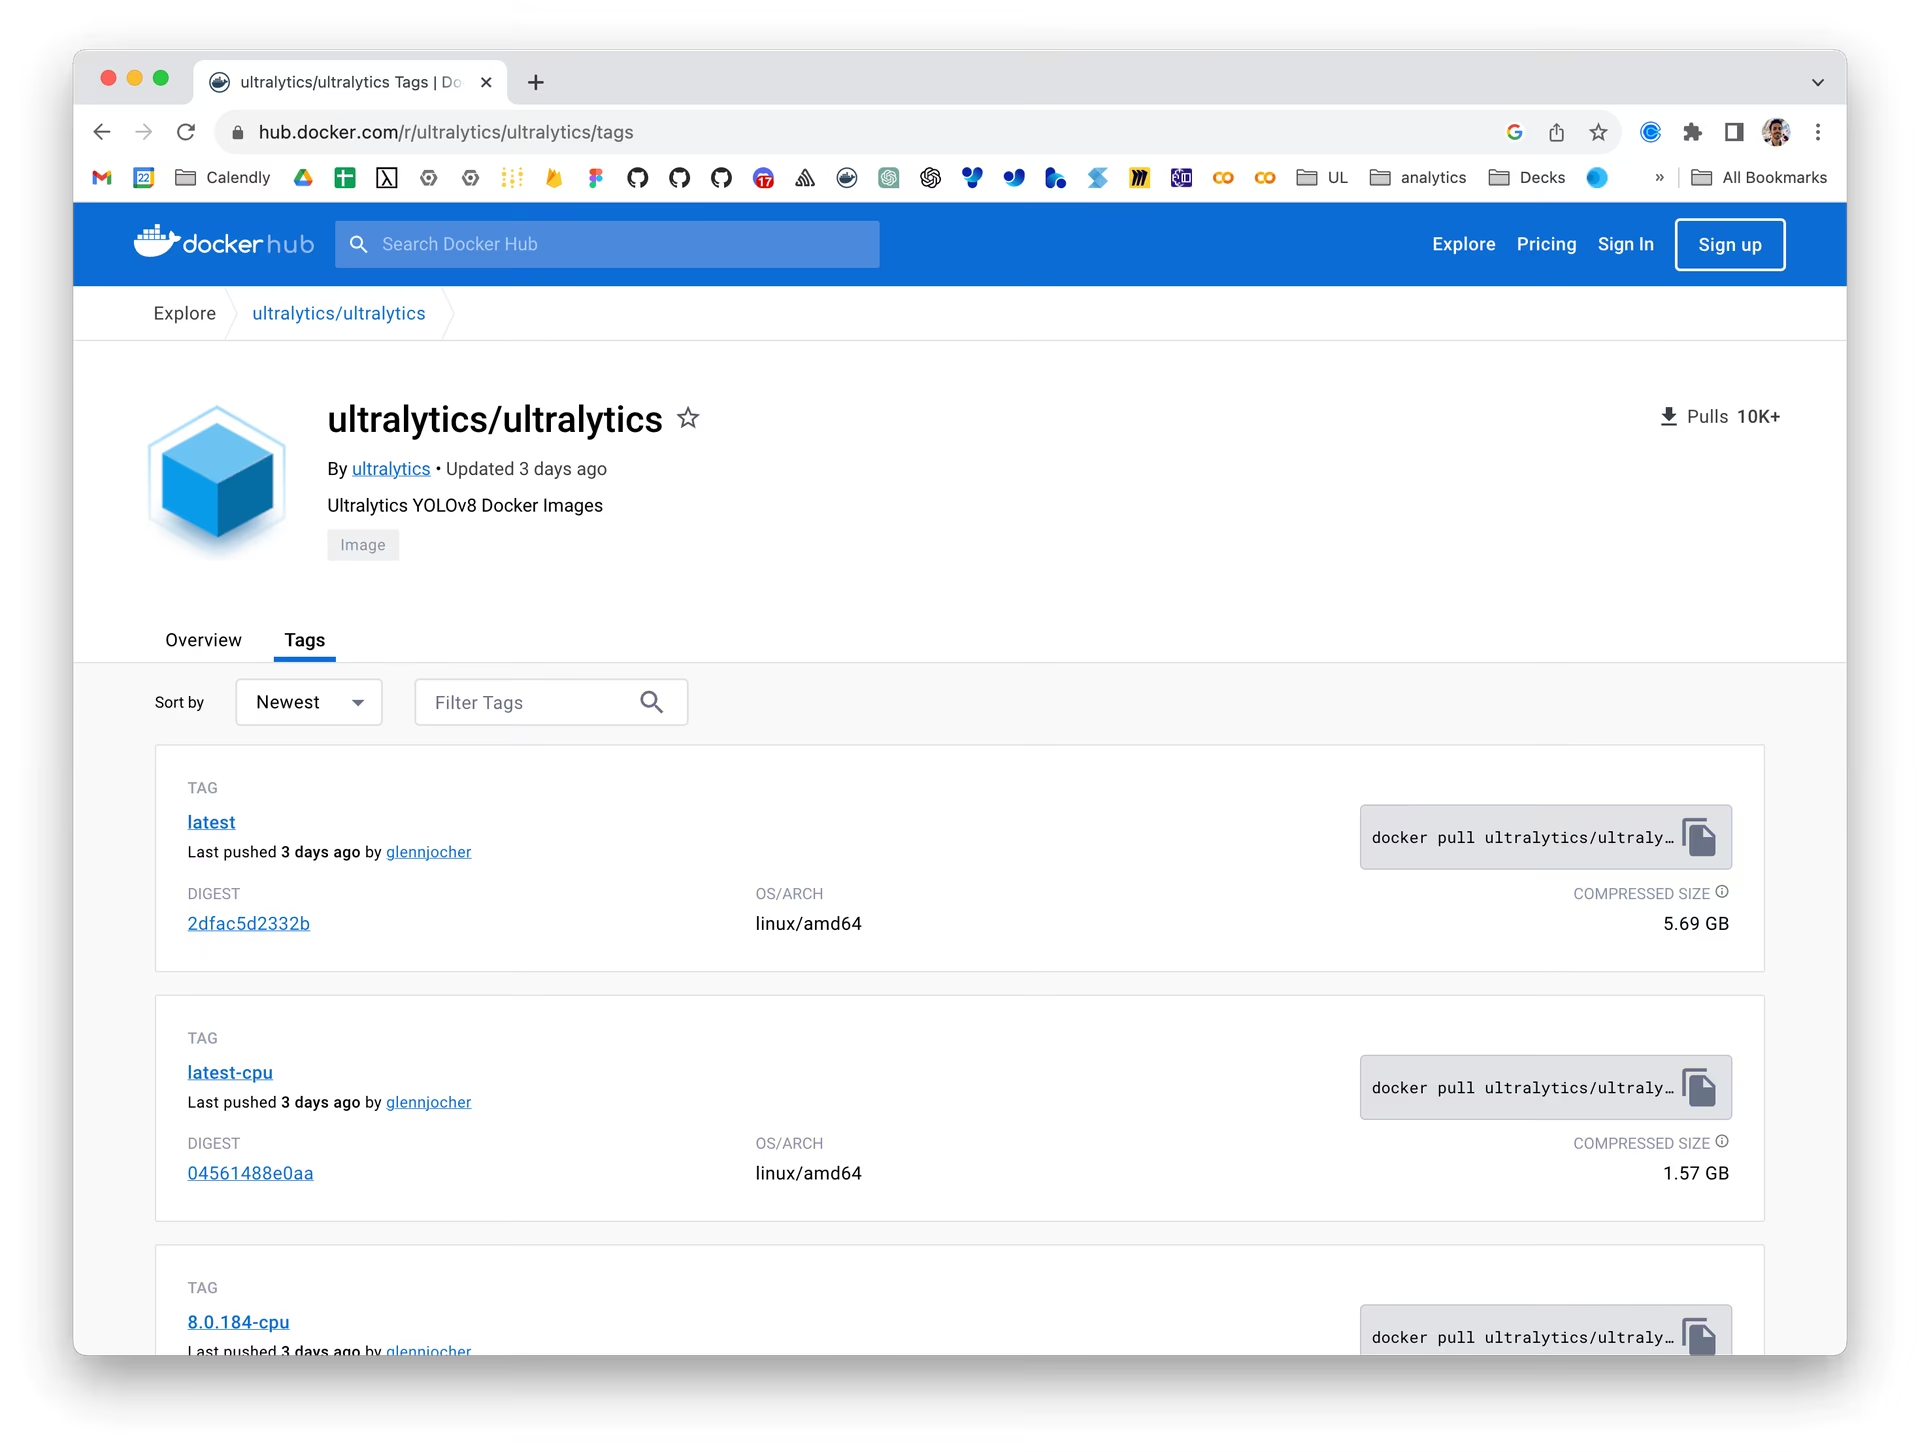
Ultralytics は、次のイメージをDocker Hubに公開しています。各イメージは、リンク先の Dockerfile からDocker 公開ワークフローによってビルドされます。
| タグ | プラットフォームと用途 | ソース |
|---|---|---|
latest | GPU トレーニングおよび推論向けの CUDA 対応 Linux AMD64 イメージ | Dockerfile |
latest-export | 変換およびベンチマーク向けの、CUDA とエクスポート用依存関係を含む Linux AMD64 イメージ | Dockerfile-export |
latest-amd | AMD GPU のトレーニングおよび推論向けの、ROCm と MIGraphX を備えた Linux AMD64 イメージ | Dockerfile-amd |
latest-python | CPU 推論向けの軽量な Linux AMD64 Python 3.14 イメージ | Dockerfile-python |
latest-python-export | エクスポート依存関係を含む Linux AMD64 Python 3.13 CPU イメージ | Dockerfile-python-export |
latest-cpu | デフォルトコマンドに Bash を使用する Linux AMD64 CPU イメージ | Dockerfile-cpu |
latest-jupyter | JupyterLab と Ultralytics のチュートリアルノートブックを含む Linux AMD64 CPU イメージ | Dockerfile-jupyter |
latest-arm64 | Apple silicon、Raspberry Pi、その他の ARM64 システム向け Linux ARM64 Python 3.13 CPU イメージ | Dockerfile-arm64 |
latest-nvidia-arm64 | DGX Spark(DGX OS)および Thor 上の PyTorch(JetPack 7.1)向け Linux ARM64 イメージ。バンドルされた TensorRT は JetPack に対応していません。 | Dockerfile-nvidia-arm64 |
latest-jetson-jetpack6 | JetPack 6 を実行するNVIDIA Jetsonデバイス向け Linux ARM64 イメージ | Dockerfile-jetson-jetpack6 |
latest-jetson-jetpack5 | JetPack 5 を実行するNVIDIA Jetsonデバイス向け Linux ARM64 イメージ | Dockerfile-jetson-jetpack5 |
latest-jetson-jetpack4 | JetPack 4 を実行するNVIDIA Jetsonデバイス向け Linux ARM64 イメージ | Dockerfile-jetson-jetpack4 |
latest-runner | セルフホスト型 GitHub Actions GPU ランナー向け Linux AMD64 CUDA イメージ | Dockerfile-runner |
latest-runner-cpu | セルフホスト型 GitHub Actions CPU ランナー向け Linux AMD64 イメージ | Dockerfile-runner-cpu |
AMD64 GPUイメージ(latest、latest-export、latest-runner)はPyTorch 2.15とCUDA 13.2を使用します。イメージを起動する前に、nvidia-smiを使用してホストドライバーのCUDA対応状況を確認してください。新しいコンテナをインストールしても、ホストドライバーはアップグレードされません。CUDA 13では、Tesla P100やV100を含むMaxwell、Pascal、Volta GPUのサポートが削除されています。
NVIDIA ARM64イメージは、CUDA 13.4とTensorRT 11.4を搭載したNVIDIA PyTorch 26.10を使用します。Thorに対するPyTorchのサポートはTensorRTには適用されません。NVIDIAはJetPackでTensorRT 11.4をサポートしていません。JetsonでTensorRTにエクスポートする場合は、お使いのJetPackリリースでサポートされているTensorRT 10.xランタイムを使用してください。JetsonガイドまたはDGX Sparkガイドで、プラットフォームの要件を確認してください。JetPack 4、5、6の各イメージには、それぞれのデバイス専用のスタックが引き続き含まれています。
Conda Dockerfile はローカルビルドに使用できます。latest-conda の自動公開は無効になっているため、そのレジストリタグにはこれらの更新は含まれていません。
Python、CPU、Jupyter、および CPU runner の各イメージは Python 3.14 を使用します。Python エクスポートイメージは、latest-python-3.13 ベースを使用します。このベースは、TensorFlow、CoreML、PaddlePaddle がまだ Python 3.14 をサポートしていないため、--build-arg PYTHON_VERSION=3.13 を含む同じ Dockerfile-python からビルドされています。
latest で始まるタグは、main ブランチで直近に公開されたビルドを参照します。バージョン付きタグでは、latest のプレフィックスが、VERSION、VERSION-cpu、VERSION-jetson-jetpack6 などの Ultralytics リリースに置き換わります。再現可能な環境には、バージョン付きタグを使用してください。
最新のイメージを取得するには、次のコマンドを実行します。
# Pull the latest Ultralytics image from Docker Hub
sudo docker pull ultralytics/ultralytics:latest
代わりに自分でイメージをビルドするには、リポジトリをクローンし、上の表にある対応する Dockerfile を指定して、リポジトリのルートをビルドコンテキストとして使用します。
# Build the CPU image locally from docker/Dockerfile-cpu
sudo docker build -t ultralytics/ultralytics:latest-cpu -f docker/Dockerfile-cpu .
Docker コンテナで Ultralytics を実行する#
Ultralytics Dockerコンテナの実行方法は次のとおりです。
CPU のみを使用する#
# Run without GPU
sudo docker run -it --ipc=host ultralytics/ultralytics:latest-cpu
GPU を使用する#
# Run with all GPUs
sudo docker run -it --ipc=host --device nvidia.com/gpu=all ultralytics/ultralytics:latest

# Run specifying which GPUs to use
sudo docker run -it --ipc=host --device nvidia.com/gpu=2 --device nvidia.com/gpu=3 ultralytics/ultralytics:latest
-it フラグを指定すると疑似 TTY が割り当てられ、標準入力が開いたままになるため、コンテナを操作できます。--ipc=host フラグを指定すると、ホストの IPC 名前空間が共有され、プロセス間でメモリを共有できます。これはメモリ共有に不可欠です。NVIDIA GPU では、--device nvidia.com/gpu=... フラグを指定すると、CDI 経由でアクセスできます。AMD GPU では、--device フラグを指定すると、GPU カーネルドライバー(/dev/kfd)とディスプレイのレンダーノード(/dev/dri)にアクセスできます。
Linux では、CDI デバイスの要求にDocker >= 28.2.0(CDI はデフォルトで有効)と nvidia-container-toolkit >= 1.18(CDI 仕様の自動生成)が必要です。GPU コンテナを実行する前に、古い Linux ホストをアップグレードしてください。従来の --gpus all フラグを使用すると、通常のパッケージ更新時にホストで systemd が再読み込みされる際、GPU アクセス(Failed to initialize NVML: Unknown Error)が失われることがあります(nvidia-container-toolkit#48)。CDI の --device 要求にはデバイスノードがコンテナ設定に含まれるため、トレーニングワーカーや CI ランナーなどの長時間稼働するコンテナでも、再読み込み後に GPU アクセスを維持できます。
Windows での Docker Desktop の GPU サポートでは、NVIDIA CDI デバイスを利用できないため、現在は WSL 2 バックエンドで --gpus all を使用します。Windows は Linux の systemd を使用しないため、前述のデーモン再読み込みによる障害は発生しません。
ファイルアクセスに関する注意#
コンテナ内からローカルマシン上のファイルを操作するには、Docker ボリュームを使用できます。
# Mount a local directory into the container
sudo docker run -it --ipc=host --device nvidia.com/gpu=all -v /path/on/host:/path/in/container ultralytics/ultralytics:latest
/path/on/host はローカルマシン上のディレクトリパスに、/path/in/container は Docker コンテナ内の目的のパスに置き換えてください。
トレーニング出力を永続化する#
トレーニング出力は、デフォルトでコンテナ内の /ultralytics/runs/<task>/<name>/ に保存されます。ホストディレクトリをマウントしない場合、コンテナを削除すると出力も失われます。
トレーニング出力を永続化するには、次のようにします。
# Recommended: mount workspace and specify project path
sudo docker run --rm -it -v "$(pwd)":/w -w /w ultralytics/ultralytics:latest \
  yolo train model=yolo26n.pt data=coco8.yaml project=/w/runs
これにより、すべてのトレーニング出力がホストマシンの ./runs に保存されます。
Docker コンテナでグラフィカルユーザーインターフェース(GUI)アプリケーションを実行する#
以下の手順は実験的なものです。DockerコンテナとX11ソケットを共有すると、潜在的なセキュリティリスクが生じます。そのため、このソリューションは管理された環境でのみテストすることを推奨します。
Dockerは主にバックグラウンドアプリケーションやCLIプログラムのコンテナ化に使用されますが、GUIプログラムも実行できます。Linuxでは、グラフィカル表示を処理する主要なディスプレイサーバーが2つあります。X11(Xウィンドウシステムとも呼ばれます)とWaylandです。開始する前に、現在使用しているディスプレイサーバーを確認することが重要です。次のコマンドを実行して確認してください。
env | grep -E -i 'x11|xorg|wayland'X11またはWaylandディスプレイサーバーのセットアップと設定は、このガイドの対象外です。上記のコマンドで何も表示されない場合は、続行する前に、使用するシステムでいずれかのディスプレイサーバーを起動する必要があります。
GUIを使用してDockerコンテナを実行する#
GPUの使用
GPUを使用する場合は、コマンドに--device nvidia.com/gpu=allフラグを追加できます。
X11を使用している場合は、次のコマンドを実行して、DockerコンテナからX11ソケットにアクセスできるようにします。
xhost +local:docker && docker run -e DISPLAY=$DISPLAY \
  -v /tmp/.X11-unix:/tmp/.X11-unix \
  -v ~/.Xauthority:/root/.Xauthority \
-it --ipc=host ultralytics/ultralytics:latestこのコマンドは、DISPLAY環境変数をホストのディスプレイに設定し、X11ソケットをマウントして、.Xauthorityファイルをコンテナにマッピングします。xhost +local:dockerコマンドを実行すると、DockerコンテナからX11サーバーにアクセスできるようになります。
GUIでDockerを使用する#
Ultralyticsのイメージにはヘッドレス版のOpenCVが含まれているため、まずコンテナ内にOpenCVのGUIビルドとシステムライブラリをインストールしてください:
apt-get update && apt-get install -y --no-install-recommends libgl1 libglib2.0-0 libsm6
pip uninstall -y opencv-python-headless && pip install opencv-pythonこれで、Dockerコンテナ内にグラフィカルアプリケーションを表示できます。たとえば、次のCLIコマンドを実行して、YOLO26モデルの予測結果を可視化できます。
yolo predict model=yolo26n.pt show=Trueテスト
Docker GUIの使用後#
どちらの場合も、作業が終わったらDockerグループからのアクセス権を忘れずに取り消してください。
xhost -local:docker画像の結果をターミナルで直接表示しますか?
LinuxとmacOSでは、sixelプロトコルを使って、VSCodeの統合ターミナルに画像結果を表示できます。
これで、Dockerを使用してUltralyticsを利用する準備が整いました。Ultralytics Webアプリケーションをセルフホストするには、Platform On-Premiseガイドを参照してください。
よくある質問#
DockerでUltralyticsをセットアップするには、まずDockerがシステムにインストールされていることを確認します。NVIDIA GPUを使用する場合は、NVIDIA Container ToolkitをインストールしてGPUサポートを有効にします。次に、以下のコマンドを使ってDocker Hubから最新のUltralytics Dockerイメージを取得します。
sudo docker pull ultralytics/ultralytics:latestUltralytics Dockerイメージを使用すると、同じソフトウェアと依存関係を再現できるため、異なるマシン間で一貫した環境を確保できます。チーム間のコラボレーション、さまざまなハードウェアでのモデル実行、モデルデプロイの再現性の維持に特に役立ちます。NVIDIA GPUでの一般的なトレーニングには
latestを使用し、NVIDIA JetsonデバイスではJetPackのバージョンに対応するイメージを選択してください。まず、NVIDIA Container Toolkitがインストールされ、設定されていることを確認してください。次に、以下のコマンドを使用して、GPUサポートを有効にした状態でUltralytics YOLOを実行します。
sudo docker run -it --ipc=host --device nvidia.com/gpu=all ultralytics/ultralytics:latest # all GPUsこのコマンドはGPUアクセスが可能なDockerコンテナをセットアップします。使用するGPUを指定したり、AMD ROCmに切り替えたりできます。
Dockerコンテナ内のGUIでYOLOの予測結果を可視化するには、Dockerからディスプレイサーバーにアクセスできるようにする必要があります。X11を実行しているシステムでは、次のコマンドを使用します。
xhost +local:docker && docker run -e DISPLAY=$DISPLAY \
  -v /tmp/.X11-unix:/tmp/.X11-unix \
  -v ~/.Xauthority:/root/.Xauthority \
  -it --ipc=host ultralytics/ultralytics:latest
Waylandを実行しているシステムでは、次を使用します。
xhost +local:docker && docker run -e DISPLAY=$DISPLAY \ -v $XDG_RUNTIME_DIR/$WAYLAND_DISPLAY:/tmp/$WAYLAND_DISPLAY \ --net=host -it --ipc=host ultralytics/ultralytics:latestコンテナ内で、Dockerコンテナでグラフィカルユーザーインターフェース(GUI)アプリケーションを実行するセクションで説明されているように、
show=Trueを使用する前にOpenCVのGUIビルドをインストールしてください。はい、
-vフラグを使用して、ローカルディレクトリをUltralytics Dockerコンテナにマウントできます。sudo docker run -it --ipc=host --device nvidia.com/gpu=all -v /path/on/host:/path/in/container ultralytics/ultralytics:latest/path/on/hostをローカルマシン上のディレクトリに、/path/in/containerをコンテナ内で使用するパスに置き換えてください。この設定により、コンテナ内でローカルファイルを使用できます。詳しくは、ファイルアクセスに関する注意のセクションをご覧ください。


コメント14
質問したり、結果を共有したり、ほかの人をサポートしたりできます。
 Letícia Rama
Hello,
Is this workflow suitable for other YOLO families, such as YOLO26?
 Glenn JocherUltralytics
Yes, the same workflow supports YOLO26 and other model families available in the
ultralyticspackage—use an up-to-date official image and specify the appropriate weights, such asmodel=yolo26n.pt. See the Docker Quickstart Guide for current image options, and feel free to drop any follow-up questions here so the Ultralytics team can help.1- Letícia Rama
Right Glenn, thanks
lauravchrobak
It looks like the, "Running Ultralytics in Docker Container" section is duplicated here
HellaPinot
Hello! I have been testing running yolov8 inside a container, things seem to work well however after a somewhat random amount of time the inference hangs with no error output.
I know the container hasn't crashed as I am reading events from a processing queue and I can see new partitions are being allocated on another thread.
I'm running two models one after the other (different sizes and detection classes), so I'm wondering if this could be the root of the issue? At no point would they be running at the same time.
I believe it is happening exactly when I call predict. Its hard to debug as again it happens very randomly and there is not output from the container, it seems like there might be an infinite loop somewhere thats stopping it from continuing.
Curious if anything like this has been encountered before?
- Glenn JocherUltralytics
Hello! 👋
It sounds like a tricky issue, especially since it occurs randomly. Here are a few suggestions that might help you isolate or resolve the problem:
-
Logging and Monitoring: Enhance the logging within your container. Consider logging the input sizes and other relevant data before the prediction call, and make sure you're logging any exceptions that could be silently caught.
-
Resource Checks: Ensure that there are no resource starvation issues, such as GPU memory not being freed up properly. Tools like
nvidia-smican help monitor GPU usage. -
Sequential Model Loading: Although the models are run sequentially and not in parallel, it could be beneficial to explicitly clear the memory after each model's predictions are done. This can be done by deleting model objects and calling
torch.cuda.empty_cache()if you are using PyTorch. -
Hardware Testing: Run your container pointing the inference to CPU only for a time to see if the problem persists. This could help determine if the issue is related to GPU computation or not.
-
Reproducibility Tactic: Since the issue is sporadic, try to determine if there’s a specific type of input or specific conditions under which this occurs more frequently.
If these suggestions don't help, please provide more details or code snippets, and I’d be happy to dive deeper into this!
Let me know how it goes!
-
HWKevinhwk
I want to install ultralytics using docker on top of NVIDIA TX2, is there a detailed procedure? The reason for this question is that after entering the command nvidia-smi in the TX2 terminal, the output is command not found, and I'm worried that the steps in the document above are not applicable to TX2.
 Paula DerrengerUltralytics(編集済み)
@HWKevinhwk hey there! 🚀 Setting up Ultralytics on NVIDIA TX2 with Docker can be a bit tricky if
nvidia-smiis missing, but no worries.For NVIDIA Jetson platforms like TX2,
nvidia-smiis typically not available, and you'll usetegrastatsinstead to monitor the GPU. The Jetson TX2 is supported on JetPack 4, so install JetPack 4 first, as it includes the NVIDIA drivers and libraries needed for GPU acceleration. Jetson devices use the Docker integration provided through JetPack with--runtime=nvidiarather than--gpus all. Then pull and run the Ultralytics Docker image for JetPack 4:t=ultralytics/ultralytics:latest-jetson-jetpack4 sudo docker pull $t && sudo docker run -it --ipc=host --runtime=nvidia $tSee the NVIDIA Jetson guide for details. If you encounter any specific issues, feel free to drop them here. Happy detecting! 🎉
Is there a detailed tutorial on deploying yolov8 on jetson TX2 using docker? I am pulling images docker pull ultralytics/ultralytics:latest-jetson terminal will downloading pause, long time pulling images unsuccessful, repeated attempts still so, any solution please?
- Paula DerrengerUltralytics(編集済み)
@HWKevinhwk hey there! 😊
It sounds like you're facing issues with the Docker image pull for the Jetson TX2. This might be due to network issues or Docker Hub delays, or to using a tag that does not exist.
Here's a simplified breakdown to get you started on the TX2 using Docker:
-
Ensure JetPack is installed: The TX2 is supported on JetPack 4, which includes the GPU drivers necessary for Docker integration with the Jetson GPU.
-
Install Docker:
sudo apt-get install docker.io -
NVIDIA runtime support (JetPack should handle this):
nvidia-smidoesn't work on Jetson, so verify thenvidiaruntime withdocker info | grep -i runtime. -
Pull the Docker image for Jetson. Pulling large Docker images can be challenging on slower networks:
sudo docker pull ultralytics/ultralytics:latest-jetson-jetpack4If you keep facing issues while pulling the image, try restarting your Docker service or check your network settings. Sometimes, using a different network can help too!
-
Run the Image:
sudo docker run -it --ipc=host --runtime=nvidia ultralytics/ultralytics:latest-jetson-jetpack4
This should set you on the right path to running Ultralytics YOLO on your Jetson TX2. If the problem persists, it might be worth checking Docker's log or discussing this issue further with your network admin or on Docker forums! 😄
Happy coding! 🚀
-
Peter-coding
Hey! I trained a YOLOv8 model on my local computer. I have the best.pt file, and I can use it in CLI (conda) for predict. I want to make a python app, which uses this best.pt file, and I want to containerize it. Is it possible to write the full python app (it is just a few lines of code, which runs the detection, then writes the detection result to a database), then containerize it, and able to use it anywhere? Thank you! :D
- Paula DerrengerUltralytics
Hey there! 😊
Absolutely, you can absolutely containerize your Python app that uses the
best.ptmodel! Here's a quick guide:-
Create Your Python App: Just like you mentioned, write your Python code that performs the detection and interacts with the database.
-
Dockerize Your Application:
-
Dockerfile: Create a Dockerfile in your project directory. Here's a simple example that uses Ultralytics' Docker image as a base:
FROM ultralytics/ultralytics:latest WORKDIR /app COPY . /app RUN pip install -r requirements.txt # Assuming you have a requirements.txt CMD ["python", "your_script.py"] -
Build Your Docker Image: Run the following command in your project directory:
sudo docker build -t your-app-name . -
Run Your Container: To run your container, especially if you're planning to use GPU, you might want to specify
--gpus all:sudo docker run -it --ipc=host --gpus all your-app-nameFor accessing local files, consider mounting a volume as described in the Docker Quickstart Guide.
-
-
Deployment: With your Docker image built, you can now deploy and run it anywhere that Docker is supported. If using a GPU, ensure the host machine supports NVIDIA GPUs and has the necessary drivers and Docker configured correctly.
That's it! You should be able to use your model within a containerized app now. If you hit any snags, double-check the Docker Quickstart Guide for Ultralytics for more details. Happy coding! 😄
-
udayzee05
DEPRECATION NOTICE The nvidia-docker wrapper is no longer supported, and the NVIDIA Container Toolkit has been extended to allow users to configure Docker to use the NVIDIA Container Runtime. For further instructions, see the NVIDIA Container Toolkit documentation and specifically the install guide.22 Jan 2024
- Paula DerrengerUltralytics(編集済み)
Hey there! 👋 Thanks for bringing up the deprecation notice regarding the nvidia-docker wrapper. You're right; use the NVIDIA Container Toolkit for GPU support in Docker containers. Here's how to set it up on Ubuntu/Debian, as described in our Docker Quickstart Guide:
# Add the NVIDIA Container Toolkit repository
curl -fsSL https://nvidia.github.io/libnvidia-container/gpgkey | sudo gpg --dearmor -o /usr/share/keyrings/nvidia-container-toolkit-keyring.gpg \
  && curl -s -L https://nvidia.github.io/libnvidia-container/stable/deb/nvidia-container-toolkit.list \
  | sed 's#deb https://#deb [signed-by=/usr/share/keyrings/nvidia-container-toolkit-keyring.gpg] https://#g' \
    | sudo tee /etc/apt/sources.list.d/nvidia-container-toolkit.list

# Install the NVIDIA Container Toolkit
sudo apt-get update
sudo apt-get install -y nvidia-container-toolkit
And to verify that the GPU devices are available to Docker:
nvidia-ctk cdi listThis should list entries such as
nvidia.com/gpu=all, indicating that your Docker setup can leverage GPU acceleration. 🚀For more detailed instructions and tips on using Ultralytics with Docker, including mounting local directories and running containers, check out our Docker Quickstart Guide. Happy coding!