Ultralytics Docker 빠른 시작 가이드
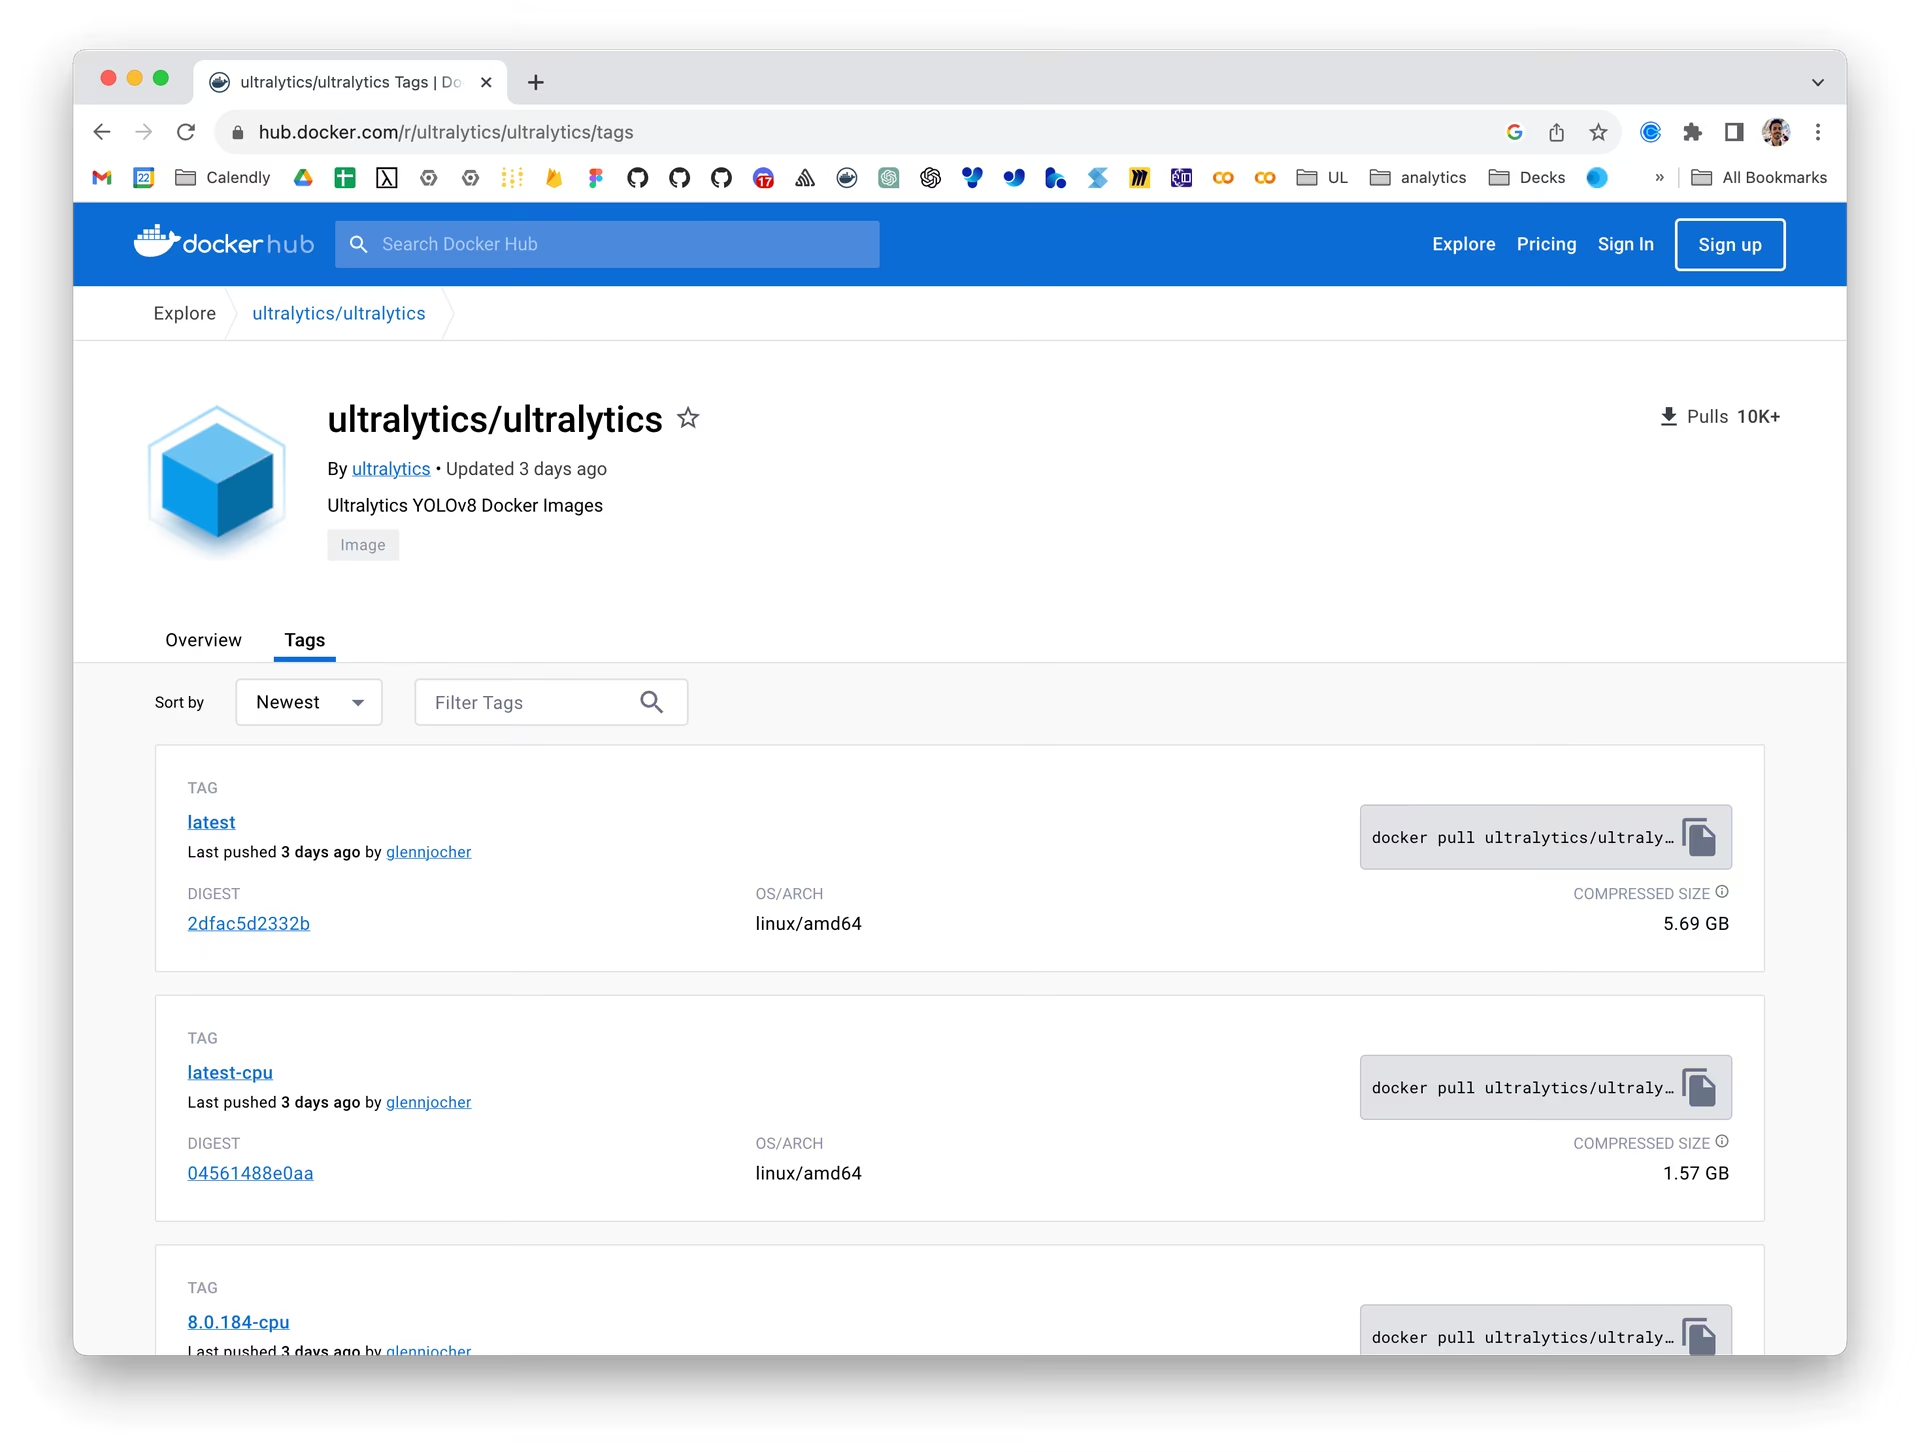
이 가이드에서는 Ultralytics 프로젝트를 위한 Docker 환경 설정 방법을 설명합니다. Docker는 애플리케이션을 개발하고 배포하며 실행하는 플랫폼입니다. 애플리케이션을 컨테이너에서 실행하므로 배포 위치와 관계없이 소프트웨어가 동일하게 작동합니다.


이 가이드에서 배울 내용#
- NVIDIA 지원을 사용해 Docker 설정하기
- Ultralytics Docker 이미지 설치하기
- CPU 또는 GPU 지원을 사용해 Docker 컨테이너에서 Ultralytics 실행하기
- Docker에서 디스플레이 서버를 사용해 Ultralytics 탐지 결과 표시하기
- 컨테이너에 로컬 디렉터리 마운트하기
시청: Docker 시작 방법 | Docker에서 Ultralytics Python 패키지 사용 라이브 데모 🎉
사전 요구 사항#
- 시스템에 Docker가 설치되어 있는지 확인하세요. 설치되어 있지 않다면 Docker 웹사이트에서 다운로드하여 설치할 수 있습니다.
- GPU 가속을 사용하려면 시스템에 NVIDIA GPU와 NVIDIA 드라이버가 설치되어 있는지 확인하세요. CPU 이미지는 NVIDIA 하드웨어가 필요하지 않습니다.
- NVIDIA Jetson 장치를 사용하는 경우 적절한 JetPack 버전이 설치되어 있는지 확인하세요. 자세한 내용은 NVIDIA Jetson 가이드를 참조하세요.
NVIDIA 지원을 사용해 Docker 설정하기(선택 사항)#
먼저 다음 명령어를 실행하여 NVIDIA 드라이버가 올바르게 설치되었는지 확인합니다.
nvidia-smiNVIDIA Container Toolkit 설치#
Docker 컨테이너에서 GPU 지원을 활성화하려면 NVIDIA Container Toolkit을 설치합니다.
curl -fsSL https://nvidia.github.io/libnvidia-container/gpgkey | sudo gpg --dearmor -o /usr/share/keyrings/nvidia-container-toolkit-keyring.gpg \
  && curl -s -L https://nvidia.github.io/libnvidia-container/stable/deb/nvidia-container-toolkit.list \
  | sed 's#deb https://#deb [signed-by=/usr/share/keyrings/nvidia-container-toolkit-keyring.gpg] https://#g' \
    | sudo tee /etc/apt/sources.list.d/nvidia-container-toolkit.list
패키지 목록을 업데이트하고 NVIDIA Container Toolkit을 설치합니다.
sudo apt-get updatesudo apt-get install -y nvidia-container-toolkitDocker에서 CDI 장치 확인#
GPU CDI 장치를 사용할 수 있는지 확인하려면 nvidia-ctk cdi list을 실행합니다(toolkit의 nvidia-cdi-refresh 서비스는 toolkit >= 1.18에서 사양을 자동으로 생성하고 유지 관리합니다).
nvidia-ctk cdi listnvidia.com/gpu=0 및 nvidia.com/gpu=all과 같은 항목이 표시되어야 합니다. 검색된 CDI 장치는 docker info에도 표시됩니다.
Ultralytics Docker 이미지 설치#
Ultralytics는 다음 이미지를 Docker Hub에 게시합니다. 각 이미지는 연결된 Dockerfile을 사용해 Docker 게시 워크플로에서 빌드됩니다.
| 태그 | 플랫폼 및 용도 | 소스 |
|---|---|---|
latest | GPU 학습 및 추론을 위한 CUDA 탑재 Linux AMD64 | Dockerfile |
latest-export | 변환 및 벤치마킹 종속성이 포함된 CUDA 탑재 Linux AMD64 | Dockerfile-export |
latest-amd | AMD GPU 학습 및 추론을 위한 ROCm 및 MIGraphX 탑재 Linux AMD64 | Dockerfile-amd |
latest-python | CPU 추론용 경량 Linux AMD64 Python 3.14 이미지 | Dockerfile-python |
latest-python-export | 내보내기 종속성이 포함된 Linux AMD64 Python 3.13 CPU 이미지 | Dockerfile-python-export |
latest-cpu | 기본 명령어로 Bash를 사용하는 Linux AMD64 CPU 이미지 | Dockerfile-cpu |
latest-jupyter | JupyterLab 및 Ultralytics 튜토리얼 노트북이 포함된 Linux AMD64 CPU 이미지 | Dockerfile-jupyter |
latest-arm64 | Apple silicon, Raspberry Pi 및 기타 ARM64 시스템용 Linux ARM64 Python 3.13 CPU 이미지 | Dockerfile-arm64 |
latest-nvidia-arm64 | DGX Spark(DGX OS) 및 Thor의 PyTorch(JetPack 7.1)용 Linux ARM64 이미지. 번들로 제공되는 TensorRT는 JetPack을 지원하지 않습니다. | Dockerfile-nvidia-arm64 |
latest-jetson-jetpack6 | JetPack 6을 실행하는 NVIDIA Jetson 장치용 Linux ARM64 | Dockerfile-jetson-jetpack6 |
latest-jetson-jetpack5 | JetPack 5을 실행하는 NVIDIA Jetson 장치용 Linux ARM64 | Dockerfile-jetson-jetpack5 |
latest-jetson-jetpack4 | JetPack 4을 실행하는 NVIDIA Jetson 장치용 Linux ARM64 | Dockerfile-jetson-jetpack4 |
latest-runner | 자체 호스팅 GitHub Actions GPU runner용 Linux AMD64 CUDA 이미지 | Dockerfile-runner |
latest-runner-cpu | 자체 호스팅 GitHub Actions CPU runner용 Linux AMD64 이미지 | Dockerfile-runner-cpu |
AMD64 GPU 이미지(latest, latest-export, latest-runner)는 PyTorch 2.15와 CUDA 13.2를 사용합니다. 이미지를 실행하기 전에 nvidia-smi로 호스트 드라이버의 CUDA 지원 여부를 확인하세요. 최신 컨테이너를 설치해도 호스트 드라이버는 업그레이드되지 않습니다. CUDA 13에서는 Tesla P100 및 V100을 포함한 Maxwell, Pascal, Volta GPU 지원이 제거되었습니다.
NVIDIA ARM64 이미지는 CUDA 13.4 및 TensorRT 11.4가 포함된 NVIDIA PyTorch 26.10을 사용합니다. Thor에 대한 PyTorch 지원은 TensorRT까지 확장되지 않습니다. NVIDIA는 JetPack에서 TensorRT 11.4를 지원하지 않습니다. Jetson TensorRT 내보내기에는 사용 중인 JetPack 릴리스에서 지원하는 TensorRT 10.x 런타임을 사용하세요. 플랫폼 요구 사항은 Jetson 가이드 또는 DGX Spark 가이드를 참조하세요. JetPack 4, 5, 6 이미지는 각기 별도의 디바이스별 스택을 유지합니다.
Conda Dockerfile은 로컬 빌드에 사용할 수 있습니다. latest-conda의 자동 게시가 비활성화되어 있으므로 해당 레지스트리 태그에는 이 업데이트가 포함되지 않습니다.
Python, CPU, Jupyter 및 CPU runner 이미지는 Python 3.14를 사용합니다. Python 내보내기 이미지는 latest-python-3.13 베이스를 사용하며, TensorFlow, CoreML 및 PaddlePaddle이 아직 Python 3.14를 지원하지 않으므로 --build-arg PYTHON_VERSION=3.13를 포함한 동일한 Dockerfile-python에서 빌드됩니다.
latest으로 시작하는 태그는 가장 최근에 게시된 main 브랜치 빌드를 가리킵니다. 버전 지정 태그는 latest 접두사를 VERSION, VERSION-cpu 또는 VERSION-jetson-jetpack6와 같은 Ultralytics 릴리스로 대체합니다. 재현 가능한 환경을 위해 버전 지정 태그를 사용하세요.
최신 이미지를 가져오려면 다음을 실행합니다.
# Pull the latest Ultralytics image from Docker Hub
sudo docker pull ultralytics/ultralytics:latest
대신 직접 이미지를 빌드하려면 저장소를 복제한 다음, 빌드 컨텍스트로 저장소 루트를 사용하고 위 표에서 해당하는 Dockerfile을 지정합니다.
# Build the CPU image locally from docker/Dockerfile-cpu
sudo docker build -t ultralytics/ultralytics:latest-cpu -f docker/Dockerfile-cpu .
Docker 컨테이너에서 Ultralytics 실행#
Ultralytics Docker 컨테이너를 실행하는 방법은 다음과 같습니다.
CPU만 사용#
# Run without GPU
sudo docker run -it --ipc=host ultralytics/ultralytics:latest-cpu
GPU 사용#
# Run with all GPUs
sudo docker run -it --ipc=host --device nvidia.com/gpu=all ultralytics/ultralytics:latest

# Run specifying which GPUs to use
sudo docker run -it --ipc=host --device nvidia.com/gpu=2 --device nvidia.com/gpu=3 ultralytics/ultralytics:latest
-it 플래그는 pseudo-TTY를 할당하고 stdin을 열린 상태로 유지하여 컨테이너와 상호 작용할 수 있게 합니다. --ipc=host 플래그는 호스트의 IPC 네임스페이스 공유를 활성화하며, 프로세스 간 메모리 공유에 필수적입니다. NVIDIA GPU의 경우 --device nvidia.com/gpu=... 플래그를 사용하면 CDI를 통해 액세스할 수 있습니다. AMD GPU의 경우 --device 플래그를 사용하면 GPU 커널 드라이버(/dev/kfd)와 디스플레이 렌더 노드(/dev/dri)에 액세스할 수 있습니다.
Linux에서 CDI 장치를 요청하려면 Docker >= 28.2.0(기본적으로 CDI 활성화)과 nvidia-container-toolkit >= 1.18(CDI 사양 자동 생성)이 필요합니다. GPU 컨테이너를 실행하기 전에 구형 Linux 호스트를 업그레이드하세요. 기존 --gpus all 플래그는 정기 패키지 업데이트 중 호스트가 systemd를 다시 로드할 때 GPU 액세스(Failed to initialize NVML: Unknown Error)를 잃을 수 있습니다(nvidia-container-toolkit#48). CDI --device 요청에는 컨테이너 구성에 장치 노드가 포함되므로 학습 워커나 CI runner와 같이 오래 실행되는 컨테이너에서도 다시 로드한 후 GPU 액세스가 유지됩니다.
Windows에서 Docker Desktop GPU 지원은 현재 WSL 2 백엔드에서 --gpus all을 사용합니다. 해당 환경에서는 NVIDIA CDI 장치를 사용할 수 없기 때문입니다. Windows는 Linux systemd를 사용하지 않으므로 앞서 설명한 데몬 다시 로드 오류는 발생하지 않습니다.
파일 액세스 관련 참고 사항#
컨테이너 내에서 로컬 컴퓨터의 파일을 사용하려면 Docker 볼륨을 사용할 수 있습니다.
# Mount a local directory into the container
sudo docker run -it --ipc=host --device nvidia.com/gpu=all -v /path/on/host:/path/in/container ultralytics/ultralytics:latest/path/on/host을 로컬 컴퓨터의 디렉터리 경로로 바꾸고, /path/in/container을 Docker 컨테이너 내부에서 사용할 경로로 바꾸세요.
학습 출력 유지#
학습 출력은 기본적으로 컨테이너 내 /ultralytics/runs/<task>/<name>/에 저장됩니다. 호스트 디렉터리를 마운트하지 않으면 컨테이너를 제거할 때 출력이 손실됩니다.
학습 출력을 유지하려면 다음을 실행합니다.
# Recommended: mount workspace and specify project path
sudo docker run --rm -it -v "$(pwd)":/w -w /w ultralytics/ultralytics:latest \
  yolo train model=yolo26n.pt data=coco8.yaml project=/w/runs
이 명령은 모든 학습 출력을 호스트 컴퓨터의 ./runs에 저장합니다.
Docker 컨테이너에서 그래픽 사용자 인터페이스(GUI) 애플리케이션 실행#
다음 지침은 실험적입니다. X11 소켓을 Docker 컨테이너와 공유하면 잠재적인 보안 위험이 발생합니다. 따라서 통제된 환경에서만 이 솔루션을 테스트하는 것이 좋습니다.
Docker는 주로 백그라운드 애플리케이션과 CLI 프로그램을 컨테이너화하는 데 사용되지만, 그래픽 프로그램도 실행할 수 있습니다. Linux 환경에서는 그래픽 디스플레이를 처리하는 두 가지 주요 그래픽 서버인 X11(X Window System이라고도 함)과 Wayland이 사용됩니다. 시작하기 전에 현재 사용 중인 그래픽 서버를 확인해야 합니다. 확인하려면 다음 명령을 실행하세요:
env | grep -E -i 'x11|xorg|wayland'X11 또는 Wayland 디스플레이 서버의 설정 및 구성은 이 가이드의 범위에 포함되지 않습니다. 위 명령을 실행해도 아무것도 표시되지 않으면 계속 진행하기 전에 먼저 시스템에서 둘 중 하나를 사용할 수 있도록 설정해야 합니다.
GUI를 사용하여 Docker 컨테이너 실행하기#
GPU 사용
GPU를 사용하는 경우 명령에 --device nvidia.com/gpu=all 플래그를 추가할 수 있습니다.
X11을 사용하는 경우 다음 명령을 실행하여 Docker 컨테이너가 X11 소켓에 액세스하도록 허용할 수 있습니다:
xhost +local:docker && docker run -e DISPLAY=$DISPLAY \
  -v /tmp/.X11-unix:/tmp/.X11-unix \
  -v ~/.Xauthority:/root/.Xauthority \
  -it --ipc=host ultralytics/ultralytics:latest
이 명령은 DISPLAY 환경 변수를 호스트의 디스플레이로 설정하고, X11 소켓을 마운트하며, .Xauthority 파일을 컨테이너에 매핑합니다. xhost +local:docker 명령을 사용하면 Docker 컨테이너가 X11 서버에 액세스할 수 있습니다.
GUI에서 Docker 사용하기#
Ultralytics 이미지에는 headless OpenCV가 포함되어 있으므로, 먼저 컨테이너 내부에 OpenCV GUI 빌드와 시스템 라이브러리를 설치합니다:
apt-get update && apt-get install -y --no-install-recommends libgl1 libglib2.0-0 libsm6
pip uninstall -y opencv-python-headless && pip install opencv-python
이제 Docker 컨테이너 내에서 그래픽 애플리케이션을 표시할 수 있습니다. 예를 들어, 다음 CLI 명령을 실행하여 YOLO26 모델의 예측 결과를 시각화할 수 있습니다:
yolo predict model=yolo26n.pt show=True테스트
Docker GUI 사용을 마친 후#
두 경우 모두 작업을 마치면 Docker 그룹의 액세스 권한을 해제해야 합니다.
xhost -local:docker터미널에서 이미지 결과를 바로 확인하고 싶으신가요?
Linux와 macOS에서는 sixel 프로토콜을 사용해 VSCode 통합 터미널에서 이미지 결과를 표시할 수 있습니다.
이제 Docker에서 Ultralytics를 사용할 준비가 되었습니다. Ultralytics 웹 애플리케이션을 자체 호스팅하려면 Platform 온프레미스 가이드를 참조하세요.
자주 묻는 질문#
Docker에서 Ultralytics를 설정하려면 먼저 시스템에 Docker가 설치되어 있는지 확인합니다. NVIDIA GPU가 있다면 GPU 지원을 활성화하기 위해 NVIDIA Container Toolkit을 설치합니다. 그런 다음 다음 명령을 사용해 Docker Hub에서 최신 Ultralytics Docker 이미지를 가져옵니다.
sudo docker pull ultralytics/ultralytics:latestUltralytics Docker 이미지를 사용하면 동일한 소프트웨어와 종속성을 재현하여 서로 다른 머신에서 일관된 환경을 유지할 수 있습니다. 팀 간 협업, 다양한 하드웨어에서 모델 실행, 재현 가능한 모델 배포 유지에 특히 유용합니다. 일반적인 NVIDIA GPU 학습에는
latest을 사용하거나 NVIDIA Jetson 장치의 JetPack 버전에 맞는 이미지를 선택하세요.먼저 NVIDIA Container Toolkit이 설치 및 구성되어 있는지 확인하세요. 그런 다음 다음 명령을 사용하여 GPU 지원을 활성화한 상태로 Ultralytics YOLO를 실행합니다:
sudo docker run -it --ipc=host --device nvidia.com/gpu=all ultralytics/ultralytics:latest # all GPUs이 명령은 GPU 액세스가 가능한 Docker 컨테이너를 설정합니다. 특정 GPU만 사용하도록 제한하거나 AMD ROCm으로 전환할 수 있습니다.
Docker 컨테이너의 GUI에서 YOLO 예측 결과를 시각화하려면 Docker가 디스플레이 서버에 액세스하도록 허용해야 합니다. X11을 실행하는 시스템에서는 다음 명령을 사용합니다:
xhost +local:docker && docker run -e DISPLAY=$DISPLAY \
  -v /tmp/.X11-unix:/tmp/.X11-unix \
  -v ~/.Xauthority:/root/.Xauthority \
  -it --ipc=host ultralytics/ultralytics:latest
Wayland를 실행하는 시스템에서는 다음 명령을 사용하세요:
xhost +local:docker && docker run -e DISPLAY=$DISPLAY \
  -v $XDG_RUNTIME_DIR/$WAYLAND_DISPLAY:/tmp/$WAYLAND_DISPLAY \
  --net=host -it --ipc=host ultralytics/ultralytics:latest
컨테이너 내부에서
show=True를 사용하기 전에 OpenCV GUI 빌드를 설치합니다. 자세한 내용은 Docker 컨테이너에서 그래픽 사용자 인터페이스(GUI) 애플리케이션 실행 섹션을 참조하세요.예.
-v플래그를 사용하여 Ultralytics Docker 컨테이너에 로컬 디렉터리를 마운트할 수 있습니다:sudo docker run -it --ipc=host --device nvidia.com/gpu=all -v /path/on/host:/path/in/container ultralytics/ultralytics:latest/path/on/host을 로컬 컴퓨터의 디렉터리로,/path/in/container을 컨테이너 내에서 사용할 경로로 바꾸세요. 이렇게 설정하면 컨테이너 내에서 로컬 파일을 사용할 수 있습니다. 자세한 내용은 파일 접근성 관련 참고 사항 섹션을 참조하세요.


댓글14
질문을 하거나 결과를 공유하거나 다른 사람을 도와주세요.
 Letícia Rama
Hello,
Is this workflow suitable for other YOLO families, such as YOLO26?
 Glenn JocherUltralytics
Yes, the same workflow supports YOLO26 and other model families available in the
ultralyticspackage—use an up-to-date official image and specify the appropriate weights, such asmodel=yolo26n.pt. See the Docker Quickstart Guide for current image options, and feel free to drop any follow-up questions here so the Ultralytics team can help.1- Letícia Rama
Right Glenn, thanks
lauravchrobak
It looks like the, "Running Ultralytics in Docker Container" section is duplicated here
HellaPinot
Hello! I have been testing running yolov8 inside a container, things seem to work well however after a somewhat random amount of time the inference hangs with no error output.
I know the container hasn't crashed as I am reading events from a processing queue and I can see new partitions are being allocated on another thread.
I'm running two models one after the other (different sizes and detection classes), so I'm wondering if this could be the root of the issue? At no point would they be running at the same time.
I believe it is happening exactly when I call predict. Its hard to debug as again it happens very randomly and there is not output from the container, it seems like there might be an infinite loop somewhere thats stopping it from continuing.
Curious if anything like this has been encountered before?
- Glenn JocherUltralytics
Hello! 👋
It sounds like a tricky issue, especially since it occurs randomly. Here are a few suggestions that might help you isolate or resolve the problem:
-
Logging and Monitoring: Enhance the logging within your container. Consider logging the input sizes and other relevant data before the prediction call, and make sure you're logging any exceptions that could be silently caught.
-
Resource Checks: Ensure that there are no resource starvation issues, such as GPU memory not being freed up properly. Tools like
nvidia-smican help monitor GPU usage. -
Sequential Model Loading: Although the models are run sequentially and not in parallel, it could be beneficial to explicitly clear the memory after each model's predictions are done. This can be done by deleting model objects and calling
torch.cuda.empty_cache()if you are using PyTorch. -
Hardware Testing: Run your container pointing the inference to CPU only for a time to see if the problem persists. This could help determine if the issue is related to GPU computation or not.
-
Reproducibility Tactic: Since the issue is sporadic, try to determine if there’s a specific type of input or specific conditions under which this occurs more frequently.
If these suggestions don't help, please provide more details or code snippets, and I’d be happy to dive deeper into this!
Let me know how it goes!
-
HWKevinhwk
I want to install ultralytics using docker on top of NVIDIA TX2, is there a detailed procedure? The reason for this question is that after entering the command nvidia-smi in the TX2 terminal, the output is command not found, and I'm worried that the steps in the document above are not applicable to TX2.
 Paula DerrengerUltralytics(수정됨)
@HWKevinhwk hey there! 🚀 Setting up Ultralytics on NVIDIA TX2 with Docker can be a bit tricky if
nvidia-smiis missing, but no worries.For NVIDIA Jetson platforms like TX2,
nvidia-smiis typically not available, and you'll usetegrastatsinstead to monitor the GPU. The Jetson TX2 is supported on JetPack 4, so install JetPack 4 first, as it includes the NVIDIA drivers and libraries needed for GPU acceleration. Jetson devices use the Docker integration provided through JetPack with--runtime=nvidiarather than--gpus all. Then pull and run the Ultralytics Docker image for JetPack 4:t=ultralytics/ultralytics:latest-jetson-jetpack4 sudo docker pull $t && sudo docker run -it --ipc=host --runtime=nvidia $tSee the NVIDIA Jetson guide for details. If you encounter any specific issues, feel free to drop them here. Happy detecting! 🎉
Is there a detailed tutorial on deploying yolov8 on jetson TX2 using docker? I am pulling images docker pull ultralytics/ultralytics:latest-jetson terminal will downloading pause, long time pulling images unsuccessful, repeated attempts still so, any solution please?
- Paula DerrengerUltralytics(수정됨)
@HWKevinhwk hey there! 😊
It sounds like you're facing issues with the Docker image pull for the Jetson TX2. This might be due to network issues or Docker Hub delays, or to using a tag that does not exist.
Here's a simplified breakdown to get you started on the TX2 using Docker:
-
Ensure JetPack is installed: The TX2 is supported on JetPack 4, which includes the GPU drivers necessary for Docker integration with the Jetson GPU.
-
Install Docker:
sudo apt-get install docker.io -
NVIDIA runtime support (JetPack should handle this):
nvidia-smidoesn't work on Jetson, so verify thenvidiaruntime withdocker info | grep -i runtime. -
Pull the Docker image for Jetson. Pulling large Docker images can be challenging on slower networks:
sudo docker pull ultralytics/ultralytics:latest-jetson-jetpack4If you keep facing issues while pulling the image, try restarting your Docker service or check your network settings. Sometimes, using a different network can help too!
-
Run the Image:
sudo docker run -it --ipc=host --runtime=nvidia ultralytics/ultralytics:latest-jetson-jetpack4
This should set you on the right path to running Ultralytics YOLO on your Jetson TX2. If the problem persists, it might be worth checking Docker's log or discussing this issue further with your network admin or on Docker forums! 😄
Happy coding! 🚀
-
Peter-coding
Hey! I trained a YOLOv8 model on my local computer. I have the best.pt file, and I can use it in CLI (conda) for predict. I want to make a python app, which uses this best.pt file, and I want to containerize it. Is it possible to write the full python app (it is just a few lines of code, which runs the detection, then writes the detection result to a database), then containerize it, and able to use it anywhere? Thank you! :D
- Paula DerrengerUltralytics
Hey there! 😊
Absolutely, you can absolutely containerize your Python app that uses the
best.ptmodel! Here's a quick guide:-
Create Your Python App: Just like you mentioned, write your Python code that performs the detection and interacts with the database.
-
Dockerize Your Application:
-
Dockerfile: Create a Dockerfile in your project directory. Here's a simple example that uses Ultralytics' Docker image as a base:
FROM ultralytics/ultralytics:latest WORKDIR /app COPY . /app RUN pip install -r requirements.txt # Assuming you have a requirements.txt CMD ["python", "your_script.py"] -
Build Your Docker Image: Run the following command in your project directory:
sudo docker build -t your-app-name . -
Run Your Container: To run your container, especially if you're planning to use GPU, you might want to specify
--gpus all:sudo docker run -it --ipc=host --gpus all your-app-nameFor accessing local files, consider mounting a volume as described in the Docker Quickstart Guide.
-
-
Deployment: With your Docker image built, you can now deploy and run it anywhere that Docker is supported. If using a GPU, ensure the host machine supports NVIDIA GPUs and has the necessary drivers and Docker configured correctly.
That's it! You should be able to use your model within a containerized app now. If you hit any snags, double-check the Docker Quickstart Guide for Ultralytics for more details. Happy coding! 😄
-
udayzee05
DEPRECATION NOTICE The nvidia-docker wrapper is no longer supported, and the NVIDIA Container Toolkit has been extended to allow users to configure Docker to use the NVIDIA Container Runtime. For further instructions, see the NVIDIA Container Toolkit documentation and specifically the install guide.22 Jan 2024
- Paula DerrengerUltralytics(수정됨)
Hey there! 👋 Thanks for bringing up the deprecation notice regarding the nvidia-docker wrapper. You're right; use the NVIDIA Container Toolkit for GPU support in Docker containers. Here's how to set it up on Ubuntu/Debian, as described in our Docker Quickstart Guide:
# Add the NVIDIA Container Toolkit repository
curl -fsSL https://nvidia.github.io/libnvidia-container/gpgkey | sudo gpg --dearmor -o /usr/share/keyrings/nvidia-container-toolkit-keyring.gpg \
  && curl -s -L https://nvidia.github.io/libnvidia-container/stable/deb/nvidia-container-toolkit.list \
  | sed 's#deb https://#deb [signed-by=/usr/share/keyrings/nvidia-container-toolkit-keyring.gpg] https://#g' \
    | sudo tee /etc/apt/sources.list.d/nvidia-container-toolkit.list

# Install the NVIDIA Container Toolkit
sudo apt-get update
sudo apt-get install -y nvidia-container-toolkit
And to verify that the GPU devices are available to Docker:
nvidia-ctk cdi listThis should list entries such as
nvidia.com/gpu=all, indicating that your Docker setup can leverage GPU acceleration. 🚀For more detailed instructions and tips on using Ultralytics with Docker, including mounting local directories and running containers, check out our Docker Quickstart Guide. Happy coding!