Ultralytics YOLOによるモデルのトレーニング
はじめに#
ディープラーニングモデルのトレーニングでは、データを入力し、正確な予測ができるようにパラメーターを調整します。Ultralytics YOLO26のTrainモードでは、最新のハードウェア上で物体検出モデルやその他のビジョンタスクモデルを効率的にトレーニングできます。このガイドでは、YOLO26で独自のモデルをトレーニングするために必要な詳細を説明します。まだUltralyticsをインストールしていない場合は、クイックスタートガイドから始めてください。
トレーニングの使用例については、未リリースのYOLO27プレビューをご覧ください。
視聴: Google Colab でカスタムデータセットを使って YOLO モデルをトレーニングする方法。
トレーニングにUltralytics YOLOを選ぶ理由#
YOLO26のTrainモードを使用する理由:
- 効率性: 単一GPU構成でも複数GPUへのスケーリングでも、ハードウェアを最大限に活用できます。
- 汎用性: COCO、VOC、ImageNetなどの既存のデータセットに加えて、カスタムデータセットでもトレーニングできます。
- 使いやすさ:シンプルながら強力なCLIとPythonインターフェースにより、スムーズにトレーニングできます。
- ハイパーパラメーターの柔軟性: モデルの性能を細かく調整できる、幅広いカスタマイズ可能なハイパーパラメーターを利用できます。より詳細に制御するには、トレーナー自体をカスタマイズできます。
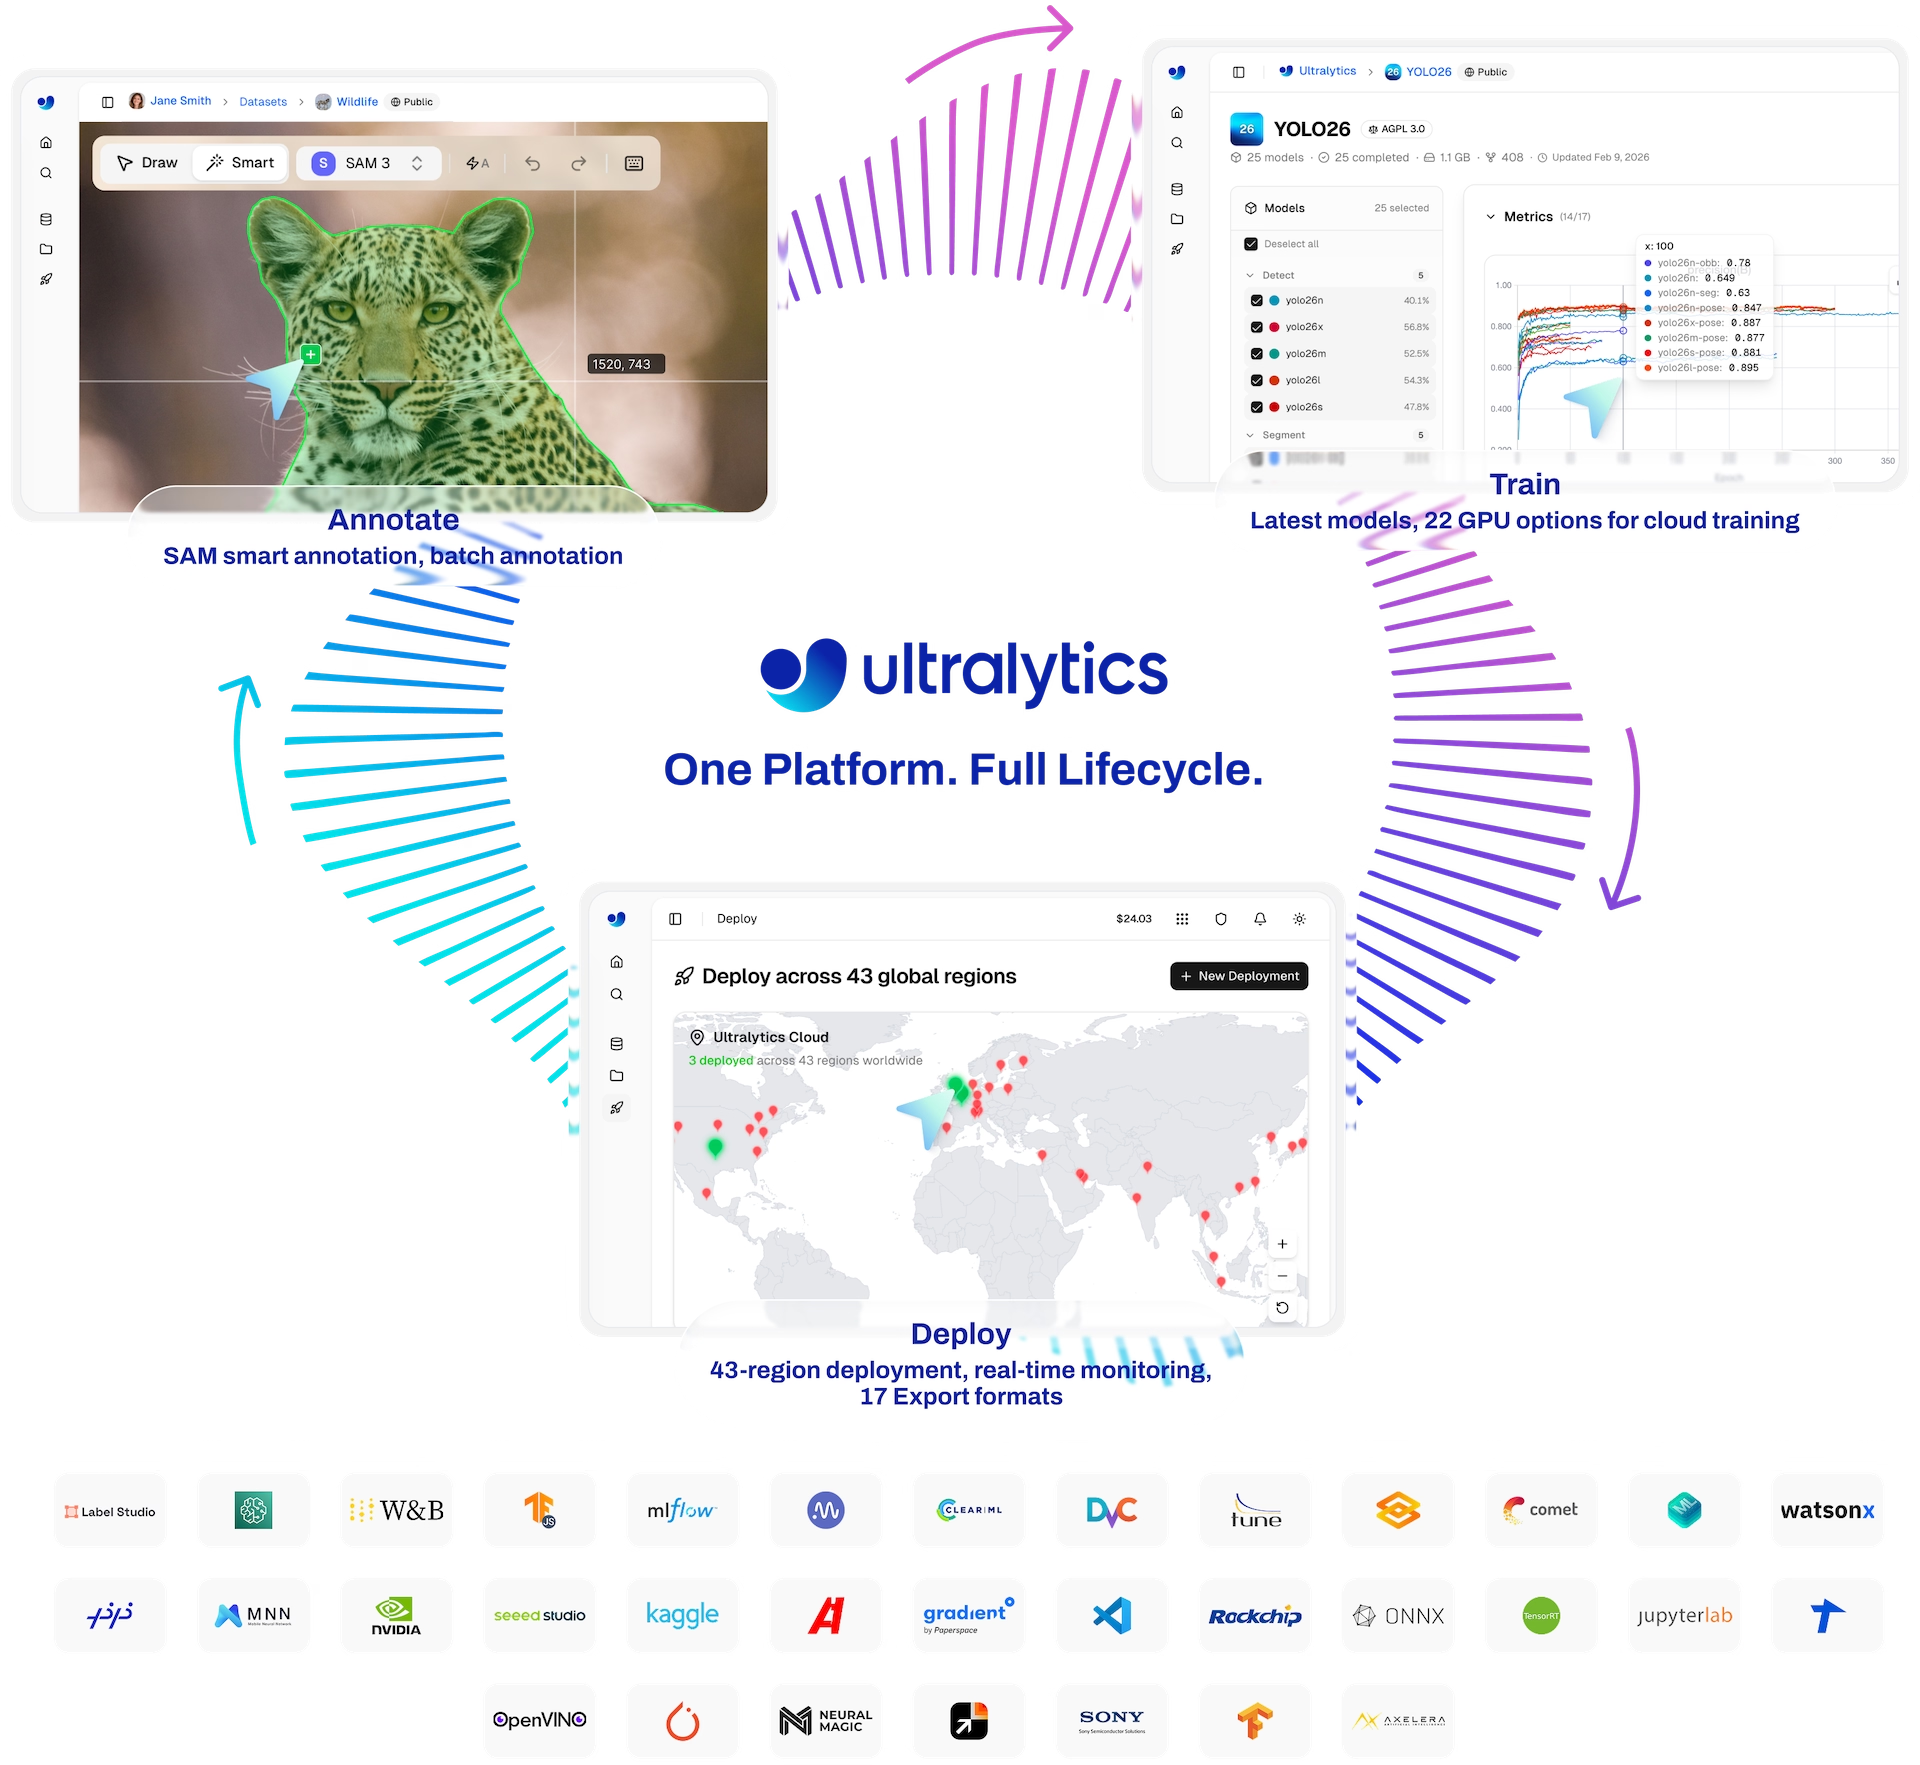
- クラウドトレーニング:Ultralytics Platformを通じてクラウドGPUでトレーニングでき、リアルタイムの指標と自動チェックポイント保存を利用できます。
trainモードの主な機能#
YOLO26のtrainモードの主な機能は次のとおりです。
- データセットの自動ダウンロード:ダウンロード元が指定されたデータセット設定は、初回使用時に自動でダウンロードされます(例:
yolo train data=coco8.yaml)。対応する形式とデータセットについては、データセットの概要をご覧ください。 - マルチGPU対応: 複数のGPUにトレーニングを分散して、トレーニング時間を短縮できます。
- ハイパーパラメーターの設定:YAML設定ファイルまたはCLI引数を使って、ハイパーパラメーターを変更できます。
- 可視化とモニタリング:トレーニング指標をリアルタイムで追跡し、学習プロセスを可視化することで、より深い分析が可能になります。
使用例#
COCO8データセットでYOLO26nを、画像サイズ640、100エポックでトレーニングします。device引数を使用してトレーニングデバイスを指定できます。引数を指定しない場合、利用可能であればGPUのdevice=0が使用され、そうでなければdevice='cpu'が使用されます。
Windowsでは、スクリプトとしてトレーニングを起動するとRuntimeErrorが発生することがあります。解決するには、トレーニングコードの前にif __name__ == "__main__":ブロックを追加します。
デバイスは自動的に決定されます。GPUが利用可能な場合はGPU(デフォルトのCUDAデバイス0)が使用され、それ以外の場合はCPUでトレーニングが開始されます。
from ultralytics import YOLO

# モデルを読み込む
model = YOLO("yolo26n.yaml")  # YAMLから新しいモデルを構築します
model = YOLO("yolo26n.pt")  # 事前トレーニング済みモデルを読み込みます(トレーニングにはこちらを推奨します)
model = YOLO("yolo26n.yaml").load("yolo26n.pt")  # YAMLからモデルを構築し、重みを転送します

# モデルをトレーニングする
results = model.train(data="coco8.yaml", epochs=100, imgsz=640)マルチGPUトレーニング#
マルチGPUトレーニングでは、複数のGPUにトレーニング負荷を分散することで、利用可能なハードウェアをより効果的に活用できます。この機能はPython APIとコマンドラインインターフェースの両方で利用できます。マルチGPUトレーニングを有効にするには、使用するGPUデバイスIDを指定します。
GPU 2台(CUDAデバイス0と1)でトレーニングするには、次のコマンドを使用します。必要に応じてGPUを追加してください。
from ultralytics import YOLO

# モデルを読み込む
model = YOLO("yolo26n.pt")  # 事前トレーニング済みモデルを読み込みます(トレーニングにはこちらを推奨します)

# GPUを2台使用してモデルをトレーニングします
results = model.train(data="coco8.yaml", epochs=100, imgsz=640, device=[0, 1])

# 最もアイドル状態のGPUを2台使用してモデルをトレーニングします
results = model.train(data="coco8.yaml", epochs=100, imgsz=640, device=[-1, -1])torch>=2.4用の公式PyTorchホイールでは、Windows上でマルチGPUトレーニングを実行できません。Ultralyticsはtorch.distributed.runを通じてDDPを起動します。このランデブーステップではTCPStoreが構築されますが、PyTorch 2.4以降、デフォルトのバックエンドはlibuvになっており、公式Windowsホイールはlibuvなしでビルドされています。そのため、トレーニングは次のエラーで直ちに終了します。
RuntimeError: use_libuv was requested but PyTorch was built without libuv support
ランデブー処理がTCPStoreを直接構築し、そのコードパスでは変数を読み取らないため、USE_LIBUV=0を設定しても解決しません。複数のGPUを使用するにはLinuxまたはWSL2でトレーニングするか、Windowsでdevice=0を使用して単一GPUでトレーニングしてください。
複数のデバイス(例:device=[0, 1])を指定すると、Ultralyticsは内部で新しいトレーナーインスタンスを起動し、torch.distributed.runを実行します。これは、標準的なCLIの使用方法と、変更していないPythonスクリプトで動作します。
ただし、スクリプトにカスタムトレーナー、バリデーター、データセット、拡張パイプラインなどのカスタムコンポーネントが含まれている場合、これらのオブジェクトは自動的にシリアライズしてDDPサブプロセスに転送できません。この場合は、torch.distributed.runを使用してスクリプトを直接起動する必要があります。
python -m torch.distributed.run --nproc_per_node 2 your_training_script.pyAMD GPUでのトレーニングでは、標準的なdevice=0またはdevice=cuda:0の構文でPyTorch ROCmビルドを使用します。ROCmのインストール、マルチGPUトレーニング、AMPに関する注意事項、エクスポート済みモデルのMIGraphX推論については、AMD統合ガイドをご覧ください。
Intel GPUでのトレーニングではdevice=xpu:0を使用します。複数のXPU IDを使用する場合は、XCCLを提供するPyTorchビルドが必要です。
Huawei Ascend NPUでのトレーニング#
Ultralyticsはtorch_npuを通じて、Huawei Ascend NPUでのトレーニングと検証に対応しています。PyTorch用Ascend拡張機能のインストールガイドに従って、互換性のあるCANN、PyTorch、torch_npuの各バージョンをインストールし、Ultralyticsを起動する前にCANN環境を読み込んでください。
source /usr/local/Ascend/ascend-toolkit/set_env.shfrom ultralytics import YOLO
model = YOLO("yolo26n.pt")
# Ascend NPUを1台使用してトレーニングします
results = model.train(data="coco8.yaml", epochs=100, imgsz=640, device="npu:0")
# HCCLを使用してAscend NPUを2台でトレーニングします
results = model.train(data="coco8.yaml", epochs=100, imgsz=640, device="npu:0,1")AMP、検証、チェックポイント保存、再開などの標準的なトレーニング機能は、アクティブなNPUを使用します。AutoBatchは単一NPUでのトレーニングに対応し、複数のNPU IDを指定するとHCCLを通じて分散トレーニングが起動します。トレーニング後のモデルのエクスポートとデプロイについては、Huawei Ascend統合ガイドをご覧ください。
アイドル状態のGPUを使用したトレーニング#
アイドルGPUトレーニングでは、マルチGPUシステムで最も使用率の低いGPUが自動的に選択されるため、デバイスを手動で選ぶ必要はありません。利用可能なGPUを使用率と空きVRAMに基づいて順位付けします。
トレーニングに最もアイドル状態のGPUを自動選択して使用するには、-1デバイスパラメーターを使用します。共有コンピューティング環境や複数のユーザーが利用するサーバーで特に便利です。
from ultralytics import YOLO

# モデルを読み込む
model = YOLO("yolo26n.pt")  # 事前トレーニング済みモデルを読み込みます(トレーニングにはこちらを推奨します)

# 最もアイドル状態のGPUを1台使用してトレーニングします
results = model.train(data="coco8.yaml", epochs=100, imgsz=640, device=-1)

# 最もアイドル状態のGPUを2台使用してトレーニングします
results = model.train(data="coco8.yaml", epochs=100, imgsz=640, device=[-1, -1])
自動選択アルゴリズムは、次の条件を優先します。
- 現在の使用率が低いGPU
- 利用可能なメモリ(空きVRAM)が多いGPU
実行開始時の状況に基づいてデバイスが選択されるため、共有コンピューティング環境や複数のトレーニングジョブを同時に実行する場合に特に役立ちます。
Apple SiliconでのMPSトレーニング#
Ultralytics YOLOモデルは、AppleのカスタムGPU上で計算処理や画像処理タスクを実行するMetal Performance Shaders(MPS)フレームワークを通じて、Apple siliconでトレーニングできます。
Apple siliconでトレーニングするには、Pythonまたはコマンドラインでトレーニングを開始する際に、デバイスとしてmpsを指定します。
from ultralytics import YOLO

# モデルを読み込む
model = YOLO("yolo26n.pt")  # 事前トレーニング済みモデルを読み込みます(トレーニングにはこちらを推奨します)

# MPSを使用してモデルをトレーニングします
results = model.train(data="coco8.yaml", epochs=100, imgsz=640, device="mps")中断したトレーニングの再開#
保存済みチェックポイントからトレーニングを再開すると、実行が予期せず中断された場合や、新しいデータまたは追加エポックでモデルのトレーニングを続けたい場合に便利です。
トレーニングを再開すると、Ultralytics YOLOは最後に保存されたモデルの重みを読み込み、オプティマイザーの状態、学習率スケジューラー、エポック番号、データセットも復元します。その後、中断した箇所からトレーニングを続行します。チェックポイントのデータセットとは異なるデータセットで続行するには、resumeとともにdata=を明示的に渡します。
Ultralytics YOLOでトレーニングを再開するには、trainメソッドの呼び出し時にresume引数をTrueに設定し、トレーニング途中のモデルの重みを含む.ptファイルのパスを指定します。
中断したトレーニングをPythonまたはコマンドラインで再開するには、次のようにします。
from ultralytics import YOLO

# モデルを読み込む
model = YOLO("path/to/last.pt")  # 部分的にトレーニングされたモデルを読み込む

# トレーニングを再開する
results = model.train(resume=True)resume=Trueを設定すると、train関数はpath/to/last.ptファイルに保存された状態を使用して、中断した箇所からトレーニングを続行します。resume引数を省略するかFalseに設定すると、train関数は新しいトレーニングセッションを開始します。Ultralytics Platformにストリーミングする実行を再開すると、同じPlatformモデルが続けて使用されます。
チェックポイントはデフォルトで各エポックの終了時に保存されます。また、save_period引数を使用して固定間隔で保存することもできます。そのため、トレーニングを再開するには、少なくとも1エポックを完了する必要があります。
トレーニング設定#
YOLOモデルのトレーニング設定には、トレーニングプロセスで使用するさまざまなハイパーパラメーターと構成が含まれます。これらの設定はモデルの性能、速度、精度に影響します。主なトレーニング設定には、バッチサイズ、学習率、モメンタム、重み減衰があります。さらに、オプティマイザー、損失関数、トレーニングデータセットの構成もトレーニングプロセスに影響を与えます。性能を最適化するには、これらの設定を慎重に調整し、試行を重ねることが重要です。
MuSGDオプティマイザー#
YOLO26のMuSGDは、標準的なSGDの更新とMuon形式の直交化更新を組み合わせたハイブリッドオプティマイザーです。
直交化されたMuon更新によって最適化の安定性を高められるため、YOLO26の長時間トレーニングや大規模なデータセットでの使用が推奨されます。
2Dの線形重みと、2Dに再構成した4Dの畳み込みフィルターのみが、SGDとともにMuon形式の更新を受けます。一方、バッチ正規化の重みやバイアス項など、その他すべてのパラメーターには標準的なSGDが適用されます。
optimizer=autoを使用すると、Ultralyticsは長時間のトレーニング(通常、反復回数が10000を超える場合)にMuSGDを自動的に選択します。短時間のトレーニングでは、トレーナーはAdamWに切り替えます。autoモードでは、トレーナーが学習率も選択するため、ユーザーが指定したlr0は無視されます。これらの設定を手動で制御するには、optimizer=AdamW lr0=0.001などのオプティマイザーを明示的に選択します。
使用例:
yolo train model=yolo26n.pt data=coco8.yaml optimizer=MuSGD実装についてはultralytics/optim/muon.pyを、オプティマイザーの自動選択ロジックについてはBaseTrainer.build_optimizerを参照してください。
| 引数 | 種類 | デフォルト | 説明 |
|---|---|---|---|
model | str | None | トレーニングに使用するモデルファイルを指定します。.ptの事前学習済みモデル、または.yamlの構成ファイルへのパスを指定できます。モデル構造の定義や重みの初期化に必要です。 |
data | str | None | データセットYAMLへのパス(例: coco8.yaml)です。トレーニングデータと検証データのパス、クラス名、クラス数が記載されています。分類の場合は、データセットのディレクトリまたは組み込みデータセット名(例: imagenet10)を指定します。 |
epochs | int | 100 | トレーニングの総エポック数です。各エポックは、データセット全体を1回学習することを表します。この値を調整すると、トレーニング時間やモデルの性能に影響する場合があります。 |
time | float | None | トレーニングの最大時間(時間単位)です。設定すると、epochs引数より優先され、指定した時間が経過するとトレーニングが自動的に停止します。時間に制約のあるトレーニングに便利です。 |
patience | int | 100 | 検証メトリクスが改善しない状態で、トレーニングを早期停止するまでのエポック数です。性能が頭打ちになった時点でトレーニングを停止することで、過学習を防ぎます。 |
batch | intまたはfloat | 16 | バッチサイズには3つのモードがあります。整数で設定するモード(例: batch=16)、利用可能なGPUメモリの60%を使用する自動モード(batch=-1)、または利用可能なGPUメモリに対する割合を指定する自動モード(batch=0.70)です。 |
imgsz | int | 640 | トレーニング時の目標画像サイズです。画像は、指定値を辺の長さとする正方形にリサイズされます(rect=Falseの場合)。YOLOモデルではアスペクト比が維持されますが、RT-DETRでは維持されません。モデルの精度と計算量に影響します。 |
save | bool | True | トレーニングのチェックポイントと最終モデルの重みを保存します。トレーニングの再開やモデルのデプロイに便利です。 |
save_period | int | -1 | モデルのチェックポイントを保存する頻度をエポック数で指定します。値を-1にすると、この機能は無効になります。長時間のトレーニング中に中間モデルを保存する場合に便利です。 |
cache | boolまたはstr | False | データセットの画像をメモリ(True/ram)またはディスク(disk)にキャッシュするか、キャッシュを無効にする(False)かを指定します。ディスクI/Oを減らしてトレーニングを高速化しますが、メモリ使用量は増加します。 |
tile | boolまたはint | False | 各ソース画像を固定サイズのトレーニングタイルに分割し、ラベルをクリップして、負例ウィンドウを保持します。True は imgsz を使用します。正の整数を指定するとタイルサイズが設定されます。高解像度タイル分割をご覧ください。 |
device | int、str、またはlist | None | トレーニングに使用する計算デバイスを指定します。単一GPU(device=0)、複数GPU(device=[0,1])、CPU(device=cpu)、Appleシリコン向けMPS(device=mps)、Huawei Ascend NPU(device=npu:0またはdevice=npu:0,1)、Intel XPU(device=xpu:0)、またはアイドル状態のGPU(device=-1)や複数のアイドル状態のGPU(device=[-1,-1])の自動選択を指定できます。 |
workers | int | 8 | データ読み込みに使用するワーカースレッド数です(マルチGPUトレーニングではRANKごとに指定します)。データの前処理とモデルへの入力速度に影響し、特にマルチGPU環境で役立ちます。 |
project | str | None | トレーニング出力の保存先となるプロジェクトディレクトリの名前です。相対パスは runs_dir/<task> の下に配置され、絶対パスはそのまま使用されます。 |
name | str | None | トレーニング実行の名前です。プロジェクトフォルダー内にサブディレクトリを作成し、トレーニングログと出力を保存するために使用します。 |
exist_ok | bool | False | Trueの場合、既存のプロジェクト名または名前のディレクトリを上書きできます。以前の出力を手動で削除せずに、反復的な実験を行う場合に便利です。 |
save_dir | str | None | 実行の出力を保存するディレクトリを直接指定し、project/nameの組み合わせを上書きします。パスは自動で連番化されず、そのまま使用されるため、連続する実行で同じディレクトリが再利用されます。 |
pretrained | boolまたはstr | True | 事前学習済みの重みからトレーニングを開始するかどうかを指定します。ブール値、または読み込む重みのパスを表す文字列を指定できます。pretrained=Falseでは、モデルアーキテクチャを維持したまま、ランダムに初期化した重みでトレーニングします。 |
cls_remap | bool | True | データセットをまたいでファインチューニングする際、クラス名が一致する場合は、事前学習済み分類ヘッドの行を新しいモデルにコピーします。これにより、共通するクラスでは学習済みのバイアスが維持され、ヘッドの幅が変わらない場合は重みも維持されます。クラス数が異なる場合も、クラス数が同じでクラスの順序が異なる場合も適用されます。 |
optimizer | str | 'auto' | トレーニングに使用するオプティマイザーを選択します。SGD、MuSGD、Adam、Adamax、AdamW、NAdam、RAdam、RMSProp、またはautoを指定すると、トレーニング反復回数に基づいてAdamWまたはMuSGDが選択されます。収束速度と安定性に影響します。 |
seed | int | 0 | トレーニングの乱数シードを設定し、同じ構成で実行した場合に結果を再現できるようにします。 |
deterministic | bool | True | 決定論的アルゴリズムの使用を強制します。再現性を確保できますが、非決定論的アルゴリズムが制限されるため、性能や速度に影響する場合があります。 |
verbose | bool | True | トレーニング中の詳細な出力を有効にし、進行状況バー、エポックごとのメトリクス、その他のトレーニング情報をコンソールに表示します。 |
single_cls | bool | False | マルチクラスデータセットのすべてのクラスを、トレーニング中に単一のクラスとして扱います。二値分類タスクや、クラス分類よりも物体の有無に注目する場合に便利です。 |
classes | list[int] | None | トレーニング対象とするクラスIDのリストを指定します。トレーニング時に特定のクラスだけに絞り込む場合に便利です。 |
rect | bool | False | 最小パディング戦略を有効にします。バッチ内の画像は、最長辺が imgsz になる共通サイズに合わせて、最小限のパディングが適用されます。効率と速度が向上する可能性がありますが、モデルの精度に影響する場合があります。標準のYOLOトレーナーでは、この設定にかかわらず、detect、segment、pose、OBBの検証に rect=True が使用されます。 |
multi_scale | float | 0.0 | 各バッチでimgszをmulti_scaleの範囲でランダムに変化させます(例: 0.25 → 0.75xから1.25x)。モデルのストライドの倍数に丸められます。0.0ではマルチスケールトレーニングが無効になります。 |
cos_lr | bool | False | コサイン学習率スケジューラーを使用し、エポックを通じてコサイン曲線に沿って学習率を調整します。収束を改善するための学習率管理に役立ちます。 |
close_mosaic | int | 10 | 完了前のトレーニングを安定させるため、最後のNエポックではモザイクデータ拡張を無効にします。0に設定すると、この機能は無効になります。 |
resume | bool | False | 最後に保存されたチェックポイントからトレーニングを再開します。モデルのウェイト、オプティマイザーの状態、エポック数を自動的に読み込み、中断した時点からトレーニングを続行します。 |
amp | boolまたはstr | True | トレーニングの精度を設定します。Trueまたは"fp16"はFP16、"bf16"は対応するCUDAデバイスでBF16、Falseまたは"fp32"はFP32を使用します。 |
quantize | intまたはstr | None | INT8量子化を考慮したトレーニング(QAT)を行うには、8(または"int8")に設定します。学習中に疑似量子化を行い、INT8エクスポートに耐えられるよう重みをファインチューニングします。量子化考慮トレーニングをご覧ください。 |
fraction | float、int、またはlist | 1.0 | データセットのサブセットを割合、件数、または[train, val, test]のリストで指定します。1は分割全体を意味し、1より大きい整数は画像数を表します。省略可能なtest項目のみ、0/0.0で対象なしを指定できます。2項目のリストではtest全体が維持されます。 |
profile | bool | False | トレーニング中にONNXとTensorRTの速度をプロファイリングします。モデルのデプロイを最適化する際に役立ちます。 |
freeze | intまたはlist | None | モデルの先頭N層、またはインデックスやモジュール名で指定した層(先頭のmodel.を含まない23.cv2)を凍結し、トレーニング可能なパラメーター数を減らします。ファインチューニングや転移学習に便利です。 |
lr0 | float | 0.01 | 初期学習率(例: SGD=1E-2、Adam=1E-3)。デフォルトのoptimizer='auto'では無視されます。使用するにはオプティマイザーを明示的に指定してください。 |
lrf | float | 0.01 | 初期学習率に対する最終学習率の割合(= lr0 * lrf)です。スケジューラーと組み合わせて、時間経過に応じた学習率の調整に使用します。 |
momentum | float | 0.937 | AdamオプティマイザーのSGD/MuSGDのモメンタムまたはbeta1です。optimizer=autoを使用する場合、AdamWは0.9を使用し、MuSGDは0.9から開始します。その後、ウォームアップによってwarmup_momentumからmomentumへ補間されます。ウォームアップなしの場合、自動MuSGDは0.9のままです。 |
weight_decay | float | 0.0005 | L2正則化項です。大きな重みにペナルティを課し、過学習を防ぎます。 |
warmup_epochs | float | 3.0 | ウォームアップエポック数(小数可)は、最終エポックにウォームアップが残らないよう上限が設定されます。学習率は0(warmup_bias_lr のバイアス)からスケジュールされた値まで、モメンタムは warmup_momentum から momentum まで線形に上昇します。また、勾配の累積数は1バッチから公称値(nbs を参照)まで増加し、いずれもウォームアップ終了時に目標値に達します。 |
warmup_momentum | float | 0.8 | モメンタム項を持つオプティマイザー(SGD、MuSGD、RMSprop)の開始時モメンタムで、ウォームアップ終了時までに momentum まで線形に上昇します。Adam系ではbeta1をウォームアップしません。 |
warmup_bias_lr | float | 0.1 | ウォームアップ段階におけるバイアスパラメーターの学習率です。初期エポックでのモデル学習を安定させます。デフォルトのoptimizer='auto'では自動的に0.0に設定されるため、使用するにはオプティマイザーを明示的に指定してください。 |
distill_model | str | None | 知識蒸留に使用する教師モデルのチェックポイントへのパス(例: yolo26x.pt)です。設定すると、固定された教師モデルの指導による追加の蒸留損失を用いて、生徒モデルをトレーニングします。 |
dis | float | 6.0 | 標準の検出損失に加算する蒸留損失の重みです。値を大きくすると、教師モデルによる特徴のガイダンスの影響が強まります。 |
box | float | 7.5 | 損失関数におけるボックス損失項の重みです。バウンディングボックスの座標を正確に予測することをどの程度重視するかを調整します。 |
cls | float | 0.5 | 合計損失における分類損失の重みです。他の項目に対する、正しいクラス予測の重要度を調整します。 |
cls_pw | float | 0.0 | クラス頻度の逆数を用いてクラスの不均衡に対処するための、クラス重み付けの係数です。0.0ではクラス重み付けが無効になり、1.0では頻度の逆数による重み付けが完全に適用されます。0から1の値では、部分的に重み付けされます。 |
dfl | float | 1.5 | ボックス距離の回帰項の重みです。検出ヘッドがreg_max > 1を使用する場合は分布焦点損失(DFL)、DFLを使用しないYOLO26(reg_max: 1)では正規化されたボックス距離に対するL1損失を指します。 |
pose | float | 12.0 | 姿勢推定用にトレーニングするモデルにおける姿勢損失の重みです。姿勢キーポイントを正確に予測することをどの程度重視するかを調整します。 |
kobj | float | 1.0 | 姿勢推定モデルにおけるキーポイントの物体らしさ損失の重みです。検出信頼度と姿勢精度のバランスを調整します。 |
rle | float | 1.0 | 姿勢推定モデルにおける残差対数尤度推定損失の重みです。キーポイントの位置特定精度に影響します。 |
angle | float | 1.0 | OBBモデルにおける角度損失の重みです。回転バウンディングボックスの角度予測の精度に影響します。 |
dlog | float | 1.0 | 深度推定モデルにおけるスケール不変対数(SILog)損失の重みです。深度精度を左右する主要な項です。 |
dgrad | float | 0.5 | 深度推定モデルにおける勾配損失の重みです。深度エッジの誤差にペナルティを課し、表面境界をより鮮明にします。 |
dlam | float | 1.0 | 深度推定モデルにおけるSILog損失の分散重視係数です。1.0では損失が完全なスケール不変となり、0.0では単純な対数RMSEになります。 |
nbs | int | 64 | 公称バッチサイズです。オプティマイザーステップごとに round(nbs / batch) バッチ分の勾配を累積します(最低1バッチで、time モード以外では実行全体のバッチ数が上限です)。これに合わせて、weight_decay は batch * accumulate / nbs でスケーリングされます。 |
overlap_mask | bool | True | トレーニング時に物体マスクを単一のマスクに統合するか、物体ごとに分けたままにするかを指定します。統合時に重なりがある場合は、小さいマスクが大きいマスクの上に重ねられます。 |
mask_ratio | int | 4 | セグメンテーションマスクのダウンサンプリング比率です。トレーニング時に使用するマスクの解像度に影響します。予測マスクの解像度は変わりません。 |
dropout | float | 0.0 | 分類タスクにおける正則化のドロップアウト率です。トレーニング中にユニットをランダムに除外することで過学習を防ぎます。 |
val | bool | True | トレーニング中の検証を有効にし、別のデータセットでモデル性能を定期的に評価します。 |
split | str | 'val' | トレーニング中の検証に使用するデータセットの分割: val、test、または train。そのメトリクスによって best.pt が選択され、早期終了が制御されます。 |
nms | bool、省略可 | None | エポック検証、チェックポイント選択、早期停止に使用する推論ヘッドを選択します。NoneまたはTrueではNMSを使用するone-to-manyヘッドが使われ、Falseでは利用可能な場合にNMSフリーヘッドが使われます。どちらのヘッドもトレーニング損失は維持されます。 |
plots | bool | True | トレーニングと検証のメトリクス、および予測例のプロットを生成して保存し、モデルの性能と学習の進捗を視覚的に確認できるようにします。 |
compile | boolまたはstr | False | PyTorch 2.xのtorch.compileグラフコンパイルをbackend='inductor'で有効にします。True → "default"、False → 無効、または"default"、"reduce-overhead"、"max-autotune-no-cudagraphs"などの文字列モードを指定できます。未対応の場合は警告を表示し、eagerモードにフォールバックします。 |
channels_last | bool | None | トレーニング中の畳み込みでは、channels_last(NHWC)メモリ形式を使用します。None は、WindowsおよびAMD ROCmを除き、PyTorch 1.11以降のCUDA環境で自動的に有効になりますが、WindowsとAMD ROCmでは速度が低下することが測定されています。False は無効にし、True は明示的に有効にします。CPUまたはMPSでのトレーニングでは常にNCHWが使用され(True は警告とともに無視されます)。 |
max_det | int | 300 | トレーニング時の検証で、画像あたりの最大検出数を設定します。detect、segment、pose、OBBでは、デフォルトの300は、トレーニング/検証データ内のラベル付き物体数が300を超える場合に限り、その最大数まで増加します。その他の値は固定され、上限を超えると警告が表示されます。 |
batch引数には3種類の値を指定でき、トレーナーはさらに2つの安全策を適用します。
- 固定 バッチサイズ: 整数値(例:
batch=16)を設定し、バッチあたりの画像数を直接指定します。マルチGPUトレーニングでは、このグローバルバッチサイズが各GPUに均等に分割されるため、GPU数以上の値を指定する必要があります。割り切れない分は切り捨てられます(例: 2台のGPUでbatch=15を指定すると、各GPUで7枚の画像を使用してトレーニングします)。 - 自動モード(GPUメモリの60%):
batch=-1を使用すると、学習に利用可能なCUDAメモリの約60%に合わせてバッチサイズが自動調整されます。 - 使用率を指定する自動モード: 割合の値を設定すると(例:
batch=0.70)、利用可能なGPUメモリに対する指定した割合に基づいてバッチサイズが調整されます。 - OOM自動再試行:最初のエポック中にCUDAのメモリ不足エラーが発生すると、トレーナーはバッチサイズを自動的に半分にして再試行します(最大3回)。これはシングルGPUトレーニングにのみ適用されます。マルチGPU(DDP)トレーニングでは、エラーが直ちに発生します。
- 適合する値が見つからない場合: 使用可能なプロファイルを生成できるバッチサイズ候補がない場合、AutoBatchは無関係なデフォルト値に暗黙的にフォールバックせず、明確な
RuntimeErrorを発生させます。
データ拡張の設定とハイパーパラメーター#
データ拡張手法は、トレーニングデータに多様性を加え、未知のデータに対するモデルの汎化性能を高めることで、YOLOモデルの堅牢性と性能を向上させるために不可欠です。次の表では、各拡張引数の目的と効果を説明します。
| 引数 | 種類 | デフォルト | 対応タスク | 範囲 | 説明 |
|---|---|---|---|---|---|
hsv_h | float | 0.015 | detect, segment, semantic, depth, classify, pose, obb | 0.0 - 1.0 | 色相環の一部の割合に応じて画像の色相を調整し、色に変化を加えます。さまざまな照明条件へのモデルの汎化に役立ちます。classify の場合、auto_augment=None のときにのみ適用されます。 |
hsv_s | float | 0.7 | detect, segment, semantic, depth, classify, pose, obb | 0.0 - 1.0 | 画像の彩度を割合に応じて変化させ、色の鮮やかさを調整します。さまざまな環境条件のシミュレーションに役立ちます。classify の場合、auto_augment=None のときにのみ適用されます。 |
hsv_v | float | 0.4 | detect, segment, semantic, depth, classify, pose, obb | 0.0 - 1.0 | 画像の値(明るさ)を割合に応じて変更し、さまざまな照明条件下でのモデルの性能向上に役立ちます。classify の場合、auto_augment=None のときにのみ適用されます。 |
degrees | float | 0 | detect, segment, semantic, depth, pose, obb | 0.0 - 180 | 指定された角度の範囲内で画像をランダムに回転させ、さまざまな向きのオブジェクトを認識するモデルの能力を高めます。 |
translate | float | 0.1 | detect, segment, semantic, depth, pose, obb | 0.0 - 1.0 | 画像サイズに対する割合に応じて画像を水平方向および垂直方向に平行移動させ、部分的にしか見えないオブジェクトの検出学習に役立てます。 |
scale | float | tuple | 0.5 | detect, segment, semantic, depth, classify, pose, obb | 0 - 1、または明示的な (min, max) タプル(classify には適用されません) | ゲイン係数を使って画像を拡大・縮小し、カメラからの距離が異なるオブジェクトをシミュレートします。 |
shear | float | 0 | detect, segment, semantic, depth, pose, obb | -180 - +180 | 指定された角度で画像をせん断変換し、さまざまな角度からオブジェクトを見た状態を再現します。 |
perspective | float | 0 | detect, segment, semantic, depth, pose, obb | 0.0 - 0.001 | 画像にランダムな射影変換を適用し、3D空間内のオブジェクトをモデルが理解する能力を高めます。 |
flipud | float | 0 | detect, segment, semantic, depth, classify, pose, obb | 0.0 - 1.0 | 指定された確率で画像を上下反転し、オブジェクトの特性を変えずにデータの多様性を高めます。 |
fliplr | float | 0.5 | detect, segment, semantic, depth, classify, pose, obb | 0.0 - 1.0 | 指定された確率で画像を左右反転します。対称的なオブジェクトの学習やデータセットの多様性向上に役立ちます。 |
bgr | float | 0 | detect, segment, semantic, depth, pose, obb | 0.0 - 1.0 | 指定された確率で画像のチャンネルをRGBからBGRに反転させ、チャンネル順序の誤りに対する堅牢性を高めます。 |
mosaic | float | 1 | detect, segment, semantic, pose, obb | 0.0 - 1.0 | 4枚のトレーニング画像を1枚に結合し、さまざまなシーン構成と物体間の相互作用をシミュレートします。複雑なシーンの理解に効果的です。 |
mixup | float | 0 | detect, segment, semantic, pose, obb | 0.0 - 1.0 | 2枚の画像とそれぞれのラベルをブレンドして、合成画像を作成します。ラベルノイズと視覚的な多様性を加えることで、モデルの汎化性能を高めます。 |
cutmix | float | 0 | detect, segment, semantic, pose, obb | 0.0 - 1.0 | 2枚の画像の一部を組み合わせ、領域を区別したまま部分的にブレンドします。オクルージョンの状況を作り出すことで、モデルの堅牢性を高めます。 |
copy_paste | float | 0 | segment, semantic, obb | 0.0 - 1.0 | 貼り付け対象となるオブジェクトの割合です。flip は画像内でオブジェクトを反転させ、mixup は画像間で適用する確率としてもこの値を使用します。 |
copy_paste_mode | str | flip | segment, semantic, obb | - | 使用する copy-paste 戦略を指定します。選択肢は 'flip' と 'mixup' です。 |
auto_augment | str | randaugment | classify | - | 事前定義されたデータ拡張ポリシー('randaugment'、'autoaugment'、または 'augmix')を適用し、視覚的な多様性によってモデルの性能を高めます。 |
erasing | float | 0.4 | classify | 0.0 - 1.0 | トレーニング中に画像の領域をランダムに消去し、モデルが目立ちにくい特徴に注目するよう促します。 |
augmentations | list | None | detect, segment, semantic, depth, pose, obb | - | 高度なデータ拡張に使用するカスタムAlbumentations変換です(Python APIのみ)。特殊なデータ拡張のニーズに応じて、変換オブジェクトのリストを指定できます。 |
これらの設定は、データセットとタスクの具体的な要件に合わせて調整できます。値を変えて試すことで、最適な拡張戦略を見つけやすくなります。
トレーニング時のデータ拡張処理について詳しくは、リファレンスセクションを参照してください。
ロギング#
トレーニング指標、プロット、チェックポイントは常に実行ディレクトリに書き込まれます。また、Ultralyticsは、インストールして有効にした実験トラッカーにもデータをストリーミングします。Comet、ClearML、TensorBoard、MLflow、Weights & Biases、DVCLiveが対象です。各ロガーはUltralyticsの設定から切り替えられます。たとえばyolo settings tensorboard=Trueを使用します。以下では、最も一般的な3つの構成を紹介します。
Comet#
Cometは、データサイエンティストや開発者が実験やモデルを追跡、比較、説明、最適化できるプラットフォームです。リアルタイムの指標、コードの差分、ハイパーパラメーターの追跡機能を提供します。
Cometを使用するには:
# pip install comet_ml
import comet_ml

comet_ml.login()
CometのWebサイトでアカウントにサインインし、APIキーを取得してください。実験を記録するには、APIキーを環境変数またはスクリプトに追加する必要があります。
ClearML#
ClearMLは、実験の追跡を自動化し、リソースを効率的に共有できるオープンソースプラットフォームです。チームがMLの作業をより効率的に管理、実行、再現できるように設計されています。
ClearMLを使用するには:
# pip install clearml
import clearml

clearml.browser_login()
このスクリプトを実行した後、ブラウザーでClearMLアカウントにサインインし、セッションを認証する必要があります。
TensorBoard#
TensorBoardは、TensorFlow用の可視化ツールキットです。TensorFlowのグラフを可視化したり、グラフの実行に関する定量的なメトリクスをプロットしたり、グラフを通過する画像などの追加データを表示したりできます。
Google ColabでTensorBoardを使用するには:
%load_ext tensorboard
tensorboard --logdir ultralytics/runs # replace with 'runs' directoryTensorBoardをローカルで使用するには、以下のコマンドを実行し、localhost:6006で結果を確認します。
tensorboard --logdir ultralytics/runs # replace with 'runs' directoryこれによりTensorBoardが起動し、トレーニングログが保存されているディレクトリが指定されます。
ロガーを設定したら、通常どおりトレーニングを開始します。トレーニング指標は選択したプラットフォームに自動的に記録され、経時的な性能の監視、モデルの比較、改善点の特定に利用できます。
次のステップ#
トレーニング済みモデルを保留データで検証し、実環境での精度を確認してから、ONNX、TensorRT、またはその他のデプロイ形式にエクスポートします。COCO8ではなく独自のデータでトレーニングしますか?まずデータセットガイドに従ってフォーマットしてください。
よくある質問#
はい。Ultralytics Platformのクラウドトレーニングには、すぐに利用できる無料クレジットが含まれています。データセットをアップロードし、モデルとGPUを選択すれば、ブラウザーから直接トレーニングできます。
Ultralytics YOLO26を使用して物体検出モデルをトレーニングするには、Python APIまたはCLIを使用できます。以下にそれぞれの例を示します。
単一GPUおよびCPUでのトレーニング例from ultralytics import YOLO # モデルを読み込む model = YOLO("yolo26n.pt") # 事前トレーニング済みモデルを読み込みます(トレーニングにはこちらを推奨します) # モデルをトレーニングする results = model.train(data="coco8.yaml", epochs=100, imgsz=640)詳細については、トレーニング設定のセクションを参照してください。
Ultralytics YOLO26のトレーニングモードの主な機能は次のとおりです。
- データセットの自動ダウンロード: COCO、VOC、ImageNetなどの標準データセットを自動的にダウンロードします。
- マルチGPUサポート: 複数のGPUを使用してトレーニングを拡張し、処理を高速化します。
- ハイパーパラメーター設定: YAMLファイルまたはCLI引数でハイパーパラメーターをカスタマイズできます。
- 可視化とモニタリング: トレーニングメトリクスをリアルタイムで追跡し、より深い分析に役立てます。
これらの機能により、ニーズに合わせた効率的なトレーニングが可能になります。詳細については、トレーニングモードの主な機能のセクションを参照してください。
中断したセッションからトレーニングを再開するには、
resume引数をTrueに設定し、最後に保存されたチェックポイントへのパスを指定します。トレーニング再開の例from ultralytics import YOLO # 部分的にトレーニングされたモデルを読み込む model = YOLO("path/to/last.pt") # トレーニングを再開する results = model.train(resume=True)詳細については、中断したトレーニングの再開のセクションを確認してください。
クラス不均衡は、トレーニングデータ内で一部のクラスのサンプル数が他のクラスより大幅に少ない場合に発生します。その結果、モデルが希少クラスで良好な性能を発揮できないことがあります。Ultralytics YOLOは、
cls_pw引数によるクラス重み付けに対応しており、この問題に対処できます。損失の重み付けは、クラス不均衡への対処で説明されているように、希少クラスのデータを収集してオーバーサンプリングした後、最後の手順として適用するのが最も効果的です。cls_pw引数は、クラス頻度の逆数に基づいてクラス重み付けの強さを制御します。cls_pw=0.0(デフォルト):クラス重み付けを無効にしますcls_pw=1.0:クラス頻度の逆数による重み付けを完全に適用します0.0から1.0までの値:中程度の不均衡に対して部分的な重み付けを行います
クラス重みは
(1.0 / class_counts) ^ cls_pwとして計算され、平均が1.0になるように正規化されます。class_countsはクラスごとのラベル付きオブジェクト数、分類の場合はクラスごとのトレーニング画像数です。また、classes=によって除外されたクラスなど、トレーニングラベルがないクラスの重みは1.0になります。セマンティックセグメンテーションでは、代わりにピクセル頻度に基づいて重みが計算されます。これは(1.0 / ln(1.02 + p)) ^ cls_pwとして表され、pは各クラスにおけるラベル付きトレーニングピクセルの割合です。そのため、ラベル付きピクセルがないクラスの重みが最大になります。不均衡データセットでのトレーニングfrom ultralytics import YOLO # 事前トレーニング済みモデルを読み込む model = YOLO("yolo26n.pt") # クラス不均衡が深刻なデータで、クラス重み付けを完全に適用してトレーニングする results = model.train(data="custom.yaml", epochs=100, imgsz=640, cls_pw=1.0) # または、中程度の不均衡に対して部分的な重み付け(0.25)を使用する results = model.train(data="custom.yaml", epochs=100, imgsz=640, cls_pw=0.25)ヒントクラス不均衡が中程度のデータセットでは
cls_pw=0.25から始め、希少クラスの性能が依然として低い場合は1.0に増やします。トレーニングログで計算されたクラス重みを確認し、重みの分布を検証できます。はい。Ultralytics YOLO26は、Metal Performance Shaders(MPS)フレームワークを利用したApple siliconチップでのトレーニングに対応しています。トレーニングデバイスとして
mpsを指定してください。MPSでのトレーニング例from ultralytics import YOLO # 事前トレーニング済みモデルを読み込む model = YOLO("yolo26n.pt") # Appleシリコンチップ(M1/M2/M3/M4)でモデルをトレーニングする results = model.train(data="coco8.yaml", epochs=100, imgsz=640, device="mps")詳細については、AppleシリコンでのMPSトレーニングのセクションを参照してください。
Ultralytics YOLO26では、引数を使用してバッチサイズ、学習率、エポック数など、さまざまなトレーニング設定を構成できます。概要を以下に示します。
引数 デフォルト 説明 modelNoneトレーニングに使用するモデルファイルへのパス。 dataNoneデータセットYAML(例: coco8.yaml)、または分類の場合はデータセットのディレクトリや名前(例:imagenet10)へのパス。epochs100トレーニングの合計エポック数。 batch16整数または自動モードで設定できるバッチサイズ。 imgsz640トレーニングの目標画像サイズ。 deviceNonecpu、0、0,1、mpsなど、トレーニングに使用する計算デバイス。saveTrueトレーニングチェックポイントと最終モデルの重みの保存を有効にします。 トレーニング設定の詳細なガイドについては、トレーニング設定のセクションを確認してください。


コメント1,074
質問したり、結果を共有したり、ほかの人をサポートしたりできます。
drcosimo
Hi there, I' m new to this field and I'm trying to train a YOLO model for detection and tracking of video streams for security.
Until now I have managed to create my pipeline for training and I want to understand if it's a correct/possible approach:
-
Load a pretrained model from yolo
-
transfer learning with my custom dataset that possibly can focus on just some classes(person,car,truck,bus,bycicle)
-
Validate model to see how it performs
-
Operate a tuning with the custom best model and using my custom dataset
-
Retrain the initial pretrained model with my custom dataset and the best hyperparameters found in the tuning process.
-
Validate final model
The questions are several:
- The above approach is logically correct or it has flaws?
- Is it correct to narrow the detected classes? Or it isn't crucial to the precision of the model?
- When tuning(if its a correct approach) should i use my dataset or try the coco dataset to keep generalization?
- When tuning should i specify the classes to detect?
- When retraining should I use the first pretrained model or it is better to use my custom trained model?
- In the final training am I using the correct parameters?
Here the code of the pipeline:
from ultralytics import YOLO import yaml
load pretrained model from coco dataset
model:YOLO = YOLO('yolov8n.yaml').load('yolov8n.pt')
train_classes = []
NOTE if you're using COCO format, the new dataset should also be in COCO format.
operate transfer learning with my custom dataset, narrowing the classes to the ones I want to detect
model.train(data='custom_data.yaml',classes=train_classes,epochs=200,imgsz=640,optimizer='AdamW',device=[0,1],augment=True,name='custom_model')
load custom model
custom_model = YOLO('path/to/best.pt')
validate custom model
custom_model.val()
try tuning to find the best hyperparameters for my custom model
custom_model.tune(data='custom_data.yaml', epochs=50, iterations=100,optimizer="AdamW", plots=True,save=True,val=True)
load best hyperparameters
cfg = yaml.load(open('path/to/best_hyperparameters.yaml'))
retrain custom model from pretrained on coco with best hyperparameters
model.train(data='custom_data.yaml',classes=train_classes,epochs=200,imgsz=640,device=[0,1],name='custom_model',exist_ok=True,optimizer='AdamW',**cfg)
load and validate
tuned_custom_model = YOLO('path/to/best.pt')
tuned_custom_model.val()
Thank you for your effort and time in this project!
3 Paula DerrengerUltralytics(編集済み)
Hello,
Your approach to training a YOLO model for detection and tracking is well-thought-out and mostly aligns with best practices. Here are some insights and answers to your questions:
-
Approach Validity: Your steps are logically sound. Starting with a pretrained model and applying transfer learning to your specific classes is a recommended strategy. Validating and tuning based on the performance helps refine the model further.
-
Narrowing Detected Classes: It's perfectly fine to focus on specific classes if those are the only ones relevant to your use case. This can help improve the model's performance by reducing the complexity of the problem it needs to solve.
-
Dataset for Tuning: Use your custom dataset for tuning. This ensures that the hyperparameters are optimized for the specific characteristics of your data rather than the general characteristics of the COCO dataset.
-
Specifying Classes During Tuning: When tuning, you should specify the classes if your dataset is a subset of the original classes used in the pretrained model. This helps in focusing the model’s learning and evaluation on relevant classes.
-
Model for Retraining: Tuning only finds hyperparameters, so the usual practice is to train again from the original pretrained model with the best hyperparameters, as in your step 5. Continuing from the already fine-tuned model is also possible, but then it effectively trains for longer, which makes the result harder to compare with the tuning runs.
-
Parameters for Final Training: The parameters should be chosen based on the results of your tuning. Ensure that they are the ones that gave the best validation performance during the tuning phase.
Keep up the great work, and don't hesitate to reach out if you have more questions!
-
Thank you very much for you response. I adjusted my script to follow your insights. I have another question regarding transfer learning. The normal approach in transfer learning is to freeze the first n layers to preserve the more generic feature extraction properties of an already trained model and then it is retrained letting only the remaining layers update. I found the callback function to achieve this. My question is, applying the fine-tuning as specified by ultralytics documentation has the same effect? What I mean is: executing the train method again on a pretrained model changing the dataset causes the underlying library to execute the freeze automatically? If it isn't the case it is not clear to me why the fine-tuning is said to have the same effect as applying transfer learning.
Another question is: it is useful to take a pretrained model from ultralytics and train it with the coco dataset? Because from what I know the pretrained model is already trained using coco dataset. Doing such a thing following the logic you provide for fine-tuning would be essentially the same as resuming a training / do the same train with more epochs?
Thank you again for your time.
- Paula DerrengerUltralytics
Hello,
Thank you for your follow-up questions. Let's address each of them:
-
Freezing Layers in Transfer Learning: The Ultralytics YOLO framework does not automatically freeze any layers when you initiate training, even if you're using a pretrained model. If you want to freeze the first N layers (common in transfer learning to preserve learned features), you must explicitly specify this in your training script. This is different from some other frameworks that might automate this aspect of transfer learning.
-
Training on COCO Dataset with a Pretrained Model: If the pretrained model you are using was already trained on the COCO dataset, retraining it on the same dataset without significant changes or additional data might not yield substantial improvements. It could be beneficial for fine-tuning if you've made modifications to the model architecture or if you're using a significantly altered version of the dataset. However, generally, this approach would indeed be akin to simply extending the training duration.
For fine-tuning and transfer learning, it's crucial to tailor the approach based on what changes you've made to the dataset or model and your specific goals (e.g., improving accuracy, adapting to new classes, etc.).
I hope this clarifies your queries! If you have more questions or need further assistance, feel free to ask.
-
-
wangztao
这个翻译太那啥了吧, train翻译成火车?
3- Paula DerrengerUltralytics
哈哈,确实,“train”翻译成“火车”听起来很有趣 😄。这里的“train”应该翻译为“训练”,指的是在机器学习中对模型进行训练,以提高其准确性和效率。感谢您指出这个问题,我们会尽快修正翻译错误。如果您有任何其他建议或问题,欢迎随时告诉我们!🚀
2
Syedshajib55
Hi, does platform.ultralytics currently support using custom PyTorch modules directly via a YAML configuration without modifying tasks.py or the core source code? We are attempting to train a custom architecture (e.g., YOLO26) and want to know if there is an existing feature for dynamic module registration.
1Muh-7
Hi, As far as I know, not at the moment. Ultralytics doesn't seem to have a built-in dynamic registration system where you can define a custom PyTorch module outside the repo and then use it directly in the YAML.
Usually, the custom module still needs to be imported/registered in
tasks.pyso thatparse_model()can resolve it from the YAML.It would be really useful if Ultralytics added something like a
register_module()API for this, though. Murat Raimbekov
@Syedshajib55 @Muh-7 Platform can train any model that the
ultralyticsPython package can build, including custom architectures from a modified package or fork. The custom code runs on your own hardware; Platform receives real-time metrics, console and system logs, plots, and the final weights.There is no dynamic registration API.
parse_model()resolves layer names from theultralytics.nn.tasksnamespace, so a name in your YAML must exist there. You don't need to edittasks.pyfor that — expose the class from your own package before building the model:import ultralytics.nn.tasks as tasks from my_custom_package import MyBlock tasks.MyBlock = MyBlock # now `[-1, 1, MyBlock, [...]]` resolves in the YAMLFull local training with metric streaming to Platform:
pip install "ultralytics>=8.4.120"
export ULTRALYTICS_API_KEY="YOUR_API_KEY"
import ultralytics.nn.tasks as tasks from my_custom_package import MyBlock from ultralytics import YOLO tasks.MyBlock = MyBlock model = YOLO("custom-model.yaml") # YAML referencing MyBlock model.train( data="ul://username/datasets/my-dataset", epochs=100, project="username/my-project", name="custom-architecture", )projectandnameenable the Platform integration automatically; nothing else is required. Verified on 8.4.157 with a customnn.Moduleinserted into a YOLO26n YAML: the model builds, trains, and appears on Platform as a completed run with weights and train args.One caveat: the saved
.ptpickles the class by import path (my_custom_package.MyBlock), so any environment that loads it needs that package importable — otherwise loading fails withModuleNotFoundError. That includes Platform-side features that load the uploaded weights with the stock package (Predict, Export, Deploy); local training and streaming are unaffected. Setup details: https://docs.ultralytics.com/platform/train/cloud-training/#remote-training
RussellLee12345
Hello all,
I want my training images to rotate 360 degrees randomly. How do I set the hyper-parameter: degrees?
Thanks a lot.
1 Glenn JocherUltralytics
@RussellLee12345 to rotate your training images randomly up to 360 degrees, set the
degreesparameter to180in your training configuration. This allows for rotations within the range of -180 to +180 degrees. For more details, see the augmentation settings in the Train Settings documentation.
GKYoffice
Please tell me how to set imgsz when I use the yolo11 model for training. Can it only be an integer (this means that the final input is a square)? After I modify this parameter, will the input interface of the network change the input of data? There are corresponding transformations, such as imgsz=1280, does it mean that my input data will be resized to 1280*1280 and input into the network for training?
Thanks!
1- Glenn JocherUltralytics
@GKYoffice when using the YOLO11 model,
imgszcan be set as an integer, which resizes the input data to a square of that size (e.g.,1280x1280). This parameter adjusts the input dimensions for training. For more details, please visit the training documentation.
IruhDegSet
hi, I'm just wondering if yolov8 accepts class weights, in the data.yaml file:
names: ['class 1', 'class 2', 'class 3']
classes_weights: [c1_weight, c2_weight, c3_weight]
if no how to incorpoorate wighted loss in yolov8 THX
1I forgot to mention that the task is segmentation not bb detection
1- Glenn JocherUltralytics
@IruhDegSet yOLOv8 does not directly support class weights in the
data.yamlfile. To incorporate weighted loss, you can modify the loss function in the training script to apply different weights to each class. For more details, you might explore custom loss implementations in PyTorch. @glenn-jocher thank you for your reply, does this apply on yolo v 11 too?
- Glenn JocherUltralytics(編集済み)
Yes, YOLO11 supports similar features, including training and hyperparameter customization. For specific details on YOLO11, please refer to the documentation or the relevant sections in the repository.
 User
Dear author, how are the weights of these three losses set: box: 7.5, cls: 0.5, dfl: 1.5? Are they adjusted on the COCO validation, manually adjusted, or obtained through hyperparameter search? For the model I trained, the output confidence scores are very low. I directly increased the weight of cls by 10 times, but the effect did not improve. What other methods can I take?
1- Glenn JocherUltralytics
@Stephen-Hao the weights for the
box,cls, anddfllosses in YOLOv8 are typically set based on empirical results and fine-tuning on standard datasets like COCO. These values are chosen to balance the contributions of each loss component to the overall training process. If increasing theclsweight did not improve your model's performance, consider the following approaches:- Hyperparameter Tuning: Experiment with other hyperparameters such as learning rate, batch size, and augmentation settings.
- Data Quality: Ensure your dataset is well-labeled and balanced. Poor quality data can significantly affect model performance.
- Training Duration: Increase the number of epochs to allow the model more time to learn.
- Validation: Regularly validate your model to monitor overfitting and adjust training strategies accordingly.
For more detailed guidance, you can refer to the Ultralytics YOLO training documentation.
- User
Thank you a lot!
- Glenn JocherUltralytics
@Stephen-Hao thank you for your question! The weights for
box,cls, anddfllosses are typically set based on empirical results and fine-tuning on standard datasets like COCO. If increasing theclsweight didn't improve your model's performance, consider experimenting with other hyperparameters such as learning rate, batch size, and augmentation settings. Additionally, ensure your dataset is well-labeled and balanced. For more detailed guidance, you can refer to the Ultralytics YOLO training documentation.
karthikUthaman
how to train a trained model again with new dataset
1- Glenn JocherUltralytics(編集済み)
Hey there! 🙌 It's awesome that you're looking to further improve your model with new data. To re-train a pre-trained model on a new dataset, you can simply follow these steps:
-
Make sure your new dataset is prepared in the same YOLO format as your initial training (a dataset YAML plus one
.txtlabel file per image). -
Load your pre-trained model using the
YOLOloading method, then specify your new dataset in thetrainmethod. Here's a quick code snippet for clarity:from ultralytics import YOLO # Load your pre-trained model model = YOLO('path/to/your/pretrained/model.pt') # Start training on the new dataset results = model.train(data='path/to/your/new/dataset.yaml', epochs=50, imgsz=640)
Just replace
'path/to/your/pretrained/model.pt'and'path/to/your/new/dataset.yaml'with the actual paths to your model and new dataset config file, respectively. Adjust theepochsandimgsz(image size) to suit your needs. 🛠️That's it! Your model will now continue training on the new dataset. If you have any further questions or run into issues, feel free to ask. Happy training! 🚀
-
songziang182
谢谢你们开发了这么完善的 yolov8🙏, 我想问一下,这两种训练方式的区别 model = YOLO('yolov8n.pt') model = YOLO('yolov8n.yaml').load('yolov8n.pt') model.train(.........)
1- Paula DerrengerUltralytics
Hello there! 😊
The main difference between the two training methods you've mentioned:
-
model = YOLO('yolov8n.pt'): This directly loads a pretrained YOLOv8n model. It's the simplest way to load a model that has already been trained, making it ready for further training, evaluation, or inference right away. -
model = YOLO('yolov8n.yaml').load('yolov8n.pt'): This approach builds a new model from the YAML configuration file and then transfers the weights from the pretrained.ptmodel. It's a two-step process, where the model is first constructed based on the architecture defined in the YAML file, and then the weights from a pretrained model are loaded. This method is useful when you want to customize the model architecture before loading the weights.
Both methods ultimately get you to a similar starting point for continuing training or making predictions. The choice depends on whether you need to customize the model architecture as defined in the YAML file before applying the pretrained weights.
Let me know if this helps or if you have more questions!
-
Thank you for answering me. I find it very useful. I have another question, which is the configuration file yolov8n.yaml. I didn’t find where it is. Can I adjust the scale of the model, for example, n, s, m, l, etc., is this the case?
- Paula DerrengerUltralytics(編集済み)
Hey! 😊 Thank you for your kind words, and I'm glad the information was helpful to you!
Regarding the
yolov8n.yamlconfiguration file, it defines the architecture for YOLOv8 models. All scales share one model file (yolov8.yaml) that contains ascalessection mapping each letter to[depth, width, max_channels]; the letter in the name you load (yolov8n.yaml,yolov8s.yaml, ...) selects the scale:scales: n: [0.33, 0.25, 1024] s: [0.33, 0.50, 1024]To create or modify a model, copy the YAML from the Ultralytics GitHub repository, edit the layers or scales, then load it together with the pretrained weights as you mentioned:
model = YOLO('path/to/custom_yolov8.yaml').load('yolov8n.pt')
model.train(.........)
Model changes can require a solid understanding of the network architecture to be effective.
I hope this clarifies your question! Feel free to reach out if you have further queries or need more examples. 😊
vonzo
So, imgsz works different when training than when predicting?
For train: if it's an
intthe ratio will be kept and the train function will take care of that (can't be atuple). For predict: if it's anintthe image will be resized as a square of sizeimgsz x imgsz, if it's atuplethe image will be resized usingHxWand the user has to take care of the ratio andstride.Is this right? I would add a comment in the doc to avoid confusions
1- Paula DerrengerUltralytics(編集済み)
You've got it mostly right! 👍 For training (
train),imgszis anint, the aspect ratio is maintained and resizing is handled internally. It can't be atuple. For prediction (predict), anintimgszresizes the longest side toimgszwhile keeping the aspect ratio, with padding only up to a multiple of the model stride (so the image is not forced into a square), and a[h, w]list sets the size explicitly.Great suggestion on the documentation comment – clarity is key! If you have any more questions or need further examples, feel free to ask. 😊