Ultralytics YOLO 모델 학습
소개#
딥러닝 모델을 학습하려면 데이터로 모델을 학습시키고, 정확하게 예측할 수 있도록 파라미터를 조정해야 합니다. Ultralytics YOLO26의 Train 모드는 최신 하드웨어에서 객체 탐지 및 기타 비전 태스크 모델을 효율적으로 학습합니다. 이 가이드에서는 YOLO26으로 자체 모델을 학습하는 데 필요한 세부 정보를 다룹니다. 아직 Ultralytics를 설치하지 않았다면 빠른 시작 가이드부터 확인하세요.
계획된 학습 예제는 출시 예정인 YOLO27 미리 보기를 참조하세요.
시청: Google Colab에서 사용자 지정 데이터셋으로 YOLO 모델을 학습하는 방법.
학습에 Ultralytics YOLO를 선택해야 하는 이유#
YOLO26의 Train 모드를 사용하는 이유:
- 효율성: 단일 GPU 환경이든 여러 GPU로 확장하는 환경이든 하드웨어를 최대한 활용합니다.
- 다용성: COCO, VOC, ImageNet처럼 쉽게 사용할 수 있는 데이터셋 외에도 사용자 지정 데이터셋으로 학습할 수 있습니다.
- 사용 편의성: 간편한 학습 경험을 제공하는 강력하면서도 단순한 CLI 및 Python 인터페이스입니다.
- 유연한 하이퍼파라미터: 모델 성능을 세밀하게 조정할 수 있도록 다양한 하이퍼파라미터를 사용자 지정할 수 있습니다. 더 세밀하게 제어하려면 트레이너 자체를 사용자 지정할 수 있습니다.
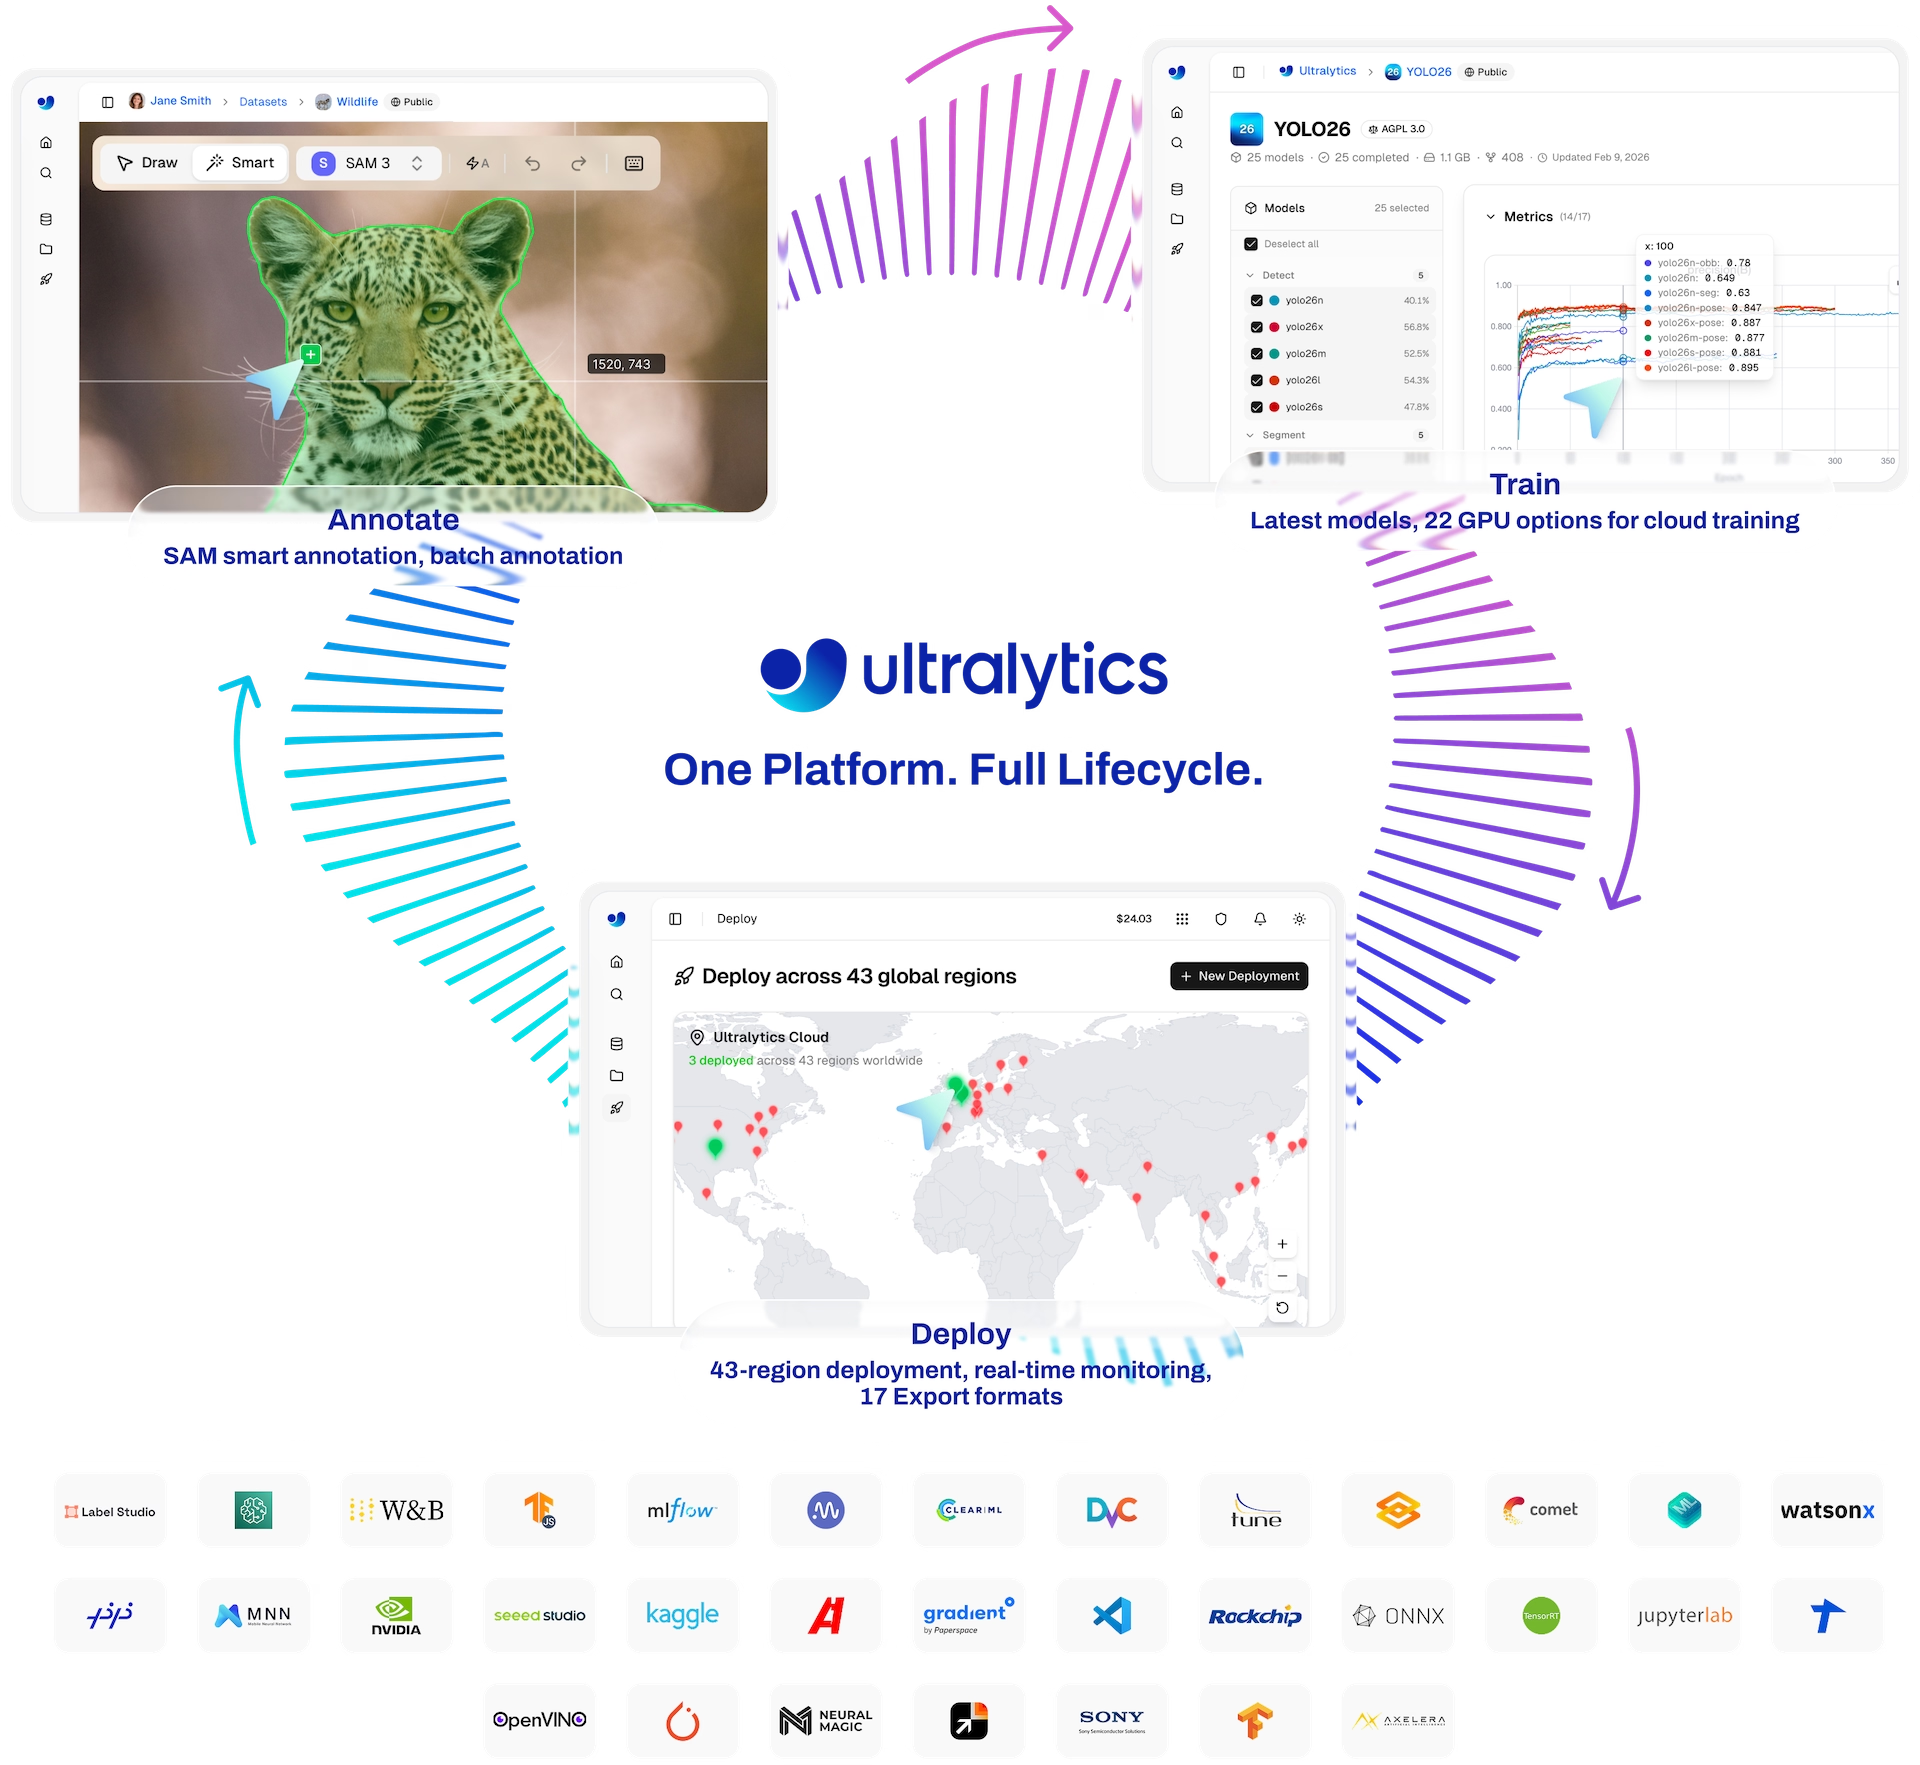
- 클라우드 학습: 실시간 지표와 자동 체크포인트 저장 기능을 활용하여 Ultralytics Platform의 클라우드 GPU에서 학습할 수 있습니다.
Train 모드의 주요 기능#
YOLO26의 Train 모드에서 주목할 만한 기능은 다음과 같습니다:
- 데이터셋 자동 다운로드: 다운로드 소스가 지정된 데이터셋 구성은 처음 사용할 때 자동으로 다운로드됩니다(예:
yolo train data=coco8.yaml). 지원되는 형식과 데이터셋은 데이터셋 개요를 참조하세요. - 다중 GPU 지원: 여러 GPU에 학습을 분산해 학습 시간을 단축합니다.
- 하이퍼파라미터 구성: YAML 구성 파일이나 CLI 인수를 통해 하이퍼파라미터를 수정할 수 있습니다.
- 시각화 및 모니터링: 학습 지표를 실시간으로 추적하고 학습 과정을 시각화하여 더 나은 인사이트를 얻을 수 있습니다.
사용 예시#
이미지 크기 640으로 COCO8 데이터셋에서 YOLO26n을 100 에폭 동안 학습합니다. device 인수를 사용해 학습 디바이스를 지정할 수 있습니다. 인수를 전달하지 않으면 GPU를 사용할 수 있는 경우 device=0가 사용되며, 그렇지 않으면 device='cpu'가 사용됩니다.
Windows에서 스크립트로 학습을 시작할 때 RuntimeError이 발생할 수 있습니다. 학습 코드 앞에 if __name__ == "__main__": 블록을 추가하여 해결하세요.
장치는 자동으로 결정됩니다. GPU를 사용할 수 있으면 GPU(기본 CUDA 장치 0)를 사용하고, 그렇지 않으면 CPU에서 학습을 시작합니다.
from ultralytics import YOLO

# 모델 로드
model = YOLO("yolo26n.yaml")  # YAML에서 새 모델을 생성합니다.
model = YOLO("yolo26n.pt")  # 사전 학습된 모델을 불러옵니다(학습에 권장).
model = YOLO("yolo26n.yaml").load("yolo26n.pt")  # YAML에서 모델을 생성하고 가중치를 전이합니다.

# 모델 학습
results = model.train(data="coco8.yaml", epochs=100, imgsz=640)
다중 GPU 학습#
다중 GPU 학습은 여러 GPU에 학습 부하를 분산해 사용 가능한 하드웨어를 더 효과적으로 활용합니다. 이 기능은 Python API와 명령줄 인터페이스에서 모두 사용할 수 있습니다. 다중 GPU 학습을 활성화하려면 사용할 GPU 디바이스 ID를 지정하세요.
GPU 2개(CUDA 디바이스 0 및 1)로 학습하려면 다음 명령을 사용하세요. 필요한 경우 GPU를 더 추가하면 됩니다.
from ultralytics import YOLO

# 모델 로드
model = YOLO("yolo26n.pt")  # 사전 학습된 모델을 불러옵니다(학습에 권장).

# GPU 2개로 모델을 학습합니다.
results = model.train(data="coco8.yaml", epochs=100, imgsz=640, device=[0, 1])

# 사용률이 가장 낮은 GPU 2개로 모델을 학습합니다.
results = model.train(data="coco8.yaml", epochs=100, imgsz=640, device=[-1, -1])Windows에서 torch>=2.4용 공식 PyTorch 휠을 사용하면 다중 GPU 학습이 작동하지 않습니다. Ultralytics는 torch.distributed.run을 통해 DDP를 실행하는데, 이때 랑데부 단계에서 TCPStore를 생성합니다. PyTorch 2.4부터 해당 구성은 기본적으로 libuv 백엔드를 사용하며, 공식 Windows 휠은 libuv를 포함하지 않고 빌드됩니다. 이로 인해 학습이 다음 오류와 함께 즉시 종료됩니다:
RuntimeError: use_libuv was requested but PyTorch was built without libuv support
USE_LIBUV=0을 설정해도 문제가 해결되지 않습니다. 랑데부 과정에서 TCPStore을 직접 생성하며 해당 코드 경로는 변수를 읽지 않기 때문입니다. 여러 GPU를 사용하려면 Linux 또는 WSL2에서 학습하거나, Windows에서 device=0을 사용하여 단일 GPU로 학습하세요.
여러 디바이스(예: device=[0, 1])를 지정하면 Ultralytics는 내부적으로 새 트레이너 인스턴스를 생성하고 내부에서 torch.distributed.run을 실행합니다. 이 기능은 표준 CLI 사용 방식과 수정하지 않은 Python 스크립트에서 작동합니다.
하지만 스크립트에 사용자 지정 트레이너, 검증기, 데이터셋, 증강 파이프라인 등의 사용자 지정 구성 요소가 포함된 경우 이러한 객체를 자동으로 직렬화하여 DDP 하위 프로세스로 전달할 수 없습니다. 이 경우 torch.distributed.run을 사용하여 스크립트를 직접 실행해야 합니다:
python -m torch.distributed.run --nproc_per_node 2 your_training_script.pyAMD GPU 학습에는 표준 device=0 또는 device=cuda:0 구문과 함께 PyTorch ROCm 빌드를 사용합니다. ROCm 설치, 다중 GPU 학습, AMP 관련 참고 사항, 내보낸 모델의 MIGraphX 추론에 대해서는 AMD 통합 가이드를 참조하세요.
Intel GPU 학습에는 device=xpu:0을 사용하거나, XCCL을 제공하는 PyTorch 빌드에서 여러 XPU ID를 사용합니다.
Huawei Ascend NPU 학습#
Ultralytics는 torch_npu을 통해 Huawei Ascend NPU에서의 학습과 검증을 지원합니다. PyTorch용 Ascend Extension 설치 가이드에 따라 호환되는 CANN, PyTorch, torch_npu 버전을 설치한 다음, Ultralytics를 시작하기 전에 CANN 환경을 적용하세요:
source /usr/local/Ascend/ascend-toolkit/set_env.shfrom ultralytics import YOLO
model = YOLO("yolo26n.pt")
# Ascend NPU 하나에서 학습합니다.
results = model.train(data="coco8.yaml", epochs=100, imgsz=640, device="npu:0")
# HCCL을 사용하여 Ascend NPU 2개에서 학습합니다.
results = model.train(data="coco8.yaml", epochs=100, imgsz=640, device="npu:0,1")AMP, 검증, 체크포인트 저장, 학습 재개를 포함한 표준 학습 기능은 활성화된 NPU를 사용합니다. 단일 NPU 학습에서는 AutoBatch를 사용할 수 있으며, 여러 NPU ID를 지정하면 HCCL을 통해 분산 학습이 시작됩니다. 학습 후 모델 내보내기 및 배포에 대해서는 Huawei Ascend 통합 가이드를 참조하세요.
유휴 GPU 학습#
유휴 GPU 학습은 다중 GPU 시스템에서 사용률이 가장 낮은 GPU를 자동으로 선택하므로 디바이스를 수동으로 선택할 필요가 없습니다. 사용 가능한 GPU의 사용률과 여유 VRAM을 기준으로 순위를 매깁니다.
학습에 사용할 유휴 GPU를 자동으로 선택하려면 -1 장치 매개변수를 사용하세요. 이 기능은 여러 사용자가 함께 쓰는 컴퓨팅 환경이나 서버에서 특히 유용합니다.
from ultralytics import YOLO

# 모델 로드
model = YOLO("yolo26n.pt")  # 사전 학습된 모델을 불러옵니다(학습에 권장).

# 사용률이 가장 낮은 GPU 하나를 사용하여 학습합니다.
results = model.train(data="coco8.yaml", epochs=100, imgsz=640, device=-1)

# 사용률이 가장 낮은 GPU 2개를 사용하여 학습합니다.
results = model.train(data="coco8.yaml", epochs=100, imgsz=640, device=[-1, -1])
자동 선택 알고리즘은 다음 조건을 우선시합니다:
- 현재 사용률이 낮은 GPU
- 사용 가능한 메모리(여유 VRAM)가 많은 GPU
실행을 시작할 때마다 현재 상태에 따라 디바이스를 선택하므로 공유 컴퓨팅 환경이나 여러 학습 작업을 동시에 실행하는 경우 특히 유용합니다.
Apple Silicon MPS 학습#
Ultralytics YOLO 모델은 Metal Performance Shaders(MPS) 프레임워크를 통해 Apple silicon에서 학습할 수 있습니다. 이 프레임워크는 Apple의 맞춤형 GPU에서 연산과 이미지 처리 작업을 실행합니다.
Apple silicon에서 학습하려면 Python 또는 명령줄에서 학습을 시작할 때 디바이스로 mps을 지정하세요.
from ultralytics import YOLO

# 모델 로드
model = YOLO("yolo26n.pt")  # 사전 학습된 모델을 불러옵니다(학습에 권장).

# MPS로 모델을 학습합니다.
results = model.train(data="coco8.yaml", epochs=100, imgsz=640, device="mps")
중단된 학습 재개#
실행이 예기치 않게 중단되었거나 새 데이터 또는 추가 에폭으로 모델 학습을 계속하려는 경우, 저장된 체크포인트에서 학습을 재개하면 유용합니다.
학습을 재개하면 Ultralytics YOLO는 마지막으로 저장된 모델의 가중치를 불러오고 옵티마이저 상태, 학습률 스케줄러, 에폭 번호, 데이터셋도 복원합니다. 그런 다음 중단된 지점부터 학습을 계속합니다. 체크포인트의 데이터셋이 아닌 다른 데이터셋으로 학습을 계속하려면 resume와 함께 data=을 명시적으로 전달하세요.
Ultralytics YOLO에서 학습을 재개하려면 train 메서드를 호출할 때 resume 인수를 True로 설정하고, 학습이 진행된 모델 가중치가 포함된 .pt 파일의 경로를 지정하세요.
중단된 학습 실행을 Python 또는 명령줄에서 재개하려면 다음을 수행하세요.
from ultralytics import YOLO

# 모델 로드
model = YOLO("path/to/last.pt")  # 부분적으로 학습된 모델 불러오기

# 학습 재개
results = model.train(resume=True)resume=True을 설정하면 train 함수가 path/to/last.pt 파일에 저장된 상태를 사용해 중단된 지점부터 학습을 계속합니다. resume 인수를 생략하거나 False로 설정하면 train 함수가 새 학습 세션을 시작합니다. Ultralytics Platform으로 스트리밍하는 실행을 재개하면 동일한 Platform 모델을 계속 사용합니다.
체크포인트는 기본적으로 각 에폭이 끝날 때 저장되며, save_period 인수를 사용하여 고정된 간격으로 저장할 수도 있습니다. 따라서 학습 실행을 재개하려면 최소 1개 에폭을 완료해야 합니다.
학습 설정#
YOLO 모델의 학습 설정에는 학습 과정에서 사용되는 다양한 하이퍼파라미터와 구성이 포함됩니다. 이러한 설정은 모델의 성능, 속도, 정확도에 영향을 줍니다. 주요 학습 설정에는 배치 크기, 학습률, 모멘텀, 가중치 감쇠가 포함됩니다. 또한 옵티마이저, 손실 함수, 학습 데이터셋 구성도 학습 과정에 영향을 줄 수 있습니다. 이러한 설정을 신중하게 조정하고 실험하는 것이 성능 최적화의 핵심입니다.
MuSGD 옵티마이저#
YOLO26에서 MuSGD는 표준 SGD 업데이트와 Muon 방식의 직교화 업데이트를 결합한 하이브리드 옵티마이저입니다.
직교화된 Muon 업데이트가 최적화 안정화에 도움이 될 수 있으므로 더 긴 YOLO26 학습 실행과 더 큰 데이터셋에 권장됩니다.
2D 선형 가중치와 2D로 재구성된 4D 합성곱 필터에만 SGD와 함께 Muon 방식의 업데이트를 적용합니다. 배치 정규화 가중치와 편향 항 등 나머지 파라미터에는 표준 SGD를 적용합니다.
optimizer=auto을 사용하면 Ultralytics가 장기 학습 실행(일반적으로 iterations > 10000)에서 MuSGD를 자동으로 선택합니다. 단기 실행에서는 트레이너가 AdamW로 전환합니다. auto 모드에서는 트레이너가 학습률도 선택하므로 사용자가 제공한 lr0는 무시됩니다. 이러한 설정을 직접 제어하려면 optimizer=AdamW lr0=0.001과 같이 옵티마이저를 명시적으로 선택합니다.
사용 예시:
yolo train model=yolo26n.pt data=coco8.yaml optimizer=MuSGDultralytics/optim/muon.py의 구현과 BaseTrainer.build_optimizer의 옵티마이저 자동 선택 로직을 참조하세요.
| 인수 | 유형 | 기본값 | 설명 |
|---|---|---|---|
model | str | None | 학습에 사용할 모델 파일을 지정합니다. .pt 사전 학습 모델 또는 .yaml 구성 파일의 경로를 지정할 수 있습니다. 모델 구조를 정의하거나 가중치를 초기화하는 데 필요합니다. |
data | str | None | 데이터셋 YAML의 경로입니다(예: coco8.yaml). 이 파일에는 학습 및 검증 데이터의 경로, 클래스 이름, 클래스 수가 포함됩니다. 분류 작업에서는 데이터셋 디렉터리 또는 기본 제공 데이터셋 이름(예: imagenet10)을 사용합니다. |
epochs | int | 100 | 총 학습 에포크 수입니다. 각 에포크는 전체 데이터셋을 한 번 순회하는 것을 의미합니다. 이 값을 조정하면 학습 시간과 모델 성능에 영향을 줄 수 있습니다. |
time | float | None | 최대 학습 시간(시간 단위)입니다. 이 값을 설정하면 epochs 인수를 덮어쓰고 지정된 시간이 지난 후 학습을 자동으로 중지합니다. 시간 제약이 있는 학습 시나리오에 유용합니다. |
patience | int | 100 | 검증 지표가 개선되지 않아도 조기 종료 전에 학습을 계속할 에포크 수입니다. 성능이 정체되었을 때 학습을 중단하여 과적합을 방지하는 데 도움이 됩니다. |
batch | int 또는 float | 16 | 배치 크기는 세 가지 모드로 설정할 수 있습니다. 정수로 설정(batch=16), 사용 가능한 GPU 메모리의 60%를 사용하는 자동 모드(batch=-1), 또는 사용 가능한 GPU 메모리 중 지정한 비율을 사용하는 자동 모드(batch=0.70)입니다. |
imgsz | int | 640 | 학습에 사용할 목표 이미지 크기입니다. 이미지는 지정된 값과 같은 길이의 변을 가진 정사각형으로 크기가 조정됩니다(rect=False인 경우). YOLO 모델은 종횡비를 유지하지만 RT-DETR은 유지하지 않습니다. 모델 정확도와 계산 복잡도에 영향을 줍니다. |
save | bool | True | 학습 체크포인트와 최종 모델 가중치의 저장을 활성화합니다. 학습 재개 또는 모델 배포에 유용합니다. |
save_period | int | -1 | 에포크 단위로 지정하는 모델 체크포인트 저장 주기입니다. -1로 설정하면 이 기능이 비활성화됩니다. 장시간 학습 중간에 모델을 저장할 때 유용합니다. |
cache | bool 또는 str | False | 데이터셋 이미지를 메모리(True/ram) 또는 디스크(disk)에 캐싱하거나 캐싱을 비활성화합니다(False). 메모리 사용량이 늘어나는 대신 디스크 I/O를 줄여 학습 속도를 높입니다. |
tile | bool 또는 int | False | 각 원본 이미지를 고정된 학습 타일로 확장하고, 라벨을 타일 경계에 맞게 자르며 음성 윈도우도 유지합니다. True은 imgsz을 사용하며, 양의 정수는 타일 크기를 설정합니다. 고해상도 타일링을 참조하세요. |
device | int 또는 str 또는 list | None | 학습에 사용할 계산 장치를 지정합니다. 단일 GPU(device=0), 여러 GPU(device=[0,1]), CPU(device=cpu), Apple 실리콘용 MPS(device=mps), Huawei Ascend NPU(device=npu:0 또는 device=npu:0,1), Intel XPU(device=xpu:0), 유휴 GPU 자동 선택(device=-1) 또는 여러 유휴 GPU 자동 선택(device=[-1,-1])을 지정할 수 있습니다. |
workers | int | 8 | 데이터 로딩에 사용할 워커 스레드 수입니다(Multi-GPU 학습에서는 RANK당). 데이터 전처리와 모델 입력 속도에 영향을 미치며, 특히 Multi-GPU 구성에서 유용합니다. |
project | str | None | 학습 출력이 저장되는 프로젝트 디렉터리의 이름입니다. 상대 경로는 runs_dir/<task> 아래에 지정되며, 절대 경로는 입력한 그대로 사용됩니다. |
name | str | None | 학습 실행의 이름입니다. 프로젝트 폴더 안에 하위 디렉터리를 생성하는 데 사용되며, 이 디렉터리에 학습 로그와 결과가 저장됩니다. |
exist_ok | bool | False | True로 설정하면 기존 프로젝트/이름 디렉터리를 덮어쓸 수 있습니다. 이전 결과를 수동으로 삭제하지 않고 반복 실험을 수행할 때 유용합니다. |
save_dir | str | None | project/name 조합을 덮어쓰고 실행 결과를 저장할 정확한 디렉터리를 지정합니다. 경로를 자동으로 증가시키지 않고 그대로 사용하므로, 연속 실행 시 같은 디렉터리를 재사용합니다. |
pretrained | bool 또는 str | True | 사전 학습 가중치로 학습을 시작할지 결정합니다. 불리언 값이나 로드할 가중치의 문자열 경로를 지정할 수 있습니다. pretrained=False은 모델 아키텍처를 유지하면서 무작위로 초기화된 가중치로 학습합니다. |
cls_remap | bool | True | 데이터셋 간에 파인튜닝할 때 클래스 이름이 일치하는 경우 사전 학습된 분류 헤드의 행을 새 모델로 복사합니다. 따라서 클래스가 겹치면 학습된 바이어스를 유지하며, 헤드 너비가 같을 경우 가중치도 유지합니다. 클래스 수가 다르거나 클래스 수는 같지만 순서가 달라도 적용됩니다. |
optimizer | str | 'auto' | 학습에 사용할 옵티마이저입니다. SGD, MuSGD, Adam, Adamax, AdamW, NAdam, RAdam, RMSProp 또는 auto을 지정하면 학습 반복 횟수에 따라 AdamW 또는 MuSGD을 선택합니다. 수렴 속도와 안정성에 영향을 줍니다. |
seed | int | 0 | 학습의 무작위 시드를 설정하여 같은 구성으로 실행할 때 결과를 재현할 수 있도록 합니다. |
deterministic | bool | True | 결정론적 알고리즘을 강제하여 결과를 재현할 수 있도록 합니다. 비결정론적 알고리즘을 제한하므로 성능과 속도에 영향을 줄 수 있습니다. |
verbose | bool | True | 학습 중 상세 출력을 활성화하여 콘솔에 진행률 표시줄, 에포크별 지표, 추가 학습 정보를 표시합니다. |
single_cls | bool | False | 다중 클래스 데이터셋의 모든 클래스를 학습 중 단일 클래스로 취급합니다. 이진 분류 작업이나 분류보다 객체 존재 여부에 집중할 때 유용합니다. |
classes | list[int] | None | 학습에 사용할 클래스 ID 목록을 지정합니다. 학습 중 특정 클래스만 필터링하여 집중할 때 유용합니다. |
rect | bool | False | 최소 패딩 전략을 활성화합니다. 배치 내 이미지에는 공통 크기에 도달하도록 최소한의 패딩이 적용되며, 가장 긴 변의 길이는 imgsz과 같습니다. 효율성과 속도를 향상할 수 있지만 모델 정확도에 영향을 줄 수 있습니다. 표준 YOLO 트레이너는 이 설정과 관계없이 detect, segment, pose 및 OBB 검증에 rect=True을 사용합니다. |
multi_scale | float | 0.0 | 각 배치에서 imgsz을 +/- multi_scale만큼 무작위로 변경합니다(예: 0.25 -> 0.75x에서 1.25x까지). 값을 모델 스트라이드의 배수로 반올림하며, 0.0는 멀티스케일 학습을 비활성화합니다. |
cos_lr | bool | False | 코사인 학습률 스케줄러를 사용하여 에포크에 따라 코사인 곡선 형태로 학습률을 조정합니다. 더 나은 수렴을 위해 학습률을 관리하는 데 도움이 됩니다. |
close_mosaic | int | 10 | 완료 전 학습을 안정화하기 위해 마지막 N개 에포크에서 모자이크 데이터 증강을 비활성화합니다. 0으로 설정하면 이 기능이 비활성화됩니다. |
resume | bool | False | 마지막으로 저장된 체크포인트에서 학습을 재개합니다. 모델 가중치, 옵티마이저 상태 및 에포크 수를 자동으로 불러와 중단된 지점부터 학습을 이어갑니다. |
amp | bool 또는 str | True | 학습 정밀도를 설정합니다. True 또는 "fp16"은 FP16을 사용하고, "bf16"는 지원되는 CUDA 장치에서 BF16을 사용하며, False 또는 "fp32"는 FP32를 사용합니다. |
quantize | int 또는 str | None | INT8 양자화 인식 학습(QAT)을 활성화하려면 8(또는 "int8")로 설정합니다. 가짜 양자화를 학습 루프에 적용해 파인튜닝함으로써 가중치가 INT8 내보내기를 지원하도록 합니다. 양자화 인식 학습을 참조하세요. |
fraction | float, int 또는 list | 1.0 | 데이터셋 하위 집합을 비율/개수 또는 [train, val, test] 목록으로 지정합니다. 1은 전체 분할을 의미하고, 1보다 큰 정수는 이미지 개수입니다. 선택적 테스트 항목에만 0/0.0를 지정하여 테스트 데이터가 없음을 나타낼 수 있습니다. 두 항목으로 된 목록은 테스트 데이터를 전체로 유지합니다. |
profile | bool | False | 학습 중 ONNX 및 TensorRT 속도 프로파일링을 활성화합니다. 모델 배포 최적화에 유용합니다. |
freeze | int 또는 list | None | 모델의 처음 N개 레이어 또는 인덱스나 모듈 이름으로 지정한 특정 레이어(23.cv2, 앞의 model. 제외)를 고정하여 학습 가능한 파라미터 수를 줄입니다. 파인튜닝 또는 전이 학습에 유용합니다. |
lr0 | float | 0.01 | 초기 학습률(예: SGD=1E-2, Adam=1E-3)입니다. 기본 optimizer='auto'에서는 무시되므로, 사용하려면 옵티마이저를 명시적으로 지정하세요. |
lrf | float | 0.01 | 초기 학습률 대비 최종 학습률의 비율 = (lr0 * lrf)입니다. 스케줄러와 함께 사용하여 시간에 따라 학습률을 조정합니다. |
momentum | float | 0.937 | Adam 옵티마이저의 SGD/MuSGD 모멘텀 또는 beta1입니다. optimizer=auto을 사용하면 AdamW는 0.9를 사용하고, MuSGD는 0.9에서 시작한 다음 워밍업을 통해 warmup_momentum에서 momentum까지 보간됩니다. 워밍업이 없으면 자동 MuSGD는 0.9을 유지합니다. |
weight_decay | float | 0.0005 | 과적합을 방지하기 위해 큰 가중치에 페널티를 부여하는 L2 정규화 항입니다. |
warmup_epochs | float | 3.0 | 워밍업 에포크 수(소수 허용)는 마지막 에포크에 워밍업이 남지 않도록 제한됩니다. 학습률은 0(warmup_bias_lr의 bias)에서 예정된 값까지 선형적으로 증가하고, 모멘텀은 warmup_momentum에서 momentum까지 선형적으로 증가하며, 그래디언트 누적은 배치 1개에서 명목값까지 증가합니다(nbs 참조). 이 값들은 모두 워밍업이 끝날 때 목표값에 도달합니다. |
warmup_momentum | float | 0.8 | 모멘텀 항이 있는 옵티마이저(SGD, MuSGD, RMSprop)의 시작 모멘텀으로, 워밍업이 끝날 때까지 momentum으로 선형적으로 증가합니다. Adam 계열의 beta1은 워밍업되지 않습니다. |
warmup_bias_lr | float | 0.1 | 워밍업 단계에서 바이어스 파라미터에 적용되는 학습률로, 초기 에포크의 모델 학습을 안정화하는 데 도움이 됩니다. 기본 optimizer='auto'에서는 0.0으로 자동 설정되므로, 사용하려면 옵티마이저를 명시적으로 지정해야 합니다. |
distill_model | str | None | 지식 증류에 사용할 교사 모델 체크포인트의 경로입니다(예: yolo26x.pt). 이 값을 설정하면 고정된 교사의 지도를 받는 추가 증류 손실을 사용하여 학생 모델을 학습합니다. |
dis | float | 6.0 | 표준 감지 손실에 더해지는 증류 손실의 가중치입니다. 값이 클수록 교사의 특징 지도 영향이 커집니다. |
box | float | 7.5 | 손실 함수의 박스 손실 구성요소 가중치로, 경계 상자 좌표를 정확하게 예측하는 데 부여되는 비중을 결정합니다. |
cls | float | 0.5 | 전체 손실 함수에서 분류 손실의 가중치로, 다른 구성요소에 비해 올바른 클래스를 예측하는 것의 중요도에 영향을 줍니다. |
cls_pw | float | 0.0 | 역 클래스 빈도를 사용하여 클래스 불균형을 처리하는 클래스 가중치의 지수입니다. 0.0은 클래스 가중치를 비활성화하고, 1.0은 역 빈도 가중치를 전부 적용합니다. 0과 1 사이의 값은 부분 가중치를 적용합니다. |
dfl | float | 1.5 | 박스 거리 회귀 항의 가중치입니다. 감지 헤드가 reg_max > 1을 사용하는 경우 분포 초점 손실(DFL)을 사용하고, DFL이 없는 YOLO26에서는 정규화된 박스 거리에 L1 손실을 적용합니다(reg_max: 1). |
pose | float | 12.0 | 자세 추정으로 학습된 모델의 자세 손실 가중치로, 자세 키포인트를 정확하게 예측하는 데 부여되는 비중을 결정합니다. |
kobj | float | 1.0 | 자세 추정 모델에서 키포인트 객체성 손실의 가중치로, 감지 신뢰도와 자세 정확도의 균형을 조정합니다. |
rle | float | 1.0 | 자세 추정 모델의 잔차 로그 우도 추정 손실 가중치로, 키포인트 위치 지정의 정밀도에 영향을 줍니다. |
angle | float | 1.0 | OBB 모델의 각도 손실 가중치로, 방향 경계 상자 각도 예측의 정밀도에 영향을 줍니다. |
dlog | float | 1.0 | 깊이 추정 모델에서 척도 불변 로그(SILog) 손실의 가중치로, 깊이 정확도를 좌우하는 주요 항입니다. |
dgrad | float | 0.5 | 깊이 추정 모델의 그래디언트 손실 가중치입니다. 깊이 경계의 오류에 페널티를 부여하고 더 선명한 표면 경계를 유도합니다. |
dlam | float | 1.0 | 깊이 추정 모델에서 SILog 손실의 분산 집중 계수입니다. 1.0은 손실을 완전히 척도 불변으로 만들고, 0.0은 일반 로그-RMSE로 줄입니다. |
nbs | int | 64 | 명목 배치 크기입니다. 옵티마이저 스텝마다 round(nbs / batch)개 배치에 걸쳐 그래디언트가 누적됩니다(최소 1개이며, time 모드가 아니면 실행의 전체 배치 수를 초과하지 않음). 이에 맞춰 weight_decay는 batch * accumulate / nbs으로 조정됩니다. |
overlap_mask | bool | True | 학습을 위해 객체 마스크를 단일 마스크로 병합할지, 객체별로 분리하여 유지할지 결정합니다. 병합 중 겹치는 영역이 있으면 작은 마스크가 큰 마스크 위에 배치됩니다. |
mask_ratio | int | 4 | 분할 마스크의 다운샘플링 비율로, 학습 중 사용되는 마스크의 해상도에 영향을 줍니다. 예측된 마스크의 해상도는 변경하지 않습니다. |
dropout | float | 0.0 | 분류 작업의 정규화에 사용할 드롭아웃 비율입니다. 학습 중 유닛을 무작위로 제외하여 과적합을 방지합니다. |
val | bool | True | 학습 중 검증을 활성화하여 별도의 데이터셋에서 모델 성능을 주기적으로 평가할 수 있습니다. |
split | str | 'val' | 학습 중 검증에 사용되는 데이터셋 분할: val, test 또는 train입니다. 해당 데이터셋의 지표는 best.pt을 선택하고 조기 종료를 결정합니다. |
nms | bool, 선택 사항 | None | 에포크 검증, 체크포인트 선택, 조기 종료에 사용할 추론 헤드를 선택합니다. None 또는 True은 NMS를 사용하는 일대다 헤드를 사용하고, False는 사용 가능한 경우 NMS가 필요 없는 헤드를 사용합니다. 두 헤드 모두 학습 손실을 유지합니다. |
plots | bool | True | 학습 및 검증 지표와 예측 예시의 플롯을 생성하고 저장하여 모델 성능과 학습 진행 상황을 시각적으로 확인할 수 있습니다. |
compile | bool 또는 str | False | backend='inductor'을 사용하여 PyTorch 2.x torch.compile 그래프 컴파일을 활성화합니다. True → "default", False → 비활성화, 또는 "default", "reduce-overhead", "max-autotune-no-cudagraphs"과 같은 문자열 모드를 지정할 수 있습니다. 지원되지 않으면 경고를 표시하고 eager 모드로 대체합니다. |
channels_last | bool | None | 학습 중 컨볼루션에 channels_last (NHWC) 메모리 형식을 사용합니다. None은 Windows와 AMD ROCm을 제외하고 PyTorch 1.11 이상에서 CUDA 사용 시 이 형식을 자동으로 활성화합니다. Windows와 AMD ROCm에서는 이 형식의 속도가 더 느린 것으로 측정되었습니다. False은 이 형식을 비활성화하고, True는 이 형식을 명시적으로 요청합니다. CPU 또는 MPS에서 학습할 때는 항상 NCHW를 사용하며(True은 경고와 함께 무시됩니다). |
max_det | int | 300 | 학습 검증 중 이미지당 최대 감지 수입니다. detect, segment, pose 및 OBB에서는 기본값 300이 학습/검증 레이블 객체 수 중 최댓값보다 해당 수가 큰 경우에만 그 최댓값으로 증가합니다. 다른 값은 그대로 유지되며, 한도를 초과하면 경고가 표시됩니다. |
batch 인수는 세 가지 유형의 값을 허용하며, 트레이너는 두 가지 보호 장치를 추가합니다.
- 고정 배치 크기: 정수 값을 설정하여(예:
batch=16) 배치당 이미지 수를 직접 지정합니다. 멀티 GPU 학습에서는 전역 배치 크기를 GPU 간에 균등하게 나누므로, 전역 배치 크기는 GPU 개수 이상이어야 합니다. 나머지는 버려집니다(예: GPU 2개에서batch=15를 사용하면 GPU당 이미지 7개를 학습합니다). - 자동 모드(GPU 메모리 60%): 학습에 사용할 수 있는 CUDA 메모리의 약 60%를 기준으로 배치 크기를 자동 조정하려면
batch=-1을 사용합니다. - 사용률 비율을 지정하는 자동 모드: 사용 가능한 GPU 메모리 중 지정한 비율을 기준으로 배치 크기를 조정하려면 비율 값을 설정합니다(예:
batch=0.70). - OOM 자동 재시도: 첫 번째 에폭 중 CUDA 메모리 부족 오류가 발생하면 트레이너가 배치 크기를 절반으로 줄여 최대 3회까지 자동으로 재시도합니다. 이 기능은 단일 GPU 학습에만 적용되며, 멀티 GPU(DDP) 학습에서는 오류가 즉시 발생합니다.
- 적합한 크기를 찾지 못한 경우: 사용 가능한 프로파일을 생성하는 후보 배치 크기가 없으면 AutoBatch는 관련 없는 기본값으로 조용히 대체하는 대신 명확한
RuntimeError을 발생시킵니다.
증강 설정 및 하이퍼파라미터#
데이터 증강 기법은 학습 데이터에 다양성을 더해 모델이 보지 못한 데이터에도 더 잘 일반화하도록 지원하므로 YOLO 모델의 견고성과 성능을 높이는 데 필수적입니다. 다음 표에서는 각 증강 인수의 목적과 효과를 설명합니다.
| 인수 | 유형 | 기본값 | 지원 작업 | 범위 | 설명 |
|---|---|---|---|---|---|
hsv_h | float | 0.015 | detect, segment, semantic, depth, classify, pose, obb | 0.0 - 1.0 | 색상환의 일부 비율만큼 이미지의 색조를 조정하여 색상 변화를 도입합니다. 다양한 조명 조건에 걸쳐 모델이 일반화하는 데 도움이 됩니다. classify의 경우 auto_augment=None일 때만 적용됩니다. |
hsv_s | float | 0.7 | detect, segment, semantic, depth, classify, pose, obb | 0.0 - 1.0 | 이미지의 채도를 일정 비율만큼 변경하여 색상의 강도에 영향을 줍니다. 다양한 환경 조건을 시뮬레이션하는 데 유용합니다. classify의 경우 auto_augment=None일 때만 적용됩니다. |
hsv_v | float | 0.4 | detect, segment, semantic, depth, classify, pose, obb | 0.0 - 1.0 | 이미지의 명도(밝기)를 일정 비율만큼 변경하여 다양한 조명 조건에서 모델이 원활하게 작동하도록 돕습니다. classify의 경우 auto_augment=None일 때만 적용됩니다. |
degrees | float | 0 | detect, segment, semantic, depth, pose, obb | 0.0 - 180 | 지정된 각도 범위 내에서 이미지를 무작위로 회전하여 다양한 방향의 객체를 인식하는 모델의 능력을 향상합니다. |
translate | float | 0.1 | detect, segment, semantic, depth, pose, obb | 0.0 - 1.0 | 이미지 크기의 일정 비율만큼 이미지를 가로 및 세로로 이동하여 일부만 보이는 객체를 감지하는 학습을 돕습니다. |
scale | float | tuple | 0.5 | detect, segment, semantic, depth, classify, pose, obb | 0 - 1 또는 명시적인 (min, max) 튜플입니다(classify에는 해당하지 않음). | 배율 계수를 사용해 이미지 크기를 조정하여 카메라에서 서로 다른 거리에 있는 객체를 시뮬레이션합니다. |
shear | float | 0 | detect, segment, semantic, depth, pose, obb | -180 - +180 | 지정된 각도만큼 이미지를 전단 변환하여 서로 다른 각도에서 객체를 바라보는 효과를 모방합니다. |
perspective | float | 0 | detect, segment, semantic, depth, pose, obb | 0.0 - 0.001 | 이미지에 무작위 원근 변환을 적용하여 3D 공간에서 객체를 이해하는 모델의 능력을 향상합니다. |
flipud | float | 0 | detect, segment, semantic, depth, classify, pose, obb | 0.0 - 1.0 | 지정된 확률에 따라 이미지를 위아래로 뒤집어 객체의 특성에 영향을 주지 않고 데이터 다양성을 높입니다. |
fliplr | float | 0.5 | detect, segment, semantic, depth, classify, pose, obb | 0.0 - 1.0 | 지정된 확률에 따라 이미지를 좌우로 뒤집습니다. 대칭 객체를 학습하고 데이터 세트의 다양성을 높이는 데 유용합니다. |
bgr | float | 0 | detect, segment, semantic, depth, pose, obb | 0.0 - 1.0 | 지정된 확률에 따라 이미지 채널을 RGB에서 BGR로 뒤집어 채널 순서가 잘못된 경우에도 견고성을 높입니다. |
mosaic | float | 1 | detect, segment, semantic, pose, obb | 0.0 - 1.0 | 학습 이미지 네 개를 하나로 결합해 다양한 장면 구성과 객체 상호작용을 시뮬레이션합니다. 복잡한 장면 이해에 효과적입니다. |
mixup | float | 0 | detect, segment, semantic, pose, obb | 0.0 - 1.0 | 이미지 두 개와 해당 레이블을 혼합하여 합성 이미지를 만듭니다. 레이블 노이즈와 시각적 다양성을 도입하여 모델의 일반화 능력을 향상합니다. |
cutmix | float | 0 | detect, segment, semantic, pose, obb | 0.0 - 1.0 | 이미지 두 개의 일부를 결합하여 각 영역의 구분을 유지하면서 부분적으로 혼합합니다. 가림 상황을 만들어 모델의 견고성을 향상합니다. |
copy_paste | float | 0 | segment, semantic, obb | 0.0 - 1.0 | 붙여넣기 대상이 될 수 있는 객체 중 실제로 붙여넣는 비율입니다. flip은 이미지 내에서 객체를 복제하고, mixup은 이 값을 이미지 간 적용 확률로도 사용합니다. |
copy_paste_mode | str | flip | segment, semantic, obb | - | 사용할 copy-paste 전략을 지정합니다. 'flip' 및 'mixup'를 선택할 수 있습니다. |
auto_augment | str | randaugment | classify | - | 미리 정의된 증강 정책('randaugment', 'autoaugment' 또는 'augmix')을 적용하여 시각적 다양성을 통해 모델 성능을 향상합니다. |
erasing | float | 0.4 | classify | 0.0 - 1.0 | 학습 중 이미지 영역을 무작위로 지워 모델이 덜 뚜렷한 특징에 집중하도록 유도합니다. |
augmentations | list | None | detect, segment, semantic, depth, pose, obb | - | 고급 데이터 증강을 위한 사용자 지정 Albumentations 변환입니다(Python API 전용). 특수한 증강 요구 사항에 맞춰 변환 객체 목록을 허용합니다. |
이러한 설정은 데이터셋과 태스크의 구체적인 요구 사항에 맞게 조정할 수 있습니다. 다양한 값을 실험하면 최적의 증강 전략을 찾는 데 도움이 됩니다.
학습 증강 작업에 대한 자세한 내용은 참조 섹션을 확인하세요.
로깅#
학습 지표, 플롯, 체크포인트는 항상 실행 디렉터리에 기록되며, Ultralytics는 설치하고 활성화한 실험 추적기에도 데이터를 스트리밍합니다. 지원되는 추적기는 Comet, ClearML, TensorBoard, MLflow, Weights & Biases, DVCLive입니다. 각 로거는 예를 들어 yolo settings tensorboard=True처럼 Ultralytics 설정을 통해 전환할 수 있습니다. 가장 일반적인 세 가지 설정을 아래에 소개합니다.
Comet#
Comet은 데이터 과학자와 개발자가 실험과 모델을 추적, 비교, 설명, 최적화할 수 있도록 지원하는 플랫폼입니다. 실시간 지표, 코드 차이, 하이퍼파라미터 추적 기능을 제공합니다.
Comet을 사용하려면:
# pip install comet_ml
import comet_ml

comet_ml.login()
Comet 웹사이트에서 계정에 로그인하고 API 키를 발급받으세요. 실험을 로깅하려면 이 키를 환경 변수나 스크립트에 추가해야 합니다.
ClearML#
ClearML은 실험 추적을 자동화하고 리소스를 효율적으로 공유하도록 지원하는 오픈 소스 플랫폼입니다. 팀이 ML 작업을 더욱 효율적으로 관리하고 실행하며 재현할 수 있도록 설계되었습니다.
ClearML을 사용하려면:
# pip install clearml
import clearml

clearml.browser_login()
이 스크립트를 실행한 후 브라우저에서 ClearML 계정에 로그인하고 세션을 인증해야 합니다.
TensorBoard#
TensorBoard는 TensorFlow용 시각화 툴킷입니다. TensorFlow 그래프를 시각화하고, 그래프 실행에 대한 정량적 메트릭을 플로팅하며, 그래프를 통과하는 이미지와 같은 추가 데이터를 표시할 수 있습니다.
Google Colab에서 TensorBoard를 사용하려면:
%load_ext tensorboard
tensorboard --logdir ultralytics/runs # replace with 'runs' directory
TensorBoard를 로컬에서 사용하려면 아래 명령을 실행하고 localhost:6006에서 결과를 확인하세요.
tensorboard --logdir ultralytics/runs # replace with 'runs' directory이 명령은 TensorBoard를 실행하고 학습 로그가 저장된 디렉터리를 지정합니다.
로거를 설정한 후 평소처럼 학습을 시작하세요. 학습 지표는 선택한 플랫폼에 자동으로 기록되므로 시간에 따른 성능을 모니터링하고, 모델을 비교하고, 개선이 필요한 부분을 파악할 수 있습니다.
다음 단계#
학습된 모델을 홀드아웃 데이터에 대해 검증하여 실제 환경에서의 정확도를 확인한 다음, ONNX, TensorRT 또는 다른 배포 형식으로 내보내기합니다. COCO8 대신 자체 데이터로 학습하시나요? 먼저 데이터셋 가이드에 따라 형식을 지정하세요.
자주 묻는 질문#
네. Ultralytics Platform 클라우드 학습을 시작할 때 사용할 수 있는 무료 크레딧이 제공됩니다. 데이터셋을 업로드하고 모델과 GPU를 선택한 후 브라우저에서 바로 학습할 수 있습니다.
Ultralytics YOLO26으로 객체 탐지 모델을 학습하려면 Python API 또는 CLI를 사용할 수 있습니다. 아래에 각 방법의 예시가 나와 있습니다:
단일 GPU 및 CPU 학습 예제from ultralytics import YOLO # 모델 로드 model = YOLO("yolo26n.pt") # 사전 학습된 모델을 불러옵니다(학습에 권장). # 모델 학습 results = model.train(data="coco8.yaml", epochs=100, imgsz=640)자세한 내용은 학습 설정 섹션을 참조하세요.
Ultralytics YOLO26 학습 모드의 주요 기능은 다음과 같습니다:
- 데이터셋 자동 다운로드: COCO, VOC, ImageNet과 같은 표준 데이터셋을 자동으로 다운로드합니다.
- 멀티 GPU 지원: 여러 GPU에서 학습을 확장하여 처리 속도를 높입니다.
- 하이퍼파라미터 구성: YAML 파일이나 CLI 인수를 통해 하이퍼파라미터를 사용자 지정할 수 있습니다.
- 시각화 및 모니터링: 학습 메트릭을 실시간으로 추적하여 더 나은 분석을 지원합니다.
이러한 기능을 통해 필요에 따라 효율적이고 유연하게 학습을 구성할 수 있습니다. 자세한 내용은 학습 모드 주요 기능 섹션을 참조하세요.
중단된 세션에서 학습을 재개하려면
resume인수를True로 설정하고 마지막으로 저장된 체크포인트의 경로를 지정합니다.학습 재개 예시from ultralytics import YOLO # 부분적으로 학습된 모델 불러오기 model = YOLO("path/to/last.pt") # 학습 재개 results = model.train(resume=True)자세한 내용은 중단된 학습 재개 섹션을 확인하세요.
클래스 불균형은 학습 데이터에서 일부 클래스의 예시 수가 다른 클래스보다 훨씬 적을 때 발생합니다. 이로 인해 모델이 희소 클래스에서 성능을 제대로 내지 못할 수 있습니다. Ultralytics YOLO는 이 문제를 해결하기 위해
cls_pw인수를 통한 클래스 가중치 적용을 지원합니다. 손실 가중치 조정은 희소 클래스를 수집하고 오버샘플링한 후 마지막 단계로 적용하는 것이 가장 효과적이며, 자세한 내용은 클래스 불균형 처리를 참고하세요.cls_pw인수는 클래스 빈도의 역수에 따라 클래스 가중치의 강도를 제어합니다:cls_pw=0.0(기본값): 클래스 가중치를 비활성화합니다.cls_pw=1.0: 역빈도 가중치를 전면 적용합니다.0.0과1.0사이의 값: 중간 수준의 불균형에 부분 가중치를 적용합니다.
클래스 가중치는
(1.0 / class_counts) ^ cls_pw으로 계산한 뒤 평균이 1.0이 되도록 정규화합니다.class_counts은 클래스별 레이블이 지정된 객체 수를 의미하며, 분류에서는 클래스별 학습 이미지 수를 의미합니다.classes=에서 제외된 클래스처럼 학습 레이블이 없는 클래스에는 가중치 1.0을 부여합니다. 시맨틱 분할에서는 대신 픽셀 빈도를 바탕으로 가중치를 계산하며, 그 값은(1.0 / ln(1.02 + p)) ^ cls_pw입니다. 여기서p는 클래스별 레이블이 지정된 학습 픽셀의 비율이므로, 레이블이 지정된 픽셀이 없는 클래스가 가장 큰 가중치를 받습니다.불균형 데이터셋 학습from ultralytics import YOLO # 사전 학습된 모델 불러오기 model = YOLO("yolo26n.pt") # 불균형이 심한 데이터에 전체 클래스 가중치를 적용하여 학습 results = model.train(data="custom.yaml", epochs=100, imgsz=640, cls_pw=1.0) # 또는 중간 수준의 불균형에는 부분 가중치(0.25) 적용 results = model.train(data="custom.yaml", epochs=100, imgsz=640, cls_pw=0.25)팁불균형이 중간 수준인 데이터셋에는
cls_pw=0.25부터 시작하고, 빈도가 낮은 클래스의 성능이 여전히 낮으면1.0로 높입니다. 학습 로그에서 계산된 클래스 가중치를 확인하여 가중치 분포를 검증할 수 있습니다.예, Ultralytics YOLO26은 Metal Performance Shaders(MPS) 프레임워크를 사용해 Apple silicon 칩에서 학습할 수 있습니다. 학습 디바이스로
mps을 지정하세요.MPS 학습 예제from ultralytics import YOLO # 사전 학습된 모델 불러오기 model = YOLO("yolo26n.pt") # Apple 실리콘 칩(M1/M2/M3/M4)에서 모델 학습 results = model.train(data="coco8.yaml", epochs=100, imgsz=640, device="mps")자세한 내용은 Apple Silicon MPS 학습 섹션을 참조하세요.
Ultralytics YOLO26에서는 인수를 통해 배치 크기, 학습률, 에폭 등 다양한 학습 설정을 구성할 수 있습니다. 간략한 개요는 다음과 같습니다:
인수 기본값 설명 modelNone학습할 모델 파일의 경로입니다. dataNone데이터셋 YAML의 경로(예: coco8.yaml) 또는 분류 작업의 경우 데이터셋 디렉터리나 이름(예:imagenet10)입니다.epochs100총 학습 에폭 수입니다. batch16정수 또는 자동 모드로 조정할 수 있는 배치 크기입니다. imgsz640학습에 사용할 목표 이미지 크기입니다. deviceNone학습에 사용할 계산 장치입니다(예: cpu,0,0,1또는mps).saveTrue학습 체크포인트와 최종 모델 가중치를 저장하도록 설정합니다. 학습 설정에 대한 자세한 가이드는 학습 설정 섹션을 확인하세요.


댓글1,074
질문을 하거나 결과를 공유하거나 다른 사람을 도와주세요.
drcosimo
Hi there, I' m new to this field and I'm trying to train a YOLO model for detection and tracking of video streams for security.
Until now I have managed to create my pipeline for training and I want to understand if it's a correct/possible approach:
-
Load a pretrained model from yolo
-
transfer learning with my custom dataset that possibly can focus on just some classes(person,car,truck,bus,bycicle)
-
Validate model to see how it performs
-
Operate a tuning with the custom best model and using my custom dataset
-
Retrain the initial pretrained model with my custom dataset and the best hyperparameters found in the tuning process.
-
Validate final model
The questions are several:
- The above approach is logically correct or it has flaws?
- Is it correct to narrow the detected classes? Or it isn't crucial to the precision of the model?
- When tuning(if its a correct approach) should i use my dataset or try the coco dataset to keep generalization?
- When tuning should i specify the classes to detect?
- When retraining should I use the first pretrained model or it is better to use my custom trained model?
- In the final training am I using the correct parameters?
Here the code of the pipeline:
from ultralytics import YOLO import yaml
load pretrained model from coco dataset
model:YOLO = YOLO('yolov8n.yaml').load('yolov8n.pt')
train_classes = []
NOTE if you're using COCO format, the new dataset should also be in COCO format.
operate transfer learning with my custom dataset, narrowing the classes to the ones I want to detect
model.train(data='custom_data.yaml',classes=train_classes,epochs=200,imgsz=640,optimizer='AdamW',device=[0,1],augment=True,name='custom_model')
load custom model
custom_model = YOLO('path/to/best.pt')
validate custom model
custom_model.val()
try tuning to find the best hyperparameters for my custom model
custom_model.tune(data='custom_data.yaml', epochs=50, iterations=100,optimizer="AdamW", plots=True,save=True,val=True)
load best hyperparameters
cfg = yaml.load(open('path/to/best_hyperparameters.yaml'))
retrain custom model from pretrained on coco with best hyperparameters
model.train(data='custom_data.yaml',classes=train_classes,epochs=200,imgsz=640,device=[0,1],name='custom_model',exist_ok=True,optimizer='AdamW',**cfg)
load and validate
tuned_custom_model = YOLO('path/to/best.pt')
tuned_custom_model.val()
Thank you for your effort and time in this project!
3 Paula DerrengerUltralytics(수정됨)
Hello,
Your approach to training a YOLO model for detection and tracking is well-thought-out and mostly aligns with best practices. Here are some insights and answers to your questions:
-
Approach Validity: Your steps are logically sound. Starting with a pretrained model and applying transfer learning to your specific classes is a recommended strategy. Validating and tuning based on the performance helps refine the model further.
-
Narrowing Detected Classes: It's perfectly fine to focus on specific classes if those are the only ones relevant to your use case. This can help improve the model's performance by reducing the complexity of the problem it needs to solve.
-
Dataset for Tuning: Use your custom dataset for tuning. This ensures that the hyperparameters are optimized for the specific characteristics of your data rather than the general characteristics of the COCO dataset.
-
Specifying Classes During Tuning: When tuning, you should specify the classes if your dataset is a subset of the original classes used in the pretrained model. This helps in focusing the model’s learning and evaluation on relevant classes.
-
Model for Retraining: Tuning only finds hyperparameters, so the usual practice is to train again from the original pretrained model with the best hyperparameters, as in your step 5. Continuing from the already fine-tuned model is also possible, but then it effectively trains for longer, which makes the result harder to compare with the tuning runs.
-
Parameters for Final Training: The parameters should be chosen based on the results of your tuning. Ensure that they are the ones that gave the best validation performance during the tuning phase.
Keep up the great work, and don't hesitate to reach out if you have more questions!
-
Thank you very much for you response. I adjusted my script to follow your insights. I have another question regarding transfer learning. The normal approach in transfer learning is to freeze the first n layers to preserve the more generic feature extraction properties of an already trained model and then it is retrained letting only the remaining layers update. I found the callback function to achieve this. My question is, applying the fine-tuning as specified by ultralytics documentation has the same effect? What I mean is: executing the train method again on a pretrained model changing the dataset causes the underlying library to execute the freeze automatically? If it isn't the case it is not clear to me why the fine-tuning is said to have the same effect as applying transfer learning.
Another question is: it is useful to take a pretrained model from ultralytics and train it with the coco dataset? Because from what I know the pretrained model is already trained using coco dataset. Doing such a thing following the logic you provide for fine-tuning would be essentially the same as resuming a training / do the same train with more epochs?
Thank you again for your time.
- Paula DerrengerUltralytics
Hello,
Thank you for your follow-up questions. Let's address each of them:
-
Freezing Layers in Transfer Learning: The Ultralytics YOLO framework does not automatically freeze any layers when you initiate training, even if you're using a pretrained model. If you want to freeze the first N layers (common in transfer learning to preserve learned features), you must explicitly specify this in your training script. This is different from some other frameworks that might automate this aspect of transfer learning.
-
Training on COCO Dataset with a Pretrained Model: If the pretrained model you are using was already trained on the COCO dataset, retraining it on the same dataset without significant changes or additional data might not yield substantial improvements. It could be beneficial for fine-tuning if you've made modifications to the model architecture or if you're using a significantly altered version of the dataset. However, generally, this approach would indeed be akin to simply extending the training duration.
For fine-tuning and transfer learning, it's crucial to tailor the approach based on what changes you've made to the dataset or model and your specific goals (e.g., improving accuracy, adapting to new classes, etc.).
I hope this clarifies your queries! If you have more questions or need further assistance, feel free to ask.
-
-
wangztao
这个翻译太那啥了吧, train翻译成火车?
3- Paula DerrengerUltralytics
哈哈,确实,“train”翻译成“火车”听起来很有趣 😄。这里的“train”应该翻译为“训练”,指的是在机器学习中对模型进行训练,以提高其准确性和效率。感谢您指出这个问题,我们会尽快修正翻译错误。如果您有任何其他建议或问题,欢迎随时告诉我们!🚀
2
Syedshajib55
Hi, does platform.ultralytics currently support using custom PyTorch modules directly via a YAML configuration without modifying tasks.py or the core source code? We are attempting to train a custom architecture (e.g., YOLO26) and want to know if there is an existing feature for dynamic module registration.
1Muh-7
Hi, As far as I know, not at the moment. Ultralytics doesn't seem to have a built-in dynamic registration system where you can define a custom PyTorch module outside the repo and then use it directly in the YAML.
Usually, the custom module still needs to be imported/registered in
tasks.pyso thatparse_model()can resolve it from the YAML.It would be really useful if Ultralytics added something like a
register_module()API for this, though. Murat Raimbekov
@Syedshajib55 @Muh-7 Platform can train any model that the
ultralyticsPython package can build, including custom architectures from a modified package or fork. The custom code runs on your own hardware; Platform receives real-time metrics, console and system logs, plots, and the final weights.There is no dynamic registration API.
parse_model()resolves layer names from theultralytics.nn.tasksnamespace, so a name in your YAML must exist there. You don't need to edittasks.pyfor that — expose the class from your own package before building the model:import ultralytics.nn.tasks as tasks from my_custom_package import MyBlock tasks.MyBlock = MyBlock # now `[-1, 1, MyBlock, [...]]` resolves in the YAMLFull local training with metric streaming to Platform:
pip install "ultralytics>=8.4.120"
export ULTRALYTICS_API_KEY="YOUR_API_KEY"
import ultralytics.nn.tasks as tasks from my_custom_package import MyBlock from ultralytics import YOLO tasks.MyBlock = MyBlock model = YOLO("custom-model.yaml") # YAML referencing MyBlock model.train( data="ul://username/datasets/my-dataset", epochs=100, project="username/my-project", name="custom-architecture", )projectandnameenable the Platform integration automatically; nothing else is required. Verified on 8.4.157 with a customnn.Moduleinserted into a YOLO26n YAML: the model builds, trains, and appears on Platform as a completed run with weights and train args.One caveat: the saved
.ptpickles the class by import path (my_custom_package.MyBlock), so any environment that loads it needs that package importable — otherwise loading fails withModuleNotFoundError. That includes Platform-side features that load the uploaded weights with the stock package (Predict, Export, Deploy); local training and streaming are unaffected. Setup details: https://docs.ultralytics.com/platform/train/cloud-training/#remote-training
RussellLee12345
Hello all,
I want my training images to rotate 360 degrees randomly. How do I set the hyper-parameter: degrees?
Thanks a lot.
1 Glenn JocherUltralytics
@RussellLee12345 to rotate your training images randomly up to 360 degrees, set the
degreesparameter to180in your training configuration. This allows for rotations within the range of -180 to +180 degrees. For more details, see the augmentation settings in the Train Settings documentation.
GKYoffice
Please tell me how to set imgsz when I use the yolo11 model for training. Can it only be an integer (this means that the final input is a square)? After I modify this parameter, will the input interface of the network change the input of data? There are corresponding transformations, such as imgsz=1280, does it mean that my input data will be resized to 1280*1280 and input into the network for training?
Thanks!
1- Glenn JocherUltralytics
@GKYoffice when using the YOLO11 model,
imgszcan be set as an integer, which resizes the input data to a square of that size (e.g.,1280x1280). This parameter adjusts the input dimensions for training. For more details, please visit the training documentation.
IruhDegSet
hi, I'm just wondering if yolov8 accepts class weights, in the data.yaml file:
names: ['class 1', 'class 2', 'class 3']
classes_weights: [c1_weight, c2_weight, c3_weight]
if no how to incorpoorate wighted loss in yolov8 THX
1I forgot to mention that the task is segmentation not bb detection
1- Glenn JocherUltralytics
@IruhDegSet yOLOv8 does not directly support class weights in the
data.yamlfile. To incorporate weighted loss, you can modify the loss function in the training script to apply different weights to each class. For more details, you might explore custom loss implementations in PyTorch. @glenn-jocher thank you for your reply, does this apply on yolo v 11 too?
- Glenn JocherUltralytics(수정됨)
Yes, YOLO11 supports similar features, including training and hyperparameter customization. For specific details on YOLO11, please refer to the documentation or the relevant sections in the repository.
 User
Dear author, how are the weights of these three losses set: box: 7.5, cls: 0.5, dfl: 1.5? Are they adjusted on the COCO validation, manually adjusted, or obtained through hyperparameter search? For the model I trained, the output confidence scores are very low. I directly increased the weight of cls by 10 times, but the effect did not improve. What other methods can I take?
1- Glenn JocherUltralytics
@Stephen-Hao the weights for the
box,cls, anddfllosses in YOLOv8 are typically set based on empirical results and fine-tuning on standard datasets like COCO. These values are chosen to balance the contributions of each loss component to the overall training process. If increasing theclsweight did not improve your model's performance, consider the following approaches:- Hyperparameter Tuning: Experiment with other hyperparameters such as learning rate, batch size, and augmentation settings.
- Data Quality: Ensure your dataset is well-labeled and balanced. Poor quality data can significantly affect model performance.
- Training Duration: Increase the number of epochs to allow the model more time to learn.
- Validation: Regularly validate your model to monitor overfitting and adjust training strategies accordingly.
For more detailed guidance, you can refer to the Ultralytics YOLO training documentation.
- User
Thank you a lot!
- Glenn JocherUltralytics
@Stephen-Hao thank you for your question! The weights for
box,cls, anddfllosses are typically set based on empirical results and fine-tuning on standard datasets like COCO. If increasing theclsweight didn't improve your model's performance, consider experimenting with other hyperparameters such as learning rate, batch size, and augmentation settings. Additionally, ensure your dataset is well-labeled and balanced. For more detailed guidance, you can refer to the Ultralytics YOLO training documentation.
karthikUthaman
how to train a trained model again with new dataset
1- Glenn JocherUltralytics(수정됨)
Hey there! 🙌 It's awesome that you're looking to further improve your model with new data. To re-train a pre-trained model on a new dataset, you can simply follow these steps:
-
Make sure your new dataset is prepared in the same YOLO format as your initial training (a dataset YAML plus one
.txtlabel file per image). -
Load your pre-trained model using the
YOLOloading method, then specify your new dataset in thetrainmethod. Here's a quick code snippet for clarity:from ultralytics import YOLO # Load your pre-trained model model = YOLO('path/to/your/pretrained/model.pt') # Start training on the new dataset results = model.train(data='path/to/your/new/dataset.yaml', epochs=50, imgsz=640)
Just replace
'path/to/your/pretrained/model.pt'and'path/to/your/new/dataset.yaml'with the actual paths to your model and new dataset config file, respectively. Adjust theepochsandimgsz(image size) to suit your needs. 🛠️That's it! Your model will now continue training on the new dataset. If you have any further questions or run into issues, feel free to ask. Happy training! 🚀
-
songziang182
谢谢你们开发了这么完善的 yolov8🙏, 我想问一下,这两种训练方式的区别 model = YOLO('yolov8n.pt') model = YOLO('yolov8n.yaml').load('yolov8n.pt') model.train(.........)
1- Paula DerrengerUltralytics
Hello there! 😊
The main difference between the two training methods you've mentioned:
-
model = YOLO('yolov8n.pt'): This directly loads a pretrained YOLOv8n model. It's the simplest way to load a model that has already been trained, making it ready for further training, evaluation, or inference right away. -
model = YOLO('yolov8n.yaml').load('yolov8n.pt'): This approach builds a new model from the YAML configuration file and then transfers the weights from the pretrained.ptmodel. It's a two-step process, where the model is first constructed based on the architecture defined in the YAML file, and then the weights from a pretrained model are loaded. This method is useful when you want to customize the model architecture before loading the weights.
Both methods ultimately get you to a similar starting point for continuing training or making predictions. The choice depends on whether you need to customize the model architecture as defined in the YAML file before applying the pretrained weights.
Let me know if this helps or if you have more questions!
-
Thank you for answering me. I find it very useful. I have another question, which is the configuration file yolov8n.yaml. I didn’t find where it is. Can I adjust the scale of the model, for example, n, s, m, l, etc., is this the case?
- Paula DerrengerUltralytics(수정됨)
Hey! 😊 Thank you for your kind words, and I'm glad the information was helpful to you!
Regarding the
yolov8n.yamlconfiguration file, it defines the architecture for YOLOv8 models. All scales share one model file (yolov8.yaml) that contains ascalessection mapping each letter to[depth, width, max_channels]; the letter in the name you load (yolov8n.yaml,yolov8s.yaml, ...) selects the scale:scales: n: [0.33, 0.25, 1024] s: [0.33, 0.50, 1024]To create or modify a model, copy the YAML from the Ultralytics GitHub repository, edit the layers or scales, then load it together with the pretrained weights as you mentioned:
model = YOLO('path/to/custom_yolov8.yaml').load('yolov8n.pt')
model.train(.........)
Model changes can require a solid understanding of the network architecture to be effective.
I hope this clarifies your question! Feel free to reach out if you have further queries or need more examples. 😊
vonzo
So, imgsz works different when training than when predicting?
For train: if it's an
intthe ratio will be kept and the train function will take care of that (can't be atuple). For predict: if it's anintthe image will be resized as a square of sizeimgsz x imgsz, if it's atuplethe image will be resized usingHxWand the user has to take care of the ratio andstride.Is this right? I would add a comment in the doc to avoid confusions
1- Paula DerrengerUltralytics(수정됨)
You've got it mostly right! 👍 For training (
train),imgszis anint, the aspect ratio is maintained and resizing is handled internally. It can't be atuple. For prediction (predict), anintimgszresizes the longest side toimgszwhile keeping the aspect ratio, with padding only up to a multiple of the model stride (so the image is not forced into a square), and a[h, w]list sets the size explicitly.Great suggestion on the documentation comment – clarity is key! If you have any more questions or need further examples, feel free to ask. 😊