Bộ dữ liệu VisDrone
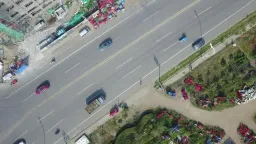
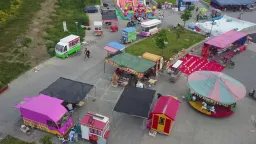
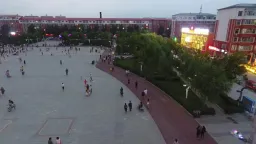
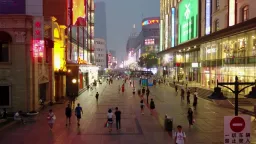
Bộ dữ liệu VisDrone là benchmark quy mô lớn sử dụng ảnh từ drone; tập con phát hiện (VisDrone2019-DET) cung cấp 8,629 ảnh trên không — 6,471 ảnh huấn luyện, 548 ảnh validation và 1,610 ảnh test-dev — được gán nhãn với 10 lớp đối tượng để thực hiện phát hiện vật thể. Bộ dữ liệu do nhóm AISKYEYE tại Phòng thí nghiệm Học máy và Khai phá dữ liệu, Đại học Thiên Tân, Trung Quốc tạo ra.
Xem: Cách huấn luyện Ultralytics YOLO trên dataset VisDrone | Phát hiện từ trên không | Hướng dẫn đầy đủ 🚀
Benchmark VisDrone đầy đủ bao gồm 288 video clip (261,908 khung hình) và 10,209 ảnh tĩnh được chụp bằng camera gắn trên drone tại 14 thành phố khác nhau ở Trung Quốc, bao quát môi trường đô thị và nông thôn, cảnh thưa và đông đúc, cùng các điều kiện thời tiết và ánh sáng đa dạng. Các khung hình có hơn 2.6 triệu bounding box được gán nhãn thủ công, kèm các thuộc tính bổ sung như khả năng quan sát cảnh, lớp đối tượng và mức độ che khuất. Cấu hình VisDrone.yaml của Ultralytics sử dụng tập con ảnh tĩnh VisDrone2019-DET của benchmark này.
Tính năng chính#
- Vật thể nhỏ, dày đặc: Góc nhìn từ trên không khiến mục tiêu nhỏ và chen chúc — riêng 548 ảnh validation đã có 38,759 bounding box được gán nhãn, trung bình khoảng 70 vật thể mỗi ảnh.
- Đa dạng cảnh: Ảnh từ 14 thành phố Trung Quốc, bao gồm địa điểm đô thị và nông thôn, ngày và đêm, cùng nhiều điều kiện thời tiết khác nhau.
- Annotation phong phú: Hơn 2.6 triệu bounding box trong toàn bộ benchmark, cùng các thuộc tính về che khuất và khả năng quan sát.
- Các tập chia được xác định trước: Các tập train / val / test-dev cố định (6,471 / 548 / 1,610 ảnh) giúp đánh giá nhất quán.
Cấu trúc dataset#
Cấu hình VisDrone của Ultralytics bao gồm tập con ảnh VisDrone2019-DET, được chia thành ba phần:
| Tập dữ liệu | Hình ảnh | Mô tả |
|---|---|---|
| Huấn luyện | 6,471 | Ảnh trên không có nhãn dùng để huấn luyện bộ phát hiện |
| Validation | 548 | Ảnh dùng để đánh giá trong quá trình phát triển |
| Test-dev | 1,610 | Ảnh giữ lại để đánh giá cuối cùng model đã huấn luyện |
Tập thứ tư, test-challenge (1,580 ảnh), được giữ lại cho cuộc thi VisDrone và không được tải xuống; vì vậy toàn bộ tập DET có tổng cộng 10,209 ảnh.
Bộ dữ liệu gán nhãn 10 lớp đối tượng: pedestrian, people, bicycle, car, van, truck, tricycle, awning-tricycle, bus và motor. VisDrone phân biệt pedestrian (người đang đứng hoặc đi bộ) với people (người ở mọi tư thế khác).
Trong lần sử dụng đầu tiên, script tải xuống chuyển annotation VisDrone gốc sang định dạng YOLO, bỏ qua các vùng được đánh dấu là không cần xét (đồng thời loại trừ danh mục "others" không được sử dụng).
Ứng dụng#
Cảnh đông đúc và mục tiêu nhỏ của VisDrone khiến dataset này trở thành benchmark tiêu chuẩn cho phát hiện đối tượng nhỏ từ góc nhìn trên không. Các ứng dụng thị giác máy tính trên drone phổ biến bao gồm:
- Giám sát giao thông và đếm phương tiện từ UAV
- Phân tích đám đông và giám sát an toàn công cộng
- Kiểm tra cơ sở hạ tầng và công trường xây dựng
- Nghiên cứu thị giác máy tính về phát hiện vật thể nhỏ trong cảnh phức tạp
Để xem các benchmark ảnh trên không khác, hãy tham khảo bộ dữ liệu xView tập trung vào ảnh vệ tinh hoặc bộ dữ liệu DOTA-v2 sử dụng bounding box định hướng.
YAML của dataset#
Tệp VisDrone.yaml định nghĩa cấu hình bộ dữ liệu — đường dẫn bộ dữ liệu, tên lớp và script tự động tải xuống rồi chuyển đổi. Tệp được duy trì trong repository Ultralytics tại https://github.com/ultralytics/ultralytics/blob/main/ultralytics/cfg/datasets/VisDrone.yaml.
# Ultralytics 🚀 AGPL-3.0 License - https://ultralytics.com/license

# VisDrone2019-DET dataset https://github.com/VisDrone/VisDrone-Dataset by Tianjin University
# Documentation: https://docs.ultralytics.com/datasets/detect/visdrone
# Example usage: yolo train data=VisDrone.yaml
# parent
# ├── ultralytics
# └── datasets
#     └── VisDrone ← downloads here (~2 GB)

# Train/val/test sets as 1) dir: path/to/imgs, 2) file: path/to/imgs.txt, or 3) list: [path/to/imgs1, path/to/imgs2, ..]
path: VisDrone # dataset root dir
train: images/train # train images (relative to 'path') 6471 images
val: images/val # val images (relative to 'path') 548 images
test: images/test # test-dev images (optional) 1610 images

# Classes
names:
  0: pedestrian
  1: people
  2: bicycle
  3: car
  4: van
  5: truck
  6: tricycle
  7: awning-tricycle
  8: bus
  9: motor

# Download script/URL (optional) ---------------------------------------------------------------------------------------
download: |
  import os
  from pathlib import Path
  import shutil

  from ultralytics.utils.downloads import download
  from ultralytics.utils import ASSETS_URL, TQDM

  def visdrone2yolo(dir, split, source_name=None):
      """Convert VisDrone annotations to YOLO format with images/{split} and labels/{split} structure."""
      from PIL import Image

      source_dir = dir / (source_name or f"VisDrone2019-DET-{split}")
      images_dir = dir / "images" / split
      labels_dir = dir / "labels" / split
      labels_dir.mkdir(parents=True, exist_ok=True)

      # Move images to new structure
      if (source_images_dir := source_dir / "images").exists():
          images_dir.mkdir(parents=True, exist_ok=True)
          for img in source_images_dir.glob("*.jpg"):
              img.rename(images_dir / img.name)

      for f in TQDM((source_dir / "annotations").glob("*.txt"), desc=f"Converting {split}"):
          img_size = Image.open(images_dir / f.with_suffix(".jpg").name).size
          dw, dh = 1.0 / img_size[0], 1.0 / img_size[1]
          lines = []

          with open(f, encoding="utf-8") as file:
              for row in [x.split(",") for x in file.read().strip().splitlines()]:
                  if row[4] != "0":  # Skip ignored regions
                      x, y, w, h = map(int, row[:4])
                      cls = int(row[5]) - 1
                      # Convert to YOLO format
                      x_center, y_center = (x + w / 2) * dw, (y + h / 2) * dh
                      w_norm, h_norm = w * dw, h * dh
                      lines.append(f"{cls} {x_center:.6f} {y_center:.6f} {w_norm:.6f} {h_norm:.6f}\n")

          (labels_dir / f.name).write_text("".join(lines), encoding="utf-8")

  # Download (ignores test-challenge split)
  dir = Path(yaml["path"])  # dataset root dir
  urls = [
      f"{ASSETS_URL}/VisDrone2019-DET-train.zip",
      f"{ASSETS_URL}/VisDrone2019-DET-val.zip",
      f"{ASSETS_URL}/VisDrone2019-DET-test-dev.zip",
      # f"{ASSETS_URL}/VisDrone2019-DET-test-challenge.zip",
  ]
  download(urls, dir=dir, threads=4)

  # Convert
  splits = {"VisDrone2019-DET-train": "train", "VisDrone2019-DET-val": "val", "VisDrone2019-DET-test-dev": "test"}
  for folder, split in splits.items():
      visdrone2yolo(dir, split, folder)  # convert VisDrone annotations to YOLO labels
      shutil.rmtree(dir / folder)  # cleanup original directory
Cách sử dụng#
VisDrone tự động tải xuống trong lần đầu huấn luyện — gồm ba archive với tổng dung lượng khoảng 2 GB — và cần khoảng 4 GB dung lượng đĩa trống trong quá trình giải nén và chuyển đổi.
Để huấn luyện model YOLO26n trên dataset VisDrone trong 100 epoch với kích thước ảnh 640, bạn có thể dùng các đoạn code sau.
from ultralytics import YOLO

# Tải model
model = YOLO("yolo26n.pt")  # tải model đã huấn luyện trước (được khuyến nghị khi huấn luyện)

# Huấn luyện model - tập dữ liệu sẽ tự động tải xuống trong lần chạy đầu tiên
results = model.train(data="VisDrone.yaml", epochs=100, imgsz=640)
Để gán nhãn thêm ảnh trên không và quản lý các lượt huấn luyện VisDrone trên trình duyệt, hãy sử dụng Ultralytics Platform.
Dữ liệu mẫu và annotation#
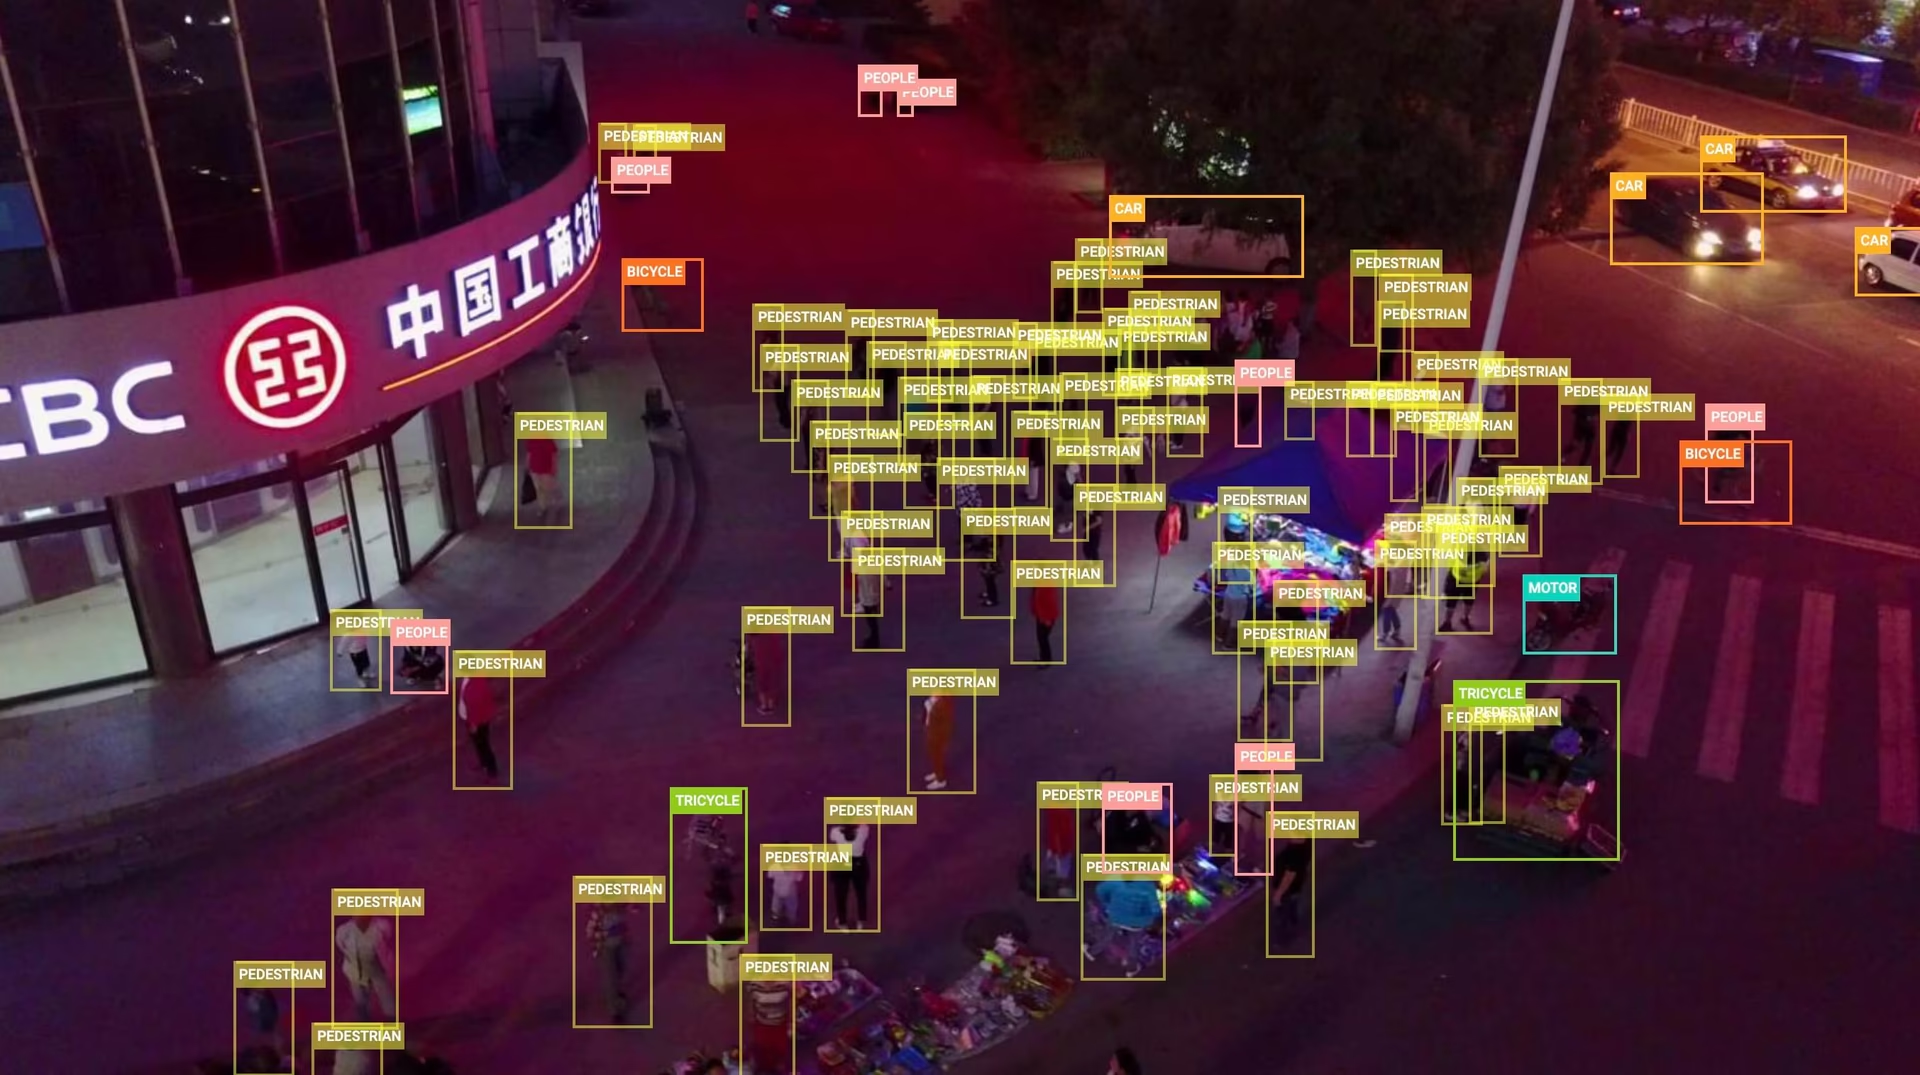
Ví dụ bên dưới minh họa một cảnh VisDrone điển hình: góc nhìn trên không của một con đường đông đúc, nơi người đi bộ và phương tiện xuất hiện dưới dạng các mục tiêu nhỏ, dày đặc, nhiều mục tiêu bị che khuất một phần bởi nhau.
Trích dẫn và lời cảm ơn#
Nếu sử dụng bộ dữ liệu VisDrone trong nghiên cứu hoặc công việc phát triển, vui lòng trích dẫn bài báo sau:
@ARTICLE{9573394,
  author={Zhu, Pengfei and Wen, Longyin and Du, Dawei and Bian, Xiao and Fan, Heng and Hu, Qinghua and Ling, Haibin},
  journal={IEEE Transactions on Pattern Analysis and Machine Intelligence},
  title={Detection and Tracking Meet Drones Challenge},
  year={2022},
  volume={44},
  number={11},
  pages={7380-7399},
  doi={10.1109/TPAMI.2021.3119563}}
Chúng tôi xin ghi nhận nhóm AISKYEYE tại Phòng thí nghiệm Học máy và Khai phá dữ liệu, Đại học Thiên Tân, Trung Quốc, đã tạo và duy trì bộ dữ liệu VisDrone. Để biết thêm thông tin, hãy truy cập repository GitHub của bộ dữ liệu VisDrone.
Câu hỏi thường gặp#
VisDrone được sử dụng để huấn luyện và đánh giá benchmark các bộ phát hiện trên ảnh chụp từ drone, trong đó vật thể nhỏ, dày đặc và được quan sát từ trên cao. Sự kết hợp giữa góc nhìn trên không, cảnh đông đúc và các điều kiện đa dạng khiến bộ dữ liệu này trở thành môi trường thử nghiệm tiêu chuẩn cho giám sát giao thông bằng UAV, phân tích đám đông và nghiên cứu phát hiện vật thể nhỏ.
Cấu hình VisDrone của Ultralytics có 8,629 ảnh: 6,471 ảnh huấn luyện, 548 ảnh validation và 1,610 ảnh kiểm thử (test-dev). Tất cả các tập đều có cùng 10 lớp: pedestrian, people, bicycle, car, van, truck, tricycle, awning-tricycle, bus và motor. Xem Cấu trúc bộ dữ liệu để biết thông tin phân chia đầy đủ.
VisDrone tự động tải xuống trong lần đầu huấn luyện bằng
data="VisDrone.yaml"— không cần thao tác thủ công. Script lấy ba archive (khoảng 2 GB) từ các tài nguyên phát hành trên GitHub của Ultralytics và chuyển đổi annotation sang định dạng YOLO. Tập test-challenge bị giữ lại cho cuộc thi không được đưa vào.Huấn luyện model YOLO26n trên VisDrone trong 100 epoch với kích thước ảnh 640:
Ví dụ huấn luyệnfrom ultralytics import YOLO # Tải model model = YOLO("yolo26n.pt") # tải model đã huấn luyện trước (được khuyến nghị khi huấn luyện) # Huấn luyện model results = model.train(data="VisDrone.yaml", epochs=100, imgsz=640)Để xem cấu hình chi tiết, hãy tham khảo trang Huấn luyện và mẹo huấn luyện model.
Các đối tượng trong VisDrone rất nhỏ so với khung hình — thường chỉ rộng vài chục pixel — và xuất hiện thành nhóm dày đặc, bị che khuất nhiều, gây khó khăn cho các bộ phát hiện được tinh chỉnh trên ảnh chụp từ mặt đất. Huấn luyện và dự đoán ở độ phân giải cao hơn (ví dụ:
imgsz=1280với batch nhỏ hơn) giúp phát hiện các mục tiêu nhỏ, còn chia ảnh độ phân giải cao theo ô chia ảnh lớn thành các phần để đối tượng nhỏ chiếm nhiều diện tích hơn trong mỗi cửa sổ suy luận.Benchmark VisDrone đầy đủ bao gồm năm tác vụ — phát hiện vật thể trong ảnh, phát hiện vật thể trong video, theo dõi một đối tượng, theo dõi nhiều đối tượng và đếm đám đông — trên 288 video clip và 10,209 ảnh tĩnh. Cấu hình
VisDrone.yamlcủa Ultralytics chỉ bao gồm tác vụ phát hiện trong ảnh (VisDrone2019-DET), tải xuống 6,471 ảnh huấn luyện, 548 ảnh validation và 1,610 ảnh test-dev.Trích dẫn bài báo "Detection and Tracking Meet Drones Challenge" (IEEE TPAMI, tập 44, số 11, 2022, DOI 10.1109/TPAMI.2021.3119563); mục Trích dẫn và ghi nhận ở trên có toàn bộ mục BibTeX.


Bình luận24
Đặt câu hỏi, chia sẻ kết quả hoặc giúp đỡ người khác.
arpithavkhanapur1226-collab
Thank you for the suggestions. I’ve tried the recommended changes and checked the dataset, including removing the degenerate bounding box, but I’m still facing the NaN issue around epoch 30. The best mAP I’m getting is only around 33.2%, which is far below the expected performance. I’ve tried several approaches already, but I’m not able to figure out what is causing the instability. Could you please help me identify what might be going wrong or suggest what I should specifically check next? ,I have attached my code and result below ,I would really appreciate your guidance.
visdrone2.ipynb
 Paula DerrengerUltralytics
Please rerun a clean baseline with the official
VisDrone.yaml, pretrained weights, and defaults; after correcting annotations, delete all*.cachefiles in the dataset’slabelsdirectories, and restart the notebook kernel if Ultralytics was upgraded. If NaNs persist, share the complete text training log/traceback, exactmodel.train(...)arguments, Ultralytics version, and output fromyolo checks; also try a smaller learning rate and higherimgszsuch as1280, since VisDrone contains many tiny objects.
I’m training YOLOv12 on the VisDrone dataset, but I faced NaN losses after around epoch 29. I found a degenerate bounding box with zero height and removed it, but the NaN issue still occurred. I then tried DDPNet on VisDrone, but the validation performance started plateauing around epoch 14. Training is also very slow on a T4 (~4 hours for 12 epochs). Could you suggest what I should check or change to improve the training performance?
- Paula DerrengerUltralytics
After correcting every invalid/non-finite label and ensuring normalized boxes have positive width/height, delete all
*.cachefiles inside thelabelsdirectories before retraining. Establish a baseline with a pretrained Ultralytics model atimgsz=640; then inspectresults.png, per-class AP, and the confusion matrix before changing augmentation or resolution. VisDrone contains many tiny, dense objects, so higher resolution may improve accuracy but will substantially slow a T4; use ann/smodel and the largest stable batch first. If NaNs persist, please share the exact training command, complete text logs around the first NaN, Ultralytics version, andyolo checksoutput; see the VisDrone training guide and fine-tuning troubleshooting.
mslabdelhak29
Hello can you offre a pretrained model i need it and i dont have source to entrain for 100 epochs
 Glenn JocherUltralytics(đã chỉnh sửa)
Hi, we don’t currently provide an official YOLO model pretrained specifically on VisDrone, so the usual workflow is to start from a generic checkpoint like
yolo26n.ptand fine‑tune it on VisDrone; you can safely reduceepochs(e.g. 10–20) or train on a subset of the data in Colab to keep compute low, and the YOLO train mode docs show how to adjust these arguments.
ysharvit
I am looking for drone photos in desert area ( in order to develop rescue detection system (I volunteer in SAR unit)) Can I filter only desert BG pictures in your dataset?
- Glenn JocherUltralytics(đã chỉnh sửa)
VisDrone doesn’t include scene/terrain metadata like “desert” (it’s largely urban/traffic), so there’s no built‑in way to filter for desert backgrounds; for SAR you’ll want to gather desert drone imagery and fine‑tune a COCO‑pretrained YOLO26 using the dataset setup in the Datasets Overview or manage it end‑to‑end with Ultralytics Platform datasets.
fardinabbasi
It would be very useful if someone could provide a list of pretrained YOLO models for the VisDrone dataset that are compatible with Ultralytics.
- Glenn JocherUltralytics(đã chỉnh sửa)
Ultralytics doesn’t currently maintain an official list of VisDrone‑trained checkpoints; the recommended path is to fine‑tune a COCO‑pretrained YOLO26 variant (e.g.,
yolo26s.pt)—see the available base weights on the YOLO26 models page.
lawyeh
Hello, the example and the yaml file pull from the object detection in images dataset (task 1). How can I train the model for object detection in video (task )?
- Glenn JocherUltralytics
For video object detection (Task 2) with VisDrone, you'll use the same YOLO training process but process video frames as individual images. Ensure your dataset paths in VisDrone.yaml point to the video task's frame sequences (organized as images), then train normally. Video inference can be done with
model.predict(source='video.mp4')after training. For video-specific annotations, verify they're converted to YOLO format per frame.1
SudhanshuBlaze
I trained yolov10x on VisDrone dataset with the below parameters, but I got the final
box_lossof1.97. I feel that model performed very poorly, do you know what might be the issue? Or what hyperparameters should I use?from ultralytics import YOLO # Load a model model = YOLO("yolov10x.pt") # load a pretrained model (recommended for training) # Train the model results = model.train(data="VisDrone.yaml", epochs=1000, imgsz=640, patience=250, project='visdrone', name='train', batch=-1)- Glenn JocherUltralytics
@SudhanshuBlaze it sounds like your model might be struggling with the complexity of the VisDrone dataset. First, ensure you're using the latest version of the Ultralytics package. You might also want to experiment with different learning rates, batch sizes, and augmentation techniques. Sometimes, reducing the learning rate or increasing the batch size can help stabilize training. Additionally, consider using early stopping to prevent overfitting. If the issue persists, reviewing the dataset for any inconsistencies or mislabeled data could also be beneficial. For more detailed guidance, you can refer to the VisDrone documentation.
mariem158
quelles sont les étapes pour télécharger roboflow100 sur google colab. je veux utiliser ce dataset pour faire la détection précise des véhicules filmés par des caméras ?
- Paula DerrengerUltralytics(đã chỉnh sửa)
@mariem158 bonjour!
Pour télécharger et utiliser le dataset Roboflow100 sur Google Colab pour la détection précise des véhicules, vous pouvez suivre les étapes ci-dessous. Cependant, il semble que vous ayez mentionné le dataset VisDrone dans votre commentaire, donc je vais également inclure des informations sur ce dataset.
Étapes pour télécharger Roboflow100 sur Google Colab
-
Installer les dépendances nécessaires:
!pip install roboflow -
Importer et configurer Roboflow:
from roboflow import Roboflow rf = Roboflow(api_key="YOUR_API_KEY") project = rf.workspace().project("roboflow100") dataset = project.version("1").download("yolov8") -
Configurer le dataset pour l'entraînement:
from ultralytics import YOLO

# Charger un modèle pré-entraîné
model = YOLO("yolo26n.pt")

# Entraîner le modèle
results = model.train(data=dataset.location + "/data.yaml", epochs=100, imgsz=640)
Utilisation du dataset VisDrone
Le dataset VisDrone est une excellente ressource pour la détection d'objets, le suivi d'objets et le comptage de foules dans des images et vidéos capturées par des drones. Voici comment vous pouvez l'utiliser avec YOLO26:
-
Télécharger et configurer le dataset VisDrone:
from ultralytics import YOLO # Charger un modèle pré-entraîné model = YOLO("yolo26n.pt") # Entraîner le modèle results = model.train(data="VisDrone.yaml", epochs=100, imgsz=640) -
YAML de configuration pour VisDrone:
# Ultralytics YOLO 🚀, AGPL-3.0 license
# VisDrone2019-DET dataset https://github.com/VisDrone/VisDrone-Dataset by Tianjin University
path: ../datasets/VisDrone
train: VisDrone2019-DET-train/images
val: VisDrone2019-DET-val/images
test: VisDrone2019-DET-test-dev/images
names:
  0: pedestrian
  1: people
  2: bicycle
  3: car
  4: van
  5: truck
  6: tricycle
  7: awning-tricycle
  8: bus
  9: motor
Pour plus de détails sur l'utilisation du dataset VisDrone, vous pouvez consulter la documentation complète ici : VisDrone Dataset Documentation.
N'hésitez pas à revenir vers nous si vous avez d'autres questions! 😊
Cordialement, L'équipe Ultralytics
-
comment intégrer visdataset sur google colab et l'intégrer dans mon code qui détecte seulement des véhicules par des drones situé verticalement au dessus de la route.
- Paula DerrengerUltralytics(đã chỉnh sửa)
Bonjour,
Merci pour votre question ! Pour intégrer le dataset VisDrone dans Google Colab et l'utiliser pour détecter uniquement des véhicules capturés par des drones, voici les étapes à suivre :
-
Configurer Google Colab:
- Assurez-vous d'avoir accès à un GPU pour accélérer l'entraînement. Allez dans
Runtime>Change runtime typeet sélectionnezGPU.
- Assurez-vous d'avoir accès à un GPU pour accélérer l'entraînement. Allez dans
-
Installer les dépendances:
- Installez les bibliothèques nécessaires, notamment
ultralyticspour YOLO26.
- Installez les bibliothèques nécessaires, notamment
-
Télécharger et préparer le dataset VisDrone:
- Utilisez le script de téléchargement et de conversion fourni dans le fichier
VisDrone.yaml.
- Utilisez le script de téléchargement et de conversion fourni dans le fichier
-
Entraîner le modèle:
- Chargez un modèle pré-entraîné YOLO26 et entraînez-le sur le dataset VisDrone en filtrant uniquement les classes de véhicules.
Voici un exemple de code pour chaque étape :
# Installer les dépendances
!pip install ultralytics

# Importer les bibliothèques nécessaires
from ultralytics import YOLO
import os
from pathlib import Path

# Télécharger et préparer le dataset VisDrone
def download_visdrone():
    from ultralytics.utils.downloads import download

    def visdrone2yolo(dir):
        from PIL import Image
        from tqdm import tqdm

        def convert_box(size, box):
            dw = 1. / size[0]
            dh = 1. / size[1]
            return (box[0] + box[2] / 2) * dw, (box[1] + box[3] / 2) * dh, box[2] * dw, box[3] * dh

        (dir / 'labels').mkdir(parents=True, exist_ok=True)
        pbar = tqdm((dir / 'annotations').glob('*.txt'), desc=f'Converting {dir}')
        for f in pbar:
            img_size = Image.open((dir / 'images' / f.name).with_suffix('.jpg')).size
            lines = []
            with open(f, 'r') as file:
                for row in [x.split(',') for x in file.read().strip().splitlines()]:
                    if row[4] == '0':
                        continue
                    cls = int(row[5]) - 1
                    box = convert_box(img_size, tuple(map(int, row[:4])))
                    lines.append(f"{cls} {' '.join(f'{x:.6f}' for x in box)}\n")
                with open(str(f).replace(f'{os.sep}annotations{os.sep}', f'{os.sep}labels{os.sep}'), 'w') as fl:
                    fl.writelines(lines)

    dir = Path('../datasets/VisDrone')
    urls = [
        'https://github.com/ultralytics/yolov5/releases/download/v1.0/VisDrone2019-DET-train.zip',
        'https://github.com/ultralytics/yolov5/releases/download/v1.0/VisDrone2019-DET-val.zip',
        'https://github.com/ultralytics/yolov5/releases/download/v1.0/VisDrone2019-DET-test-dev.zip',
        'https://github.com/ultralytics/yolov5/releases/download/v1.0/VisDrone2019-DET-test-challenge.zip'
    ]
    download(urls, dir=dir, curl=True, threads=4)
    for d in ['VisDrone2019-DET-train', 'VisDrone2019-DET-val', 'VisDrone2019-DET-test-dev']:
        visdrone2yolo(dir / d)

download_visdrone()

# Entraîner le modèle YOLO26 sur le dataset VisDrone
model = YOLO("yolo26n.pt")  # Charger un modèle pré-entraîné
results = model.train(data="VisDrone.yaml", epochs=100, imgsz=640)
Pour plus de détails sur la configuration du dataset et les options d'entraînement, vous pouvez consulter la documentation complète ici.
N'hésitez pas à revenir vers nous si vous avez d'autres questions. Bonne chance avec votre projet ! 🚀
Cordialement, L'équipe Ultralytics
-
comment je peux utiliser les modèles de visdrone et faire l'appel à ce dataset dans mon code pour faire la détection des véhicules par mon drone?
- Paula DerrengerUltralytics(đã chỉnh sửa)
Bonjour,
Merci pour votre question ! Pour utiliser le dataset VisDrone et détecter uniquement les véhicules capturés par des drones, voici comment procéder sur Google Colab :
-
Configurer Google Colab:
- Assurez-vous d'avoir accès à un GPU pour accélérer l'entraînement. Allez dans
Runtime>Change runtime typeet sélectionnezGPU.
- Assurez-vous d'avoir accès à un GPU pour accélérer l'entraînement. Allez dans
-
Installer les dépendances:
- Installez les bibliothèques nécessaires, notamment
ultralyticspour YOLO26.
- Installez les bibliothèques nécessaires, notamment
-
Télécharger et préparer le dataset VisDrone:
- Utilisez le script de téléchargement et de conversion fourni dans le fichier
VisDrone.yaml.
- Utilisez le script de téléchargement et de conversion fourni dans le fichier
-
Entraîner le modèle:
- Chargez un modèle pré-entraîné YOLO26 et entraînez-le sur le dataset VisDrone en filtrant uniquement les classes de véhicules.
Voici un exemple de code pour chaque étape :
# Installer les dépendances
!pip install ultralytics

# Importer les bibliothèques nécessaires
from ultralytics import YOLO
import os
from pathlib import Path

# Télécharger et préparer le dataset VisDrone
def download_visdrone():
    from ultralytics.utils.downloads import download

    def visdrone2yolo(dir):
        from PIL import Image
        from tqdm import tqdm

        def convert_box(size, box):
            dw = 1. / size[0]
            dh = 1. / size[1]
            return (box[0] + box[2] / 2) * dw, (box[1] + box[3] / 2) * dh, box[2] * dw, box[3] * dh

        (dir / 'labels').mkdir(parents=True, exist_ok=True)
        pbar = tqdm((dir / 'annotations').glob('*.txt'), desc=f'Converting {dir}')
        for f in pbar:
            img_size = Image.open((dir / 'images' / f.name).with_suffix('.jpg')).size
            lines = []
            with open(f, 'r') as file:
                for row in [x.split(',') for x in file.read().strip().splitlines()]:
                    if row[4] == '0':
                        continue
                    cls = int(row[5]) - 1
                    box = convert_box(img_size, tuple(map(int, row[:4])))
                    lines.append(f"{cls} {' '.join(f'{x:.6f}' for x in box)}\n")
                with open(str(f).replace(f'{os.sep}annotations{os.sep}', f'{os.sep}labels{os.sep}'), 'w') as fl:
                    fl.writelines(lines)

    dir = Path('../datasets/VisDrone')
    urls = [
        'https://github.com/ultralytics/yolov5/releases/download/v1.0/VisDrone2019-DET-train.zip',
        'https://github.com/ultralytics/yolov5/releases/download/v1.0/VisDrone2019-DET-val.zip',
        'https://github.com/ultralytics/yolov5/releases/download/v1.0/VisDrone2019-DET-test-dev.zip',
        'https://github.com/ultralytics/yolov5/releases/download/v1.0/VisDrone2019-DET-test-challenge.zip'
    ]
    download(urls, dir=dir, curl=True, threads=4)
    for d in ['VisDrone2019-DET-train', 'VisDrone2019-DET-val', 'VisDrone2019-DET-test-dev']:
        visdrone2yolo(dir / d)

download_visdrone()

# Entraîner le modèle YOLO26 sur le dataset VisDrone
model = YOLO("yolo26n.pt")  # Charger un modèle pré-entraîné
results = model.train(data="VisDrone.yaml", epochs=100, imgsz=640)
Pour plus de détails sur la configuration du dataset et les options d'entraînement, vous pouvez consulter la documentation complète ici.
N'hésitez pas à revenir vers nous si vous avez d'autres questions. Bonne chance avec votre projet ! 🚀
Cordialement, L'équipe Ultralytics
-
Elvis-Kiilu2
This is nice, but what's next after the detection? How do we send/retrieve the data to a given database? What further insights can we draw from the detected data? What other technologies can we intergrate to this to draw meaningful inferences??
- Paula DerrengerUltralytics(đã chỉnh sửa)
After detection, you have a few options to extend the functionality:
-
Data Storage: To send and store detections on a database:
import sqlite3 from datetime import datetime from ultralytics import YOLO # Connect to SQLite database connection = sqlite3.connect('my_detections.db') cursor = connection.cursor() # Create table cursor.execute('''CREATE TABLE IF NOT EXISTS detections (timestamp DATETIME, class TEXT, confidence REAL, x REAL, y REAL, width REAL, height REAL)''') # Example insertion from detection results = YOLO("yolo26n.pt")("image.jpg")[0] names = results.names timestamp = datetime.now().isoformat() for det in results.boxes: cursor.execute('''INSERT INTO detections (timestamp, class, confidence, x, y, width, height) VALUES (?, ?, ?, ?, ?, ?, ?)''', (timestamp, names[int(det.cls)], float(det.conf), *det.xywh[0].tolist())) connection.commit() connection.close() -
Further Analysis: Analyze the time series of detections to observe trends, detect anomalies, or aggregate counts over time.
-
Integration with Other Technologies: Integrate with IoT platforms for real-time alerts or incorporate AI-based services for enhanced image analysis and decision-making processes.
These steps help bridge the gap between raw detection outputs and actionable insights or responses in real-world applications.
-
Thanks @pderrenger for the reply. I wanted to implement this for my next project. Your insights are a good starting point. My aim is to extract/read data from the detected class/boxes. Then compare and match the read data with with those in a database that in a cloud data warehouse, Bigquery to be specific.
- Paula DerrengerUltralytics
Hey there! It's great to hear you're planning to use YOLOv8 for your project. To extract and compare data from detected objects with your BigQuery database, you can follow these steps:
-
Extract Data: After detection, extract the necessary details from each detection (like class, confidence, and bounding box coordinates).
-
Format Data: Convert this data into a suitable format (like JSON or CSV) that can be easily ingested into BigQuery.
-
Upload to BigQuery: Use the BigQuery API to upload your formatted data. Here’s a small Python snippet using
google-cloud-bigquery:from google.cloud import bigquery # Construct a BigQuery client object. client = bigquery.Client() # Define your table ID (dataset.table) table_id = "your-project.your_dataset.your_table" # Define the data to be inserted rows_to_insert = [ {u"class": detected_class, u"confidence": confidence, u"x_min": x_min, u"y_min": y_min, u"width": width, u"height": height} ] # Insert data into BigQuery errors = client.insert_rows_json(table_id, rows_to_insert) if errors == []: print("New rows have been added.") -
Query and Analyze: Once your data is in BigQuery, you can use SQL queries to compare, analyze, and draw insights based on your specific needs.
This workflow will help you leverage the power of cloud computing to analyze large datasets efficiently. If you need further assistance or have more specific requirements, feel free to ask! 🚀
-