دليل البدء السريع لـ Docker من Ultralytics
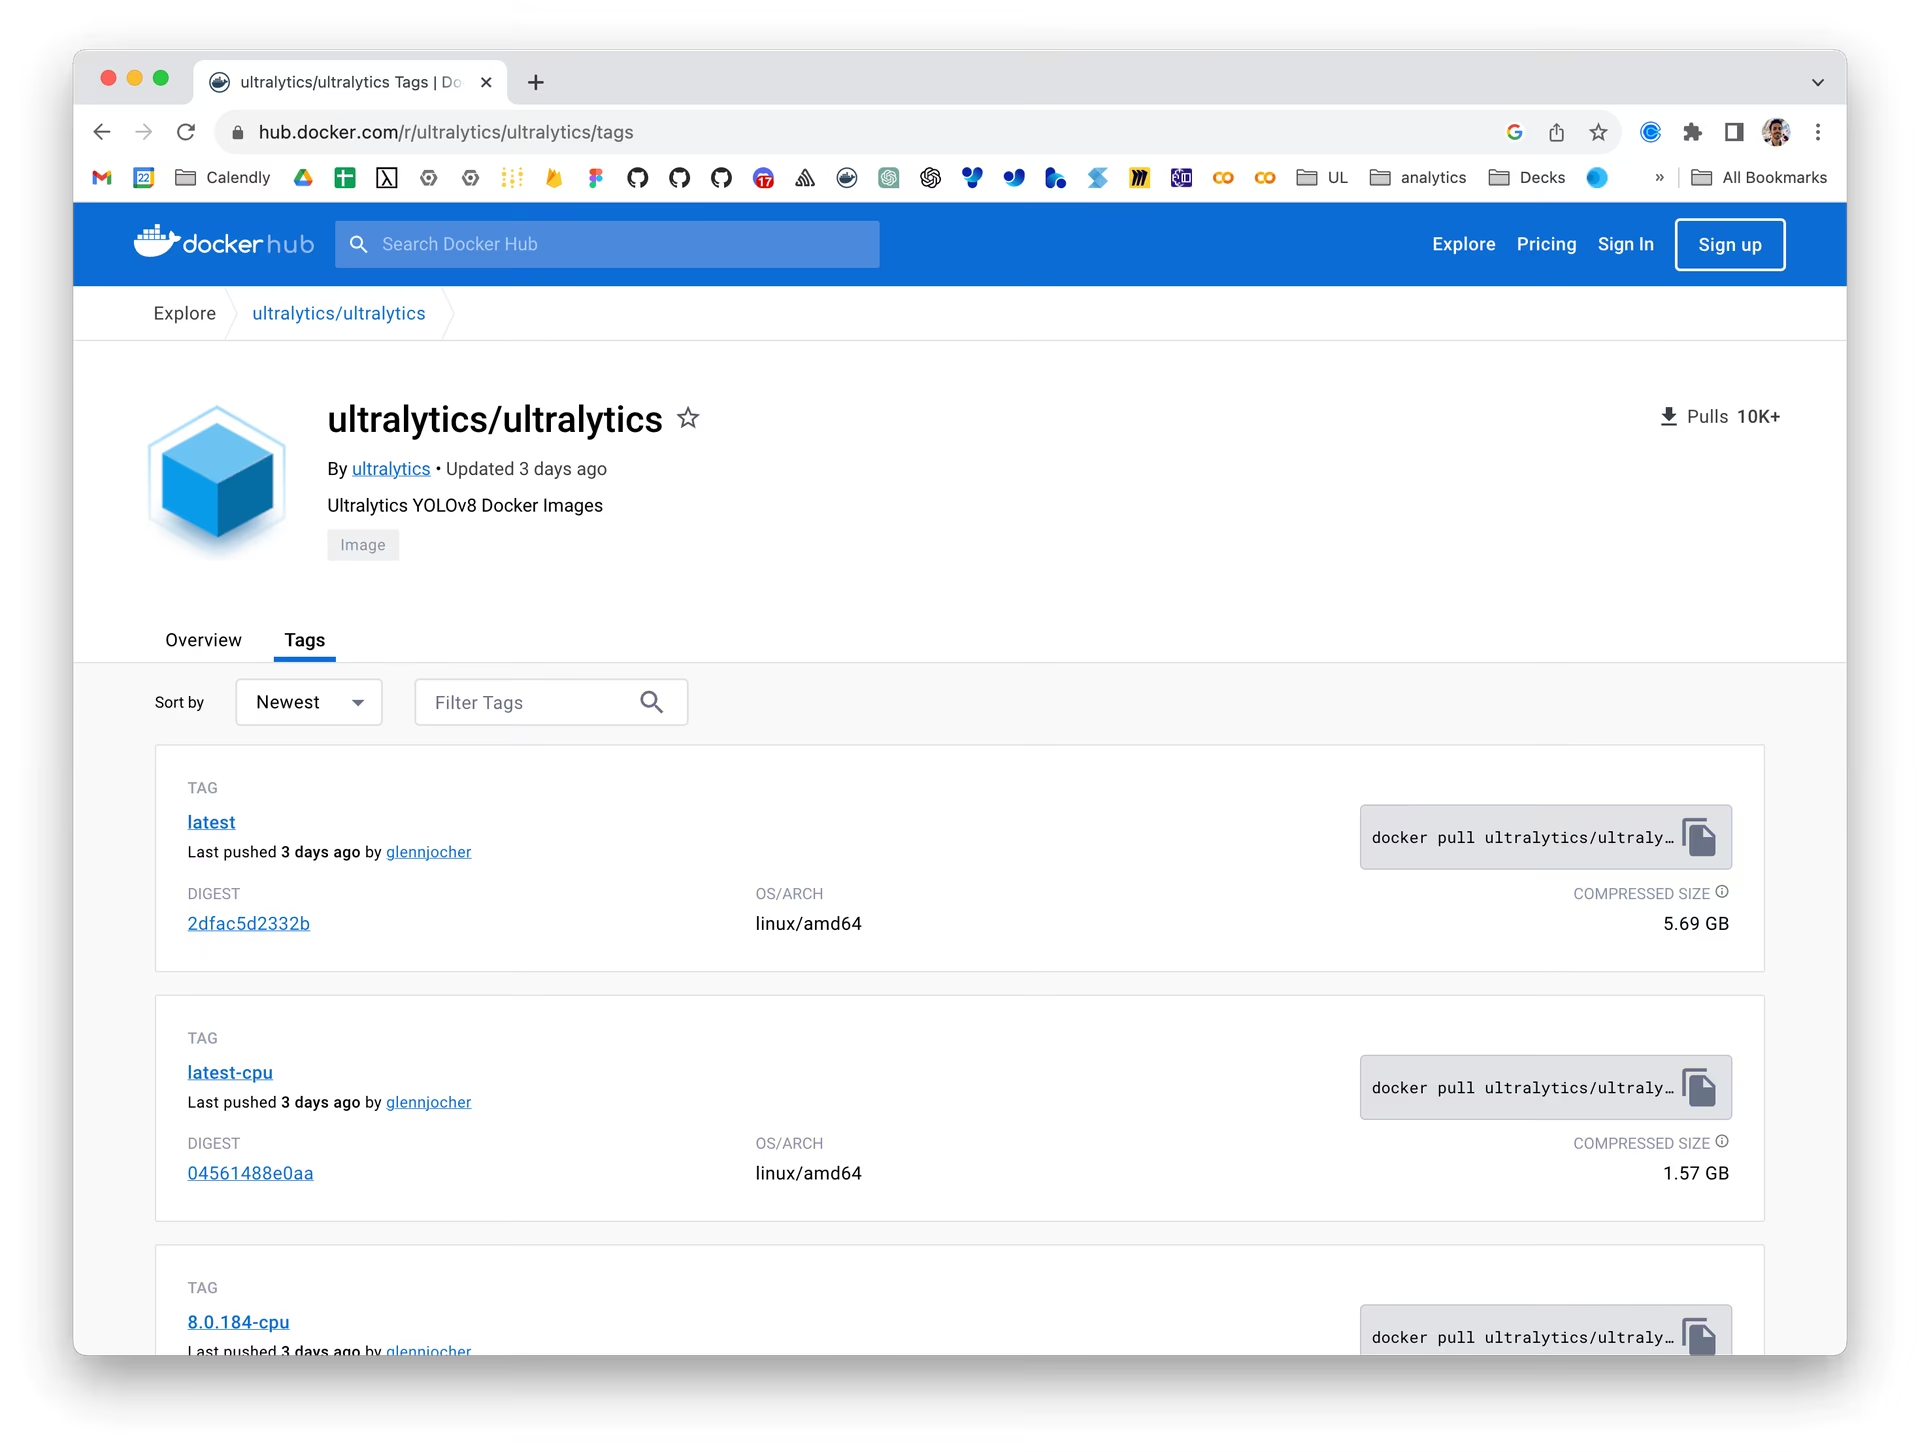
يوضح هذا الدليل كيفية إعداد بيئة Docker لمشاريع Ultralytics. Docker منصة لتطوير التطبيقات وشحنها وتشغيلها في حاويات، ما يضمن تشغيل البرنامج بالطريقة نفسها بصرف النظر عن مكان نشره.


ما ستتعلمه#
- إعداد Docker مع دعم NVIDIA
- تثبيت صور Ultralytics لـ Docker
- تشغيل Ultralytics في حاوية Docker مع دعم CPU أو GPU
- استخدام خادم عرض مع Docker لإظهار نتائج الكشف من Ultralytics
- تركيب الدلائل المحلية داخل الحاوية
شاهد: كيفية البدء باستخدام Docker | عرض توضيحي مباشر لاستخدام حزمة Ultralytics Python داخل Docker 🎉
المتطلبات الأساسية#
- تأكد من تثبيت Docker على نظامك. وإن لم يكن مثبتًا، يمكنك تنزيله وتثبيته من موقع Docker.
- لتسريع GPU، تأكد من أن نظامك يحتوي على GPU من NVIDIA وأن برامج تشغيل NVIDIA مثبتة. لا تتطلب صور CPU أجهزة NVIDIA.
- إذا كنت تستخدم أجهزة NVIDIA Jetson، فتأكد من تثبيت إصدار JetPack المناسب. راجع دليل NVIDIA Jetson لمزيد من التفاصيل.
إعداد Docker مع دعم NVIDIA (اختياري)#
أولًا، تحقق من تثبيت برامج تشغيل NVIDIA على النحو الصحيح بتشغيل:
nvidia-smiتثبيت NVIDIA Container Toolkit#
ثبّت NVIDIA Container Toolkit لتمكين دعم GPU في حاويات Docker:
curl -fsSL https://nvidia.github.io/libnvidia-container/gpgkey | sudo gpg --dearmor -o /usr/share/keyrings/nvidia-container-toolkit-keyring.gpg \
  && curl -s -L https://nvidia.github.io/libnvidia-container/stable/deb/nvidia-container-toolkit.list \
  | sed 's#deb https://#deb [signed-by=/usr/share/keyrings/nvidia-container-toolkit-keyring.gpg] https://#g' \
    | sudo tee /etc/apt/sources.list.d/nvidia-container-toolkit.list
حدّث قوائم الحزم وثبّت NVIDIA Container Toolkit:
sudo apt-get updatesudo apt-get install -y nvidia-container-toolkitالتحقق من أجهزة CDI باستخدام Docker#
شغّل nvidia-ctk cdi list للتأكد من توفر أجهزة CDI الخاصة بـ GPU (تُنشئ خدمة nvidia-cdi-refresh التابعة لمجموعة الأدوات المواصفة وتحافظ عليها تلقائيًا في إصدارات مجموعة الأدوات >= 1.18):
nvidia-ctk cdi listينبغي أن تظهر إدخالات مثل nvidia.com/gpu=0 وnvidia.com/gpu=all. كما تظهر أجهزة CDI المكتشفة في docker info.
تثبيت صور Ultralytics لـ Docker#
تنشر Ultralytics الصور التالية على Docker Hub. وتُبنى كل صورة من ملف Dockerfile المرتبط بها بواسطة سير عمل النشر إلى Docker.
| الوسم | المنصة والغرض | المصدر |
|---|---|---|
latest | Linux AMD64 مع CUDA لتدريب GPU والاستدلال | Dockerfile |
latest-export | Linux AMD64 مع CUDA وتبعيات التصدير للتحويل وقياس الأداء | Dockerfile-export |
latest-amd | Linux AMD64 مع ROCm وMIGraphX لتدريب GPU من AMD والاستدلال | Dockerfile-amd |
latest-python | صورة Linux خفيفة لـ AMD64 وPython 3.14 للاستدلال على CPU | Dockerfile-python |
latest-python-export | صورة Linux لـ AMD64 وPython 3.13 وCPU، تتضمن تبعيات التصدير | Dockerfile-python-export |
latest-cpu | صورة CPU لـ Linux AMD64 مع Bash بوصفه الأمر الافتراضي | Dockerfile-cpu |
latest-jupyter | صورة CPU لـ Linux AMD64 تتضمن JupyterLab ودفاتر دروس Ultralytics | Dockerfile-jupyter |
latest-arm64 | صورة Linux لـ ARM64 وPython 3.13 وCPU، مخصصة لأجهزة Apple silicon وRaspberry Pi وأنظمة ARM64 الأخرى | Dockerfile-arm64 |
latest-nvidia-arm64 | Linux ARM64 لـ DGX Spark (DGX OS) وPyTorch على Thor (JetPack 7.1)؛ لا يدعم JetPack إصدار TensorRT المضمّن | Dockerfile-nvidia-arm64 |
latest-jetson-jetpack6 | Linux ARM64 لأجهزة NVIDIA Jetson التي تعمل بـ JetPack 6 | Dockerfile-jetson-jetpack6 |
latest-jetson-jetpack5 | Linux ARM64 لأجهزة NVIDIA Jetson التي تعمل بـ JetPack 5 | Dockerfile-jetson-jetpack5 |
latest-jetson-jetpack4 | Linux ARM64 لأجهزة NVIDIA Jetson التي تعمل بـ JetPack 4 | Dockerfile-jetson-jetpack4 |
latest-runner | صورة CUDA لـ Linux AMD64 لمُشغّل GPU مستضاف ذاتيًا لـ GitHub Actions | Dockerfile-runner |
latest-runner-cpu | صورة Linux AMD64 لمُشغّل CPU مستضاف ذاتيًا لـ GitHub Actions | Dockerfile-runner-cpu |
تستخدم صور GPU بمعمارية AMD64 (latest وlatest-export وlatest-runner) الإصدار 2.15 من PyTorch والإصدار 13.2 من CUDA. تحقّق من دعم CUDA في برنامج تشغيل المضيف باستخدام nvidia-smi قبل تشغيلها؛ فتثبيت حاوية أحدث لا يحدّث برنامج تشغيل المضيف. أزال CUDA 13 الدعم لوحدات GPU من Maxwell وPascal وVolta، بما في ذلك Tesla P100 وV100.
تستخدم صورة NVIDIA ARM64 الإصدار NVIDIA PyTorch 26.10 مع CUDA 13.4 وTensorRT 11.4. لا يمتد دعم PyTorch لـ Thor إلى TensorRT: لا تدعم NVIDIA الإصدار TensorRT 11.4 على JetPack. لتصدير TensorRT على Jetson، استخدم بيئة التشغيل TensorRT 10.x المدعومة لإصدار JetPack لديك. اتبع متطلبات المنصة في دليل Jetson أو دليل DGX Spark. وتحتفظ صور JetPack 4 و5 و6 بمجموعات البرامج الخاصة بكل جهاز على حدة.
يتوفر ملف Dockerfile الخاص بـ Conda لإجراء عمليات البناء المحلية؛ وقد عُطّل النشر الآلي لـ latest-conda، لذا لا يتضمن وسم السجل هذا التحديثات.
تستخدم صور Python وCPU وJupyter ومشغّل CPU الإصدار Python 3.14. وتستخدم صورة تصدير Python الأساس latest-python-3.13، المبني من Dockerfile-python نفسه باستخدام --build-arg PYTHON_VERSION=3.13، لأن TensorFlow وCoreML وPaddlePaddle لا تدعم Python 3.14 بعد.
تتبّع الوسوم التي تبدأ بـ latest أحدث إصدار منشور من بناء الفرع الرئيسي. وتستبدل الوسوم ذات الإصدارات البادئة latest بإصدار من Ultralytics، مثل VERSION أو VERSION-cpu أو VERSION-jetson-jetpack6. استخدم وسمًا ذا إصدار للحصول على بيئة قابلة لإعادة الإنتاج.
لسحب أحدث صورة:
# Pull the latest Ultralytics image from Docker Hub
sudo docker pull ultralytics/ultralytics:latest
لبناء صورة بنفسك بدلًا من ذلك، استنسخ المستودع ومرّر ملف Dockerfile المطابق من الجدول أعلاه، مع استخدام جذر المستودع كسياق للبناء:
# Build the CPU image locally from docker/Dockerfile-cpu
sudo docker build -t ultralytics/ultralytics:latest-cpu -f docker/Dockerfile-cpu .
تشغيل Ultralytics في حاوية Docker#
إليك كيفية تشغيل حاوية Ultralytics Docker:
استخدام CPU فقط#
# Run without GPU
sudo docker run -it --ipc=host ultralytics/ultralytics:latest-cpu
استخدام وحدات GPU#
# Run with all GPUs
sudo docker run -it --ipc=host --device nvidia.com/gpu=all ultralytics/ultralytics:latest

# Run specifying which GPUs to use
sudo docker run -it --ipc=host --device nvidia.com/gpu=2 --device nvidia.com/gpu=3 ultralytics/ultralytics:latest
يخصص الخيار -it طرفية زائفة (pseudo-TTY) ويبقي الإدخال القياسي مفتوحًا، ما يتيح لك التفاعل مع الحاوية. ويتيح الخيار --ipc=host مشاركة مساحة أسماء IPC الخاصة بالمضيف، وهو أمر أساسي لمشاركة الذاكرة بين العمليات. أما لوحدات GPU من NVIDIA، فيمنح الخيار --device nvidia.com/gpu=... إمكانية الوصول عبر CDI. ولوحدات GPU من AMD، تتيح الخيارات --device الوصول إلى برنامج تشغيل نواة GPU (/dev/kfd) وعُقد العرض (/dev/dri).
على Linux، تتطلب طلبات أجهزة CDI إصدار Docker >= 28.2.0 (يكون CDI مفعّلًا افتراضيًا) وإصدار nvidia-container-toolkit >= 1.18 (إنشاء مواصفة CDI تلقائيًا). حدّث مضيفات Linux الأقدم قبل تشغيل حاويات GPU. وقد يؤدي الخيار القديم --gpus all إلى فقدان إمكانية الوصول إلى GPU (Failed to initialize NVML: Unknown Error) عند إعادة تحميل المضيف لـ systemd أثناء تحديثات الحزم الاعتيادية (nvidia-container-toolkit#48). تتضمن طلبات CDI --device عُقد الأجهزة في تهيئة الحاوية، لذا تحتفظ الحاويات طويلة التشغيل، مثل عمال التدريب أو مشغّلات CI، بإمكانية الوصول إلى GPU عبر عمليات إعادة التحميل.
يستخدم دعم GPU في Docker Desktop على Windows حاليًا --gpus all مع الواجهة الخلفية WSL 2، لأن أجهزة NVIDIA CDI غير متاحة هناك. ولا يستخدم Windows نظام systemd الخاص بـ Linux، لذا لا ينطبق عليه إخفاق إعادة تحميل البرنامج الخفي المذكور أعلاه.
ملاحظة بشأن إمكانية الوصول إلى الملفات#
للعمل على الملفات الموجودة على جهازك المحلي من داخل الحاوية، يمكنك استخدام وحدات تخزين Docker:
# Mount a local directory into the container
sudo docker run -it --ipc=host --device nvidia.com/gpu=all -v /path/on/host:/path/in/container ultralytics/ultralytics:latest
استبدل /path/on/host بمسار الدليل على جهازك المحلي، و/path/in/container بالمسار المطلوب داخل حاوية Docker.
الاحتفاظ بمخرجات التدريب#
تُحفظ مخرجات التدريب افتراضيًا في /ultralytics/runs/<task>/<name>/ داخل الحاوية. وإذا لم تركّب دليلًا من المضيف، فستُفقد المخرجات عند إزالة الحاوية.
للاحتفاظ بمخرجات التدريب:
# Recommended: mount workspace and specify project path
sudo docker run --rm -it -v "$(pwd)":/w -w /w ultralytics/ultralytics:latest \
  yolo train model=yolo26n.pt data=coco8.yaml project=/w/runs
يحفظ هذا جميع مخرجات التدريب في ./runs على جهازك المضيف.
تشغيل تطبيقات واجهة المستخدم الرسومية (GUI) في حاوية Docker#
التعليمات التالية تجريبية. تنطوي مشاركة مقبس X11 مع حاوية Docker على مخاطر أمنية محتملة. لذلك، يُنصح باختبار هذا الحل في بيئة محكومة فقط.
يُستخدم Docker أساسًا لوضع التطبيقات التي تعمل في الخلفية وبرامج CLI داخل حاويات، لكنه يستطيع أيضًا تشغيل البرامج الرسومية. في عالم Linux، يتولى خادما عرض رسوميّان رئيسيان التعامل مع العرض الرسومي: X11 (المعروف أيضًا باسم نظام نوافذ X) وWayland. قبل البدء، من الضروري تحديد خادم الرسوميات الذي تستخدمه حاليًا. نفّذ هذا الأمر لمعرفة ذلك:
env | grep -E -i 'x11|xorg|wayland'لا يشمل هذا الدليل إعداد خادم عرض X11 أو Wayland وتهيئته. إذا لم يُرجع الأمر أعلاه أي نتيجة، فستحتاج إلى البدء بتشغيل أحدهما على نظامك قبل المتابعة.
تشغيل حاوية Docker بواجهة رسومية#
استخدام وحدات GPU
إذا كنت تستخدم وحدات GPU، فيمكنك إضافة العلامة --device nvidia.com/gpu=all إلى الأمر.
إذا كنت تستخدم X11، فيمكنك تشغيل الأمر التالي للسماح لحاوية Docker بالوصول إلى مقبس X11:
xhost +local:docker && docker run -e DISPLAY=$DISPLAY \
  -v /tmp/.X11-unix:/tmp/.X11-unix \
  -v ~/.Xauthority:/root/.Xauthority \
  -it --ipc=host ultralytics/ultralytics:latest
يضبط هذا الأمر متغير البيئة DISPLAY على شاشة المضيف، ويثبّت مقبس X11، ويربط الملف .Xauthority بالحاوية. ويتيح الأمر xhost +local:docker لحاوية Docker الوصول إلى خادم X11.
استخدام Docker بواجهة رسومية#
تتضمن صور Ultralytics إصدار OpenCV بلا واجهة رسومية، لذا ثبّت أولاً إصدار OpenCV ذي الواجهة الرسومية ومكتبات النظام الخاصة به داخل الحاوية:
apt-get update && apt-get install -y --no-install-recommends libgl1 libglib2.0-0 libsm6
pip uninstall -y opencv-python-headless && pip install opencv-python
يمكنك الآن عرض التطبيقات الرسومية داخل حاوية Docker. على سبيل المثال، يمكنك تشغيل أمر CLI التالي لعرض التنبؤات الصادرة عن نموذج YOLO26:
yolo predict model=yolo26n.pt show=Trueالاختبار
من الطرق البسيطة للتحقق من إمكانية وصول مجموعة Docker إلى خادم X11 تشغيل حاوية تتضمن برنامجاً بواجهة رسومية مثل xclock أو xeyes. وبدلاً من ذلك، يمكنك أيضاً تثبيت هذه البرامج في حاوية Ultralytics Docker لاختبار الوصول إلى خادم X11 الخاص بخادم العرض GNU/Linux. إذا واجهت أي مشكلات، ففكّر في ضبط متغير البيئة -e QT_DEBUG_PLUGINS=1. يؤدي ضبط متغير البيئة هذا إلى إظهار معلومات تصحيح الأخطاء، ما يساعد في استكشاف المشكلات وإصلاحها.
بعد الانتهاء من استخدام واجهة Docker الرسومية#
في كلتا الحالتين، لا تنسَ إلغاء إمكانية الوصول لمجموعة Docker عند الانتهاء.
xhost -local:dockerهل تريد عرض نتائج الصور مباشرةً في Terminal؟
على Linux وmacOS، يمكنك عرض نتائج الصور في الطرفية المدمجة في VSCode باستخدام بروتوكول sixel.
أصبحت الآن مستعدًا لاستخدام Ultralytics مع Docker. لاستضافة تطبيق الويب من Ultralytics على بنيتك التحتية، راجع دليل Platform On-Premise.
الأسئلة الشائعة#
لإعداد Ultralytics باستخدام Docker، تأكد أولاً من تثبيت Docker على نظامك. إذا كان لديك GPU من NVIDIA، فثبّت NVIDIA Container Toolkit لتمكين دعم GPU. ثم اسحب أحدث صورة Docker لـ Ultralytics من Docker Hub باستخدام الأمر التالي:
sudo docker pull ultralytics/ultralytics:latestيضمن استخدام صور Docker من Ultralytics اتساق البيئة بين الأجهزة المختلفة، من خلال تكرار البرامج والاعتماديات نفسها. ويفيد ذلك خصوصًا عند التعاون بين الفرق وتشغيل النماذج على أجهزة متنوعة والحفاظ على قابلية إعادة إنتاج عمليات نشر النماذج. استخدم
latestللتدريب العام على وحدات GPU من NVIDIA، أو اختر الصورة المطابقة لإصدار JetPack لجهاز NVIDIA Jetson.تأكد أولًا من تثبيت NVIDIA Container Toolkit وتهيئته. ثم استخدم الأمر التالي لتشغيل Ultralytics YOLO مع دعم GPU:
sudo docker run -it --ipc=host --device nvidia.com/gpu=all ultralytics/ultralytics:latest # all GPUsيُعد هذا الأمر حاوية Docker مع إمكانية الوصول إلى GPU، ويمكنك تقييد الوصول إلى وحدات GPU محددة أو التبديل إلى AMD ROCm.
لعرض نتائج تنبؤ YOLO بواجهة رسومية في حاوية Docker، عليك السماح لـ Docker بالوصول إلى خادم العرض. بالنسبة إلى الأنظمة التي تعمل بـ X11، يكون الأمر كما يلي:
xhost +local:docker && docker run -e DISPLAY=$DISPLAY \
  -v /tmp/.X11-unix:/tmp/.X11-unix \
  -v ~/.Xauthority:/root/.Xauthority \
  -it --ipc=host ultralytics/ultralytics:latest
بالنسبة إلى الأنظمة التي تعمل بـ Wayland، استخدم:
xhost +local:docker && docker run -e DISPLAY=$DISPLAY \
  -v $XDG_RUNTIME_DIR/$WAYLAND_DISPLAY:/tmp/$WAYLAND_DISPLAY \
  --net=host -it --ipc=host ultralytics/ultralytics:latest
ثبّت إصدار OpenCV ذي الواجهة الرسومية داخل الحاوية قبل استخدام
show=True، كما هو موضح في قسم تشغيل تطبيقات واجهة المستخدم الرسومية (GUI) في حاوية Docker.نعم، يمكنك تركيب أدلة محلية داخل حاوية Ultralytics Docker باستخدام العلامة
-v:sudo docker run -it --ipc=host --device nvidia.com/gpu=all -v /path/on/host:/path/in/container ultralytics/ultralytics:latestاستبدل
/path/on/hostبالدليل الموجود على جهازك المحلي، و/path/in/containerبالمسار المطلوب داخل الحاوية. يتيح لك هذا الإعداد العمل على ملفاتك المحلية من داخل الحاوية. لمزيد من المعلومات، راجع قسم ملاحظة حول إمكانية الوصول إلى الملفات.


التعليقات14
اطرح سؤالًا، وشارك نتائجك، أو ساعد شخصًا آخر.
 Letícia Rama
Hello,
Is this workflow suitable for other YOLO families, such as YOLO26?
 Glenn JocherUltralytics
Yes, the same workflow supports YOLO26 and other model families available in the
ultralyticspackage—use an up-to-date official image and specify the appropriate weights, such asmodel=yolo26n.pt. See the Docker Quickstart Guide for current image options, and feel free to drop any follow-up questions here so the Ultralytics team can help.1- Letícia Rama
Right Glenn, thanks
lauravchrobak
It looks like the, "Running Ultralytics in Docker Container" section is duplicated here
HellaPinot
Hello! I have been testing running yolov8 inside a container, things seem to work well however after a somewhat random amount of time the inference hangs with no error output.
I know the container hasn't crashed as I am reading events from a processing queue and I can see new partitions are being allocated on another thread.
I'm running two models one after the other (different sizes and detection classes), so I'm wondering if this could be the root of the issue? At no point would they be running at the same time.
I believe it is happening exactly when I call predict. Its hard to debug as again it happens very randomly and there is not output from the container, it seems like there might be an infinite loop somewhere thats stopping it from continuing.
Curious if anything like this has been encountered before?
- Glenn JocherUltralytics
Hello! 👋
It sounds like a tricky issue, especially since it occurs randomly. Here are a few suggestions that might help you isolate or resolve the problem:
-
Logging and Monitoring: Enhance the logging within your container. Consider logging the input sizes and other relevant data before the prediction call, and make sure you're logging any exceptions that could be silently caught.
-
Resource Checks: Ensure that there are no resource starvation issues, such as GPU memory not being freed up properly. Tools like
nvidia-smican help monitor GPU usage. -
Sequential Model Loading: Although the models are run sequentially and not in parallel, it could be beneficial to explicitly clear the memory after each model's predictions are done. This can be done by deleting model objects and calling
torch.cuda.empty_cache()if you are using PyTorch. -
Hardware Testing: Run your container pointing the inference to CPU only for a time to see if the problem persists. This could help determine if the issue is related to GPU computation or not.
-
Reproducibility Tactic: Since the issue is sporadic, try to determine if there’s a specific type of input or specific conditions under which this occurs more frequently.
If these suggestions don't help, please provide more details or code snippets, and I’d be happy to dive deeper into this!
Let me know how it goes!
-
HWKevinhwk
I want to install ultralytics using docker on top of NVIDIA TX2, is there a detailed procedure? The reason for this question is that after entering the command nvidia-smi in the TX2 terminal, the output is command not found, and I'm worried that the steps in the document above are not applicable to TX2.
 Paula DerrengerUltralytics(تم التعديل)
@HWKevinhwk hey there! 🚀 Setting up Ultralytics on NVIDIA TX2 with Docker can be a bit tricky if
nvidia-smiis missing, but no worries.For NVIDIA Jetson platforms like TX2,
nvidia-smiis typically not available, and you'll usetegrastatsinstead to monitor the GPU. The Jetson TX2 is supported on JetPack 4, so install JetPack 4 first, as it includes the NVIDIA drivers and libraries needed for GPU acceleration. Jetson devices use the Docker integration provided through JetPack with--runtime=nvidiarather than--gpus all. Then pull and run the Ultralytics Docker image for JetPack 4:t=ultralytics/ultralytics:latest-jetson-jetpack4 sudo docker pull $t && sudo docker run -it --ipc=host --runtime=nvidia $tSee the NVIDIA Jetson guide for details. If you encounter any specific issues, feel free to drop them here. Happy detecting! 🎉
Is there a detailed tutorial on deploying yolov8 on jetson TX2 using docker? I am pulling images docker pull ultralytics/ultralytics:latest-jetson terminal will downloading pause, long time pulling images unsuccessful, repeated attempts still so, any solution please?
- Paula DerrengerUltralytics(تم التعديل)
@HWKevinhwk hey there! 😊
It sounds like you're facing issues with the Docker image pull for the Jetson TX2. This might be due to network issues or Docker Hub delays, or to using a tag that does not exist.
Here's a simplified breakdown to get you started on the TX2 using Docker:
-
Ensure JetPack is installed: The TX2 is supported on JetPack 4, which includes the GPU drivers necessary for Docker integration with the Jetson GPU.
-
Install Docker:
sudo apt-get install docker.io -
NVIDIA runtime support (JetPack should handle this):
nvidia-smidoesn't work on Jetson, so verify thenvidiaruntime withdocker info | grep -i runtime. -
Pull the Docker image for Jetson. Pulling large Docker images can be challenging on slower networks:
sudo docker pull ultralytics/ultralytics:latest-jetson-jetpack4If you keep facing issues while pulling the image, try restarting your Docker service or check your network settings. Sometimes, using a different network can help too!
-
Run the Image:
sudo docker run -it --ipc=host --runtime=nvidia ultralytics/ultralytics:latest-jetson-jetpack4
This should set you on the right path to running Ultralytics YOLO on your Jetson TX2. If the problem persists, it might be worth checking Docker's log or discussing this issue further with your network admin or on Docker forums! 😄
Happy coding! 🚀
-
Peter-coding
Hey! I trained a YOLOv8 model on my local computer. I have the best.pt file, and I can use it in CLI (conda) for predict. I want to make a python app, which uses this best.pt file, and I want to containerize it. Is it possible to write the full python app (it is just a few lines of code, which runs the detection, then writes the detection result to a database), then containerize it, and able to use it anywhere? Thank you! :D
- Paula DerrengerUltralytics
Hey there! 😊
Absolutely, you can absolutely containerize your Python app that uses the
best.ptmodel! Here's a quick guide:-
Create Your Python App: Just like you mentioned, write your Python code that performs the detection and interacts with the database.
-
Dockerize Your Application:
-
Dockerfile: Create a Dockerfile in your project directory. Here's a simple example that uses Ultralytics' Docker image as a base:
FROM ultralytics/ultralytics:latest WORKDIR /app COPY . /app RUN pip install -r requirements.txt # Assuming you have a requirements.txt CMD ["python", "your_script.py"] -
Build Your Docker Image: Run the following command in your project directory:
sudo docker build -t your-app-name . -
Run Your Container: To run your container, especially if you're planning to use GPU, you might want to specify
--gpus all:sudo docker run -it --ipc=host --gpus all your-app-nameFor accessing local files, consider mounting a volume as described in the Docker Quickstart Guide.
-
-
Deployment: With your Docker image built, you can now deploy and run it anywhere that Docker is supported. If using a GPU, ensure the host machine supports NVIDIA GPUs and has the necessary drivers and Docker configured correctly.
That's it! You should be able to use your model within a containerized app now. If you hit any snags, double-check the Docker Quickstart Guide for Ultralytics for more details. Happy coding! 😄
-
udayzee05
DEPRECATION NOTICE The nvidia-docker wrapper is no longer supported, and the NVIDIA Container Toolkit has been extended to allow users to configure Docker to use the NVIDIA Container Runtime. For further instructions, see the NVIDIA Container Toolkit documentation and specifically the install guide.22 Jan 2024
- Paula DerrengerUltralytics(تم التعديل)
Hey there! 👋 Thanks for bringing up the deprecation notice regarding the nvidia-docker wrapper. You're right; use the NVIDIA Container Toolkit for GPU support in Docker containers. Here's how to set it up on Ubuntu/Debian, as described in our Docker Quickstart Guide:
# Add the NVIDIA Container Toolkit repository
curl -fsSL https://nvidia.github.io/libnvidia-container/gpgkey | sudo gpg --dearmor -o /usr/share/keyrings/nvidia-container-toolkit-keyring.gpg \
  && curl -s -L https://nvidia.github.io/libnvidia-container/stable/deb/nvidia-container-toolkit.list \
  | sed 's#deb https://#deb [signed-by=/usr/share/keyrings/nvidia-container-toolkit-keyring.gpg] https://#g' \
    | sudo tee /etc/apt/sources.list.d/nvidia-container-toolkit.list

# Install the NVIDIA Container Toolkit
sudo apt-get update
sudo apt-get install -y nvidia-container-toolkit
And to verify that the GPU devices are available to Docker:
nvidia-ctk cdi listThis should list entries such as
nvidia.com/gpu=all, indicating that your Docker setup can leverage GPU acceleration. 🚀For more detailed instructions and tips on using Ultralytics with Docker, including mounting local directories and running containers, check out our Docker Quickstart Guide. Happy coding!