كيفية عزل الكائنات المُجزّأة باستخدام Ultralytics YOLO
ينتج تقسيم الكائنات قناعًا دقيقًا على مستوى البكسل لكل كائن مكتشف، ما يتيح عزل كل كائن من الصورة على حدة. يوضح هذا الدليل كيفية تحويل نتائج التقسيم في Ultralytics YOLO إلى كائنات معزولة باستخدام وضع التنبؤ وOpenCV، إما بخلفية سوداء مصمتة أو بخلفية شفافة للحفظ بتنسيق PNG.
شاهد: كيفية عزل الكائنات المُجزأة باستخدام Ultralytics YOLO26 | درس Python التعليمي | VisionAI 🚀
لماذا نعزل الكائنات المُجزّأة؟#
يفتح استخراج الكائنات الفردية من الصورة المجال أمام مجموعة من مهام المعالجة اللاحقة:
- إزالة الخلفية لصور المنتجات أو الكتالوجات أو التحرير الإبداعي.
- قصاصات لكل كائن لإنشاء مجموعات بيانات التصنيف من نتائج الكشف.
- المعالجة المركزة كي لا ترى الخطوات اللاحقة، مثل OCR أو تحليل الألوان أو القياس، سوى الكائن دون المشهد المحيط به.
- تصدير PNG بخلفية شفافة لتركيب الكائنات على خلفيات جديدة.
تعمل هذه الطريقة مع أي نموذج لتقسيم الصور من Ultralytics YOLO وتتبع أربع مراحل: تشغيل الاستدلال → استخراج كل محيط → عزل الكائن → حفظ النتيجة.
تشغيل استدلال التقسيم#
ثبّت المكتبات المطلوبة، ثم حمّل نموذج تقسيم مثل YOLO26n-seg (اللاحقة -seg مطلوبة لإنتاج الأقنعة)، ونفّذ التنبؤ على الصورة المصدر:
from ultralytics import YOLO
# تحميل نموذج للتقسيم
model = YOLO("yolo26n-seg.pt")
# تشغيل الاستدلال على مصدر
results = model.predict(source="path/to/image.jpg")إذا استدعيت model.predict() دون تحديد source، فسيستخدم Ultralytics صور الأمثلة المرفقة مع الحزمة (bus.jpg وzidane.jpg)، وهو أمر مفيد لاختبار سير العمل بسرعة.
استخراج محيطات الكائنات#
يتوافق كل عنصر في results مع صورة واحدة، ويؤدي التكرار على النتيجة إلى إرجاع كشف واحد في كل مرة. لكل كشف، انسخ الصورة الأصلية، واقرأ تسمية الفئة، وارسم محيط قناع الكائن على قناع ثنائي فارغ. تحدد المنطقة البيضاء في هذا القناع بدقة البكسلات التي تنتمي إلى الكائن.
تُنفذ المقاطع البرمجية في هذا القسم والقسم التالي داخل حلقة الكشف أدناه؛ أما الشيفرة الكاملة الجاهزة للنسخ واللصق فتجدها في المثال الكامل.
from pathlib import Path
import cv2
import numpy as np
for r in results:
img = np.copy(r.orig_img)
img_name = Path(r.path).stem # الاسم الأساسي للصورة المصدر
# التكرار على كل كائن مكتشف في الصورة
for ci, c in enumerate(r):
label = c.names[c.boxes.cls.tolist().pop()] # اسم الفئة
# إنشاء قناع ثنائي ورسم محيط الكائن عليه
b_mask = np.zeros(img.shape[:2], np.uint8)
contour = c.masks.xy[0].astype(np.int32).reshape(-1, 1, 2)
cv2.drawContours(b_mask, [contour], -1, (255, 255, 255), cv2.FILLED)- يعيد
c.masks.xy[0]محيط القناع على هيئة إحداثيات نقاط(x, y)للكائن في نتيجة الكشف المنفردة هذه. - يحوّل
.astype(np.int32)النقاط منfloat32، إذ لا يقبلdrawContours()في OpenCV تلك النقاط. - يعيد
.reshape(-1, 1, 2)تشكيل النقاط وفق تخطيط[N, 1, 2]الذي يتوقعهdrawContours()، حيث يشيرNإلى عدد نقاط المحيط.
يؤدي تمرير [contour] مع الفهرس -1 إلى رسم جميع نقاط المحيط المحدد، بينما يملأ cv2.FILLED كل بكسل محاط باللون الأبيض.
عزل الكائن#
بعد تجهيز القناع الثنائي، ادمجه مع الصورة الأصلية. ثمة طريقتان شائعتان، بحسب الخلفية التي تريدها:
حوّل القناع إلى ثلاثة قنوات واحتفظ بالبكسلات المتداخلة مع الكائن فقط. ستصبح كل المنطقة الواقعة خارج المحيط سوداء:
# عزل الكائن بخلفية سوداء
mask3ch = cv2.cvtColor(b_mask, cv2.COLOR_GRAY2BGR)
isolated = cv2.bitwise_and(mask3ch, img)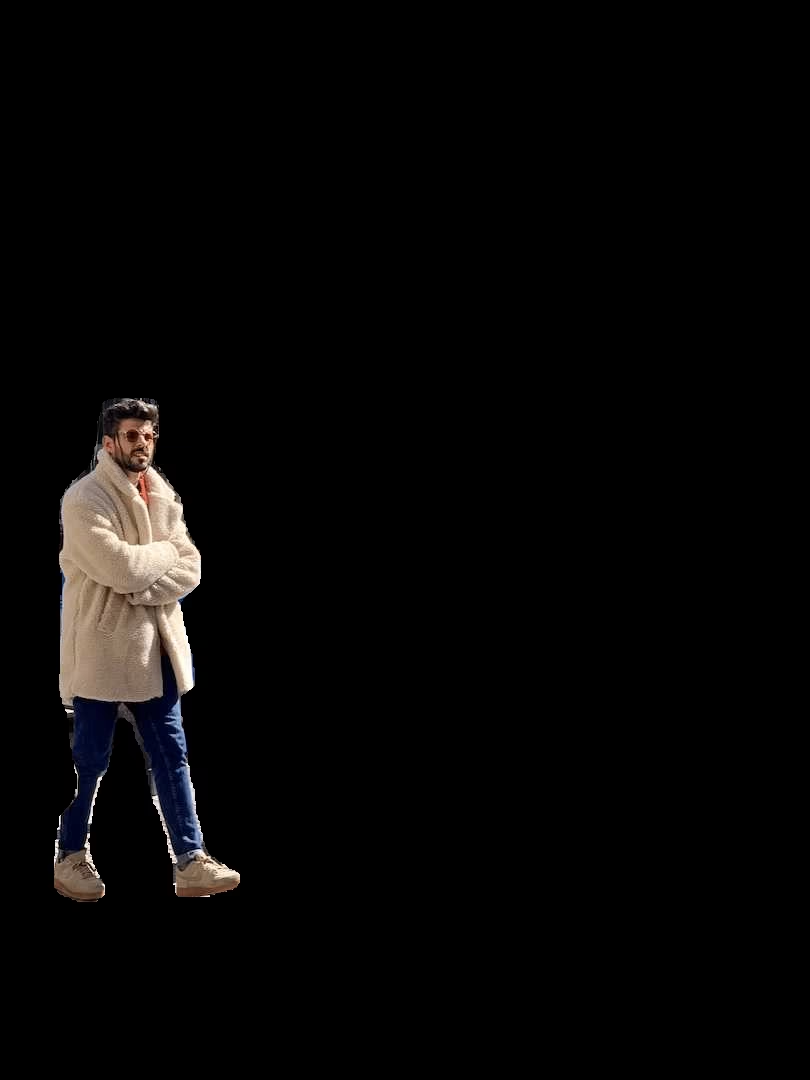
للاحتفاظ بمنطقة الكائن وحدها بدلًا من الصورة كاملة الحجم، قصّ الصورة وفق مربع الإحاطة للكشف:
# إحداثيات مربع الإحاطة
x1, y1, x2, y2 = c.boxes.xyxy.cpu().numpy().squeeze().astype(np.int32)
# قص الصورة المعزولة لتقتصر على منطقة الكائن
iso_crop = isolated[y1:y2, x1:x2]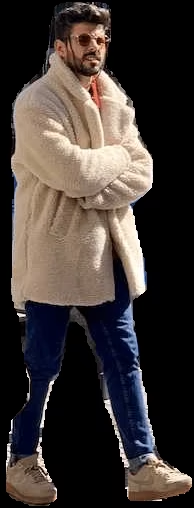
هذه الوظيفة مدمجة. مرّر save_crop=True إلى predict()، وسيحفظ Ultralytics قصاصات مربعات الإحاطة تلقائيًا دون الحاجة إلى أقنعة.
حفظ النتيجة (اختياري)#
يمكنك اختيار ما تفعله بكل كائن معزول. ومن الخطوات التالية الشائعة حفظه على القرص لاستخدامه لاحقًا:
# Save the isolated object to file
cv2.imwrite(f"{img_name}_{label}-{ci}.png", isolated)
هنا، يمثّل img_name الاسم الأساسي للصورة المصدر، ويمثّل label اسم الفئة، ويمثّل ci فهرس الكشف؛ وبذلك تحصل المثيلات المتعددة من الفئة نفسها على أسماء ملفات فريدة. استبدل isolated بـ iso_crop إذا طبّقت القص الاختياري أعلاه.
المثال الكامل#
يجمع البرنامج النصي أدناه جميع الخطوات في كتلة واحدة قابلة للتشغيل. ويستخدم خلفية سوداء افتراضيًا؛ بدّل السطر المحدد وحده إلى np.dstack([img, b_mask]) للحصول على PNG بخلفية شفافة بدلًا من ذلك:
from pathlib import Path

import cv2
import numpy as np

from ultralytics import YOLO

model = YOLO("yolo26n-seg.pt")
results = model.predict(source="path/to/image.jpg")

for r in results:
    img = np.copy(r.orig_img)
    img_name = Path(r.path).stem

    for ci, c in enumerate(r):
        label = c.names[c.boxes.cls.tolist().pop()]

        # Build a binary mask from the object contour
        b_mask = np.zeros(img.shape[:2], np.uint8)
        contour = c.masks.xy[0].astype(np.int32).reshape(-1, 1, 2)
        cv2.drawContours(b_mask, [contour], -1, (255, 255, 255), cv2.FILLED)

        # Isolate the object (black background)
        mask3ch = cv2.cvtColor(b_mask, cv2.COLOR_GRAY2BGR)
        isolated = cv2.bitwise_and(mask3ch, img)  # transparent PNG: isolated = np.dstack([img, b_mask])

        # Save or add your custom post-processing here
        cv2.imwrite(f"{img_name}_{label}-{ci}.png", isolated)

        # Optional: crop to the bounding box before saving
        # x1, y1, x2, y2 = c.boxes.xyxy.cpu().numpy().squeeze().astype(np.int32)
        # cv2.imwrite(f"{img_name}_{label}-{ci}.png", isolated[y1:y2, x1:x2])
للاستخدام المتكرر، ضع محتوى الحلقة داخل دالة لتتمكن من استدعائها على صور عديدة.
الخلاصة#
أصبحت لديك الآن طريقة متكاملة لعزل الكائنات المُجزّأة باستخدام Ultralytics YOLO: شغّل الاستدلال، وأنشئ قناعًا ثنائيًا من كل محيط، ثم استخرج الكائن على خلفية سوداء أو شفافة، مع إمكانية قصه اختياريًا وفق مربع الإحاطة. استكشف وثائق مهمة التقسيم ووضع التنبؤ كاملةً لتكييف سير العمل مع فئاتك.
الأسئلة الشائعة#
حمّل نموذجًا للتقسيم، وشغّل الاستدلال، وأنشئ قناعًا ثنائيًا من محيط كل كشف، ثم ادمجه مع الصورة الأصلية:
import cv2
import numpy as np

from ultralytics import YOLO

model = YOLO("yolo26n-seg.pt")
results = model.predict(source="path/to/your/image.jpg")

img = np.copy(results[0].orig_img)
b_mask = np.zeros(img.shape[:2], np.uint8)
contour = results[0].masks.xy[0].astype(np.int32).reshape(-1, 1, 2)
cv2.drawContours(b_mask, [contour], -1, (255, 255, 255), cv2.FILLED)

mask3ch = cv2.cvtColor(b_mask, cv2.COLOR_GRAY2BGR)
isolated = cv2.bitwise_and(mask3ch, img)
راجع المثال الكامل للاطلاع على حلقة المعالجة الكاملة لكل كشف.
هناك نمطان أساسيان. للحصول على خلفية سوداء، حوّل القناع إلى ثلاثة قنوات واستخدم
cv2.bitwise_and(). وللحصول على خلفية شفافة (عند الحفظ بصيغة PNG)، أضف القناع بوصفه قناة ألفا رابعة باستخدامnp.dstack([img, b_mask]). ويُشرح كلا النمطين في عزل الكائن.اقرأ إحداثيات مربع الإحاطة من الكشف، ثم قص الصورة المعزولة:
x1, y1, x2, y2 = results[0].boxes.xyxy[0].cpu().numpy().astype(np.int32)
iso_crop = isolated[y1:y2, x1:x2]
تعرّف على المزيد حول نتائج مربعات الإحاطة في وثائق وضع التنبؤ.
يوفر Ultralytics YOLO تجزئةً سريعةً وفوريةً للكائنات مع إنشاء أقنعة ومربعات إحاطة دقيقة، بالإضافة إلى واجهة Python API بسيطة تحوّل نتائج الاستدلال إلى كائنات معزولة باستخدام بضعة أسطر من شيفرة OpenCV.
نعم. استخدم الوسيط
save_cropفيpredict()لحفظ قصاصات مربعات الإحاطة مع خلفيتها الأصلية:results = model.predict(source="path/to/your/image.jpg", save_crop=True)اقرأ المزيد في قسم وسيطات الاستدلال في وضع التنبؤ.


التعليقات16
اطرح سؤالًا، وشارك نتائجك، أو ساعد شخصًا آخر.
cordonballas
wow thanx that's exactly what i've been looking for.
 Glenn JocherUltralytics
@cordonballas thank you for your positive feedback! We're glad the segmentation isolation guide was helpful. If you have any further questions, feel free to ask—the YOLO community and our team are here to help. 😊
For continued support, check our Segment Task documentation and Predict Mode guide.
AbdulGhofur23
How can I extract a mask from a TIFF (Tag Image File Format) so that the mask's coordinates align with the projection of the TIFF image?
- Glenn JocherUltralytics
To extract masks from a TIFF image while aligning the mask's coordinates with the image's projection, you can use the segmentation results from Ultralytics YOLO. Generate the mask using
results.masks.xyfor contour points and overlay it on the TIFF image. Ensure alignment by maintaining the original image dimensions during processing. For more, refer to the Isolating Segmentation Objects Guide. Let us know if you need further assistance!1
vedhanayagan9626
I used yolo v11n seg model , i got a segmented image as output with bounding boxes in those some of predictions are overlapped like a bounding box on two items as single so i try to remove a rectangle and associated segmentation from an image and add new rectangle by hold and drag functionality its looks likw working but i cant get optimized result. Is there any way to remove and add new bounding boxes after a segmentation result?
- Glenn JocherUltralytics
@vedhanayagan9626 to address overlapping predictions, you can manually refine results by manipulating masks and bounding boxes post-inference. Use the mask and bounding box coordinates from
results[0].masksandresults[0].boxesto remove or modify specific predictions. For new bounding boxes, you might need to create and integrate them into your results structure manually. Refer to the Isolating Segmentation Objects guide for detailed steps. For optimized results, ensure adequate data quality and model tuning.
SerhiiPostupaiev
Hello, can you please explain how the YOLOv8 performs upscaling? For example, my input images are 854x480, YOLOv8 scales them up to 864x512. How does it exactly performs upscaling? Does it use padding or some other approaches?
 Paula DerrengerUltralytics
@SerhiiPostupaiev hello! In YOLOv8, images are scaled up or down to a specific model input size, optimally a square format (like 640x640) or a dimension supported by the model (such as 864x512 in your case). The upscaling for images that do not exactly match the input dimensions typically involves:
- Resizing the image to the closest dimension that maintains the aspect ratio.
- Padding the resized image to reach the required input size, ensuring that the aspect ratio is preserved.
For instance, for an image of 854x480, YOLOv8 may:
- Resize the image to fit the model's width of 864 while maintaining the aspect ratio, which adjusts the height accordingly.
- Pad the height to the nearest model-supported dimension (like 512), adding pixel values (usually zeros) to the top and bottom or sides of the image to reach the required size.
Here’s a rough example in Python using OpenCV for how padding might be handled:
import cv2
import numpy as np

# Example image load
image = cv2.imread('input.jpg')
# Resizing the image
resized_image = cv2.resize(image, (864, keep_aspect_ratio_height))  # Example variable for illustration

# Padding the resized image
top_padding = (512 - resized_image.shape[0]) // 2
bottom_padding = 512 - resized_image.shape[0] - top_padding
padded_image = cv2.copyMakeBorder(resized_image, top_padding, bottom_padding, 0, 0, cv2.BORDER_CONSTANT, value=[0, 0, 0])
This ensures the entire image is used during prediction without distorting its original aspect ratio. 😊
EnricoMendez
Hello, I run this code example but it only display one object's mask, is it posible to join all the objects' masks in a single frame?
- Glenn JocherUltralytics
Hey there! 😊 Absolutely, you can combine all the objects' masks into a single frame. Just modify the section where you're drawing the contours onto the mask. Instead of creating a new binary mask
b_maskfor each object, you initialize one common mask before iterating through the objects and draw every object's contour on this common mask. Here's a quick example to illustrate:# Initialize one common binary mask for all objects b_mask_all = np.zeros(img.shape[:2], np.uint8) for ci, c in enumerate(r): # Your contour extraction remains the same contour = c.masks.xy.pop().astype(np.int32).reshape(-1, 1, 2) # Draw each contour onto the common mask cv2.drawContours(b_mask_all, [contour], -1, (255, 255, 255), cv2.FILLED) # After the loop, you can use `b_mask_all` which contains all objects' masksJust keep in mind, with
b_mask_all, you'll have all the detected objects' masks on one mask. If the objects overlap in your image, their masks will also overlap inb_mask_all. Hope this helps! Let us know if you have more questions. 😊
mariamg03
hi is there a way I can apply the edits on the binary image then revert back to the original with the mask part edited?
- Paula DerrengerUltralytics
Hey there! 👋 Yes, you can certainly make edits on a binary mask and then apply those changes back to the original image, essentially modifying only the parts that the mask covers. Here's a quick outline of how you could achieve this with an example focusing on segmentation tasks:
-
After segmenting your image and obtaining the binary mask (let's say
b_mask), you can perform any edits you like on this mask. For example, inverting the mask, dilating, or eroding. -
To apply the edited mask back to the original image (
orig_img), you would use the mask to isolate the area of interest in the original image and then apply your edits.
Here's a code snippet demonstrating this with a simple inversion edit:
import cv2
import numpy as np

# Assuming 'b_mask' is your binary mask and 'orig_img' is your original image
# Let's say you inverted the binary mask
edited_mask = 255 - b_mask  # Inverting mask

# Convert the single channel binary mask to a 3 channel mask to match the original image
edited_mask_3ch = cv2.cvtColor(edited_mask, cv2.COLOR_GRAY2BGR)

# Apply the edited mask back to the original image
# This line performs bitwise-and operation to only keep parts of the image where the mask is white
edited_image = cv2.bitwise_and(orig_img, edited_mask_3ch)

# At this point, 'edited_image' contains the original image with edits applied to the segmented part
This is a simplified example to show the concept. Depending on the edits you've made to
b_mask, you might need to adjust how you applyedited_maskback toorig_img.Remember, after editing the mask, you can always revert it back to its original form if you've kept a copy before editing, or you can apply the inverse of your edits.
I hope this helps! Let me know if you have more questions. Happy coding! 😊
-
Safiislamian
Hi sir, thanku for your response does load dataset will work or not. As the dataset is in yolo form where we have different folders and subfolders like train having images and labels etc
On Wed, Mar 27, 2024, 7:03 AM Glenn Jocher @.***> wrote:
Hey there! 👋 Glad to see you're interested in applying YOLOv8 for instance segmentation with a dataset from Roboflow. Below is a quick guide to help you get started with applying YOLOv8 for detection and then using masks for the dataset based on class. Step 1: Install Ultralytics YOLO
First, ensure you have Ultralytics installed:
pip install ultralytics
Step 2: Load Your Model
from ultralytics import YOLOmodel = YOLO('yolov8n-seg.pt') # Use yolov8n-seg.pt for segmentation models
Step 3: Predict and Isolate Objects
Now, for predicting and isolating objects based on their classes, you'll dive into the prediction results to access and manipulate the segmentation masks:
results = model.predict(source='path/to/your/dataset')for result in results: for detection in result: class_name = detection.names[detection.boxes.cls.tolist().pop()] # Create a binary mask from detection binary_mask = np.zeros(result.orig_img.shape[:2], np.uint8) contour = detection.masks.xy.pop().astype(np.int32).reshape(-1, 1, 2) cv2.drawContours(binary_mask, [contour], -1, (255, 255, 255), cv2.FILLED) # Example to save or further process the mask
Note: Replace 'path/to/your/dataset' with the actual path to your images. Step 4: Saving or Processing the Masks
You may wish to save each mask based on its class for processing later. You can modify the loop to save each binary mask to a file using cv2.imwrite() method.
cv2.imwrite(f'{class_name}_mask.jpg', binary_mask)
This will save each mask with its respective class name as part of the filename, allowing for easy organization by class.
Hope this helps! 😊 Let us know if you need further assistance or have more questions. Happy coding!
— Reply to this email directly, view it on GitHub https://github.com/orgs/ultralytics/discussions/9334#discussioncomment-8922405, or unsubscribe https://github.com/notifications/unsubscribe-auth/AUP75TG3RFWAL7YRMWDR66DY2ILE5AVCNFSM6AAAAABFJ334B2VHI2DSMVQWIX3LMV43SRDJONRXK43TNFXW4Q3PNVWWK3TUHM4DSMRSGQYDK . You are receiving this because you commented.Message ID: @.*** com>
- Paula DerrengerUltralytics(تم التعديل)
Hi there! 😄
Absolutely, loading a dataset structured in YOLO format (with separate folders for train/test images and labels) works well with YOLO26. You can specify the dataset structure in a YAML file and provide this file when initiating training or validation processes. Here's an example
data.yamlfile structure for your dataset:train: /path/to/dataset/train/images # path to images folder val: /path/to/dataset/val/images # path to validation images # Classes nc: 80 # number of classes names: ['class1', 'class2', ...] # class namesAnd here's how you might start training with your dataset:
yolo detect train data=data.yaml model=yolo26n.ptMake sure to replace
/path/to/dataset/train/imagesand/path/to/dataset/val/imageswith the actual paths to your dataset and similarly update thenc(number of classes) andnames(class labels) accordingly.If you have any more questions or need further assistance, feel free to ask. Happy to help! 🚀
There is a dataset on roboflow for instance segmentation, i want to apply first yolov8 and then masks for all the dataset arranged on the basis of their classes. please provide me details and code for that Thank you...
- Glenn JocherUltralytics(تم التعديل)
Hey there! 👋 Glad to see you're interested in applying YOLO26 for instance segmentation with a dataset from Roboflow. Below is a quick guide to help you get started with applying YOLO26 for detection and then using masks for the dataset based on class.
Step 1: Install Ultralytics YOLO
First, ensure you have Ultralytics installed:
pip install ultralyticsStep 2: Load Your Model
from ultralytics import YOLO
model = YOLO('yolo26n-seg.pt')  # Use yolo26n-seg.pt for segmentation models
Step 3: Predict and Isolate Objects
Now, for predicting and isolating objects based on their classes, you'll dive into the prediction results to access and manipulate the segmentation masks:
results = model.predict(source='path/to/your/dataset')
for result in results:
    for detection in result:
        class_name = detection.names[detection.boxes.cls.tolist().pop()]
        # Create a binary mask from detection
        binary_mask = np.zeros(result.orig_img.shape[:2], np.uint8)
        contour = detection.masks.xy.pop().astype(np.int32).reshape(-1, 1, 2)
        cv2.drawContours(binary_mask, [contour], -1, (255, 255, 255), cv2.FILLED)
        # Example to save or further process the mask
Note: Replace
'path/to/your/dataset'with the actual path to your images.Step 4: Saving or Processing the Masks
You may wish to save each mask based on its class for processing later. You can modify the loop to save each binary mask to a file using
cv2.imwrite()method.cv2.imwrite(f'{class_name}_mask.jpg', binary_mask)This will save each mask with its respective class name as part of the filename, allowing for easy organization by class.
Hope this helps! 😊 Let us know if you need further assistance or have more questions. Happy coding!