Isolating Segmentation Objects
After performing the Segment Task, it's sometimes desirable to extract the isolated objects from the inference results. This guide provides a generic recipe on how to accomplish this using the Ultralytics Predict Mode.
Watch: How to Remove Background and Isolate Objects with Ultralytics YOLO Segmentation & OpenCV in Python 🚀
Recipe Walkthrough
See the Ultralytics Quickstart Installation section for a quick walkthrough on installing the required libraries.
Load a model and run
predict()method on a source.from ultralytics import YOLO # Load a model model = YOLO("yolo26n-seg.pt") # Run inference results = model.predict()No Prediction Arguments?
Without specifying a source, the example images from the library will be used:
'ultralytics/assets/bus.jpg'
'ultralytics/assets/zidane.jpg'
This is helpful for rapid testing with the
predict()method.For additional information about Segmentation Models, visit the Segment Task page. To learn more about
predict()method, see Predict Mode section of the Documentation.Now iterate over the results and the contours. For workflows that want to save an image to file, the source image
base-nameand the detectionclass-labelare retrieved for later use (optional).from pathlib import Path import numpy as np # (2) Iterate detection results (helpful for multiple images) for r in results: img = np.copy(r.orig_img) img_name = Path(r.path).stem # source image base-name # Iterate each object contour (multiple detections) for ci, c in enumerate(r): # (1) Get detection class name label = c.names[c.boxes.cls.tolist().pop()]- To learn more about working with detection results, see Boxes Section for Predict Mode.
- To learn more about
predict()results see Working with Results for Predict Mode
For-Loop
A single image will only iterate the first loop once. A single image with only a single detection will iterate each loop only once.
Start with generating a binary mask from the source image and then draw a filled contour onto the mask. This will allow the object to be isolated from the other parts of the image. An example from
bus.jpgfor one of the detectedpersonclass objects is shown on the right.import cv2 # Create binary mask b_mask = np.zeros(img.shape[:2], np.uint8) # (1) Extract contour result contour = c.masks.xy.pop() # (2) Changing the type contour = contour.astype(np.int32) # (3) Reshaping contour = contour.reshape(-1, 1, 2) # Draw contour onto mask _ = cv2.drawContours(b_mask, [contour], -1, (255, 255, 255), cv2.FILLED)For more info on
c.masks.xysee Masks Section from Predict Mode.Here the values are cast into
np.int32for compatibility withdrawContours()function from OpenCV.The OpenCV
drawContours()function expects contours to have a shape of[N, 1, 2]expand section below for more details.
Expand to understand what is happening when defining the
contourvariable.-
c.masks.xy:: Provides the coordinates of the mask contour points in the format(x, y). For more details, refer to the Masks Section from Predict Mode. -.pop():: Asmasks.xyis a list containing a single element, this element is extracted using thepop()method. -.astype(np.int32):: Usingmasks.xywill return with a data type offloat32, but this won't be compatible with the OpenCVdrawContours()function, so this will change the data type toint32for compatibility. -.reshape(-1, 1, 2):: Reformats the data into the required shape of[N, 1, 2]whereNis the number of contour points, with each point represented by a single entry1, and the entry is composed of2values. The-1denotes that the number of values along this dimension is flexible.Expand for an explanation of the
drawContours()configuration.- Encapsulating the
contourvariable within square brackets,[contour], was found to effectively generate the desired contour mask during testing. - The value-1specified for thedrawContours()parameter instructs the function to draw all contours present in the image. - Thetuple(255, 255, 255)represents the color white, which is the desired color for drawing the contour in this binary mask. - The addition ofcv2.FILLEDwill color all pixels enclosed by the contour boundary the same, in this case, all enclosed pixels will be white. - See OpenCV Documentation ondrawContours()for more information.Next there are 2 options for how to move forward with the image from this point and a subsequent option for each.
Object Isolation Options
Example
# Create 3-channel mask
mask3ch = cv2.cvtColor(b_mask, cv2.COLOR_GRAY2BGR)

# Isolate object with binary mask
isolated = cv2.bitwise_and(mask3ch, img)
How does this work?
First, the binary mask is first converted from a single-channel image to a three-channel image. This conversion is necessary for the subsequent step where the mask and the original image are combined. Both images must have the same number of channels to be compatible with the blending operation.
The original image and the three-channel binary mask are merged using the OpenCV function
bitwise_and(). This operation retains only pixel values that are greater than zero(> 0)from both images. Since the mask pixels are greater than zero(> 0)only within the contour region, the pixels remaining from the original image are those that overlap with the contour.
Isolate with Black Pixels: Sub-options
Full-size Image
There are no additional steps required if keeping full size image.
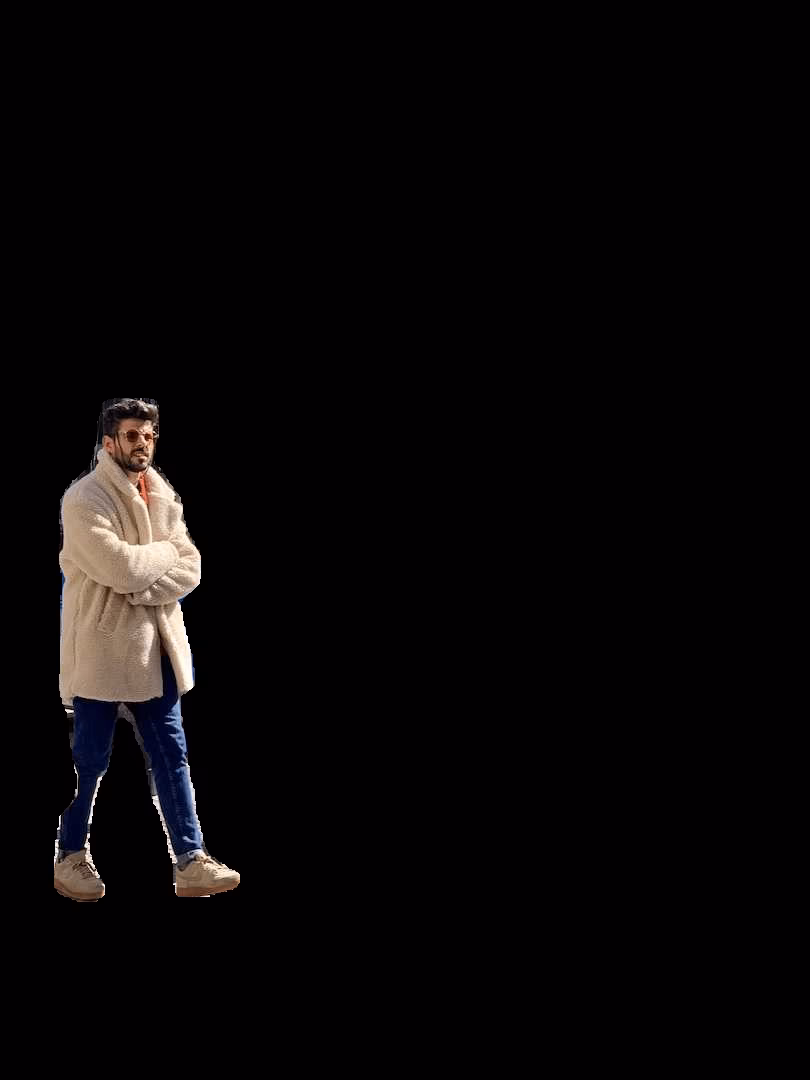
Example full-size output Cropped object Image
Additional steps required to crop image to only include object region.
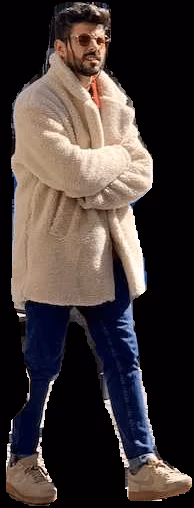
# (1) Bounding box coordinates x1, y1, x2, y2 = c.boxes.xyxy.cpu().numpy().squeeze().astype(np.int32) # Crop image to object region iso_crop = isolated[y1:y2, x1:x2]- For more information on bounding box results, see Boxes Section from Predict Mode
What does this code do?
The
c.boxes.xyxy.cpu().numpy()call retrieves the bounding boxes as a NumPy array in thexyxyformat, wherexmin,ymin,xmax, andymaxrepresent the coordinates of the bounding box rectangle. See Boxes Section from Predict Mode for more details.The
squeeze()operation removes any unnecessary dimensions from the NumPy array, ensuring it has the expected shape.Converting the coordinate values using
.astype(np.int32)changes the box coordinates data type fromfloat32toint32, making them compatible for image cropping using index slices.Finally, the bounding box region is cropped from the image using index slicing. The bounds are defined by the
[ymin:ymax, xmin:xmax]coordinates of the detection bounding box.
# Isolate object with transparent background (when saved as PNG)
isolated = np.dstack([img, b_mask])
How does this work?
- Using the NumPy
dstack()function (array stacking along depth-axis) in conjunction with the binary mask generated, will create an image with four channels. This allows for all pixels outside of the object contour to be transparent when saving as aPNGfile.
Isolate with Transparent Pixels: Sub-options
Full-size Image
There are no additional steps required if keeping full size image.
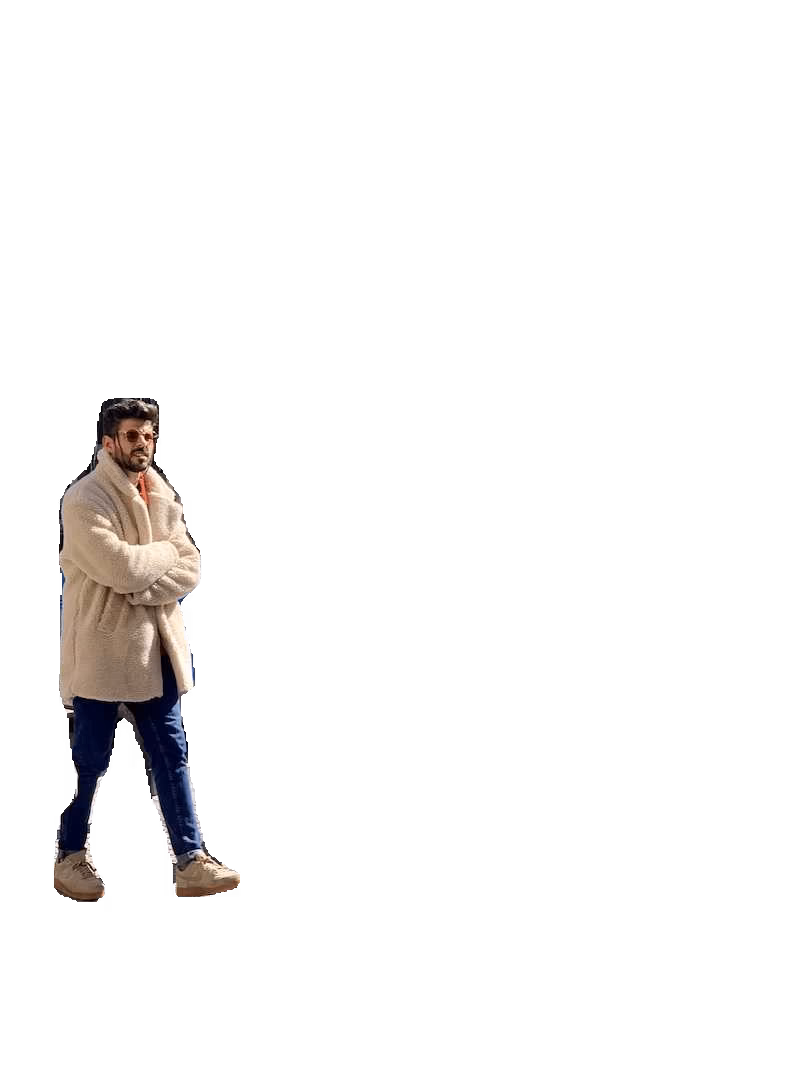
Example full-size output + transparent background Cropped object Image
Additional steps required to crop image to only include object region.
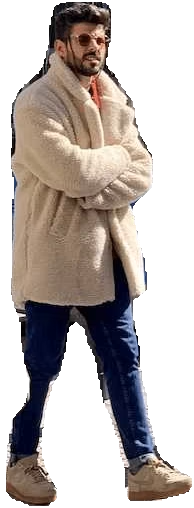
# (1) Bounding box coordinates x1, y1, x2, y2 = c.boxes.xyxy.cpu().numpy().squeeze().astype(np.int32) # Crop image to object region iso_crop = isolated[y1:y2, x1:x2]- For more information on bounding box results, see Boxes Section from Predict Mode
What does this code do?
When using
c.boxes.xyxy.cpu().numpy(), the bounding boxes are returned as a NumPy array, using thexyxybox coordinates format, which correspond to the pointsxmin, ymin, xmax, ymaxfor the bounding box (rectangle), see Boxes Section from Predict Mode for more information.Adding
squeeze()ensures that any extraneous dimensions are removed from the NumPy array.Converting the coordinate values using
.astype(np.int32)changes the box coordinates data type fromfloat32toint32which will be compatible when cropping the image using index slices.Finally the image region for the bounding box is cropped using index slicing, where the bounds are set using the
[ymin:ymax, xmin:xmax]coordinates of the detection bounding box.
What if I want the cropped object including the background?
This is a built-in feature for the Ultralytics library. See the
save_cropargument for Predict Mode Inference Arguments for details.What to do next is entirely left to you as the developer. A basic example of one possible next step (saving the image to file for future use) is shown.
- NOTE: this step is optional and can be skipped if not required for your specific use case.
Example Final Step
# Save isolated object to file _ = cv2.imwrite(f"{img_name}_{label}-{ci}.png", iso_crop)- In this example, the
img_nameis the base-name of the source image file,labelis the detected class-name, andciis the index of the object detection (in case of multiple instances with the same class name).
Full Example code
Here, all steps from the previous section are combined into a single block of code. For repeated use, it would be optimal to define a function to do some or all commands contained in the for-loops, but that is an exercise left to the reader.
from pathlib import Path

import cv2
import numpy as np

from ultralytics import YOLO

m = YOLO("yolo26n-seg.pt")  # (4)!
res = m.predict(source="path/to/image.jpg")  # (3)!

# Iterate detection results (5)
for r in res:
    img = np.copy(r.orig_img)
    img_name = Path(r.path).stem

    # Iterate each object contour (6)
    for ci, c in enumerate(r):
        label = c.names[c.boxes.cls.tolist().pop()]

        b_mask = np.zeros(img.shape[:2], np.uint8)

        # Create contour mask (1)
        contour = c.masks.xy.pop().astype(np.int32).reshape(-1, 1, 2)
        _ = cv2.drawContours(b_mask, [contour], -1, (255, 255, 255), cv2.FILLED)

        # Choose one:

        # OPTION-1: Isolate object with black background
        mask3ch = cv2.cvtColor(b_mask, cv2.COLOR_GRAY2BGR)
        isolated = cv2.bitwise_and(mask3ch, img)

        # OPTION-2: Isolate object with transparent background (when saved as PNG)
        isolated = np.dstack([img, b_mask])

        # OPTIONAL: detection crop (from either OPT1 or OPT2)
        x1, y1, x2, y2 = c.boxes.xyxy.cpu().numpy().squeeze().astype(np.int32)
        iso_crop = isolated[y1:y2, x1:x2]

        # Add your custom post-processing here (2)
- The line populating
contouris combined into a single line here, where it was split to multiple above. - What goes here is up to you!
- See Predict Mode for additional information.
- See Segment Task for more information.
- Learn more about Working with Results
- Learn more about Segmentation Mask Results
FAQ
How do I isolate objects using Ultralytics YOLO26 for segmentation tasks?
To isolate objects using Ultralytics YOLO26, follow these steps:
Load the model and run inference:
from ultralytics import YOLO

model = YOLO("yolo26n-seg.pt")
results = model.predict(source="path/to/your/image.jpg")
Generate a binary mask and draw contours:
import cv2
import numpy as np

img = np.copy(results[0].orig_img)
b_mask = np.zeros(img.shape[:2], np.uint8)
contour = results[0].masks.xy[0].astype(np.int32).reshape(-1, 1, 2)
cv2.drawContours(b_mask, [contour], -1, (255, 255, 255), cv2.FILLED)
Isolate the object using the binary mask:
mask3ch = cv2.cvtColor(b_mask, cv2.COLOR_GRAY2BGR)
isolated = cv2.bitwise_and(mask3ch, img)
Refer to the guide on Predict Mode and the Segment Task for more information.
What options are available for saving the isolated objects after segmentation?
Ultralytics YOLO26 offers two main options for saving isolated objects:
With a Black Background:
mask3ch = cv2.cvtColor(b_mask, cv2.COLOR_GRAY2BGR)
isolated = cv2.bitwise_and(mask3ch, img)
With a Transparent Background:
isolated = np.dstack([img, b_mask])
For further details, visit the Predict Mode section.
How can I crop isolated objects to their bounding boxes using Ultralytics YOLO26?
To crop isolated objects to their bounding boxes:
Retrieve bounding box coordinates:
x1, y1, x2, y2 = results[0].boxes.xyxy[0].cpu().numpy().astype(np.int32)Crop the isolated image:
iso_crop = isolated[y1:y2, x1:x2]
Learn more about bounding box results in the Predict Mode documentation.
Why should I use Ultralytics YOLO26 for object isolation in segmentation tasks?
Ultralytics YOLO26 provides:
- High-speed real-time object detection and segmentation.
- Accurate bounding box and mask generation for precise object isolation.
- Comprehensive documentation and easy-to-use API for efficient development.
Explore the benefits of using YOLO in the Segment Task documentation.
Can I save isolated objects including the background using Ultralytics YOLO26?
Yes, this is a built-in feature in Ultralytics YOLO26. Use the save_crop argument in the predict() method. For example:
results = model.predict(source="path/to/your/image.jpg", save_crop=True)
Read more about the save_crop argument in the Predict Mode Inference Arguments section.


