Docker Quickstart Guide for Ultralytics#
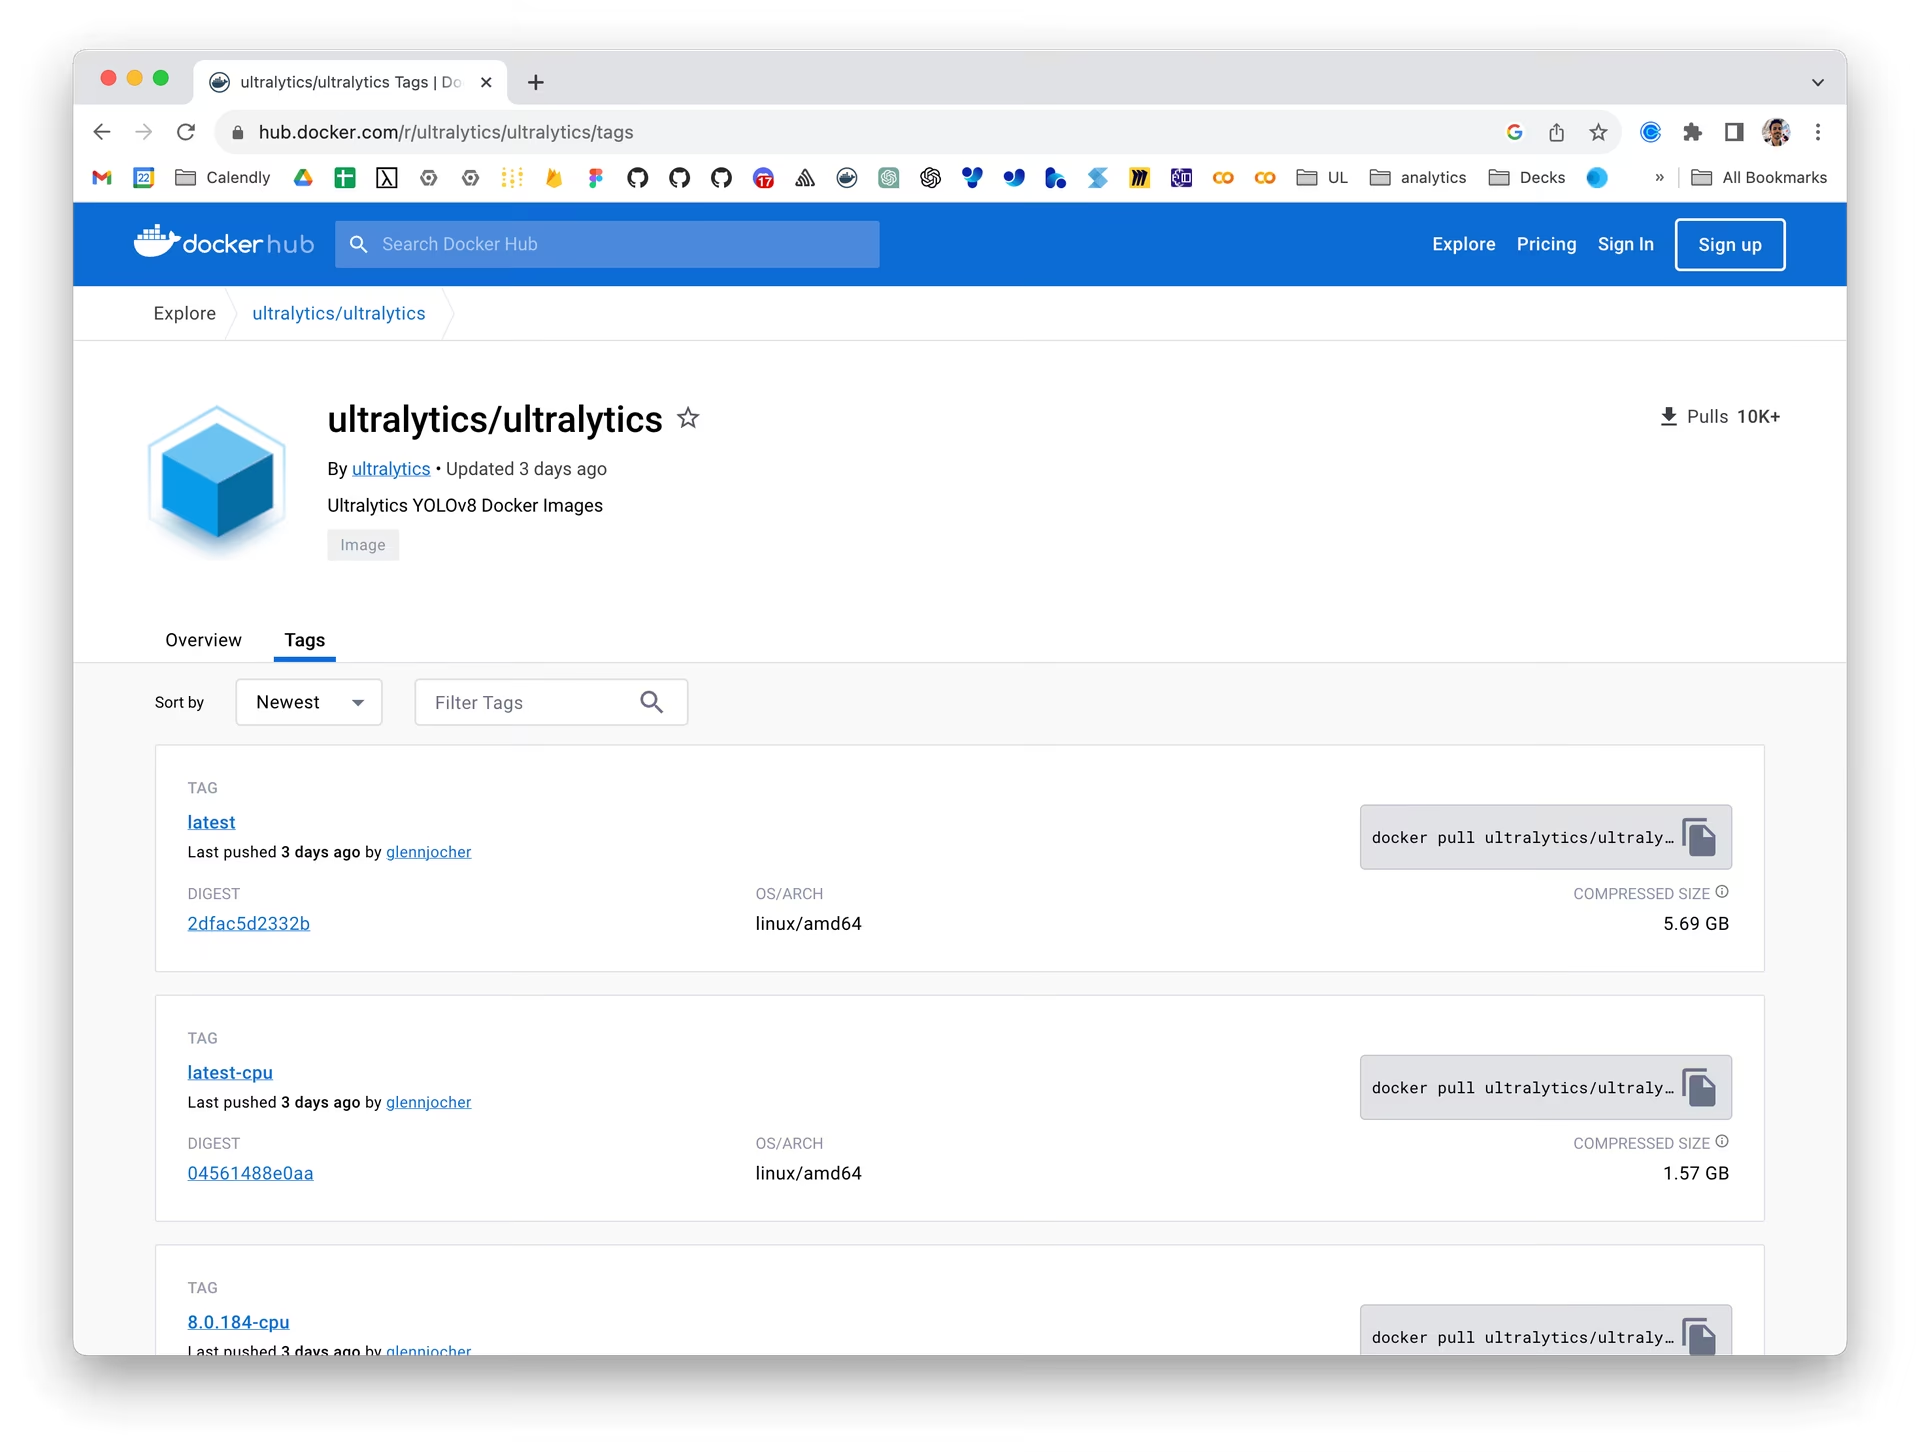
This guide serves as a comprehensive introduction to setting up a Docker environment for your Ultralytics projects. Docker is a platform for developing, shipping, and running applications in containers. It is particularly beneficial for ensuring that the software will always run the same, regardless of where it's deployed. For more details, visit the Ultralytics Docker repository on Docker Hub.


What You Will Learn#
- Setting up Docker with NVIDIA support
- Installing Ultralytics Docker images
- Running Ultralytics in a Docker container with CPU or GPU support
- Using a display server with Docker to show Ultralytics detection results
- Mounting local directories into the container
Watch: How to Get started with Docker | Usage of Ultralytics Python Package inside Docker live demo 🎉
Prerequisites#
- Make sure Docker is installed on your system. If not, you can download and install it from Docker's website.
- For GPU acceleration, ensure that your system has an NVIDIA GPU and NVIDIA drivers installed. CPU images do not require NVIDIA hardware.
- If you are using NVIDIA Jetson devices, ensure that you have the appropriate JetPack version installed. Refer to the NVIDIA Jetson guide for more details.
Setting up Docker with NVIDIA Support (Optional)#
First, verify that the NVIDIA drivers are properly installed by running:
nvidia-smiInstalling NVIDIA Container Toolkit#
Now, let's install the NVIDIA Container Toolkit to enable GPU support in Docker containers:
curl -fsSL https://nvidia.github.io/libnvidia-container/gpgkey | sudo gpg --dearmor -o /usr/share/keyrings/nvidia-container-toolkit-keyring.gpg \
  && curl -s -L https://nvidia.github.io/libnvidia-container/stable/deb/nvidia-container-toolkit.list \
  | sed 's#deb https://#deb [signed-by=/usr/share/keyrings/nvidia-container-toolkit-keyring.gpg] https://#g' \
    | sudo tee /etc/apt/sources.list.d/nvidia-container-toolkit.list
Update the package lists and install the NVIDIA Container Toolkit:
sudo apt-get updatesudo apt-get install -y nvidia-container-toolkitVerify CDI Devices with Docker#
Run nvidia-ctk cdi list to ensure the GPU CDI devices are available (the toolkit's nvidia-cdi-refresh service generates and maintains the spec automatically on toolkit >= 1.18):
nvidia-ctk cdi listYou should see entries such as nvidia.com/gpu=0 and nvidia.com/gpu=all. Discovered CDI devices also appear in docker info.
Installing Ultralytics Docker Images#
Ultralytics publishes the following images to Docker Hub. Each image is built from its linked Dockerfile by the Docker publishing workflow.
| Tag | Platform and purpose | Source |
|---|---|---|
latest | Linux AMD64 with CUDA for GPU training and inference | Dockerfile |
latest-export | Linux AMD64 with CUDA and export dependencies for conversion and benchmarking | Dockerfile-export |
latest-amd | Linux AMD64 with ROCm and MIGraphX for AMD GPU training and inference | Dockerfile-amd |
latest-python | Lightweight Linux AMD64 Python 3.14 image for CPU inference | Dockerfile-python |
latest-python-export | Linux AMD64 Python 3.13 CPU image with export dependencies | Dockerfile-python-export |
latest-cpu | Linux AMD64 CPU image with Bash as the default command | Dockerfile-cpu |
latest-jupyter | Linux AMD64 CPU image with JupyterLab and Ultralytics tutorial notebooks | Dockerfile-jupyter |
latest-arm64 | Linux ARM64 Python 3.13 CPU image for Apple silicon, Raspberry Pi, and other ARM64 systems | Dockerfile-arm64 |
latest-nvidia-arm64 | Linux ARM64 for DGX Spark (DGX OS) and PyTorch on Thor (JetPack 7.1); bundled TensorRT does not support JetPack | Dockerfile-nvidia-arm64 |
latest-jetson-jetpack6 | Linux ARM64 for NVIDIA Jetson devices running JetPack 6 | Dockerfile-jetson-jetpack6 |
latest-jetson-jetpack5 | Linux ARM64 for NVIDIA Jetson devices running JetPack 5 | Dockerfile-jetson-jetpack5 |
latest-jetson-jetpack4 | Linux ARM64 for NVIDIA Jetson devices running JetPack 4 | Dockerfile-jetson-jetpack4 |
latest-runner | Linux AMD64 CUDA image for a self-hosted GitHub Actions GPU runner | Dockerfile-runner |
latest-runner-cpu | Linux AMD64 image for a self-hosted GitHub Actions CPU runner | Dockerfile-runner-cpu |
The AMD64 GPU images (latest, latest-export, and latest-runner) use PyTorch 2.14 and CUDA 13.2. Check the host driver's CUDA support with nvidia-smi before launching them; installing a newer container does not upgrade the host driver. CUDA 13 removes support for Maxwell, Pascal, and Volta GPUs, including Tesla P100 and V100. See NVIDIA's CUDA release notes and driver compatibility requirements.
The NVIDIA ARM64 image uses NVIDIA PyTorch 26.08 with CUDA 13.4 and TensorRT 11.2. Its PyTorch support for Thor does not extend to TensorRT: NVIDIA does not support TensorRT 11.2 on JetPack. For Jetson TensorRT exports, use the supported TensorRT 10.x runtime for your JetPack release. Follow the platform requirements in the Jetson guide or DGX Spark guide. The JetPack 4, 5, and 6 images retain their separate device-specific stacks.
The Conda Dockerfile is available for local builds; automated publishing of latest-conda is disabled, so that registry tag does not contain these updates.
Use latest-python-export for LiteRT exports. The GPU latest-export image keeps PyTorch 2.14 and omits LiteRT because its current dependency requires PyTorch below 2.14.
The Python, CPU, Jupyter, and CPU runner images use Python 3.14. The Python export image uses the latest-python-3.13 base, built from the same Dockerfile-python with --build-arg PYTHON_VERSION=3.13, because TensorFlow, CoreML, and PaddlePaddle do not support Python 3.14 yet.
Tags beginning with latest track the most recently published main-branch build. Versioned tags replace the latest prefix with an Ultralytics release, such as VERSION, VERSION-cpu, or VERSION-jetson-jetpack6. Use a versioned tag for a reproducible environment.
To pull the latest image:
# Pull the latest Ultralytics image from Docker Hub
sudo docker pull ultralytics/ultralytics:latest
To build an image yourself instead, clone the repository and pass the matching Dockerfile from the table above, using the repository root as the build context:
# Build the CPU image locally from docker/Dockerfile-cpu
sudo docker build -t ultralytics/ultralytics:latest-cpu -f docker/Dockerfile-cpu .
Running Ultralytics in Docker Container#
Here's how to execute the Ultralytics Docker container:
Using only the CPU#
# Run without GPU
sudo docker run -it --ipc=host ultralytics/ultralytics:latest-cpu
Using GPUs#
# Run with all GPUs
sudo docker run -it --ipc=host --device nvidia.com/gpu=all ultralytics/ultralytics:latest

# Run specifying which GPUs to use
sudo docker run -it --ipc=host --device nvidia.com/gpu=2 --device nvidia.com/gpu=3 ultralytics/ultralytics:latest
The -it flag assigns a pseudo-TTY and keeps stdin open, allowing you to interact with the container. The --ipc=host flag enables sharing of host's IPC namespace, essential for sharing memory between processes. For NVIDIA GPUs, the --device nvidia.com/gpu=... flag grants access through CDI. For AMD GPUs, the --device flags grant access to the GPU kernel driver (/dev/kfd) and display render nodes (/dev/dri).
On Linux, CDI device requests require Docker >= 28.2.0 (CDI enabled by default) and nvidia-container-toolkit >= 1.18 (automatic CDI spec generation). Upgrade older Linux hosts before running GPU containers. The legacy --gpus all flag can lose GPU access (Failed to initialize NVML: Unknown Error) when the host reloads systemd during routine package updates (nvidia-container-toolkit#48). CDI --device requests include the device nodes in the container configuration, so long-running containers such as training workers or CI runners keep GPU access across reloads.
Docker Desktop GPU support on Windows currently uses --gpus all with the WSL 2 backend because NVIDIA CDI devices are not available there. Windows does not use Linux systemd, so the daemon-reload failure above does not apply.
Note on File Accessibility#
To work with files on your local machine within the container, you can use Docker volumes:
# Mount a local directory into the container
sudo docker run -it --ipc=host --device nvidia.com/gpu=all -v /path/on/host:/path/in/container ultralytics/ultralytics:latest
Replace /path/on/host with the directory path on your local machine and /path/in/container with the desired path inside the Docker container.
Persisting Training Outputs#
Training outputs save to /ultralytics/runs/<task>/<name>/ inside the container by default. Without mounting a host directory, outputs are lost when the container is removed.
To persist training outputs:
# Recommended: mount workspace and specify project path
sudo docker run --rm -it -v "$(pwd)":/w -w /w ultralytics/ultralytics:latest \
  yolo train model=yolo26n.pt data=coco8.yaml project=/w/runs
This saves all training outputs to ./runs on your host machine.
Run graphical user interface (GUI) applications in a Docker Container#
Docker is primarily used to containerize background applications and CLI programs, but it can also run graphical programs. In the Linux world, two main graphic servers handle graphical display: X11 (also known as the X Window System) and Wayland. Before starting, it's essential to determine which graphics server you are currently using. Run this command to find out:
env | grep -E -i 'x11|xorg|wayland'Setup and configuration of an X11 or Wayland display server is outside the scope of this guide. If the above command returns nothing, then you'll need to start by getting either working for your system before continuing.
Running a Docker Container with a GUI#
Use GPUs
If you're using GPUs, you can add the --device nvidia.com/gpu=all flag to the command.
If you're using X11, you can run the following command to allow the Docker container to access the X11 socket:
xhost +local:docker && docker run -e DISPLAY=$DISPLAY \
  -v /tmp/.X11-unix:/tmp/.X11-unix \
  -v ~/.Xauthority:/root/.Xauthority \
  -it --ipc=host ultralytics/ultralytics:latest
This command sets the DISPLAY environment variable to the host's display, mounts the X11 socket, and maps the .Xauthority file to the container. The xhost +local:docker command allows the Docker container to access the X11 server.
Using Docker with a GUI#
Ultralytics images ship headless OpenCV, so first install the GUI build of OpenCV and its system libraries inside the container:
apt-get update && apt-get install -y --no-install-recommends libgl1 libglib2.0-0 libsm6
pip uninstall -y opencv-python-headless && pip install opencv-python
Now you can display graphical applications inside your Docker container. For example, you can run the following CLI command to visualize the predictions from a YOLO26 model:
yolo predict model=yolo26n.pt show=TrueTesting
A simple way to validate that the Docker group has access to the X11 server is to run a container with a GUI program like xclock or xeyes. Alternatively, you can also install these programs in the Ultralytics Docker container to test the access to the X11 server of your GNU-Linux display server. If you run into any problems, consider setting the environment variable -e QT_DEBUG_PLUGINS=1. Setting this environment variable enables the output of debugging information, aiding in the troubleshooting process.
When finished with Docker GUI#
In both cases, don't forget to revoke access from the Docker group when you're done.
xhost -local:dockerWant to view image results directly in the Terminal?
Refer to the following guide on viewing the image results using a terminal
You are now set up to use Ultralytics with Docker and ready to take advantage of its capabilities. To self-host the Ultralytics web application, see the Platform On-Premise guide. For alternative Python package installation methods, see the Ultralytics quickstart documentation.
FAQ#
To set up Ultralytics with Docker, first ensure that Docker is installed on your system. If you have an NVIDIA GPU, install the NVIDIA Container Toolkit to enable GPU support. Then, pull the latest Ultralytics Docker image from Docker Hub using the following command:
sudo docker pull ultralytics/ultralytics:latestFor detailed steps, refer to our Docker Quickstart Guide.
Using Ultralytics Docker images ensures a consistent environment across different machines, replicating the same software and dependencies. This is particularly useful for collaborating across teams, running models on various hardware, and maintaining reproducibility. Use
latestfor general NVIDIA GPU training or select the image matching your JetPack version for an NVIDIA Jetson device. See the complete image table or explore Ultralytics Docker Hub.First, ensure that the NVIDIA Container Toolkit is installed and configured. Then, use the following command to run Ultralytics YOLO with GPU support:
sudo docker run -it --ipc=host --device nvidia.com/gpu=all ultralytics/ultralytics:latest # all GPUsThis command sets up a Docker container with GPU access. For additional details, see the Docker Quickstart Guide.
To visualize YOLO prediction results with a GUI in a Docker container, you need to allow Docker to access your display server. For systems running X11, the command is:
xhost +local:docker && docker run -e DISPLAY=$DISPLAY \
  -v /tmp/.X11-unix:/tmp/.X11-unix \
  -v ~/.Xauthority:/root/.Xauthority \
  -it --ipc=host ultralytics/ultralytics:latest
For systems running Wayland, use:
xhost +local:docker && docker run -e DISPLAY=$DISPLAY \
  -v $XDG_RUNTIME_DIR/$WAYLAND_DISPLAY:/tmp/$WAYLAND_DISPLAY \
  --net=host -it --ipc=host ultralytics/ultralytics:latest
Inside the container, install the GUI build of OpenCV before using
show=True, as described in the Run graphical user interface (GUI) applications in a Docker Container section.Yes, you can mount local directories into the Ultralytics Docker container using the
-vflag:sudo docker run -it --ipc=host --device nvidia.com/gpu=all -v /path/on/host:/path/in/container ultralytics/ultralytics:latestReplace
/path/on/hostwith the directory on your local machine and/path/in/containerwith the desired path inside the container. This setup allows you to work with your local files within the container. For more information, refer to the Note on File Accessibility section.