Link to this sectionROS (Robot Operating System) 퀵스타트 가이드#
이 가이드는 Ultralytics YOLO를 ROS1(rospy) 또는 ROS2(rclpy)와 통합하여 RGB 이미지, 깊이 이미지 및 포인트 클라우드에서 실시간 객체 탐지와 세그멘테이션을 실행하는 방법을 설명합니다.
ROS 환경에서 YOLO 설정하기로 이동한 다음, RGB 이미지, 깊이 이미지 또는 포인트 클라우드 작업을 진행하십시오.
ROS Introduction (captioned) from Open Robotics on Vimeo.
Link to this sectionROS란 무엇인가요?#
Robot Operating System (ROS)는 로봇 공학 연구 및 산업 현장에서 널리 사용되는 오픈 소스 프레임워크입니다. ROS는 개발자가 로봇 애플리케이션을 생성할 수 있도록 돕는 라이브러리 및 도구 모음을 제공합니다. ROS는 다양한 로봇 플랫폼에서 작동하도록 설계되어 로봇 공학자들에게 유연하고 강력한 도구입니다.
Link to this sectionROS의 주요 기능#
-
모듈형 아키텍처: ROS는 모듈형 아키텍처를 갖추고 있어 개발자가 노드(nodes)라고 불리는 재사용 가능한 작은 구성 요소를 조합하여 복잡한 시스템을 구축할 수 있습니다. 각 노드는 일반적으로 특정 기능을 수행하며, 노드들은 토픽(topics)이나 서비스(services)를 통해 메시지를 주고받으며 통신합니다.
-
통신 미들웨어: ROS는 프로세스 간 통신 및 분산 컴퓨팅을 지원하는 강력한 통신 인프라를 제공합니다. 이는 데이터 스트림(토픽)을 위한 발행-구독(publish-subscribe) 모델과 서비스 호출을 위한 요청-응답(request-reply) 모델을 통해 구현됩니다.
-
하드웨어 추상화: ROS는 하드웨어에 대한 추상화 계층을 제공하여 개발자가 장치에 구애받지 않는 코드를 작성할 수 있게 합니다. 이를 통해 동일한 코드를 다양한 하드웨어 설정에서 사용할 수 있어 통합과 실험이 훨씬 쉬워집니다.
-
도구 및 유틸리티: ROS는 시각화, 디버깅, 시뮬레이션을 위한 풍부한 도구와 유틸리티를 함께 제공합니다. 예를 들어, RViz는 센서 데이터와 로봇 상태 정보를 시각화하는 데 사용되며, Gazebo는 알고리즘과 로봇 설계를 테스트하기 위한 강력한 시뮬레이션 환경을 제공합니다.
-
광범위한 생태계: ROS 생태계는 방대하며 지속적으로 성장하고 있습니다. 내비게이션, 조작, 인지 등 다양한 로봇 애플리케이션을 위한 수많은 패키지를 이용할 수 있습니다. 커뮤니티는 이러한 패키지의 개발과 유지보수에 적극적으로 기여하고 있습니다.
ROS 버전의 진화
2007년 개발된 이래 ROS는 여러 버전으로 발전하며 ROS 1과 ROS 2로 나뉘었습니다. 아래의 기존 예제는 ROS1 Noetic을 사용하며, Using ROS2 섹션의 간결한 어댑터는 현재 ROS2 릴리스에 해당하는 rclpy 인터페이스를 보여줍니다.
Link to this sectionROS 1 vs. ROS 2#
ROS 1이 로봇 개발을 위한 견고한 기반을 제공했지만, ROS 2는 다음을 통해 그 단점을 보완합니다:
- 실시간 성능: 실시간 시스템 및 결정론적 동작에 대한 개선된 지원.
- 보안: 다양한 환경에서 안전하고 신뢰할 수 있는 작동을 위한 향상된 보안 기능.
- 확장성: 다중 로봇 시스템 및 대규모 배포에 대한 더 나은 지원.
- 크로스 플랫폼 지원: Linux 외에 Windows 및 macOS를 포함한 다양한 운영 체제와의 확장된 호환성.
- 유연한 통신: 더 유연하고 효율적인 프로세스 간 통신을 위해 DDS 사용.
Link to this sectionROS 메시지 및 토픽#
ROS에서 노드 간 통신은 메시지(messages)와 토픽(topics)을 통해 이루어집니다. 메시지는 노드 간에 교환되는 정보를 정의하는 데이터 구조이며, 토픽은 메시지를 주고받는 명명된 채널입니다. 노드는 특정 토픽으로 메시지를 발행하거나 구독하여 서로 통신할 수 있습니다. 이 발행-구독 모델은 노드 간의 비동기 통신과 디커플링(decoupling)을 가능하게 합니다. 로봇 시스템의 각 센서나 액추에이터는 일반적으로 토픽으로 데이터를 발행하며, 이는 다른 노드에서 처리나 제어를 위해 소비됩니다. 이 가이드에서는 Image, Depth, PointCloud 메시지와 카메라 토픽에 집중할 것입니다.
Link to this sectionUltralytics YOLO와 ROS 설정하기#
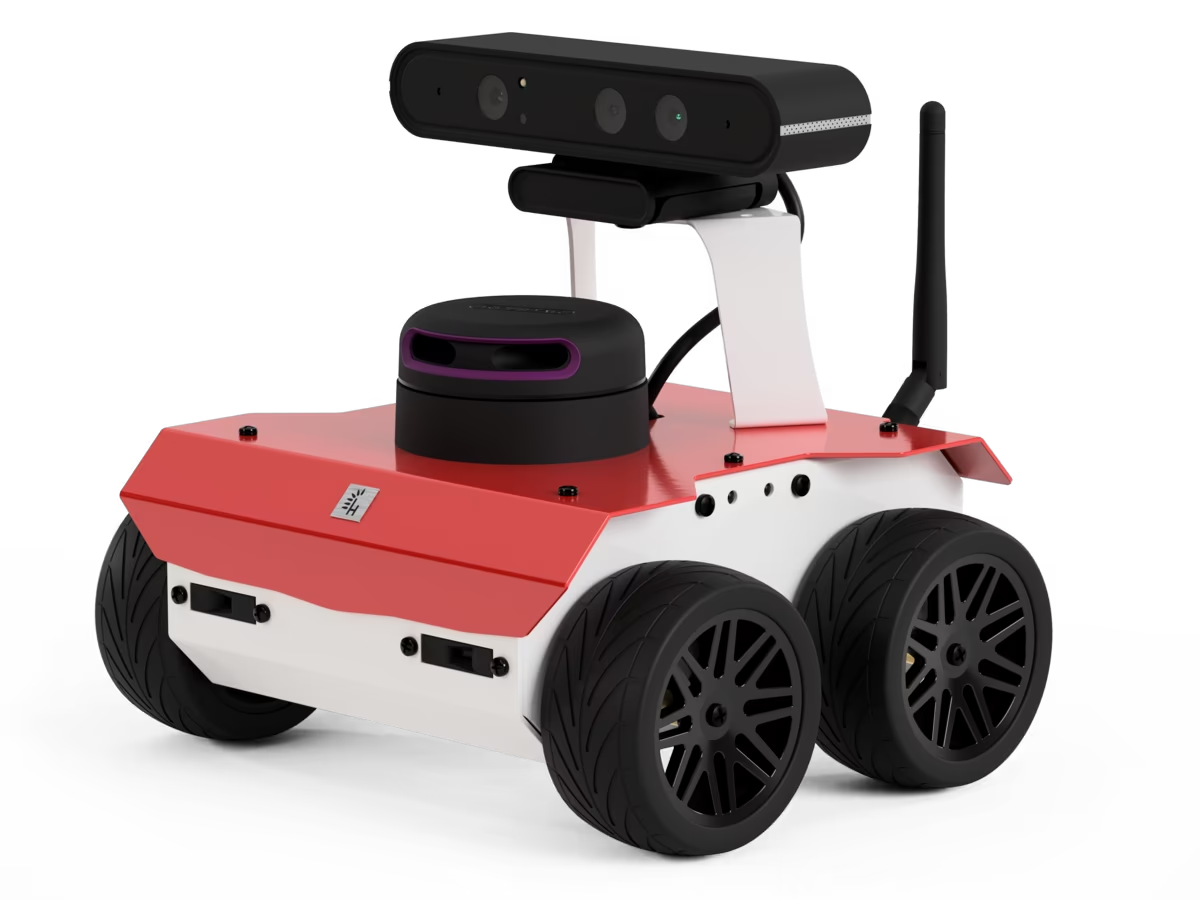
The ROS1 examples were tested using this ROS environment, a fork of the ROSbot ROS repository. The same YOLO and NumPy processing applies in ROS2; only the node lifecycle and message conversion differ.
Link to this section의존성 설치#
ROS 환경 외에도 다음 의존성을 설치해야 합니다:
-
ROS NumPy 패키지: ROS Image 메시지와 NumPy 배열 간의 빠른 변환을 위해 필요합니다.
pip install ros_numpy -
Ultralytics 패키지:
pip install ultralytics
Link to this sectionROS2 사용하기#
ROS2는 rospy를 rclpy로, ros_numpy 이미지 변환을 cv_bridge로 대체합니다. 다음 노드는 아래의 RGB 탐지 흐름에 대한 완벽한 ROS2 등가물입니다. 모델을 한 번 인스턴스화하고 콜백 전체에서 재사용하십시오.
import cv_bridge
import rclpy
from rclpy.node import Node
from rclpy.qos import qos_profile_sensor_data
from sensor_msgs.msg import Image

from ultralytics import YOLO

class UltralyticsNode(Node):
    """Run YOLO detection on ROS2 image messages."""

    def __init__(self):
        super().__init__("ultralytics")
        self.bridge = cv_bridge.CvBridge()
        self.model = YOLO("yolo26m.pt")
        self.publisher = self.create_publisher(Image, "/ultralytics/detection/image", 5)
        self.create_subscription(Image, "/camera/color/image_raw", self.callback, qos_profile_sensor_data)

    def callback(self, message):
        """Publish the annotated camera frame."""
        image = self.bridge.imgmsg_to_cv2(message, desired_encoding="bgr8")
        annotated = self.model(image)[0].plot(show=False)
        self.publisher.publish(self.bridge.cv2_to_imgmsg(annotated, encoding="bgr8"))

def main(args=None):
    """Start the ROS2 node."""
    rclpy.init(args=args)
    node = UltralyticsNode()
    rclpy.spin(node)
    node.destroy_node()
    rclpy.shutdown()

if __name__ == "__main__":
    main()
깊이 이미지의 경우 아래의 깊이 처리 코드를 재사용하되 메시지 획득 및 변환 부분만 교체하십시오:
self.create_subscription(Image, "/camera/color/image_raw", self.rgb_callback, qos_profile_sensor_data)
self.create_subscription(Image, "/camera/depth/image_raw", self.depth_callback, qos_profile_sensor_data)

def rgb_callback(self, message):
    self.rgb_image = self.bridge.imgmsg_to_cv2(message, desired_encoding="bgr8")

def depth_callback(self, message):
    depth_image = self.bridge.imgmsg_to_cv2(message, desired_encoding="passthrough")
    # Apply the NumPy mask and distance calculation from the depth example below.
포인트 클라우드의 경우 ROS2는 sensor_msgs_py.point_cloud2를 제공합니다. 구성된 클라우드를 한 번 변환한 후 아래의 NumPy 세그멘테이션 및 3D 매핑을 재사용하십시오:
from sensor_msgs_py import point_cloud2

points = point_cloud2.read_points_numpy(message, field_names=("x", "y", "z", "rgb"))
points = points.reshape(message.height, message.width, 4)
Link to this sectionROS sensor_msgs/Image와 함께 Ultralytics 사용하기#
sensor_msgs/Image 메시지 타입은 ROS에서 이미지 데이터를 표현하는 데 일반적으로 사용됩니다. 이 메시지는 인코딩, 높이, 너비, 픽셀 데이터에 대한 필드를 포함하고 있어 카메라나 기타 센서로 캡처된 이미지를 전송하는 데 적합합니다. 이미지 메시지는 시각적 인지, 객체 탐지, 내비게이션과 같은 로봇 애플리케이션 작업에 널리 사용됩니다.
Link to this section이미지 단계별 사용법#
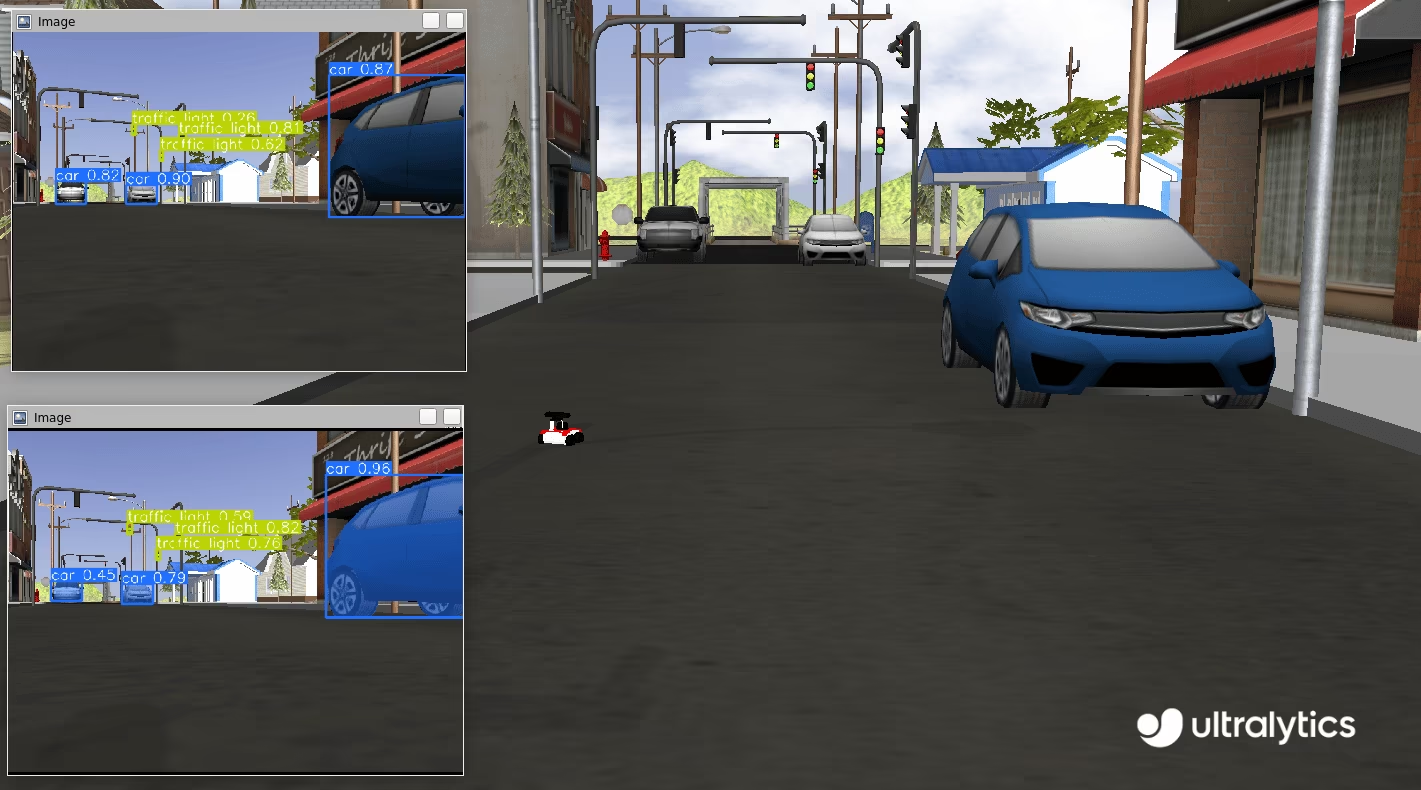
다음 코드 스니펫은 ROS와 Ultralytics YOLO 패키지를 함께 사용하는 방법을 보여줍니다. 이 예제에서는 카메라 토픽을 구독하고, YOLO를 사용하여 수신된 이미지를 처리한 다음, 탐지된 객체를 탐지 및 세그멘테이션을 위한 새로운 토픽으로 발행합니다.
먼저 필요한 라이브러리를 가져오고, 세그멘테이션용과 탐지용으로 두 개의 모델을 인스턴스화합니다. ROS 마스터와의 통신을 활성화하기 위해 ROS 노드(ultralytics라는 이름으로)를 초기화합니다. 안정적인 연결을 보장하기 위해 짧은 일시 중지를 포함하여, 노드가 진행하기 전에 연결을 설정할 충분한 시간을 제공합니다.
import time

import rospy

from ultralytics import YOLO

detection_model = YOLO("yolo26m.pt")
segmentation_model = YOLO("yolo26m-seg.pt")
rospy.init_node("ultralytics")
time.sleep(1)탐지용과 세그멘테이션용으로 두 개의 ROS 토픽을 초기화합니다. 이 토픽들은 주석이 달린 이미지를 발행하는 데 사용되어 추가 처리를 위해 접근할 수 있도록 합니다. 노드 간의 통신은 sensor_msgs/Image 메시지를 사용하여 촉진됩니다.
from sensor_msgs.msg import Image

det_image_pub = rospy.Publisher("/ultralytics/detection/image", Image, queue_size=5)
seg_image_pub = rospy.Publisher("/ultralytics/segmentation/image", Image, queue_size=5)
마지막으로, /camera/color/image_raw 토픽의 메시지를 수신하고 각 새 메시지에 대해 콜백 함수를 호출하는 구독자를 생성합니다. 이 콜백 함수는 sensor_msgs/Image 타입의 메시지를 수신하고, ros_numpy를 사용하여 이를 NumPy 배열로 변환한 다음, 앞서 인스턴스화한 YOLO 모델로 이미지를 처리하고, 이미지에 주석을 달고, 이를 각각의 토픽인 탐지용 /ultralytics/detection/image와 세그멘테이션용 /ultralytics/segmentation/image로 다시 발행합니다.
import ros_numpy

def callback(data):
    """Callback function to process image and publish annotated images."""
    array = ros_numpy.numpify(data)
    if det_image_pub.get_num_connections():
        det_result = detection_model(array)
        det_annotated = det_result[0].plot(show=False)
        det_image_pub.publish(ros_numpy.msgify(Image, det_annotated, encoding="rgb8"))

    if seg_image_pub.get_num_connections():
        seg_result = segmentation_model(array)
        seg_annotated = seg_result[0].plot(show=False)
        seg_image_pub.publish(ros_numpy.msgify(Image, seg_annotated, encoding="rgb8"))

rospy.Subscriber("/camera/color/image_raw", Image, callback)

while True:
    rospy.spin()
전체 코드
import time

import ros_numpy
import rospy
from sensor_msgs.msg import Image

from ultralytics import YOLO

detection_model = YOLO("yolo26m.pt")
segmentation_model = YOLO("yolo26m-seg.pt")
rospy.init_node("ultralytics")
time.sleep(1)

det_image_pub = rospy.Publisher("/ultralytics/detection/image", Image, queue_size=5)
seg_image_pub = rospy.Publisher("/ultralytics/segmentation/image", Image, queue_size=5)

def callback(data):
    """Callback function to process image and publish annotated images."""
    array = ros_numpy.numpify(data)
    if det_image_pub.get_num_connections():
        det_result = detection_model(array)
        det_annotated = det_result[0].plot(show=False)
        det_image_pub.publish(ros_numpy.msgify(Image, det_annotated, encoding="rgb8"))

    if seg_image_pub.get_num_connections():
        seg_result = segmentation_model(array)
        seg_annotated = seg_result[0].plot(show=False)
        seg_image_pub.publish(ros_numpy.msgify(Image, seg_annotated, encoding="rgb8"))

rospy.Subscriber("/camera/color/image_raw", Image, callback)

while True:
    rospy.spin()
디버깅
ROS (Robot Operating System) 노드 디버깅은 시스템의 분산된 특성으로 인해 어려울 수 있습니다. 이 과정에 도움이 되는 몇 가지 도구가 있습니다:
rostopic echo <TOPIC-NAME>: 이 명령어를 사용하면 특정 토픽에서 발행되는 메시지를 확인하여 데이터 흐름을 검사할 수 있습니다.rostopic list: 이 명령어를 사용하여 ROS 시스템에서 사용 가능한 모든 토픽을 나열하고 활성 데이터 스트림을 전반적으로 파악할 수 있습니다.rqt_graph: 이 시각화 도구는 노드 간의 통신 그래프를 보여주어 노드가 어떻게 상호 연결되고 상호 작용하는지에 대한 통찰력을 제공합니다.- 3D 표현과 같이 더 복잡한 시각화가 필요한 경우 RViz를 사용할 수 있습니다. RViz (ROS Visualization)는 ROS를 위한 강력한 3D 시각화 도구입니다. 이를 통해 로봇과 그 주변 환경의 상태를 실시간으로 시각화할 수 있습니다. RViz를 사용하면 센서 데이터(예:
sensor_msgs/Image), 로봇 모델 상태 및 기타 여러 유형의 정보를 보고 로봇 시스템의 동작을 더 쉽게 디버깅하고 이해할 수 있습니다.
Link to this sectionstd_msgs/String으로 탐지된 클래스 발행하기#
표준 ROS 메시지에는 std_msgs/String 메시지도 포함됩니다. 많은 애플리케이션에서 전체 주석 이미지를 다시 발행할 필요는 없으며, 로봇의 시야에 있는 클래스만 필요할 수 있습니다. 다음 예제는 std_msgs/String 메시지를 사용하여 탐지된 클래스를 /ultralytics/detection/classes 토픽에 다시 발행하는 방법을 보여줍니다. 이러한 메시지는 더 가볍고 필수적인 정보를 제공하므로 다양한 애플리케이션에서 유용합니다.
Link to this section예시 사용 사례#
카메라와 객체 탐지 모델이 장착된 창고 로봇을 고려해 보세요. 대용량 주석 이미지를 네트워크를 통해 전송하는 대신, 로봇은 탐지된 클래스 목록을 std_msgs/String 메시지로 발행할 수 있습니다. 예를 들어, 로봇이 "box", "pallet", "forklift"와 같은 객체를 탐지하면 이 클래스들을 /ultralytics/detection/classes 토픽으로 발행합니다. 이 정보는 중앙 모니터링 시스템에서 재고를 실시간으로 추적하거나, 장애물을 피하기 위해 로봇의 경로 계획을 최적화하거나, 탐지된 상자를 집어 드는 것과 같은 특정 작업을 트리거하는 데 사용될 수 있습니다. 이 접근 방식은 통신에 필요한 대역폭을 줄이고 중요한 데이터를 전송하는 데 집중합니다.
Link to this section문자열 단계별 사용법#
This example demonstrates how to use the Ultralytics YOLO package with ROS. In this example, we subscribe to a camera topic, process the incoming image using YOLO, and publish the detected objects to new topic /ultralytics/detection/classes using std_msgs/String messages. The ros_numpy package is used to convert the ROS Image message to a NumPy array for processing with YOLO.
import time

import ros_numpy
import rospy
from sensor_msgs.msg import Image
from std_msgs.msg import String

from ultralytics import YOLO

detection_model = YOLO("yolo26m.pt")
rospy.init_node("ultralytics")
time.sleep(1)
classes_pub = rospy.Publisher("/ultralytics/detection/classes", String, queue_size=5)

def callback(data):
    """Callback function to process image and publish detected classes."""
    array = ros_numpy.numpify(data)
    if classes_pub.get_num_connections():
        det_result = detection_model(array)
        classes = det_result[0].boxes.cls.cpu().numpy().astype(int)
        names = [det_result[0].names[i] for i in classes]
        classes_pub.publish(String(data=str(names)))

rospy.Subscriber("/camera/color/image_raw", Image, callback)
while True:
    rospy.spin()
Link to this sectionROS 심도(Depth) 이미지와 함께 Ultralytics 사용하기#
RGB 이미지 외에도 ROS는 카메라로부터 객체까지의 거리에 대한 정보를 제공하는 심도 이미지(depth images)를 지원합니다. 심도 이미지는 장애물 회피, 3D 매핑, 위치 추적과 같은 로봇 애플리케이션에 매우 중요합니다.
심도 이미지는 각 픽셀이 카메라에서 객체까지의 거리를 나타내는 이미지입니다. 색상을 캡처하는 RGB 이미지와 달리 심도 이미지는 공간 정보를 캡처하여 로봇이 주변 환경의 3D 구조를 인식할 수 있게 합니다.
심도 이미지는 다양한 센서를 사용하여 획득할 수 있습니다:
- 스테레오 카메라(Stereo Cameras): 두 대의 카메라를 사용하여 이미지 시차를 기반으로 심도를 계산합니다.
- 비행 시간(ToF) 카메라(Time-of-Flight Cameras): 빛이 객체로부터 돌아오는 시간을 측정합니다.
- 구조광 센서(Structured Light Sensors): 패턴을 투영하고 표면에서의 변형을 측정합니다.
Link to this section심도 이미지에 YOLO 사용하기#
ROS에서 심도 이미지는 인코딩, 높이, 너비, 픽셀 데이터 필드를 포함하는 sensor_msgs/Image 메시지 타입으로 표현됩니다. 심도 이미지에 대한 인코딩 필드는 종종 "16UC1"과 같은 형식을 사용하며, 이는 픽셀당 16비트 부호 없는 정수를 나타내며 각 값은 객체까지의 거리를 나타냅니다. 심도 이미지는 일반적으로 RGB 이미지와 함께 사용되어 환경에 대한 더 포괄적인 보기를 제공합니다.
YOLO를 사용하여 RGB와 심도 이미지 모두에서 정보를 추출하고 결합할 수 있습니다. 예를 들어, YOLO는 RGB 이미지 내의 객체를 탐지할 수 있으며, 이 탐지는 심도 이미지에서 대응하는 영역을 찾는 데 사용될 수 있습니다. 이를 통해 탐지된 객체에 대한 정확한 심도 정보를 추출하여 로봇이 3차원적으로 환경을 이해하는 능력을 향상시킵니다.
심도 이미지로 작업할 때는 RGB 이미지와 심도 이미지가 올바르게 정렬되었는지 확인하는 것이 필수적입니다. Intel RealSense 시리즈와 같은 RGB-D 카메라는 동기화된 RGB 및 심도 이미지를 제공하여 두 소스의 정보를 결합하기 쉽게 만듭니다. 별도의 RGB 카메라와 심도 카메라를 사용하는 경우 정확한 정렬을 위해 보정하는 것이 중요합니다.
Link to this section심도 단계별 사용법#
이 예제에서는 YOLO를 사용하여 이미지를 세그멘테이션하고 추출된 마스크를 심도 이미지에 적용하여 객체를 세그멘테이션합니다. 이를 통해 객체의 각 픽셀이 카메라 초점 중심에서 얼마나 떨어져 있는지 거리를 결정할 수 있습니다. 이 거리 정보를 획득함으로써 장면 내 특정 객체와 카메라 사이의 거리를 계산할 수 있습니다. 먼저 필요한 라이브러리를 가져오고, ROS 노드를 생성하며, 세그멘테이션 모델과 ROS 토픽을 인스턴스화합니다.
import time

import rospy
from std_msgs.msg import String

from ultralytics import YOLO

rospy.init_node("ultralytics")
time.sleep(1)

segmentation_model = YOLO("yolo26m-seg.pt")

classes_pub = rospy.Publisher("/ultralytics/detection/distance", String, queue_size=5)
다음으로, 들어오는 심도 이미지 메시지를 처리하는 콜백 함수를 정의합니다. 이 함수는 심도 이미지와 RGB 이미지 메시지를 기다렸다가, 이를 NumPy 배열로 변환하고, RGB 이미지에 세그멘테이션 모델을 적용합니다. 그런 다음 탐지된 각 객체에 대한 세그멘테이션 마스크를 추출하고 심도 이미지를 사용하여 카메라에서 객체까지의 평균 거리를 계산합니다. 대부분의 센서는 최대 거리가 있으며, 이를 클립 거리라고 하며, 이 거리를 넘으면 값이 inf(np.inf)로 표현됩니다. 처리하기 전에 이러한 null 값을 필터링하고 0 값을 할당하는 것이 중요합니다. 마지막으로 탐지된 객체와 해당 평균 거리를 /ultralytics/detection/distance 토픽으로 발행합니다.
import numpy as np
import ros_numpy
from sensor_msgs.msg import Image

def callback(data):
    """Callback function to process depth image and RGB image."""
    image = rospy.wait_for_message("/camera/color/image_raw", Image)
    image = ros_numpy.numpify(image)
    depth = ros_numpy.numpify(data)
    result = segmentation_model(image)

    all_objects = []
    for index, cls in enumerate(result[0].boxes.cls):
        class_index = int(cls.cpu().numpy())
        name = result[0].names[class_index]
        mask = result[0].masks.data.cpu().numpy()[index, :, :].astype(int)
        obj = depth[mask == 1]
        obj = obj[~np.isnan(obj)]
        avg_distance = np.mean(obj) if len(obj) else np.inf
        all_objects.append(f"{name}: {avg_distance:.2f}m")

    classes_pub.publish(String(data=str(all_objects)))

rospy.Subscriber("/camera/depth/image_raw", Image, callback)

while True:
    rospy.spin()
전체 코드
import time

import numpy as np
import ros_numpy
import rospy
from sensor_msgs.msg import Image
from std_msgs.msg import String

from ultralytics import YOLO

rospy.init_node("ultralytics")
time.sleep(1)

segmentation_model = YOLO("yolo26m-seg.pt")

classes_pub = rospy.Publisher("/ultralytics/detection/distance", String, queue_size=5)

def callback(data):
    """Callback function to process depth image and RGB image."""
    image = rospy.wait_for_message("/camera/color/image_raw", Image)
    image = ros_numpy.numpify(image)
    depth = ros_numpy.numpify(data)
    result = segmentation_model(image)

    all_objects = []
    for index, cls in enumerate(result[0].boxes.cls):
        class_index = int(cls.cpu().numpy())
        name = result[0].names[class_index]
        mask = result[0].masks.data.cpu().numpy()[index, :, :].astype(int)
        obj = depth[mask == 1]
        obj = obj[~np.isnan(obj)]
        avg_distance = np.mean(obj) if len(obj) else np.inf
        all_objects.append(f"{name}: {avg_distance:.2f}m")

    classes_pub.publish(String(data=str(all_objects)))

rospy.Subscriber("/camera/depth/image_raw", Image, callback)

while True:
    rospy.spin()
Link to this sectionROS sensor_msgs/PointCloud2와 함께 Ultralytics 사용하기#
sensor_msgs/PointCloud2 메시지 타입은 ROS에서 3D 포인트 클라우드 데이터를 표현하는 데 사용되는 데이터 구조입니다. 이 메시지 타입은 3D 매핑, 객체 인식, 위치 추적과 같은 작업을 가능하게 하여 로봇 애플리케이션에 필수적입니다.
포인트 클라우드는 3차원 좌표계 내에서 정의된 데이터 포인트의 집합입니다. 이러한 데이터 포인트는 3D 스캔 기술을 통해 캡처된 객체나 장면의 외부 표면을 나타냅니다. 클라우드의 각 포인트는 공간 내 위치에 해당하는 X, Y, Z 좌표를 가지며, 색상 및 강도와 같은 추가 정보도 포함할 수 있습니다.
sensor_msgs/PointCloud2를 다룰 때는 포인트 클라우드 데이터가 획득된 센서의 참조 프레임을 고려하는 것이 필수적입니다. 포인트 클라우드는 처음에 센서의 참조 프레임에서 캡처됩니다. /tf_static 토픽을 수신하여 이 참조 프레임을 결정할 수 있습니다. 그러나 특정 애플리케이션 요구 사항에 따라 포인트 클라우드를 다른 참조 프레임으로 변환해야 할 수도 있습니다. 이 변환은 좌표 프레임을 관리하고 데이터 간의 변환을 위한 도구를 제공하는 tf2_ros 패키지를 사용하여 수행할 수 있습니다.
포인트 클라우드는 다양한 센서를 사용하여 획득할 수 있습니다:
- LIDAR (Light Detection and Ranging): 레이저 펄스를 사용하여 객체까지의 거리를 측정하고 고정밀도 3D 맵을 생성합니다.
- 심도 카메라: 각 픽셀에 대한 심도 정보를 캡처하여 장면의 3D 복원을 가능하게 합니다.
- 스테레오 카메라: 둘 이상의 카메라를 활용하여 삼각 측량을 통해 심도 정보를 얻습니다.
- 구조광 스캐너: 표면에 알려진 패턴을 투영하고 변형을 측정하여 심도를 계산합니다.
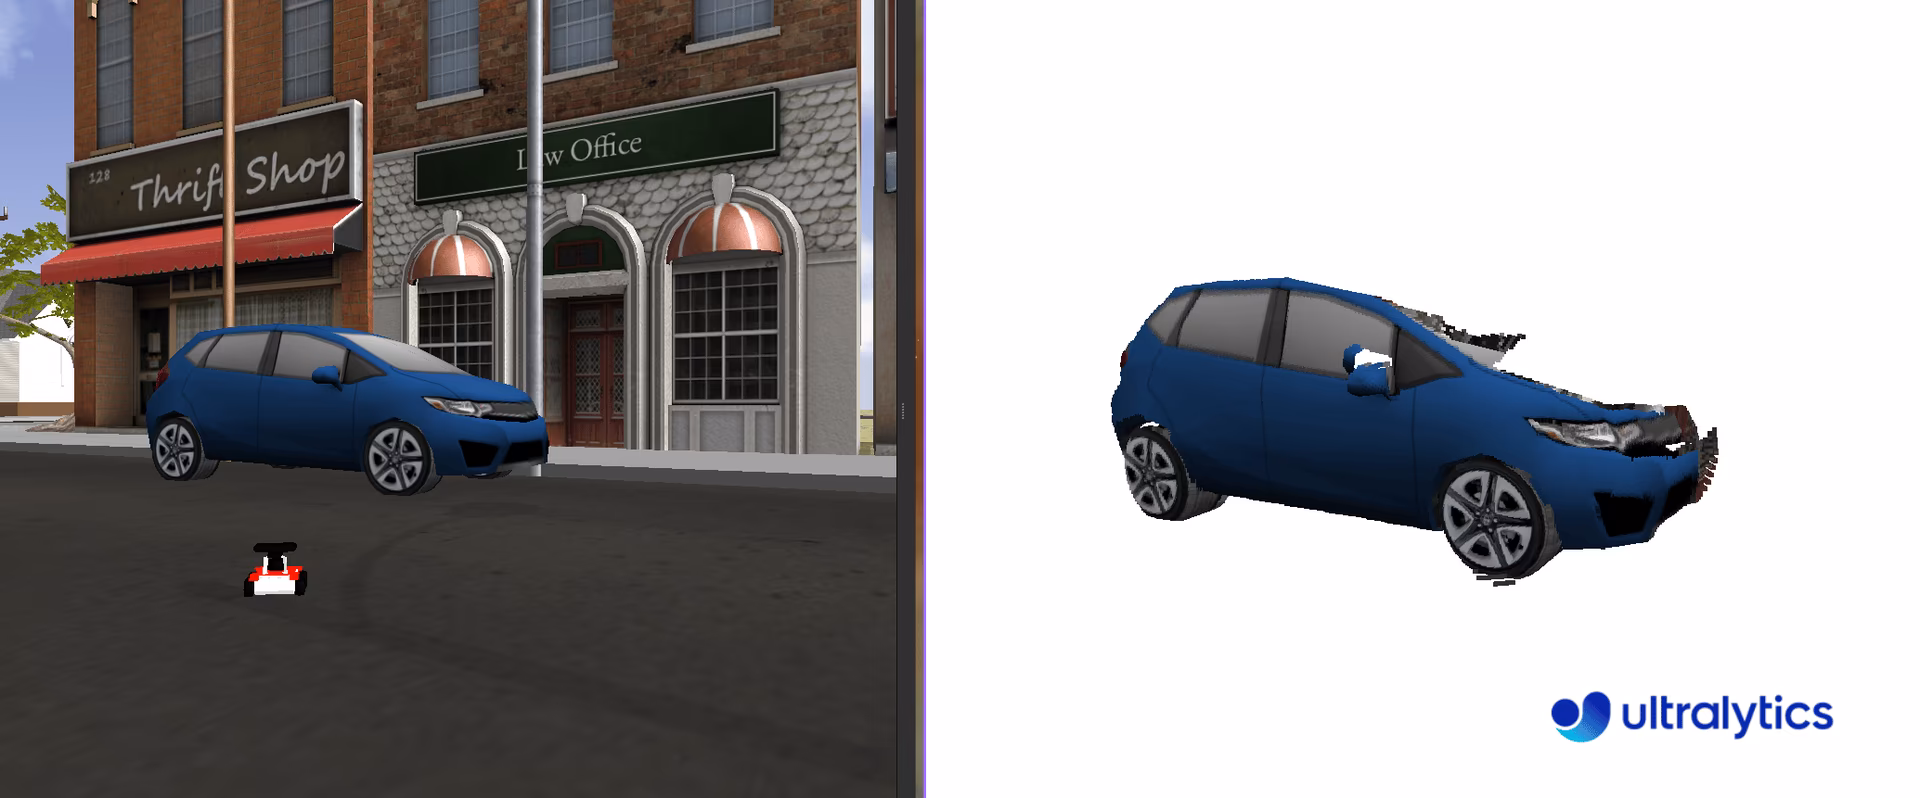
Link to this section포인트 클라우드에 YOLO 사용하기#
YOLO를 sensor_msgs/PointCloud2 타입 메시지와 통합하기 위해 심도 맵에 사용된 것과 유사한 방법을 사용할 수 있습니다. 포인트 클라우드에 포함된 색상 정보를 활용하여 2D 이미지를 추출하고, YOLO를 사용하여 이 이미지에 세그멘테이션을 수행한 다음, 결과 마스크를 3차원 포인트에 적용하여 관심 있는 3D 객체를 분리할 수 있습니다.
포인트 클라우드 처리를 위해 사용하기 쉬운 Python 라이브러리인 Open3D(pip install open3d)를 사용하는 것을 권장합니다. Open3D는 포인트 클라우드 데이터 구조를 관리하고, 시각화하며, 복잡한 작업을 원활하게 실행할 수 있는 강력한 도구를 제공합니다. 이 라이브러리는 YOLO 기반 세그멘테이션과 함께 포인트 클라우드를 조작하고 분석하는 프로세스를 크게 단순화하고 능력을 향상시킬 수 있습니다.
Link to this section포인트 클라우드 단계별 사용법#
필요한 라이브러리를 가져오고 세그멘테이션을 위한 YOLO 모델을 인스턴스화합니다.
import time

import rospy

from ultralytics import YOLO

rospy.init_node("ultralytics")
time.sleep(1)
segmentation_model = YOLO("yolo26m-seg.pt")
Create a function pointcloud2_to_array, which transforms a sensor_msgs/PointCloud2 message into two NumPy arrays. The sensor_msgs/PointCloud2 messages contain n points based on the width and height of the acquired image. For instance, a 480 x 640 image will have 307,200 points. Each point includes three spatial coordinates (xyz) and the corresponding color in RGB format. These can be considered as two separate channels of information.
The function returns the xyz coordinates and RGB values in the format of the original camera resolution (width x height). Most sensors have a maximum distance, known as the clip distance, beyond which values are represented as inf (np.inf). Before processing, it is important to filter out these null values and assign them a value of 0.
import numpy as np
import ros_numpy

def pointcloud2_to_array(pointcloud2: PointCloud2) -> tuple:
    """Convert a ROS PointCloud2 message to a numpy array.

    Args:
        pointcloud2 (PointCloud2): the PointCloud2 message

    Returns:
        (tuple): tuple containing (xyz, rgb)
    """
    pc_array = ros_numpy.point_cloud2.pointcloud2_to_array(pointcloud2)
    split = ros_numpy.point_cloud2.split_rgb_field(pc_array)
    rgb = np.stack([split["b"], split["g"], split["r"]], axis=2)
    xyz = ros_numpy.point_cloud2.get_xyz_points(pc_array, remove_nans=False)
    xyz = np.array(xyz).reshape((pointcloud2.height, pointcloud2.width, 3))
    nan_rows = np.isnan(xyz).all(axis=2)
    xyz[nan_rows] = [0, 0, 0]
    rgb[nan_rows] = [0, 0, 0]
    return xyz, rgb
Next, subscribe to the /camera/depth/points topic to receive the point cloud message and convert the sensor_msgs/PointCloud2 message into NumPy arrays containing the XYZ coordinates and RGB values (using the pointcloud2_to_array function). Process the RGB image using the YOLO model to extract segmented objects. For each detected object, extract the segmentation mask and apply it to both the RGB image and the XYZ coordinates to isolate the object in 3D space.
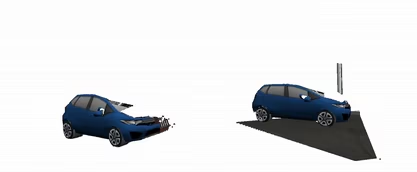
마스크는 객체가 존재하면 1, 존재하지 않으면 0인 이진 값으로 구성되므로 마스크 처리는 간단합니다. 마스크를 적용하려면 원래 채널에 마스크를 곱하기만 하면 됩니다. 이 작업은 이미지 내에서 관심 있는 객체를 효과적으로 분리합니다. 마지막으로, Open3D 포인트 클라우드 객체를 생성하고 관련된 색상과 함께 3D 공간에서 세그멘테이션된 객체를 시각화합니다.
import sys

import open3d as o3d

ros_cloud = rospy.wait_for_message("/camera/depth/points", PointCloud2)
xyz, rgb = pointcloud2_to_array(ros_cloud)
result = segmentation_model(rgb)

if not len(result[0].boxes.cls):
    print("No objects detected")
    sys.exit()

classes = result[0].boxes.cls.cpu().numpy().astype(int)
for index, class_id in enumerate(classes):
    mask = result[0].masks.data.cpu().numpy()[index, :, :].astype(int)
    mask_expanded = np.stack([mask, mask, mask], axis=2)

    obj_rgb = rgb * mask_expanded
    obj_xyz = xyz * mask_expanded

    pcd = o3d.geometry.PointCloud()
    pcd.points = o3d.utility.Vector3dVector(obj_xyz.reshape((ros_cloud.height * ros_cloud.width, 3)))
    pcd.colors = o3d.utility.Vector3dVector(obj_rgb.reshape((ros_cloud.height * ros_cloud.width, 3)) / 255)
    o3d.visualization.draw_geometries([pcd])
전체 코드
import sys
import time

import numpy as np
import open3d as o3d
import ros_numpy
import rospy
from sensor_msgs.msg import PointCloud2

from ultralytics import YOLO

rospy.init_node("ultralytics")
time.sleep(1)
segmentation_model = YOLO("yolo26m-seg.pt")

def pointcloud2_to_array(pointcloud2: PointCloud2) -> tuple:
    """Convert a ROS PointCloud2 message to a numpy array.

    Args:
        pointcloud2 (PointCloud2): the PointCloud2 message

    Returns:
        (tuple): tuple containing (xyz, rgb)
    """
    pc_array = ros_numpy.point_cloud2.pointcloud2_to_array(pointcloud2)
    split = ros_numpy.point_cloud2.split_rgb_field(pc_array)
    rgb = np.stack([split["b"], split["g"], split["r"]], axis=2)
    xyz = ros_numpy.point_cloud2.get_xyz_points(pc_array, remove_nans=False)
    xyz = np.array(xyz).reshape((pointcloud2.height, pointcloud2.width, 3))
    nan_rows = np.isnan(xyz).all(axis=2)
    xyz[nan_rows] = [0, 0, 0]
    rgb[nan_rows] = [0, 0, 0]
    return xyz, rgb

ros_cloud = rospy.wait_for_message("/camera/depth/points", PointCloud2)
xyz, rgb = pointcloud2_to_array(ros_cloud)
result = segmentation_model(rgb)

if not len(result[0].boxes.cls):
    print("No objects detected")
    sys.exit()

classes = result[0].boxes.cls.cpu().numpy().astype(int)
for index, class_id in enumerate(classes):
    mask = result[0].masks.data.cpu().numpy()[index, :, :].astype(int)
    mask_expanded = np.stack([mask, mask, mask], axis=2)

    obj_rgb = rgb * mask_expanded
    obj_xyz = xyz * mask_expanded

    pcd = o3d.geometry.PointCloud()
    pcd.points = o3d.utility.Vector3dVector(obj_xyz.reshape((ros_cloud.height * ros_cloud.width, 3)))
    pcd.colors = o3d.utility.Vector3dVector(obj_rgb.reshape((ros_cloud.height * ros_cloud.width, 3)) / 255)
    o3d.visualization.draw_geometries([pcd])
Link to this section결론#
Ultralytics YOLO가 ROS에 통합되면 로봇은 RGB 이미지, 깊이 이미지 및 포인트 클라우드 전반에 걸쳐 객체 탐지 및 세그멘테이션을 수행하여 원시 센서 스트림을 실행 가능한 인식 데이터로 변환할 수 있습니다. 여기에서 더 많은 추론 옵션을 보려면 Predict 모드를 탐색하거나, 로봇 공학 애플리케이션을 프로토타입에서 프로덕션 단계로 발전시키려면 컴퓨터 비전 프로젝트 단계를 따르십시오.
Link to this sectionFAQ#
Link to this sectionRobot Operating System (ROS)이란 무엇인가요?#
Robot Operating System (ROS)는 개발자가 강력한 로봇 애플리케이션을 만들 수 있도록 돕기 위해 로봇 공학에서 일반적으로 사용되는 오픈 소스 프레임워크입니다. 이 프레임워크는 로봇 시스템을 구축하고 인터페이스하기 위한 라이브러리 및 도구 모음을 제공하여 복잡한 애플리케이션의 개발을 더 쉽게 만듭니다. ROS는 토픽(topics)이나 서비스(services)를 통해 메시지를 주고받으며 노드 간의 통신을 지원합니다.
Link to this section실시간 객체 탐지를 위해 Ultralytics YOLO를 ROS와 통합하려면 어떻게 해야 하나요?#
Ultralytics YOLO를 ROS와 통합하려면 ROS 환경을 설정하고 YOLO를 사용하여 센서 데이터를 처리해야 합니다. 먼저 ros_numpy 및 Ultralytics YOLO와 같은 필요한 의존성을 설치하십시오:
pip install ros_numpy ultralytics다음으로, ROS 노드를 생성하고 이미지 토픽을 구독하여 객체 탐지를 위해 들어오는 데이터를 처리하십시오. 다음은 최소한의 예제입니다.
import ros_numpy
import rospy
from sensor_msgs.msg import Image

from ultralytics import YOLO

detection_model = YOLO("yolo26m.pt")
rospy.init_node("ultralytics")
det_image_pub = rospy.Publisher("/ultralytics/detection/image", Image, queue_size=5)

def callback(data):
    array = ros_numpy.numpify(data)
    det_result = detection_model(array)
    det_annotated = det_result[0].plot(show=False)
    det_image_pub.publish(ros_numpy.msgify(Image, det_annotated, encoding="rgb8"))

rospy.Subscriber("/camera/color/image_raw", Image, callback)
rospy.spin()
Link to this sectionROS 토픽이란 무엇이며 Ultralytics YOLO에서 어떻게 사용되나요?#
ROS 토픽은 게시-구독(publish-subscribe) 모델을 사용하여 ROS 네트워크 내의 노드 간 통신을 원활하게 합니다. 토픽은 노드가 메시지를 비동기적으로 주고받는 데 사용하는 명명된 채널입니다. Ultralytics YOLO의 맥락에서 노드가 이미지 토픽을 구독하도록 설정하고, 탐지나 세그멘테이션과 같은 작업을 위해 YOLO로 이미지를 처리한 다음, 그 결과를 새로운 토픽에 게시할 수 있습니다.
예를 들어, 카메라 토픽을 구독하고 들어오는 이미지를 처리하여 탐지하는 방법은 다음과 같습니다:
rospy.Subscriber("/camera/color/image_raw", Image, callback)Link to this section왜 ROS에서 Ultralytics YOLO와 함께 심도 이미지를 사용하나요?#
sensor_msgs/Image로 표현되는 ROS의 심도 이미지는 카메라로부터 객체까지의 거리를 제공하며, 이는 장애물 회피, 3D 매핑, 위치 추적과 같은 작업에 매우 중요합니다. RGB 이미지와 함께 심도 정보를 사용함으로써 로봇은 3D 환경을 더 잘 이해할 수 있습니다.
YOLO를 사용하면 RGB 이미지에서 세그멘테이션 마스크를 추출하고 이 마스크를 심도 이미지에 적용하여 정확한 3D 객체 정보를 얻을 수 있으며, 이를 통해 로봇이 주변 환경을 탐색하고 상호 작용하는 능력이 향상됩니다.
Link to this sectionROS에서 YOLO를 사용하여 3D 포인트 클라우드를 시각화하려면 어떻게 해야 하나요?#
YOLO를 사용하여 ROS에서 3D 포인트 클라우드를 시각화하려면:
sensor_msgs/PointCloud2메시지를 NumPy 배열로 변환합니다.- YOLO를 사용하여 RGB 이미지를 세그멘테이션합니다.
- 세그멘테이션 마스크를 포인트 클라우드에 적용합니다.
시각화를 위해 Open3D를 사용하는 예제는 다음과 같습니다:
import sys

import numpy as np
import open3d as o3d
import ros_numpy
import rospy
from sensor_msgs.msg import PointCloud2

from ultralytics import YOLO

rospy.init_node("ultralytics")
segmentation_model = YOLO("yolo26m-seg.pt")

def pointcloud2_to_array(pointcloud2):
    pc_array = ros_numpy.point_cloud2.pointcloud2_to_array(pointcloud2)
    split = ros_numpy.point_cloud2.split_rgb_field(pc_array)
    rgb = np.stack([split["b"], split["g"], split["r"]], axis=2)
    xyz = ros_numpy.point_cloud2.get_xyz_points(pc_array, remove_nans=False)
    xyz = np.array(xyz).reshape((pointcloud2.height, pointcloud2.width, 3))
    return xyz, rgb

ros_cloud = rospy.wait_for_message("/camera/depth/points", PointCloud2)
xyz, rgb = pointcloud2_to_array(ros_cloud)
result = segmentation_model(rgb)

if not len(result[0].boxes.cls):
    print("No objects detected")
    sys.exit()

classes = result[0].boxes.cls.cpu().numpy().astype(int)
for index, class_id in enumerate(classes):
    mask = result[0].masks.data.cpu().numpy()[index, :, :].astype(int)
    mask_expanded = np.stack([mask, mask, mask], axis=2)

    obj_rgb = rgb * mask_expanded
    obj_xyz = xyz * mask_expanded

    pcd = o3d.geometry.PointCloud()
    pcd.points = o3d.utility.Vector3dVector(obj_xyz.reshape((-1, 3)))
    pcd.colors = o3d.utility.Vector3dVector(obj_rgb.reshape((-1, 3)) / 255)
    o3d.visualization.draw_geometries([pcd])
이 접근 방식은 로봇 애플리케이션에서 내비게이션 및 조작과 같은 작업에 유용한 세그멘테이션된 객체의 3D 시각화를 제공합니다.