Набор данных VisDrone
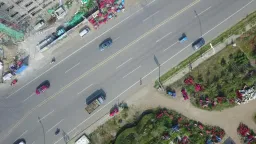
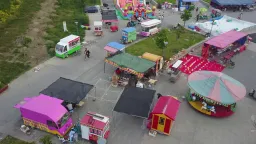
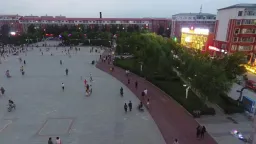
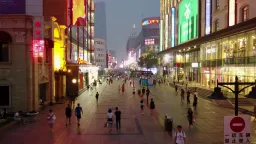
Набор данных VisDrone — крупномасштабный бенчмарк изображений с дронов. Его поднабор для обнаружения (VisDrone2019-DET) содержит 8 629 аэрофотоснимков — 6 471 для обучения, 548 для валидации и 1 610 для тестирования (test-dev) — с разметкой 10 классов объектов для обнаружения объектов. Набор создан командой AISKYEYE из лаборатории машинного обучения и интеллектуального анализа данных Тяньцзиньского университета в Китае.
Смотри: Как обучить Ultralytics YOLO на датасете VisDrone | Обнаружение объектов с воздуха | Полное руководство 🚀
Полный бенчмарк VisDrone включает 288 видеороликов (261 908 кадров) и 10 209 статичных изображений, снятых установленными на дронах камерами в 14 городах Китая. В нём представлены городская и сельская местность, малолюдные и многолюдные сцены, а также различные погодные условия и освещение. На кадрах вручную размечено более 2,6 миллиона ограничивающих рамок, дополненных такими атрибутами, как видимость сцены, класс объекта и степень перекрытия. В конфигурации Ultralytics VisDrone.yaml используется поднабор статичных изображений VisDrone2019-DET.
Основные особенности#
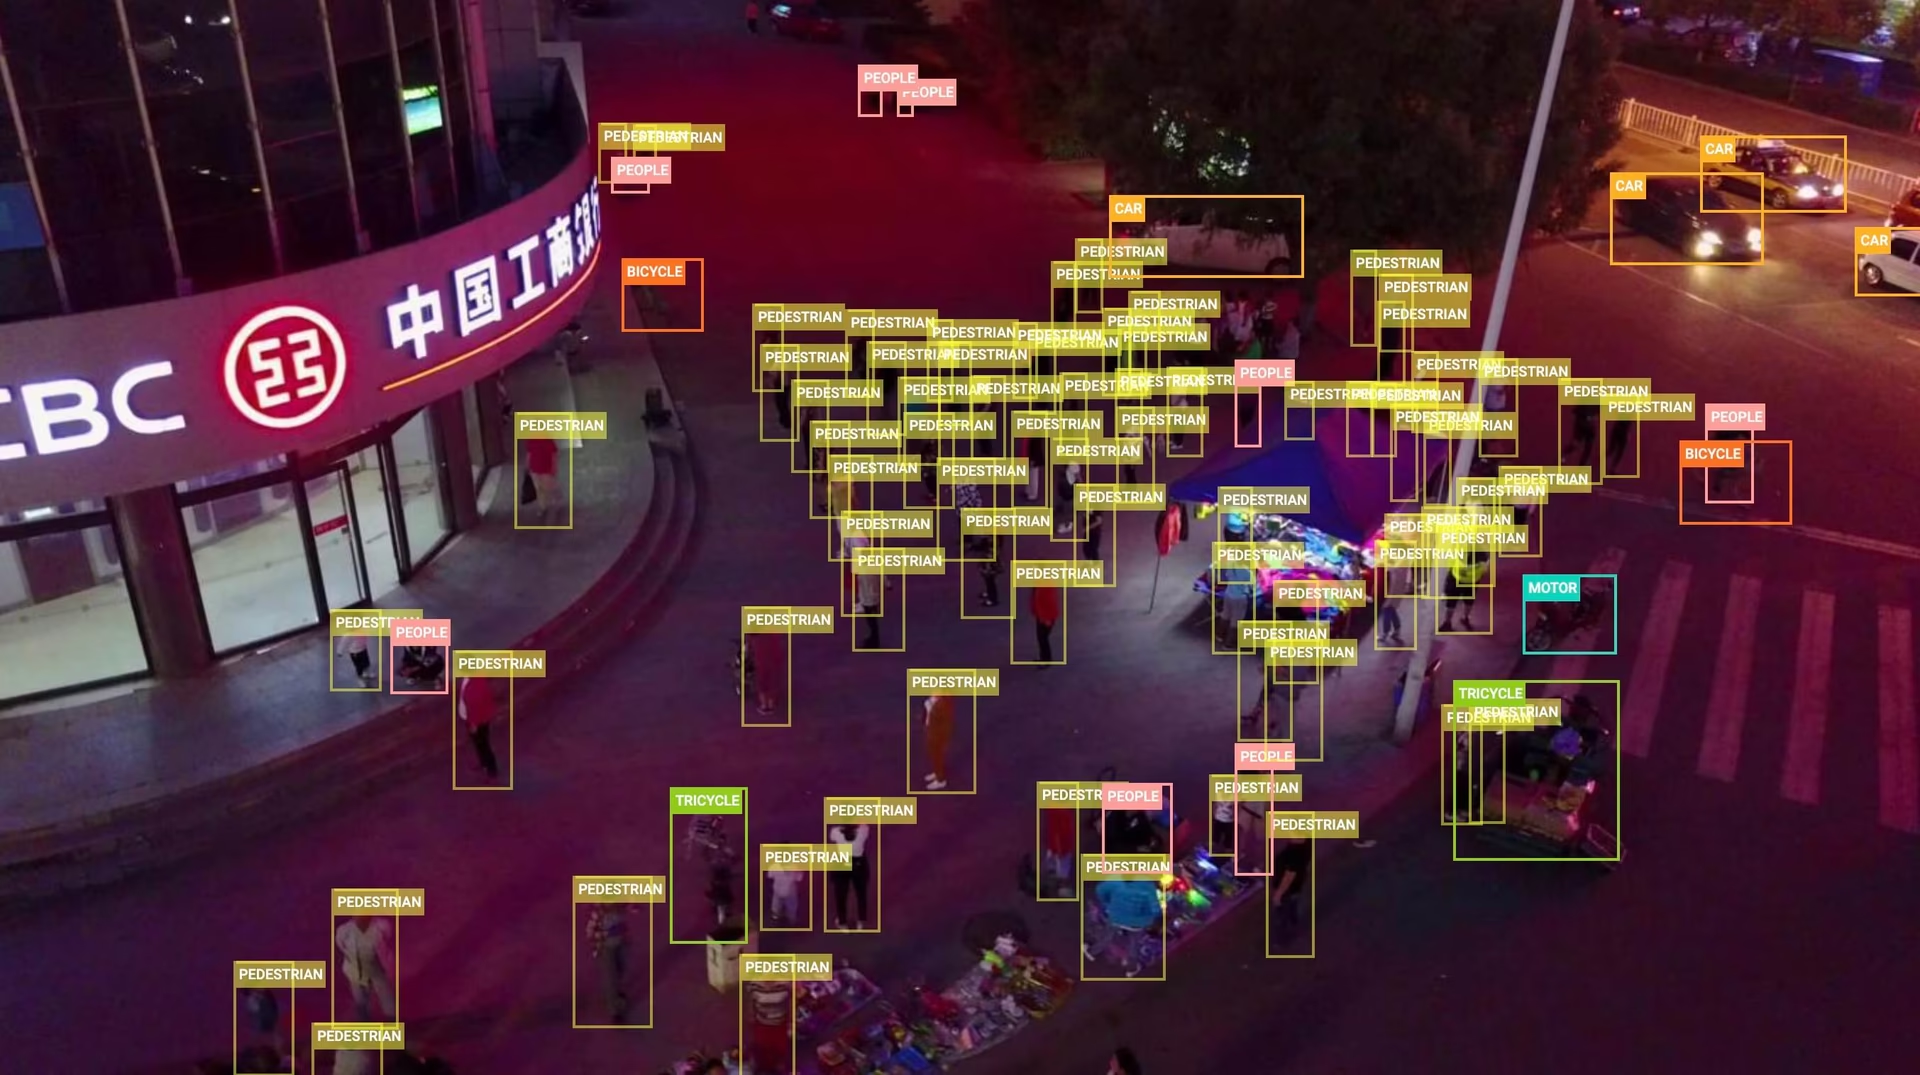
- Мелкие и плотно расположенные объекты: Съёмка с воздуха делает объекты крошечными и тесно сгруппированными: только на 548 изображениях для валидации размечено 38 759 рамок, в среднем около 70 объектов на изображение.
- Разнообразие сцен: Снимки из 14 китайских городов охватывают городскую и сельскую местность, день и ночь, а также различные погодные условия.
- Подробная разметка: Более 2,6 миллиона рамок по всему бенчмарку с атрибутами перекрытия и видимости.
- Заранее заданные разбиения: Фиксированные части train / val / test-dev (6 471 / 548 / 1 610 изображений) обеспечивают единообразную оценку.
Структура набора данных#
Конфигурация Ultralytics для VisDrone охватывает поднабор изображений VisDrone2019-DET, разделённый на три части:
| Подвыборка | Изображения | Описание |
|---|---|---|
| Обучение | 6,471 | Размеченные аэрофотоснимки, используемые для обучения детектора |
| Валидация | 548 | Изображения, используемые для оценки во время разработки |
| Test-dev | 1,610 | Отложенные изображения для итоговой оценки обученной модели |
Четвёртая часть, test-challenge (1 580 изображений), зарезервирована для соревнования VisDrone и не загружается, поэтому полный набор DET содержит 10 209 изображений.
В наборе размечено 10 классов объектов: пешеход, люди, велосипед, автомобиль, фургон, грузовик, трицикл, трицикл с навесом, автобус и мотоцикл. В VisDrone классы пешеход (человек, стоящий или идущий) и люди (человек в любой другой позе) различаются.
При первом использовании скрипт загрузки преобразует исходную разметку VisDrone в формат YOLO, пропуская области, помеченные как игнорируемые (это также исключает неиспользуемую категорию «others»).
Применение#
Плотные сцены и крошечные цели в VisDrone делают этот набор стандартным тестом для обнаружения мелких объектов с воздуха. К типичным применениям компьютерного зрения с помощью дронов относятся:
- Мониторинг дорожного движения и подсчёт автомобилей с БПЛА
- Анализ толпы и видеонаблюдение для обеспечения общественной безопасности
- Проверка инфраструктуры и строительных площадок
- Исследования в области компьютерного зрения для обнаружения мелких объектов в загруженных сценах
Другие бенчмарки аэрофотоснимков: ориентированный на спутниковые снимки набор данных xView и набор данных DOTA-v2 с ориентированными рамками.
Файл YAML набора данных#
Файл VisDrone.yaml задаёт конфигурацию набора данных: пути к данным, названия классов и скрипт автоматической загрузки и преобразования. Файл поддерживается в репозитории Ultralytics по адресу https://github.com/ultralytics/ultralytics/blob/main/ultralytics/cfg/datasets/VisDrone.yaml.
# Ultralytics 🚀 AGPL-3.0 License - https://ultralytics.com/license

# VisDrone2019-DET dataset https://github.com/VisDrone/VisDrone-Dataset by Tianjin University
# Documentation: https://docs.ultralytics.com/datasets/detect/visdrone
# Example usage: yolo train data=VisDrone.yaml
# parent
# ├── ultralytics
# └── datasets
#     └── VisDrone ← downloads here (~2 GB)

# Train/val/test sets as 1) dir: path/to/imgs, 2) file: path/to/imgs.txt, or 3) list: [path/to/imgs1, path/to/imgs2, ..]
path: VisDrone # dataset root dir
train: images/train # train images (relative to 'path') 6471 images
val: images/val # val images (relative to 'path') 548 images
test: images/test # test-dev images (optional) 1610 images

# Classes
names:
  0: pedestrian
  1: people
  2: bicycle
  3: car
  4: van
  5: truck
  6: tricycle
  7: awning-tricycle
  8: bus
  9: motor

# Download script/URL (optional) ---------------------------------------------------------------------------------------
download: |
  import os
  from pathlib import Path
  import shutil

  from ultralytics.utils.downloads import download
  from ultralytics.utils import ASSETS_URL, TQDM

  def visdrone2yolo(dir, split, source_name=None):
      """Convert VisDrone annotations to YOLO format with images/{split} and labels/{split} structure."""
      from PIL import Image

      source_dir = dir / (source_name or f"VisDrone2019-DET-{split}")
      images_dir = dir / "images" / split
      labels_dir = dir / "labels" / split
      labels_dir.mkdir(parents=True, exist_ok=True)

      # Move images to new structure
      if (source_images_dir := source_dir / "images").exists():
          images_dir.mkdir(parents=True, exist_ok=True)
          for img in source_images_dir.glob("*.jpg"):
              img.rename(images_dir / img.name)

      for f in TQDM((source_dir / "annotations").glob("*.txt"), desc=f"Converting {split}"):
          img_size = Image.open(images_dir / f.with_suffix(".jpg").name).size
          dw, dh = 1.0 / img_size[0], 1.0 / img_size[1]
          lines = []

          with open(f, encoding="utf-8") as file:
              for row in [x.split(",") for x in file.read().strip().splitlines()]:
                  if row[4] != "0":  # Skip ignored regions
                      x, y, w, h = map(int, row[:4])
                      cls = int(row[5]) - 1
                      # Convert to YOLO format
                      x_center, y_center = (x + w / 2) * dw, (y + h / 2) * dh
                      w_norm, h_norm = w * dw, h * dh
                      lines.append(f"{cls} {x_center:.6f} {y_center:.6f} {w_norm:.6f} {h_norm:.6f}\n")

          (labels_dir / f.name).write_text("".join(lines), encoding="utf-8")

  # Download (ignores test-challenge split)
  dir = Path(yaml["path"])  # dataset root dir
  urls = [
      f"{ASSETS_URL}/VisDrone2019-DET-train.zip",
      f"{ASSETS_URL}/VisDrone2019-DET-val.zip",
      f"{ASSETS_URL}/VisDrone2019-DET-test-dev.zip",
      # f"{ASSETS_URL}/VisDrone2019-DET-test-challenge.zip",
  ]
  download(urls, dir=dir, threads=4)

  # Convert
  splits = {"VisDrone2019-DET-train": "train", "VisDrone2019-DET-val": "val", "VisDrone2019-DET-test-dev": "test"}
  for folder, split in splits.items():
      visdrone2yolo(dir, split, folder)  # convert VisDrone annotations to YOLO labels
shutil.rmtree(dir / folder) # cleanup original directoryИспользование#
VisDrone загружается автоматически при первом запуске обучения — три архива общим размером около 2 ГБ. Во время распаковки и преобразования требуется примерно 4 ГБ свободного места на диске.
Чтобы обучить модель YOLO26n на датасете VisDrone в течение 100 эпох с размером изображения 640, используй следующие фрагменты кода.
from ultralytics import YOLO

# Загрузить модель
model = YOLO("yolo26n.pt")  # загрузить предварительно обученную модель (рекомендуется для обучения)

# Обучи модель — при первом запуске датасет скачается автоматически
results = model.train(data="VisDrone.yaml", epochs=100, imgsz=640)
Чтобы размечать дополнительные аэрофотоснимки и управлять запусками обучения VisDrone в браузере, используй Ultralytics Platform.
Примеры данных и аннотаций#
На примере ниже показана типичная сцена из VisDrone: вид с воздуха на оживлённую дорогу, где пешеходы и автомобили представлены мелкими, плотно расположенными объектами, многие из которых частично перекрывают друг друга.
Цитирование и благодарности#
Если ты используешь набор данных VisDrone в исследованиях или разработке, укажи следующую статью:
@ARTICLE{9573394,
  author={Zhu, Pengfei and Wen, Longyin and Du, Dawei and Bian, Xiao and Fan, Heng and Hu, Qinghua and Ling, Haibin},
  journal={IEEE Transactions on Pattern Analysis and Machine Intelligence},
  title={Detection and Tracking Meet Drones Challenge},
  year={2022},
  volume={44},
  number={11},
  pages={7380-7399},
  doi={10.1109/TPAMI.2021.3119563}}
Благодарим команду AISKYEYE из лаборатории машинного обучения и интеллектуального анализа данных Тяньцзиньского университета в Китае за создание и поддержку набора данных VisDrone. Подробнее смотри в репозитории VisDrone на GitHub.
Часто задаваемые вопросы#
VisDrone используют для обучения детекторов и оценки их качества на снимках с дронов, где объекты мелкие, плотно расположены и видны сверху. Сочетание ракурсов с воздуха, многолюдных сцен и разнообразных условий делает этот набор стандартной тестовой площадкой для мониторинга дорожного движения с помощью БПЛА, анализа толпы и исследований по обнаружению мелких объектов.
Конфигурация VisDrone в Ultralytics содержит 8 629 изображений: 6 471 для обучения, 548 для валидации и 1 610 для тестирования (test-dev). Во всех частях представлены одни и те же 10 классов: пешеход, люди, велосипед, автомобиль, фургон, грузовик, трицикл, трицикл с навесом, автобус и мотоцикл. Полную разбивку смотри в разделе Структура набора данных.
VisDrone автоматически загружается при первом запуске обучения с помощью
data="VisDrone.yaml"— вручную ничего делать не нужно. Скрипт скачивает три архива (около 2 ГБ) из ресурсов релиза Ultralytics на GitHub и преобразует разметку в формат YOLO. Зарезервированная для соревнования часть test-challenge не включена.Обучи модель YOLO26n на VisDrone в течение 100 эпох с размером изображения 640:
Пример обученияfrom ultralytics import YOLO # Загрузить модель model = YOLO("yolo26n.pt") # загрузить предварительно обученную модель (рекомендуется для обучения) # Обучить модель results = model.train(data="VisDrone.yaml", epochs=100, imgsz=640)Подробную информацию о конфигурации смотри на странице Обучение и в советах по обучению моделей.
Объекты на VisDrone очень малы относительно кадра — часто всего несколько десятков пикселей — и встречаются плотными группами с сильным перекрытием, что затрудняет работу детекторов, настроенных на фотографии с уровня земли. Обучение и предсказание при более высоком разрешении (например,
imgsz=1280с меньшим размером батча) помогают обнаруживать небольшие объекты, а тайлинг изображений высокого разрешения делит большие изображения так, чтобы маленькие объекты занимали большую часть каждого окна инференса.Полный бенчмарк VisDrone охватывает пять задач — обнаружение объектов на изображениях, обнаружение объектов в видео, отслеживание одного объекта, отслеживание нескольких объектов и подсчёт людей в толпе — на 288 видеороликах и 10 209 статичных изображениях. Конфигурация Ultralytics
VisDrone.yamlохватывает только задачу обнаружения на изображениях (VisDrone2019-DET) и загружает 6 471 изображение для обучения, 548 для валидации и 1 610 для test-dev.Укажи статью «Detection and Tracking Meet Drones Challenge» (IEEE TPAMI, том 44, № 11, 2022, DOI 10.1109/TPAMI.2021.3119563); полная запись BibTeX приведена выше в разделе Цитирование и благодарности.


Комментарии24
Задай вопрос, поделись результатами или помоги кому-нибудь.
arpithavkhanapur1226-collab
Thank you for the suggestions. I’ve tried the recommended changes and checked the dataset, including removing the degenerate bounding box, but I’m still facing the NaN issue around epoch 30. The best mAP I’m getting is only around 33.2%, which is far below the expected performance. I’ve tried several approaches already, but I’m not able to figure out what is causing the instability. Could you please help me identify what might be going wrong or suggest what I should specifically check next? ,I have attached my code and result below ,I would really appreciate your guidance.
visdrone2.ipynb
 Paula DerrengerUltralytics
Please rerun a clean baseline with the official
VisDrone.yaml, pretrained weights, and defaults; after correcting annotations, delete all*.cachefiles in the dataset’slabelsdirectories, and restart the notebook kernel if Ultralytics was upgraded. If NaNs persist, share the complete text training log/traceback, exactmodel.train(...)arguments, Ultralytics version, and output fromyolo checks; also try a smaller learning rate and higherimgszsuch as1280, since VisDrone contains many tiny objects.
I’m training YOLOv12 on the VisDrone dataset, but I faced NaN losses after around epoch 29. I found a degenerate bounding box with zero height and removed it, but the NaN issue still occurred. I then tried DDPNet on VisDrone, but the validation performance started plateauing around epoch 14. Training is also very slow on a T4 (~4 hours for 12 epochs). Could you suggest what I should check or change to improve the training performance?
- Paula DerrengerUltralytics
After correcting every invalid/non-finite label and ensuring normalized boxes have positive width/height, delete all
*.cachefiles inside thelabelsdirectories before retraining. Establish a baseline with a pretrained Ultralytics model atimgsz=640; then inspectresults.png, per-class AP, and the confusion matrix before changing augmentation or resolution. VisDrone contains many tiny, dense objects, so higher resolution may improve accuracy but will substantially slow a T4; use ann/smodel and the largest stable batch first. If NaNs persist, please share the exact training command, complete text logs around the first NaN, Ultralytics version, andyolo checksoutput; see the VisDrone training guide and fine-tuning troubleshooting.
mslabdelhak29
Hello can you offre a pretrained model i need it and i dont have source to entrain for 100 epochs
 Glenn JocherUltralytics(изменено)
Hi, we don’t currently provide an official YOLO model pretrained specifically on VisDrone, so the usual workflow is to start from a generic checkpoint like
yolo26n.ptand fine‑tune it on VisDrone; you can safely reduceepochs(e.g. 10–20) or train on a subset of the data in Colab to keep compute low, and the YOLO train mode docs show how to adjust these arguments.
ysharvit
I am looking for drone photos in desert area ( in order to develop rescue detection system (I volunteer in SAR unit)) Can I filter only desert BG pictures in your dataset?
- Glenn JocherUltralytics(изменено)
VisDrone doesn’t include scene/terrain metadata like “desert” (it’s largely urban/traffic), so there’s no built‑in way to filter for desert backgrounds; for SAR you’ll want to gather desert drone imagery and fine‑tune a COCO‑pretrained YOLO26 using the dataset setup in the Datasets Overview or manage it end‑to‑end with Ultralytics Platform datasets.
fardinabbasi
It would be very useful if someone could provide a list of pretrained YOLO models for the VisDrone dataset that are compatible with Ultralytics.
- Glenn JocherUltralytics(изменено)
Ultralytics doesn’t currently maintain an official list of VisDrone‑trained checkpoints; the recommended path is to fine‑tune a COCO‑pretrained YOLO26 variant (e.g.,
yolo26s.pt)—see the available base weights on the YOLO26 models page.
lawyeh
Hello, the example and the yaml file pull from the object detection in images dataset (task 1). How can I train the model for object detection in video (task )?
- Glenn JocherUltralytics
For video object detection (Task 2) with VisDrone, you'll use the same YOLO training process but process video frames as individual images. Ensure your dataset paths in VisDrone.yaml point to the video task's frame sequences (organized as images), then train normally. Video inference can be done with
model.predict(source='video.mp4')after training. For video-specific annotations, verify they're converted to YOLO format per frame.1
SudhanshuBlaze
I trained yolov10x on VisDrone dataset with the below parameters, but I got the final
box_lossof1.97. I feel that model performed very poorly, do you know what might be the issue? Or what hyperparameters should I use?from ultralytics import YOLO # Load a model model = YOLO("yolov10x.pt") # load a pretrained model (recommended for training) # Train the model results = model.train(data="VisDrone.yaml", epochs=1000, imgsz=640, patience=250, project='visdrone', name='train', batch=-1)- Glenn JocherUltralytics
@SudhanshuBlaze it sounds like your model might be struggling with the complexity of the VisDrone dataset. First, ensure you're using the latest version of the Ultralytics package. You might also want to experiment with different learning rates, batch sizes, and augmentation techniques. Sometimes, reducing the learning rate or increasing the batch size can help stabilize training. Additionally, consider using early stopping to prevent overfitting. If the issue persists, reviewing the dataset for any inconsistencies or mislabeled data could also be beneficial. For more detailed guidance, you can refer to the VisDrone documentation.
mariem158
quelles sont les étapes pour télécharger roboflow100 sur google colab. je veux utiliser ce dataset pour faire la détection précise des véhicules filmés par des caméras ?
- Paula DerrengerUltralytics(изменено)
@mariem158 bonjour!
Pour télécharger et utiliser le dataset Roboflow100 sur Google Colab pour la détection précise des véhicules, vous pouvez suivre les étapes ci-dessous. Cependant, il semble que vous ayez mentionné le dataset VisDrone dans votre commentaire, donc je vais également inclure des informations sur ce dataset.
Étapes pour télécharger Roboflow100 sur Google Colab
-
Installer les dépendances nécessaires:
!pip install roboflow -
Importer et configurer Roboflow:
from roboflow import Roboflow rf = Roboflow(api_key="YOUR_API_KEY") project = rf.workspace().project("roboflow100") dataset = project.version("1").download("yolov8") -
Configurer le dataset pour l'entraînement:
from ultralytics import YOLO

# Charger un modèle pré-entraîné
model = YOLO("yolo26n.pt")

# Entraîner le modèle
results = model.train(data=dataset.location + "/data.yaml", epochs=100, imgsz=640)
Utilisation du dataset VisDrone
Le dataset VisDrone est une excellente ressource pour la détection d'objets, le suivi d'objets et le comptage de foules dans des images et vidéos capturées par des drones. Voici comment vous pouvez l'utiliser avec YOLO26:
-
Télécharger et configurer le dataset VisDrone:
from ultralytics import YOLO # Charger un modèle pré-entraîné model = YOLO("yolo26n.pt") # Entraîner le modèle results = model.train(data="VisDrone.yaml", epochs=100, imgsz=640) -
YAML de configuration pour VisDrone:
# Ultralytics YOLO 🚀, AGPL-3.0 license
# VisDrone2019-DET dataset https://github.com/VisDrone/VisDrone-Dataset by Tianjin University
path: ../datasets/VisDrone
train: VisDrone2019-DET-train/images
val: VisDrone2019-DET-val/images
test: VisDrone2019-DET-test-dev/images
names:
  0: pedestrian
  1: people
  2: bicycle
  3: car
  4: van
  5: truck
  6: tricycle
  7: awning-tricycle
  8: bus
  9: motor
Pour plus de détails sur l'utilisation du dataset VisDrone, vous pouvez consulter la documentation complète ici : VisDrone Dataset Documentation.
N'hésitez pas à revenir vers nous si vous avez d'autres questions! 😊
Cordialement, L'équipe Ultralytics
-
comment intégrer visdataset sur google colab et l'intégrer dans mon code qui détecte seulement des véhicules par des drones situé verticalement au dessus de la route.
- Paula DerrengerUltralytics(изменено)
Bonjour,
Merci pour votre question ! Pour intégrer le dataset VisDrone dans Google Colab et l'utiliser pour détecter uniquement des véhicules capturés par des drones, voici les étapes à suivre :
-
Configurer Google Colab:
- Assurez-vous d'avoir accès à un GPU pour accélérer l'entraînement. Allez dans
Runtime>Change runtime typeet sélectionnezGPU.
- Assurez-vous d'avoir accès à un GPU pour accélérer l'entraînement. Allez dans
-
Installer les dépendances:
- Installez les bibliothèques nécessaires, notamment
ultralyticspour YOLO26.
- Installez les bibliothèques nécessaires, notamment
-
Télécharger et préparer le dataset VisDrone:
- Utilisez le script de téléchargement et de conversion fourni dans le fichier
VisDrone.yaml.
- Utilisez le script de téléchargement et de conversion fourni dans le fichier
-
Entraîner le modèle:
- Chargez un modèle pré-entraîné YOLO26 et entraînez-le sur le dataset VisDrone en filtrant uniquement les classes de véhicules.
Voici un exemple de code pour chaque étape :
# Installer les dépendances
!pip install ultralytics

# Importer les bibliothèques nécessaires
from ultralytics import YOLO
import os
from pathlib import Path

# Télécharger et préparer le dataset VisDrone
def download_visdrone():
    from ultralytics.utils.downloads import download

    def visdrone2yolo(dir):
        from PIL import Image
        from tqdm import tqdm

        def convert_box(size, box):
            dw = 1. / size[0]
            dh = 1. / size[1]
            return (box[0] + box[2] / 2) * dw, (box[1] + box[3] / 2) * dh, box[2] * dw, box[3] * dh

        (dir / 'labels').mkdir(parents=True, exist_ok=True)
        pbar = tqdm((dir / 'annotations').glob('*.txt'), desc=f'Converting {dir}')
        for f in pbar:
            img_size = Image.open((dir / 'images' / f.name).with_suffix('.jpg')).size
            lines = []
            with open(f, 'r') as file:
                for row in [x.split(',') for x in file.read().strip().splitlines()]:
                    if row[4] == '0':
                        continue
                    cls = int(row[5]) - 1
                    box = convert_box(img_size, tuple(map(int, row[:4])))
                    lines.append(f"{cls} {' '.join(f'{x:.6f}' for x in box)}\n")
                with open(str(f).replace(f'{os.sep}annotations{os.sep}', f'{os.sep}labels{os.sep}'), 'w') as fl:
                    fl.writelines(lines)

    dir = Path('../datasets/VisDrone')
    urls = [
        'https://github.com/ultralytics/yolov5/releases/download/v1.0/VisDrone2019-DET-train.zip',
        'https://github.com/ultralytics/yolov5/releases/download/v1.0/VisDrone2019-DET-val.zip',
        'https://github.com/ultralytics/yolov5/releases/download/v1.0/VisDrone2019-DET-test-dev.zip',
        'https://github.com/ultralytics/yolov5/releases/download/v1.0/VisDrone2019-DET-test-challenge.zip'
    ]
    download(urls, dir=dir, curl=True, threads=4)
    for d in ['VisDrone2019-DET-train', 'VisDrone2019-DET-val', 'VisDrone2019-DET-test-dev']:
        visdrone2yolo(dir / d)

download_visdrone()

# Entraîner le modèle YOLO26 sur le dataset VisDrone
model = YOLO("yolo26n.pt")  # Charger un modèle pré-entraîné
results = model.train(data="VisDrone.yaml", epochs=100, imgsz=640)
Pour plus de détails sur la configuration du dataset et les options d'entraînement, vous pouvez consulter la documentation complète ici.
N'hésitez pas à revenir vers nous si vous avez d'autres questions. Bonne chance avec votre projet ! 🚀
Cordialement, L'équipe Ultralytics
-
comment je peux utiliser les modèles de visdrone et faire l'appel à ce dataset dans mon code pour faire la détection des véhicules par mon drone?
- Paula DerrengerUltralytics(изменено)
Bonjour,
Merci pour votre question ! Pour utiliser le dataset VisDrone et détecter uniquement les véhicules capturés par des drones, voici comment procéder sur Google Colab :
-
Configurer Google Colab:
- Assurez-vous d'avoir accès à un GPU pour accélérer l'entraînement. Allez dans
Runtime>Change runtime typeet sélectionnezGPU.
- Assurez-vous d'avoir accès à un GPU pour accélérer l'entraînement. Allez dans
-
Installer les dépendances:
- Installez les bibliothèques nécessaires, notamment
ultralyticspour YOLO26.
- Installez les bibliothèques nécessaires, notamment
-
Télécharger et préparer le dataset VisDrone:
- Utilisez le script de téléchargement et de conversion fourni dans le fichier
VisDrone.yaml.
- Utilisez le script de téléchargement et de conversion fourni dans le fichier
-
Entraîner le modèle:
- Chargez un modèle pré-entraîné YOLO26 et entraînez-le sur le dataset VisDrone en filtrant uniquement les classes de véhicules.
Voici un exemple de code pour chaque étape :
# Installer les dépendances
!pip install ultralytics

# Importer les bibliothèques nécessaires
from ultralytics import YOLO
import os
from pathlib import Path

# Télécharger et préparer le dataset VisDrone
def download_visdrone():
    from ultralytics.utils.downloads import download

    def visdrone2yolo(dir):
        from PIL import Image
        from tqdm import tqdm

        def convert_box(size, box):
            dw = 1. / size[0]
            dh = 1. / size[1]
            return (box[0] + box[2] / 2) * dw, (box[1] + box[3] / 2) * dh, box[2] * dw, box[3] * dh

        (dir / 'labels').mkdir(parents=True, exist_ok=True)
        pbar = tqdm((dir / 'annotations').glob('*.txt'), desc=f'Converting {dir}')
        for f in pbar:
            img_size = Image.open((dir / 'images' / f.name).with_suffix('.jpg')).size
            lines = []
            with open(f, 'r') as file:
                for row in [x.split(',') for x in file.read().strip().splitlines()]:
                    if row[4] == '0':
                        continue
                    cls = int(row[5]) - 1
                    box = convert_box(img_size, tuple(map(int, row[:4])))
                    lines.append(f"{cls} {' '.join(f'{x:.6f}' for x in box)}\n")
                with open(str(f).replace(f'{os.sep}annotations{os.sep}', f'{os.sep}labels{os.sep}'), 'w') as fl:
                    fl.writelines(lines)

    dir = Path('../datasets/VisDrone')
    urls = [
        'https://github.com/ultralytics/yolov5/releases/download/v1.0/VisDrone2019-DET-train.zip',
        'https://github.com/ultralytics/yolov5/releases/download/v1.0/VisDrone2019-DET-val.zip',
        'https://github.com/ultralytics/yolov5/releases/download/v1.0/VisDrone2019-DET-test-dev.zip',
        'https://github.com/ultralytics/yolov5/releases/download/v1.0/VisDrone2019-DET-test-challenge.zip'
    ]
    download(urls, dir=dir, curl=True, threads=4)
    for d in ['VisDrone2019-DET-train', 'VisDrone2019-DET-val', 'VisDrone2019-DET-test-dev']:
        visdrone2yolo(dir / d)

download_visdrone()

# Entraîner le modèle YOLO26 sur le dataset VisDrone
model = YOLO("yolo26n.pt")  # Charger un modèle pré-entraîné
results = model.train(data="VisDrone.yaml", epochs=100, imgsz=640)
Pour plus de détails sur la configuration du dataset et les options d'entraînement, vous pouvez consulter la documentation complète ici.
N'hésitez pas à revenir vers nous si vous avez d'autres questions. Bonne chance avec votre projet ! 🚀
Cordialement, L'équipe Ultralytics
-
Elvis-Kiilu2
This is nice, but what's next after the detection? How do we send/retrieve the data to a given database? What further insights can we draw from the detected data? What other technologies can we intergrate to this to draw meaningful inferences??
- Paula DerrengerUltralytics(изменено)
After detection, you have a few options to extend the functionality:
-
Data Storage: To send and store detections on a database:
import sqlite3 from datetime import datetime from ultralytics import YOLO # Connect to SQLite database connection = sqlite3.connect('my_detections.db') cursor = connection.cursor() # Create table cursor.execute('''CREATE TABLE IF NOT EXISTS detections (timestamp DATETIME, class TEXT, confidence REAL, x REAL, y REAL, width REAL, height REAL)''') # Example insertion from detection results = YOLO("yolo26n.pt")("image.jpg")[0] names = results.names timestamp = datetime.now().isoformat() for det in results.boxes: cursor.execute('''INSERT INTO detections (timestamp, class, confidence, x, y, width, height) VALUES (?, ?, ?, ?, ?, ?, ?)''', (timestamp, names[int(det.cls)], float(det.conf), *det.xywh[0].tolist())) connection.commit() connection.close() -
Further Analysis: Analyze the time series of detections to observe trends, detect anomalies, or aggregate counts over time.
-
Integration with Other Technologies: Integrate with IoT platforms for real-time alerts or incorporate AI-based services for enhanced image analysis and decision-making processes.
These steps help bridge the gap between raw detection outputs and actionable insights or responses in real-world applications.
-
Thanks @pderrenger for the reply. I wanted to implement this for my next project. Your insights are a good starting point. My aim is to extract/read data from the detected class/boxes. Then compare and match the read data with with those in a database that in a cloud data warehouse, Bigquery to be specific.
- Paula DerrengerUltralytics
Hey there! It's great to hear you're planning to use YOLOv8 for your project. To extract and compare data from detected objects with your BigQuery database, you can follow these steps:
-
Extract Data: After detection, extract the necessary details from each detection (like class, confidence, and bounding box coordinates).
-
Format Data: Convert this data into a suitable format (like JSON or CSV) that can be easily ingested into BigQuery.
-
Upload to BigQuery: Use the BigQuery API to upload your formatted data. Here’s a small Python snippet using
google-cloud-bigquery:from google.cloud import bigquery # Construct a BigQuery client object. client = bigquery.Client() # Define your table ID (dataset.table) table_id = "your-project.your_dataset.your_table" # Define the data to be inserted rows_to_insert = [ {u"class": detected_class, u"confidence": confidence, u"x_min": x_min, u"y_min": y_min, u"width": width, u"height": height} ] # Insert data into BigQuery errors = client.insert_rows_json(table_id, rows_to_insert) if errors == []: print("New rows have been added.") -
Query and Analyze: Once your data is in BigQuery, you can use SQL queries to compare, analyze, and draw insights based on your specific needs.
This workflow will help you leverage the power of cloud computing to analyze large datasets efficiently. If you need further assistance or have more specific requirements, feel free to ask! 🚀
-