Hướng dẫn bắt đầu nhanh với Docker cho Ultralytics
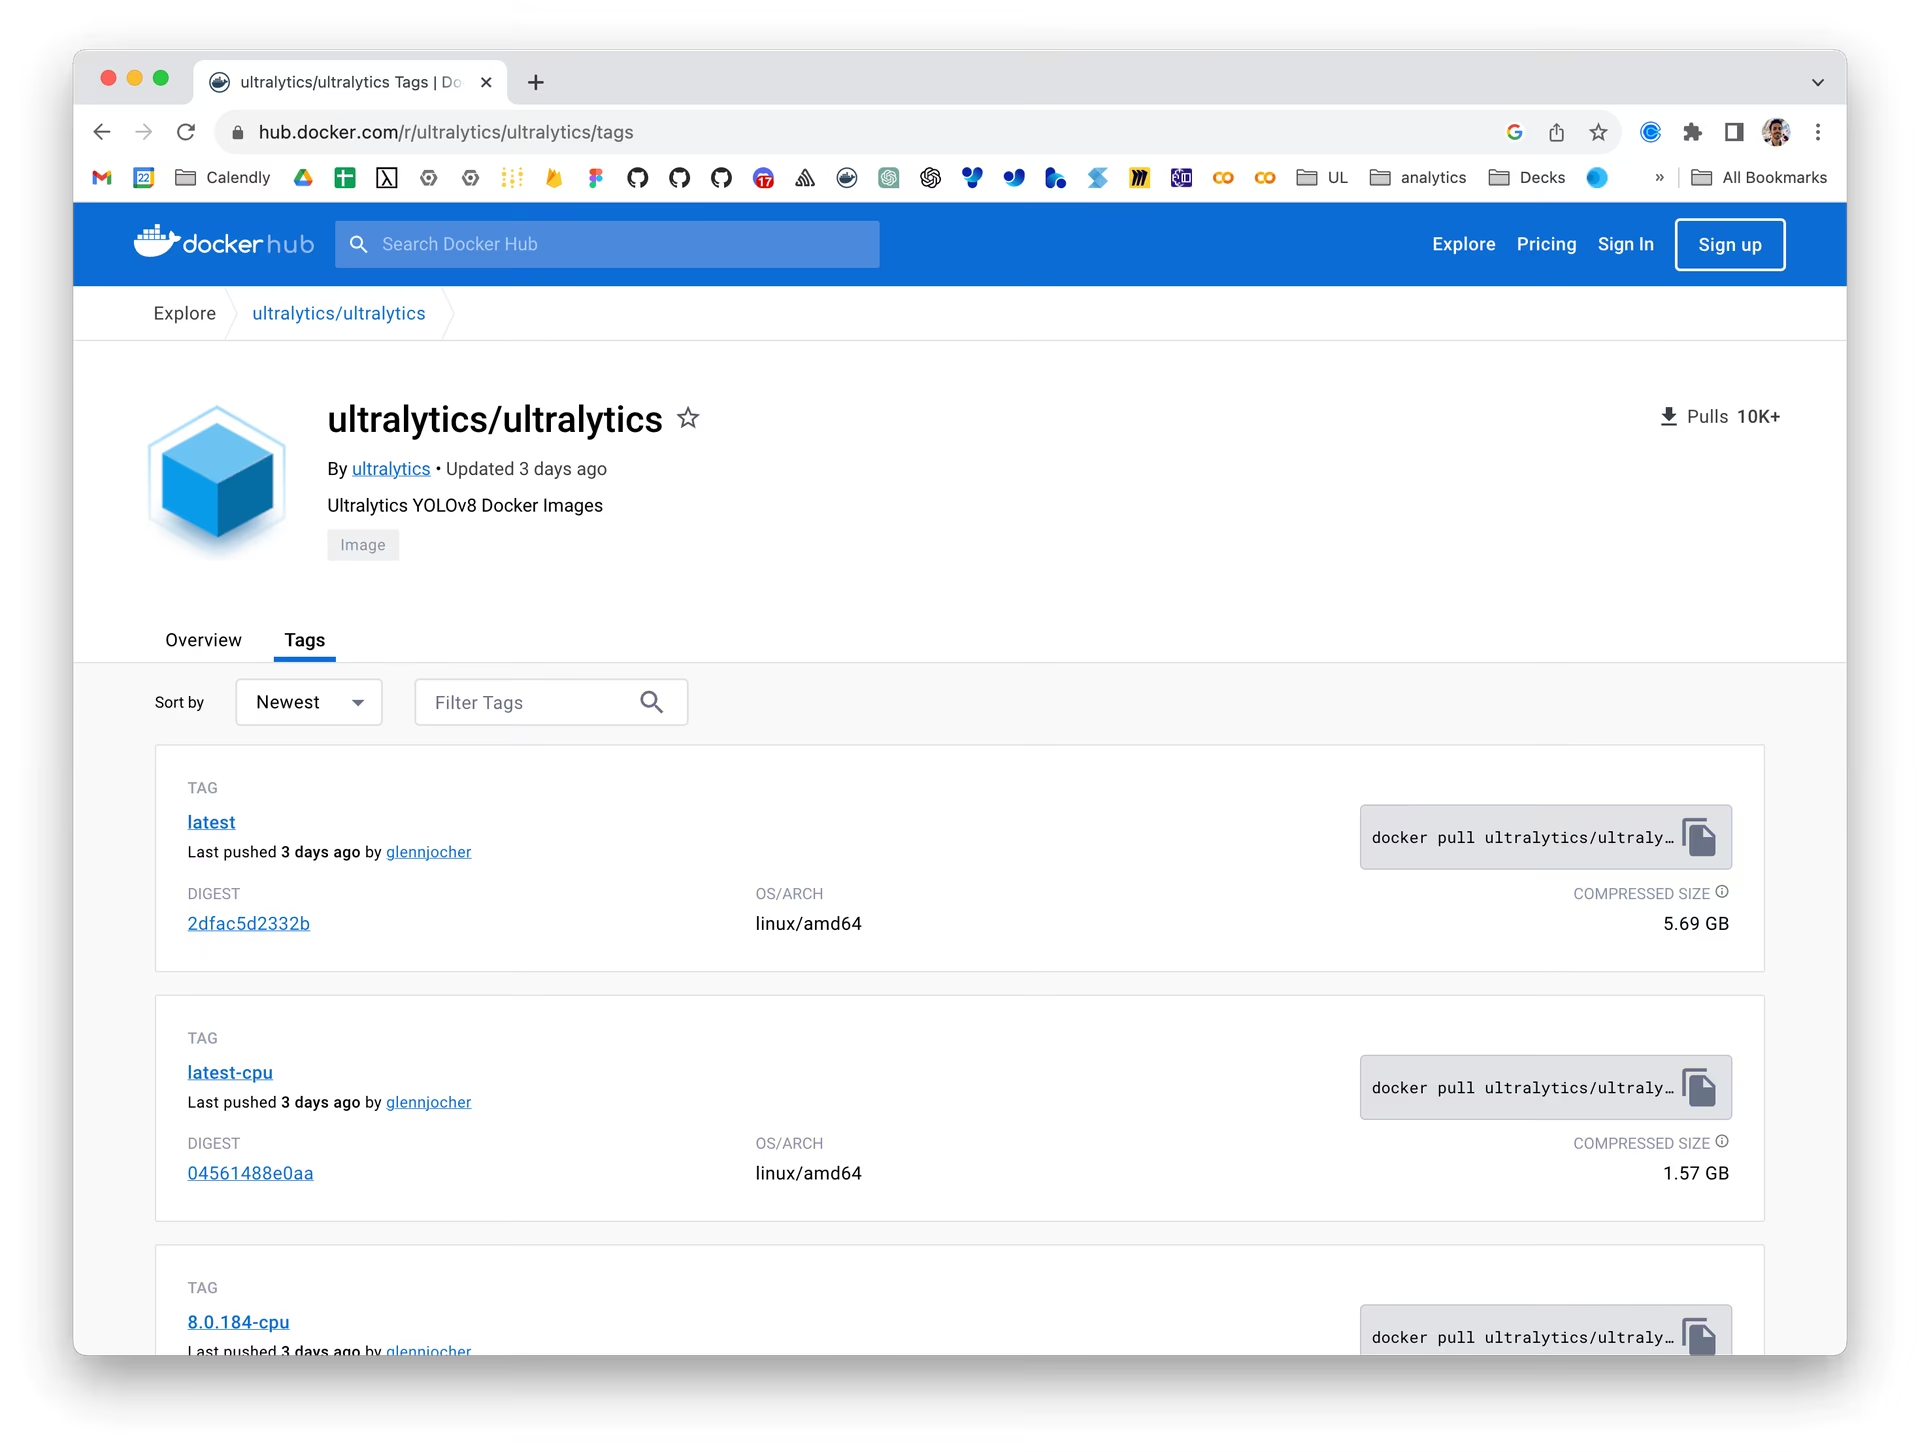
Hướng dẫn này trình bày cách thiết lập môi trường Docker cho các dự án Ultralytics. Docker là nền tảng để phát triển, phân phối và chạy ứng dụng trong container, đảm bảo phần mềm chạy nhất quán bất kể được triển khai ở đâu.


Bạn sẽ tìm hiểu#
- Thiết lập Docker với hỗ trợ NVIDIA
- Cài đặt Docker image Ultralytics
- Chạy Ultralytics trong Docker container với hỗ trợ CPU hoặc GPU
- Sử dụng display server với Docker để hiển thị kết quả phát hiện của Ultralytics
- Mount thư mục cục bộ vào container
Xem: Cách bắt đầu với Docker | Demo trực tiếp về cách sử dụng package Python của Ultralytics bên trong Docker 🎉
Điều kiện tiên quyết#
- Đảm bảo Docker đã được cài đặt trên hệ thống của bạn. Nếu chưa, bạn có thể tải xuống và cài đặt Docker từ trang web Docker.
- Để tăng tốc GPU, hãy đảm bảo hệ thống có GPU NVIDIA và đã cài đặt driver NVIDIA. Image CPU không yêu cầu phần cứng NVIDIA.
- Nếu bạn sử dụng thiết bị NVIDIA Jetson, hãy đảm bảo đã cài đặt phiên bản JetPack phù hợp. Tham khảo hướng dẫn NVIDIA Jetson để biết thêm chi tiết.
Thiết lập Docker với hỗ trợ NVIDIA (Tùy chọn)#
Trước tiên, xác minh driver NVIDIA đã được cài đặt đúng cách bằng cách chạy:
nvidia-smiCài đặt NVIDIA Container Toolkit#
Cài đặt NVIDIA Container Toolkit để bật hỗ trợ GPU trong container Docker:
curl -fsSL https://nvidia.github.io/libnvidia-container/gpgkey | sudo gpg --dearmor -o /usr/share/keyrings/nvidia-container-toolkit-keyring.gpg \
  && curl -s -L https://nvidia.github.io/libnvidia-container/stable/deb/nvidia-container-toolkit.list \
  | sed 's#deb https://#deb [signed-by=/usr/share/keyrings/nvidia-container-toolkit-keyring.gpg] https://#g' \
    | sudo tee /etc/apt/sources.list.d/nvidia-container-toolkit.list
Cập nhật danh sách package và cài đặt NVIDIA Container Toolkit:
sudo apt-get updatesudo apt-get install -y nvidia-container-toolkitXác minh thiết bị CDI bằng Docker#
Chạy nvidia-ctk cdi list để đảm bảo các thiết bị GPU CDI khả dụng (dịch vụ nvidia-cdi-refresh của toolkit tự động tạo và duy trì spec trên toolkit >= 1.18):
nvidia-ctk cdi listBạn sẽ thấy các mục như nvidia.com/gpu=0 và nvidia.com/gpu=all. Các thiết bị CDI được phát hiện cũng xuất hiện trong docker info.
Cài đặt Docker image Ultralytics#
Ultralytics phát hành các image sau lên Docker Hub. Mỗi image được build từ Dockerfile được liên kết bằng quy trình phát hành Docker.
| Tag | Nền tảng và mục đích | Nguồn |
|---|---|---|
latest | Linux AMD64 với CUDA để huấn luyện và suy luận GPU | Dockerfile |
latest-export | Linux AMD64 với CUDA và dependency xuất model để chuyển đổi và benchmark | Dockerfile-export |
latest-amd | Linux AMD64 với ROCm và MIGraphX để huấn luyện và suy luận trên GPU AMD | Dockerfile-amd |
latest-python | Image Linux AMD64 Python 3.14 gọn nhẹ cho suy luận trên CPU | Dockerfile-python |
latest-python-export | Image Linux AMD64 Python 3.13 cho CPU, kèm các dependency phục vụ export | Dockerfile-python-export |
latest-cpu | Linux AMD64 CPU image với Bash làm lệnh mặc định | Dockerfile-cpu |
latest-jupyter | Linux AMD64 CPU image với JupyterLab và notebook hướng dẫn Ultralytics | Dockerfile-jupyter |
latest-arm64 | Image Linux ARM64 Python 3.13 cho CPU, dành cho Apple silicon, Raspberry Pi và các hệ thống ARM64 khác | Dockerfile-arm64 |
latest-nvidia-arm64 | Linux ARM64 dành cho DGX Spark (DGX OS) và PyTorch trên Thor (JetPack 7.1); TensorRT đi kèm không hỗ trợ JetPack | Dockerfile-nvidia-arm64 |
latest-jetson-jetpack6 | Linux ARM64 dành cho thiết bị NVIDIA Jetson chạy JetPack 6 | Dockerfile-jetson-jetpack6 |
latest-jetson-jetpack5 | Linux ARM64 dành cho thiết bị NVIDIA Jetson chạy JetPack 5 | Dockerfile-jetson-jetpack5 |
latest-jetson-jetpack4 | Linux ARM64 dành cho thiết bị NVIDIA Jetson chạy JetPack 4 | Dockerfile-jetson-jetpack4 |
latest-runner | Linux AMD64 CUDA image dành cho GPU runner GitHub Actions tự host | Dockerfile-runner |
latest-runner-cpu | Linux AMD64 image dành cho CPU runner GitHub Actions tự host | Dockerfile-runner-cpu |
Các image GPU AMD64 (latest, latest-export và latest-runner) sử dụng PyTorch 2.15 và CUDA 13.2. Kiểm tra khả năng hỗ trợ CUDA của driver máy chủ bằng nvidia-smi trước khi khởi chạy các image này; cài đặt container mới hơn không nâng cấp driver máy chủ. CUDA 13 loại bỏ hỗ trợ cho GPU Maxwell, Pascal và Volta, bao gồm Tesla P100 và V100.
Image NVIDIA ARM64 sử dụng NVIDIA PyTorch 26.10 với CUDA 13.4 và TensorRT 11.4. Khả năng hỗ trợ Thor của PyTorch không mở rộng sang TensorRT: NVIDIA không hỗ trợ TensorRT 11.4 trên JetPack. Để export TensorRT cho Jetson, hãy dùng runtime TensorRT 10.x được hỗ trợ trong bản JetPack của bạn. Thực hiện theo các yêu cầu nền tảng trong hướng dẫn Jetson hoặc hướng dẫn DGX Spark. Các image JetPack 4, 5 và 6 vẫn sử dụng các bộ phần mềm riêng cho từng thiết bị.
Dockerfile Conda có sẵn để build cục bộ; tính năng phát hành tự động của latest-conda đã bị tắt, vì vậy tag registry đó không chứa các bản cập nhật này.
Các image Python, CPU, Jupyter và CPU runner sử dụng Python 3.14. Image Python export sử dụng base latest-python-3.13, được build từ cùng Dockerfile-python với --build-arg PYTHON_VERSION=3.13, vì TensorFlow, CoreML và PaddlePaddle hiện chưa hỗ trợ Python 3.14.
Các tag bắt đầu bằng latest theo dõi bản build nhánh main được phát hành gần đây nhất. Trong tag có phiên bản, tiền tố latest được thay bằng phiên bản phát hành Ultralytics, chẳng hạn VERSION, VERSION-cpu hoặc VERSION-jetson-jetpack6. Hãy dùng tag có phiên bản để tạo môi trường có thể tái lập.
Để tải image mới nhất:
# Pull the latest Ultralytics image from Docker Hub
sudo docker pull ultralytics/ultralytics:latest
Nếu muốn tự build image, hãy clone repository và truyền Dockerfile tương ứng trong bảng trên, dùng thư mục gốc repository làm build context:
# Build the CPU image locally from docker/Dockerfile-cpu
sudo docker build -t ultralytics/ultralytics:latest-cpu -f docker/Dockerfile-cpu .
Chạy Ultralytics trong Docker container#
Sau đây là cách chạy container Docker của Ultralytics:
Chỉ sử dụng CPU#
# Run without GPU
sudo docker run -it --ipc=host ultralytics/ultralytics:latest-cpu
Sử dụng GPU#
# Run with all GPUs
sudo docker run -it --ipc=host --device nvidia.com/gpu=all ultralytics/ultralytics:latest

# Run specifying which GPUs to use
sudo docker run -it --ipc=host --device nvidia.com/gpu=2 --device nvidia.com/gpu=3 ultralytics/ultralytics:latest
Cờ -it cấp pseudo-TTY và giữ stdin luôn mở, cho phép bạn tương tác với container. Cờ --ipc=host bật chia sẻ namespace IPC của máy chủ, cần thiết để chia sẻ bộ nhớ giữa các tiến trình. Với GPU NVIDIA, cờ --device nvidia.com/gpu=... cấp quyền truy cập thông qua CDI. Với GPU AMD, các cờ --device cấp quyền truy cập vào driver kernel GPU (/dev/kfd) và các nút render của display (/dev/dri).
Trên Linux, yêu cầu thiết bị CDI cần Docker >= 28.2.0 (CDI được bật theo mặc định) và nvidia-container-toolkit >= 1.18 (tự động tạo spec CDI). Hãy nâng cấp các máy chủ Linux cũ trước khi chạy GPU container. Cờ --gpus all cũ có thể làm mất quyền truy cập GPU (Failed to initialize NVML: Unknown Error) khi máy chủ tải lại systemd trong các lần cập nhật package định kỳ (nvidia-container-toolkit#48). Các yêu cầu CDI --device đưa các nút thiết bị vào cấu hình container, nhờ đó những container chạy lâu như worker huấn luyện hoặc CI runner vẫn giữ được quyền truy cập GPU sau khi tải lại.
Hỗ trợ GPU của Docker Desktop trên Windows hiện sử dụng --gpus all với backend WSL 2 vì thiết bị NVIDIA CDI không khả dụng trên nền tảng này. Windows không sử dụng Linux systemd, do đó lỗi tải lại daemon nêu trên không áp dụng.
Lưu ý về khả năng truy cập file#
Để làm việc với file trên máy cục bộ từ bên trong container, bạn có thể sử dụng Docker volume:
# Mount a local directory into the container
sudo docker run -it --ipc=host --device nvidia.com/gpu=all -v /path/on/host:/path/in/container ultralytics/ultralytics:latest
Thay /path/on/host bằng đường dẫn thư mục trên máy cục bộ của bạn và /path/in/container bằng đường dẫn mong muốn bên trong Docker container.
Lưu giữ output huấn luyện#
Theo mặc định, output huấn luyện được lưu tại /ultralytics/runs/<task>/<name>/ bên trong container. Nếu không mount thư mục trên máy chủ, output sẽ bị mất khi container bị xóa.
Để lưu giữ output huấn luyện:
# Recommended: mount workspace and specify project path
sudo docker run --rm -it -v "$(pwd)":/w -w /w ultralytics/ultralytics:latest \
  yolo train model=yolo26n.pt data=coco8.yaml project=/w/runs
Lệnh này lưu toàn bộ output huấn luyện vào ./runs trên máy chủ của bạn.
Chạy ứng dụng giao diện người dùng đồ họa (GUI) trong Docker container#
Các hướng dẫn sau đây chỉ mang tính thử nghiệm. Việc chia sẻ socket X11 với container Docker tiềm ẩn rủi ro bảo mật. Vì vậy, bạn chỉ nên thử giải pháp này trong môi trường được kiểm soát.
Docker chủ yếu được dùng để đóng gói các ứng dụng chạy nền và chương trình CLI trong container, nhưng cũng có thể chạy các chương trình đồ họa. Trong môi trường Linux, có hai máy chủ đồ họa chính xử lý việc hiển thị: X11 (còn gọi là Hệ thống Cửa sổ X) và Wayland. Trước khi bắt đầu, bạn cần xác định máy chủ đồ họa hiện đang sử dụng. Chạy lệnh sau để kiểm tra:
env | grep -E -i 'x11|xorg|wayland'Việc thiết lập và cấu hình máy chủ hiển thị X11 hoặc Wayland nằm ngoài phạm vi của hướng dẫn này. Nếu lệnh trên không trả về kết quả, bạn cần bắt đầu bằng cách thiết lập một trong hai máy chủ này hoạt động trên hệ thống trước khi tiếp tục.
Chạy container Docker có giao diện đồ họa#
Sử dụng GPU
Nếu bạn đang sử dụng GPU, bạn có thể thêm flag --device nvidia.com/gpu=all vào lệnh.
Nếu đang sử dụng X11, bạn có thể chạy lệnh sau để cho phép container Docker truy cập socket X11:
xhost +local:docker && docker run -e DISPLAY=$DISPLAY \
  -v /tmp/.X11-unix:/tmp/.X11-unix \
  -v ~/.Xauthority:/root/.Xauthority \
  -it --ipc=host ultralytics/ultralytics:latest
Lệnh này đặt biến môi trường DISPLAY thành display của máy chủ, mount socket X11 và ánh xạ file .Xauthority vào container. Lệnh xhost +local:docker cho phép container Docker truy cập máy chủ X11.
Sử dụng Docker với giao diện đồ họa#
Các image Ultralytics đi kèm OpenCV headless, vì vậy trước tiên hãy cài đặt bản GUI của OpenCV cùng các thư viện hệ thống bên trong container:
apt-get update && apt-get install -y --no-install-recommends libgl1 libglib2.0-0 libsm6
pip uninstall -y opencv-python-headless && pip install opencv-python
Giờ đây, bạn có thể hiển thị các ứng dụng đồ họa bên trong container Docker. Ví dụ: bạn có thể chạy lệnh CLI sau để trực quan hóa các dự đoán từ model YOLO26:
yolo predict model=yolo26n.pt show=TrueKiểm tra
Một cách đơn giản để xác thực rằng nhóm Docker có quyền truy cập vào máy chủ X11 là chạy container với chương trình GUI như xclock hoặc xeyes. Ngoài ra, bạn cũng có thể cài đặt các chương trình này trong container Docker của Ultralytics để kiểm tra quyền truy cập vào máy chủ X11 của máy chủ hiển thị GNU/Linux. Nếu gặp vấn đề, hãy cân nhắc thiết lập biến môi trường -e QT_DEBUG_PLUGINS=1. Thiết lập biến môi trường này sẽ bật đầu ra thông tin gỡ lỗi, hỗ trợ quá trình khắc phục sự cố.
Sau khi sử dụng giao diện đồ họa Docker#
Trong cả hai trường hợp, đừng quên thu hồi quyền truy cập của nhóm Docker khi hoàn tất.
xhost -local:dockerBạn muốn xem trực tiếp kết quả hình ảnh trong Terminal?
Trên Linux và macOS, bạn có thể hiển thị kết quả ảnh trong terminal tích hợp của VSCode bằng giao thức sixel.
Giờ đây, bạn đã sẵn sàng sử dụng Ultralytics với Docker. Để tự host ứng dụng web Ultralytics, hãy xem hướng dẫn Platform On-Premise.
Câu hỏi thường gặp#
Để thiết lập Ultralytics với Docker, trước tiên hãy đảm bảo Docker đã được cài đặt trên hệ thống. Nếu có GPU NVIDIA, hãy cài đặt NVIDIA Container Toolkit để bật hỗ trợ GPU. Sau đó, dùng lệnh sau để tải image Docker Ultralytics mới nhất từ Docker Hub:
sudo docker pull ultralytics/ultralytics:latestSử dụng image Docker của Ultralytics đảm bảo môi trường nhất quán giữa các máy khác nhau, với cùng phần mềm và dependency. Điều này đặc biệt hữu ích khi cộng tác giữa các nhóm, chạy model trên nhiều loại phần cứng và đảm bảo khả năng tái lập khi triển khai model. Dùng
latestđể huấn luyện trên GPU NVIDIA thông thường hoặc chọn image tương ứng với phiên bản JetPack của thiết bị NVIDIA Jetson.Trước tiên, hãy đảm bảo NVIDIA Container Toolkit đã được cài đặt và cấu hình. Sau đó, sử dụng lệnh sau để chạy Ultralytics YOLO với hỗ trợ GPU:
sudo docker run -it --ipc=host --device nvidia.com/gpu=all ultralytics/ultralytics:latest # all GPUsLệnh này thiết lập container Docker có quyền truy cập GPU; bạn có thể giới hạn quyền truy cập vào các GPU cụ thể hoặc chuyển sang AMD ROCm.
Để trực quan hóa kết quả dự đoán YOLO bằng giao diện đồ họa trong container Docker, bạn cần cho phép Docker truy cập máy chủ hiển thị. Với các hệ thống chạy X11, lệnh là:
xhost +local:docker && docker run -e DISPLAY=$DISPLAY \
  -v /tmp/.X11-unix:/tmp/.X11-unix \
  -v ~/.Xauthority:/root/.Xauthority \
  -it --ipc=host ultralytics/ultralytics:latest
Với các hệ thống chạy Wayland, hãy dùng:
xhost +local:docker && docker run -e DISPLAY=$DISPLAY \
  -v $XDG_RUNTIME_DIR/$WAYLAND_DISPLAY:/tmp/$WAYLAND_DISPLAY \
  --net=host -it --ipc=host ultralytics/ultralytics:latest
Bên trong container, hãy cài đặt bản GUI của OpenCV trước khi sử dụng
show=True, như mô tả trong phần Chạy các ứng dụng giao diện người dùng đồ họa (GUI) trong container Docker.Có, bạn có thể mount thư mục cục bộ vào container Docker của Ultralytics bằng flag
-v:sudo docker run -it --ipc=host --device nvidia.com/gpu=all -v /path/on/host:/path/in/container ultralytics/ultralytics:latestThay
/path/on/hostbằng thư mục trên máy cục bộ của bạn và/path/in/containerbằng đường dẫn mong muốn bên trong container. Cấu hình này cho phép bạn làm việc với các tệp cục bộ bên trong container. Để biết thêm thông tin, hãy tham khảo mục Lưu ý về khả năng truy cập tệp.


Bình luận14
Đặt câu hỏi, chia sẻ kết quả hoặc giúp đỡ người khác.
 Letícia Rama
Hello,
Is this workflow suitable for other YOLO families, such as YOLO26?
 Glenn JocherUltralytics
Yes, the same workflow supports YOLO26 and other model families available in the
ultralyticspackage—use an up-to-date official image and specify the appropriate weights, such asmodel=yolo26n.pt. See the Docker Quickstart Guide for current image options, and feel free to drop any follow-up questions here so the Ultralytics team can help.1- Letícia Rama
Right Glenn, thanks
lauravchrobak
It looks like the, "Running Ultralytics in Docker Container" section is duplicated here
HellaPinot
Hello! I have been testing running yolov8 inside a container, things seem to work well however after a somewhat random amount of time the inference hangs with no error output.
I know the container hasn't crashed as I am reading events from a processing queue and I can see new partitions are being allocated on another thread.
I'm running two models one after the other (different sizes and detection classes), so I'm wondering if this could be the root of the issue? At no point would they be running at the same time.
I believe it is happening exactly when I call predict. Its hard to debug as again it happens very randomly and there is not output from the container, it seems like there might be an infinite loop somewhere thats stopping it from continuing.
Curious if anything like this has been encountered before?
- Glenn JocherUltralytics
Hello! 👋
It sounds like a tricky issue, especially since it occurs randomly. Here are a few suggestions that might help you isolate or resolve the problem:
-
Logging and Monitoring: Enhance the logging within your container. Consider logging the input sizes and other relevant data before the prediction call, and make sure you're logging any exceptions that could be silently caught.
-
Resource Checks: Ensure that there are no resource starvation issues, such as GPU memory not being freed up properly. Tools like
nvidia-smican help monitor GPU usage. -
Sequential Model Loading: Although the models are run sequentially and not in parallel, it could be beneficial to explicitly clear the memory after each model's predictions are done. This can be done by deleting model objects and calling
torch.cuda.empty_cache()if you are using PyTorch. -
Hardware Testing: Run your container pointing the inference to CPU only for a time to see if the problem persists. This could help determine if the issue is related to GPU computation or not.
-
Reproducibility Tactic: Since the issue is sporadic, try to determine if there’s a specific type of input or specific conditions under which this occurs more frequently.
If these suggestions don't help, please provide more details or code snippets, and I’d be happy to dive deeper into this!
Let me know how it goes!
-
HWKevinhwk
I want to install ultralytics using docker on top of NVIDIA TX2, is there a detailed procedure? The reason for this question is that after entering the command nvidia-smi in the TX2 terminal, the output is command not found, and I'm worried that the steps in the document above are not applicable to TX2.
 Paula DerrengerUltralytics(đã chỉnh sửa)
@HWKevinhwk hey there! 🚀 Setting up Ultralytics on NVIDIA TX2 with Docker can be a bit tricky if
nvidia-smiis missing, but no worries.For NVIDIA Jetson platforms like TX2,
nvidia-smiis typically not available, and you'll usetegrastatsinstead to monitor the GPU. The Jetson TX2 is supported on JetPack 4, so install JetPack 4 first, as it includes the NVIDIA drivers and libraries needed for GPU acceleration. Jetson devices use the Docker integration provided through JetPack with--runtime=nvidiarather than--gpus all. Then pull and run the Ultralytics Docker image for JetPack 4:t=ultralytics/ultralytics:latest-jetson-jetpack4 sudo docker pull $t && sudo docker run -it --ipc=host --runtime=nvidia $tSee the NVIDIA Jetson guide for details. If you encounter any specific issues, feel free to drop them here. Happy detecting! 🎉
Is there a detailed tutorial on deploying yolov8 on jetson TX2 using docker? I am pulling images docker pull ultralytics/ultralytics:latest-jetson terminal will downloading pause, long time pulling images unsuccessful, repeated attempts still so, any solution please?
- Paula DerrengerUltralytics(đã chỉnh sửa)
@HWKevinhwk hey there! 😊
It sounds like you're facing issues with the Docker image pull for the Jetson TX2. This might be due to network issues or Docker Hub delays, or to using a tag that does not exist.
Here's a simplified breakdown to get you started on the TX2 using Docker:
-
Ensure JetPack is installed: The TX2 is supported on JetPack 4, which includes the GPU drivers necessary for Docker integration with the Jetson GPU.
-
Install Docker:
sudo apt-get install docker.io -
NVIDIA runtime support (JetPack should handle this):
nvidia-smidoesn't work on Jetson, so verify thenvidiaruntime withdocker info | grep -i runtime. -
Pull the Docker image for Jetson. Pulling large Docker images can be challenging on slower networks:
sudo docker pull ultralytics/ultralytics:latest-jetson-jetpack4If you keep facing issues while pulling the image, try restarting your Docker service or check your network settings. Sometimes, using a different network can help too!
-
Run the Image:
sudo docker run -it --ipc=host --runtime=nvidia ultralytics/ultralytics:latest-jetson-jetpack4
This should set you on the right path to running Ultralytics YOLO on your Jetson TX2. If the problem persists, it might be worth checking Docker's log or discussing this issue further with your network admin or on Docker forums! 😄
Happy coding! 🚀
-
Peter-coding
Hey! I trained a YOLOv8 model on my local computer. I have the best.pt file, and I can use it in CLI (conda) for predict. I want to make a python app, which uses this best.pt file, and I want to containerize it. Is it possible to write the full python app (it is just a few lines of code, which runs the detection, then writes the detection result to a database), then containerize it, and able to use it anywhere? Thank you! :D
- Paula DerrengerUltralytics
Hey there! 😊
Absolutely, you can absolutely containerize your Python app that uses the
best.ptmodel! Here's a quick guide:-
Create Your Python App: Just like you mentioned, write your Python code that performs the detection and interacts with the database.
-
Dockerize Your Application:
-
Dockerfile: Create a Dockerfile in your project directory. Here's a simple example that uses Ultralytics' Docker image as a base:
FROM ultralytics/ultralytics:latest WORKDIR /app COPY . /app RUN pip install -r requirements.txt # Assuming you have a requirements.txt CMD ["python", "your_script.py"] -
Build Your Docker Image: Run the following command in your project directory:
sudo docker build -t your-app-name . -
Run Your Container: To run your container, especially if you're planning to use GPU, you might want to specify
--gpus all:sudo docker run -it --ipc=host --gpus all your-app-nameFor accessing local files, consider mounting a volume as described in the Docker Quickstart Guide.
-
-
Deployment: With your Docker image built, you can now deploy and run it anywhere that Docker is supported. If using a GPU, ensure the host machine supports NVIDIA GPUs and has the necessary drivers and Docker configured correctly.
That's it! You should be able to use your model within a containerized app now. If you hit any snags, double-check the Docker Quickstart Guide for Ultralytics for more details. Happy coding! 😄
-
udayzee05
DEPRECATION NOTICE The nvidia-docker wrapper is no longer supported, and the NVIDIA Container Toolkit has been extended to allow users to configure Docker to use the NVIDIA Container Runtime. For further instructions, see the NVIDIA Container Toolkit documentation and specifically the install guide.22 Jan 2024
- Paula DerrengerUltralytics(đã chỉnh sửa)
Hey there! 👋 Thanks for bringing up the deprecation notice regarding the nvidia-docker wrapper. You're right; use the NVIDIA Container Toolkit for GPU support in Docker containers. Here's how to set it up on Ubuntu/Debian, as described in our Docker Quickstart Guide:
# Add the NVIDIA Container Toolkit repository
curl -fsSL https://nvidia.github.io/libnvidia-container/gpgkey | sudo gpg --dearmor -o /usr/share/keyrings/nvidia-container-toolkit-keyring.gpg \
  && curl -s -L https://nvidia.github.io/libnvidia-container/stable/deb/nvidia-container-toolkit.list \
  | sed 's#deb https://#deb [signed-by=/usr/share/keyrings/nvidia-container-toolkit-keyring.gpg] https://#g' \
    | sudo tee /etc/apt/sources.list.d/nvidia-container-toolkit.list

# Install the NVIDIA Container Toolkit
sudo apt-get update
sudo apt-get install -y nvidia-container-toolkit
And to verify that the GPU devices are available to Docker:
nvidia-ctk cdi listThis should list entries such as
nvidia.com/gpu=all, indicating that your Docker setup can leverage GPU acceleration. 🚀For more detailed instructions and tips on using Ultralytics with Docker, including mounting local directories and running containers, check out our Docker Quickstart Guide. Happy coding!