Link to this sectionQuick Start Guide: Seeed Studio reCamera with Ultralytics YOLO26#
reCamera was introduced for the AI community at YOLO Vision 2024 (YV24), Ultralytics annual hybrid event. It is mainly designed for edge AI applications, offering powerful processing capabilities and effortless deployment.
With support for diverse hardware configurations and open-source resources, it serves as an ideal platform for prototyping and deploying innovative computer vision solutions at the edge.
Link to this sectionWhy Choose reCamera?#
reCamera series is purpose-built for edge AI applications, tailored to meet the needs of developers and innovators. Here's why it stands out:
-
RISC-V Powered Performance: At its core is the SG200X processor, built on the RISC-V architecture, delivering exceptional performance for edge AI tasks while maintaining energy efficiency. With the ability to execute 1 trillion operations per second (1 TOPS), it handles demanding tasks like real-time object detection easily.
-
Optimized Video Technologies: Supports advanced video compression standards, including H.264 and H.265, to reduce storage and bandwidth requirements without sacrificing quality. Features like HDR imaging, 3D noise reduction, and lens correction ensure professional visuals, even in challenging environments.
-
Energy-Efficient Dual Processing: While the SG200X handles complex AI tasks, a smaller 8-bit microcontroller manages simpler operations to conserve power, making the reCamera ideal for battery-operated or low-power setups.
-
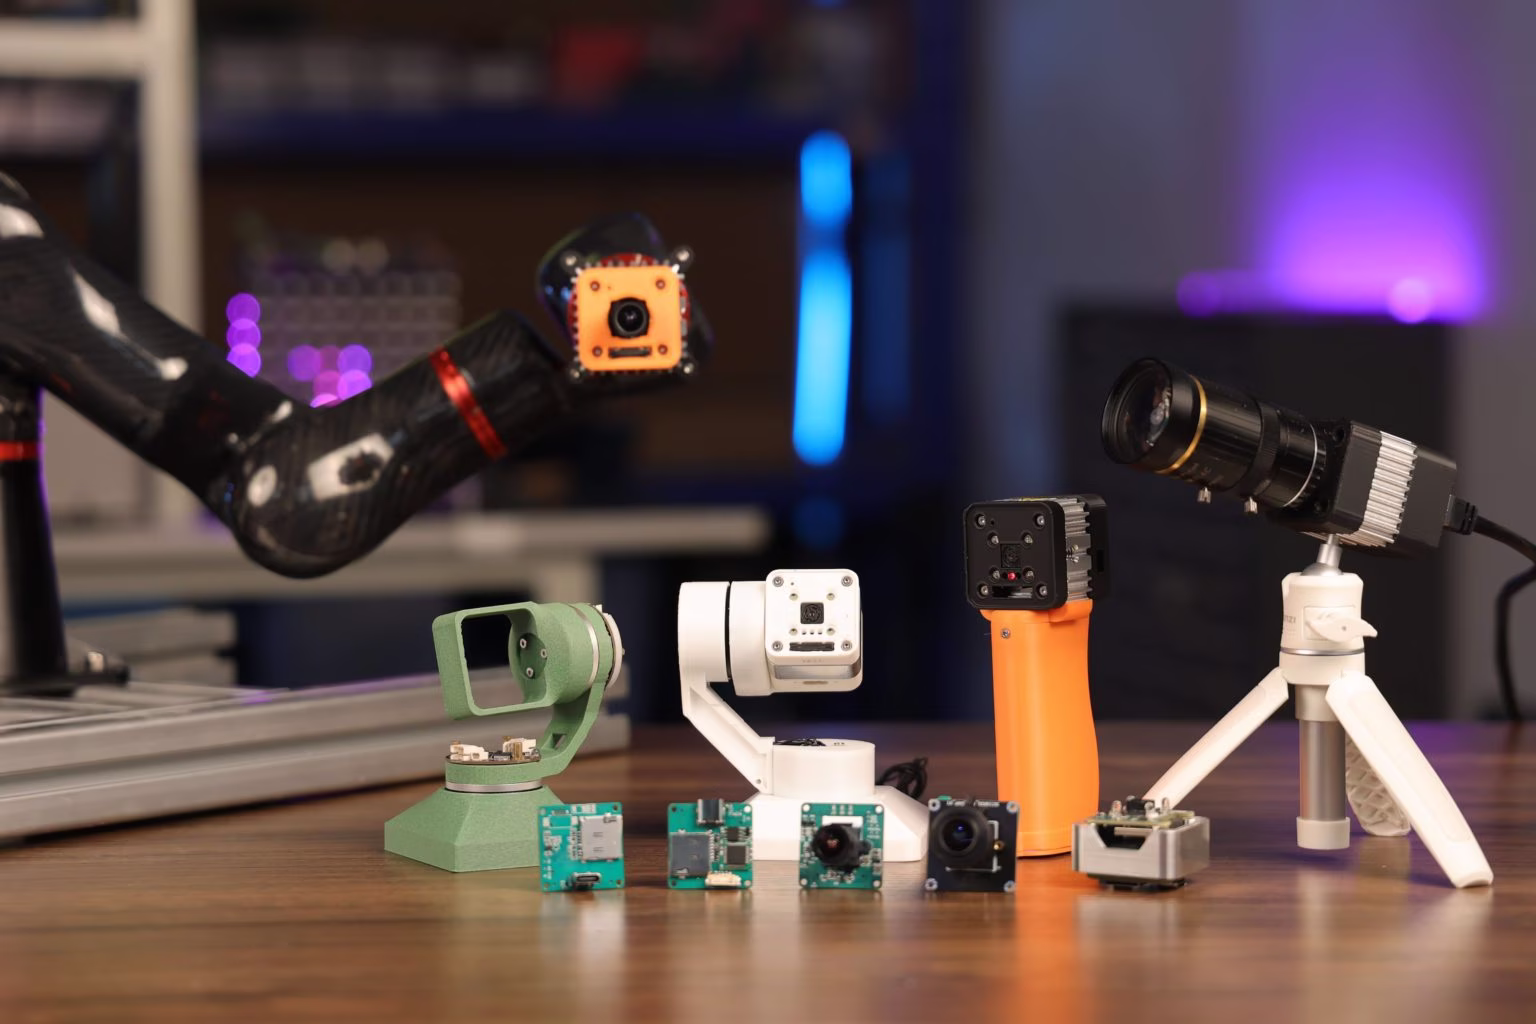
Modular and Upgradable Design: The reCamera is built with a modular structure, consisting of three main components: the core board, sensor board, and baseboard. This design allows developers to easily swap or upgrade components, ensuring flexibility and future-proofing for evolving projects.
Link to this sectionQuick Hardware Setup of reCamera#
Please follow reCamera Quick Start Guide for initial onboarding of the device such as connecting the device to a WiFi network and access the Node-RED web UI for quick previewing of detection results.
Link to this sectionInference Using Pre-installed YOLO26 Models#
reCamera comes pre-installed with four Ultralytics YOLO26 models and you can simply choose your desired model within the Node-RED dashboard.
- Detection (YOLO26n)
- Classification (YOLO26n-cls)
- Segmentation (YOLO26n-seg)
- Pose Estimation (YOLO26n-pose)
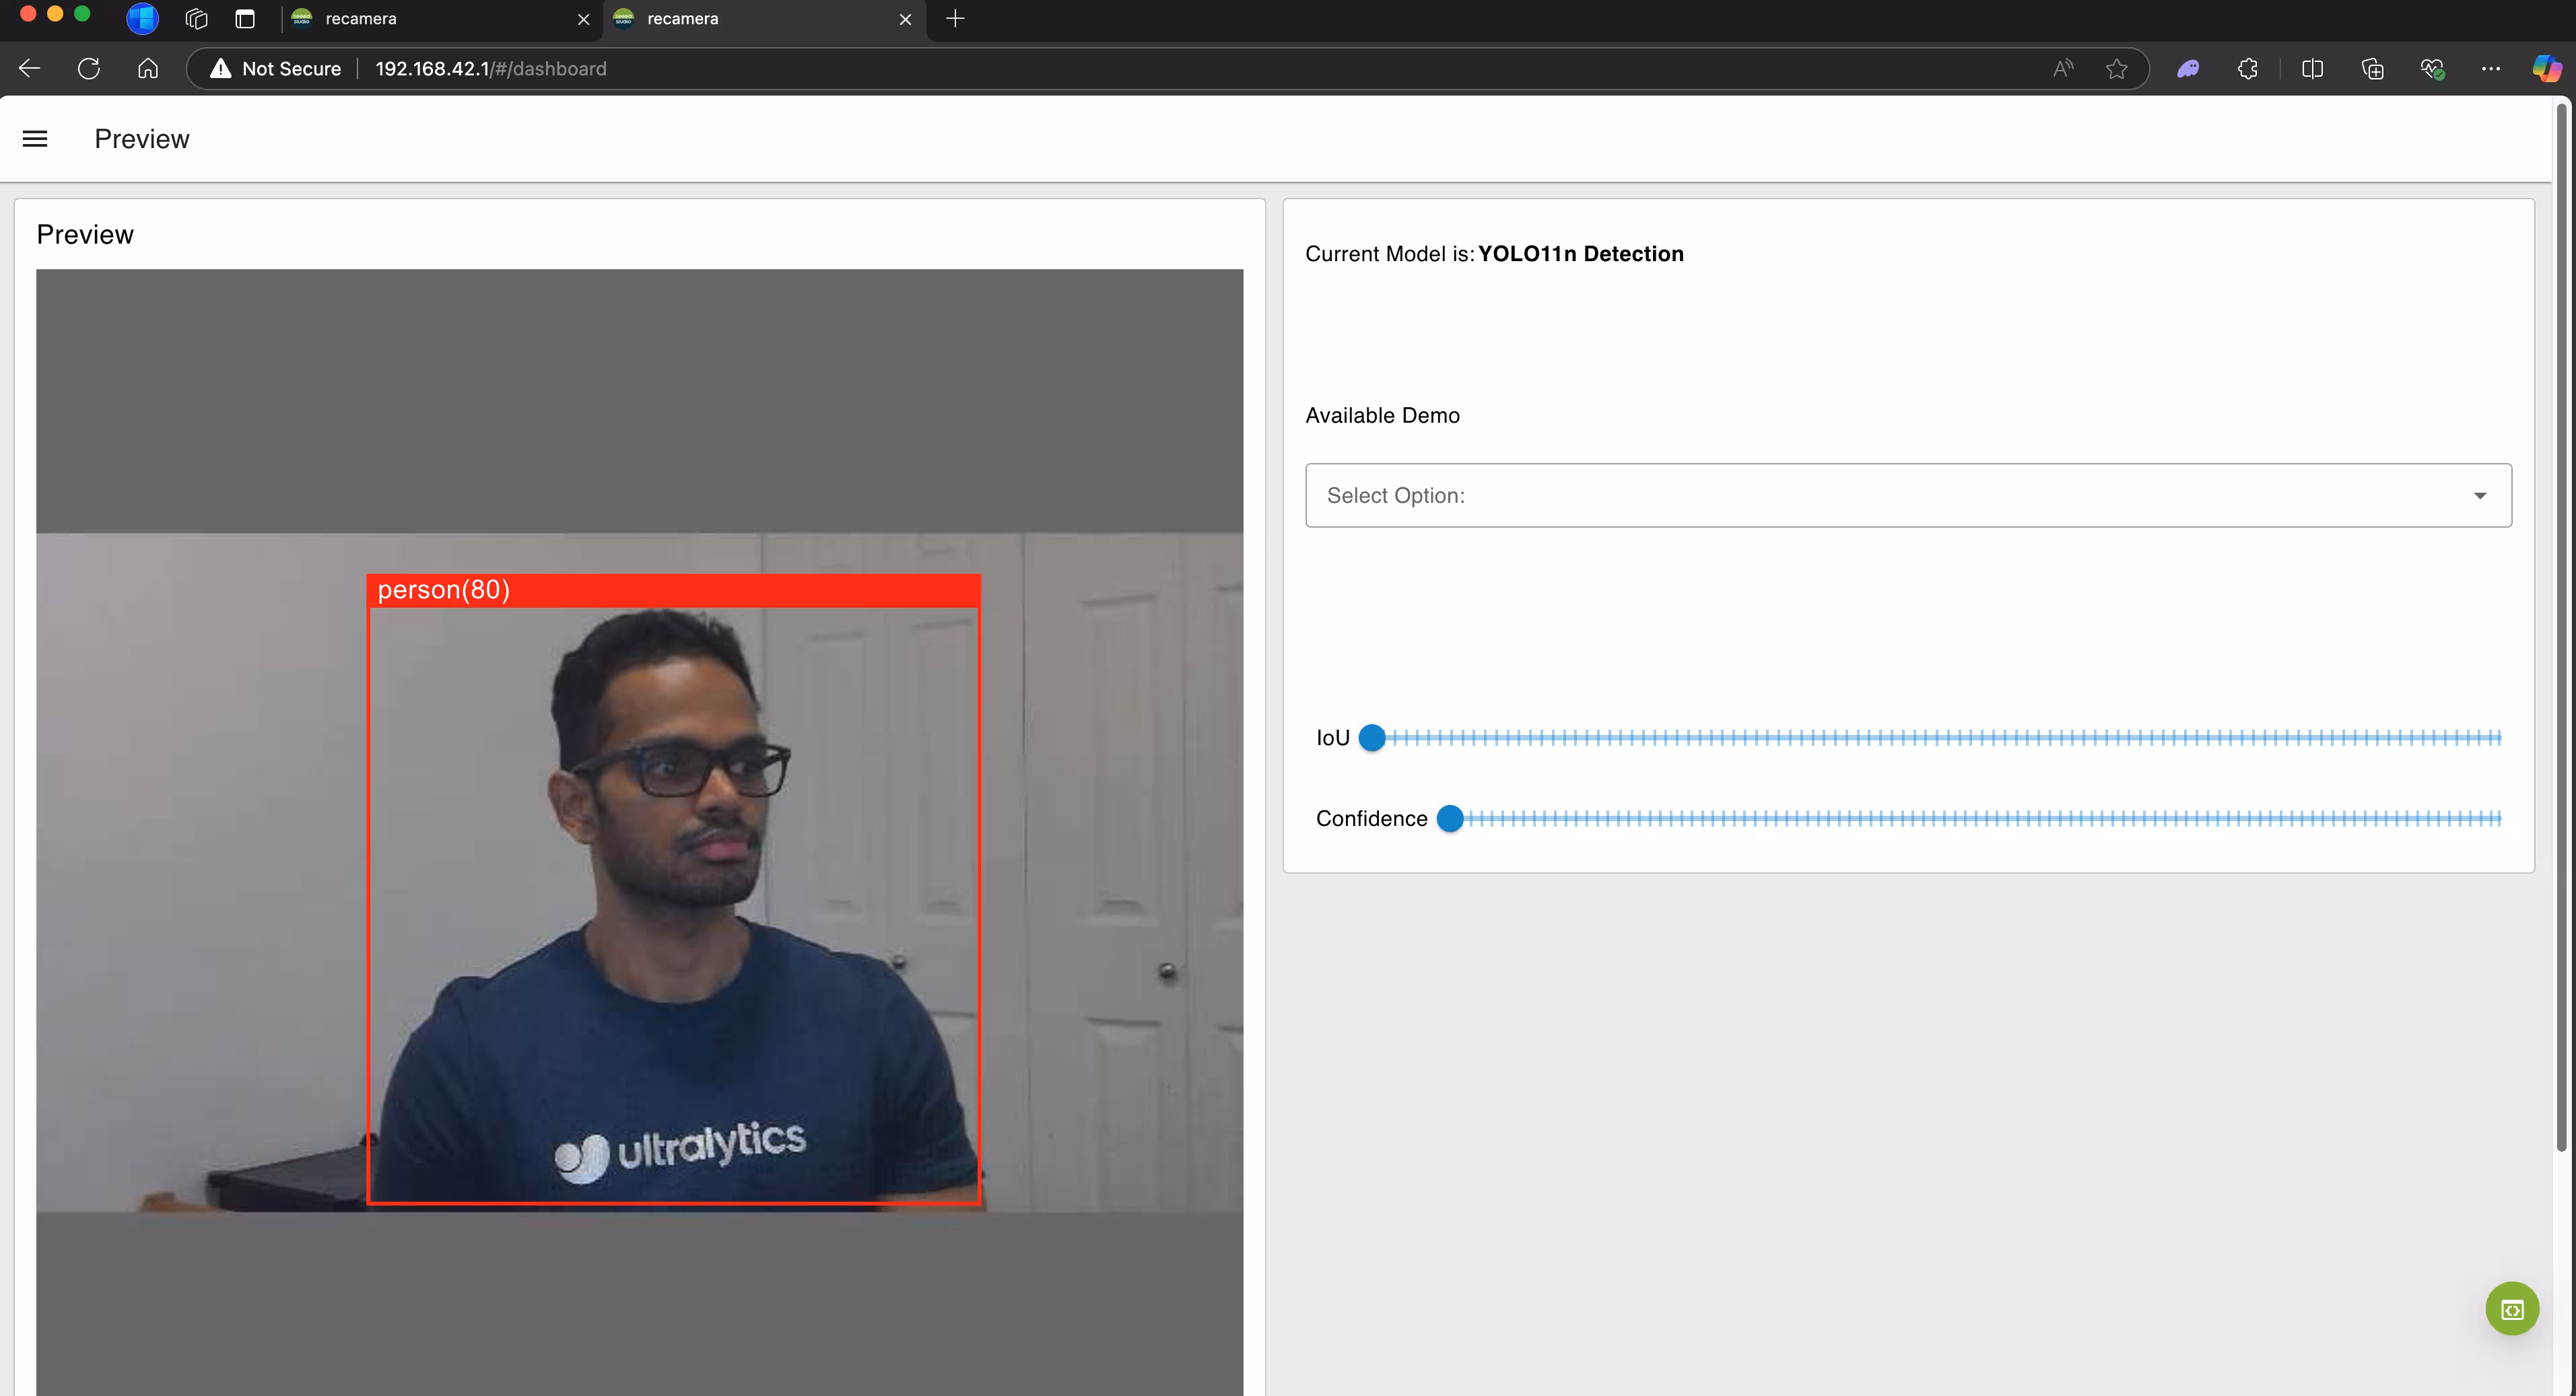
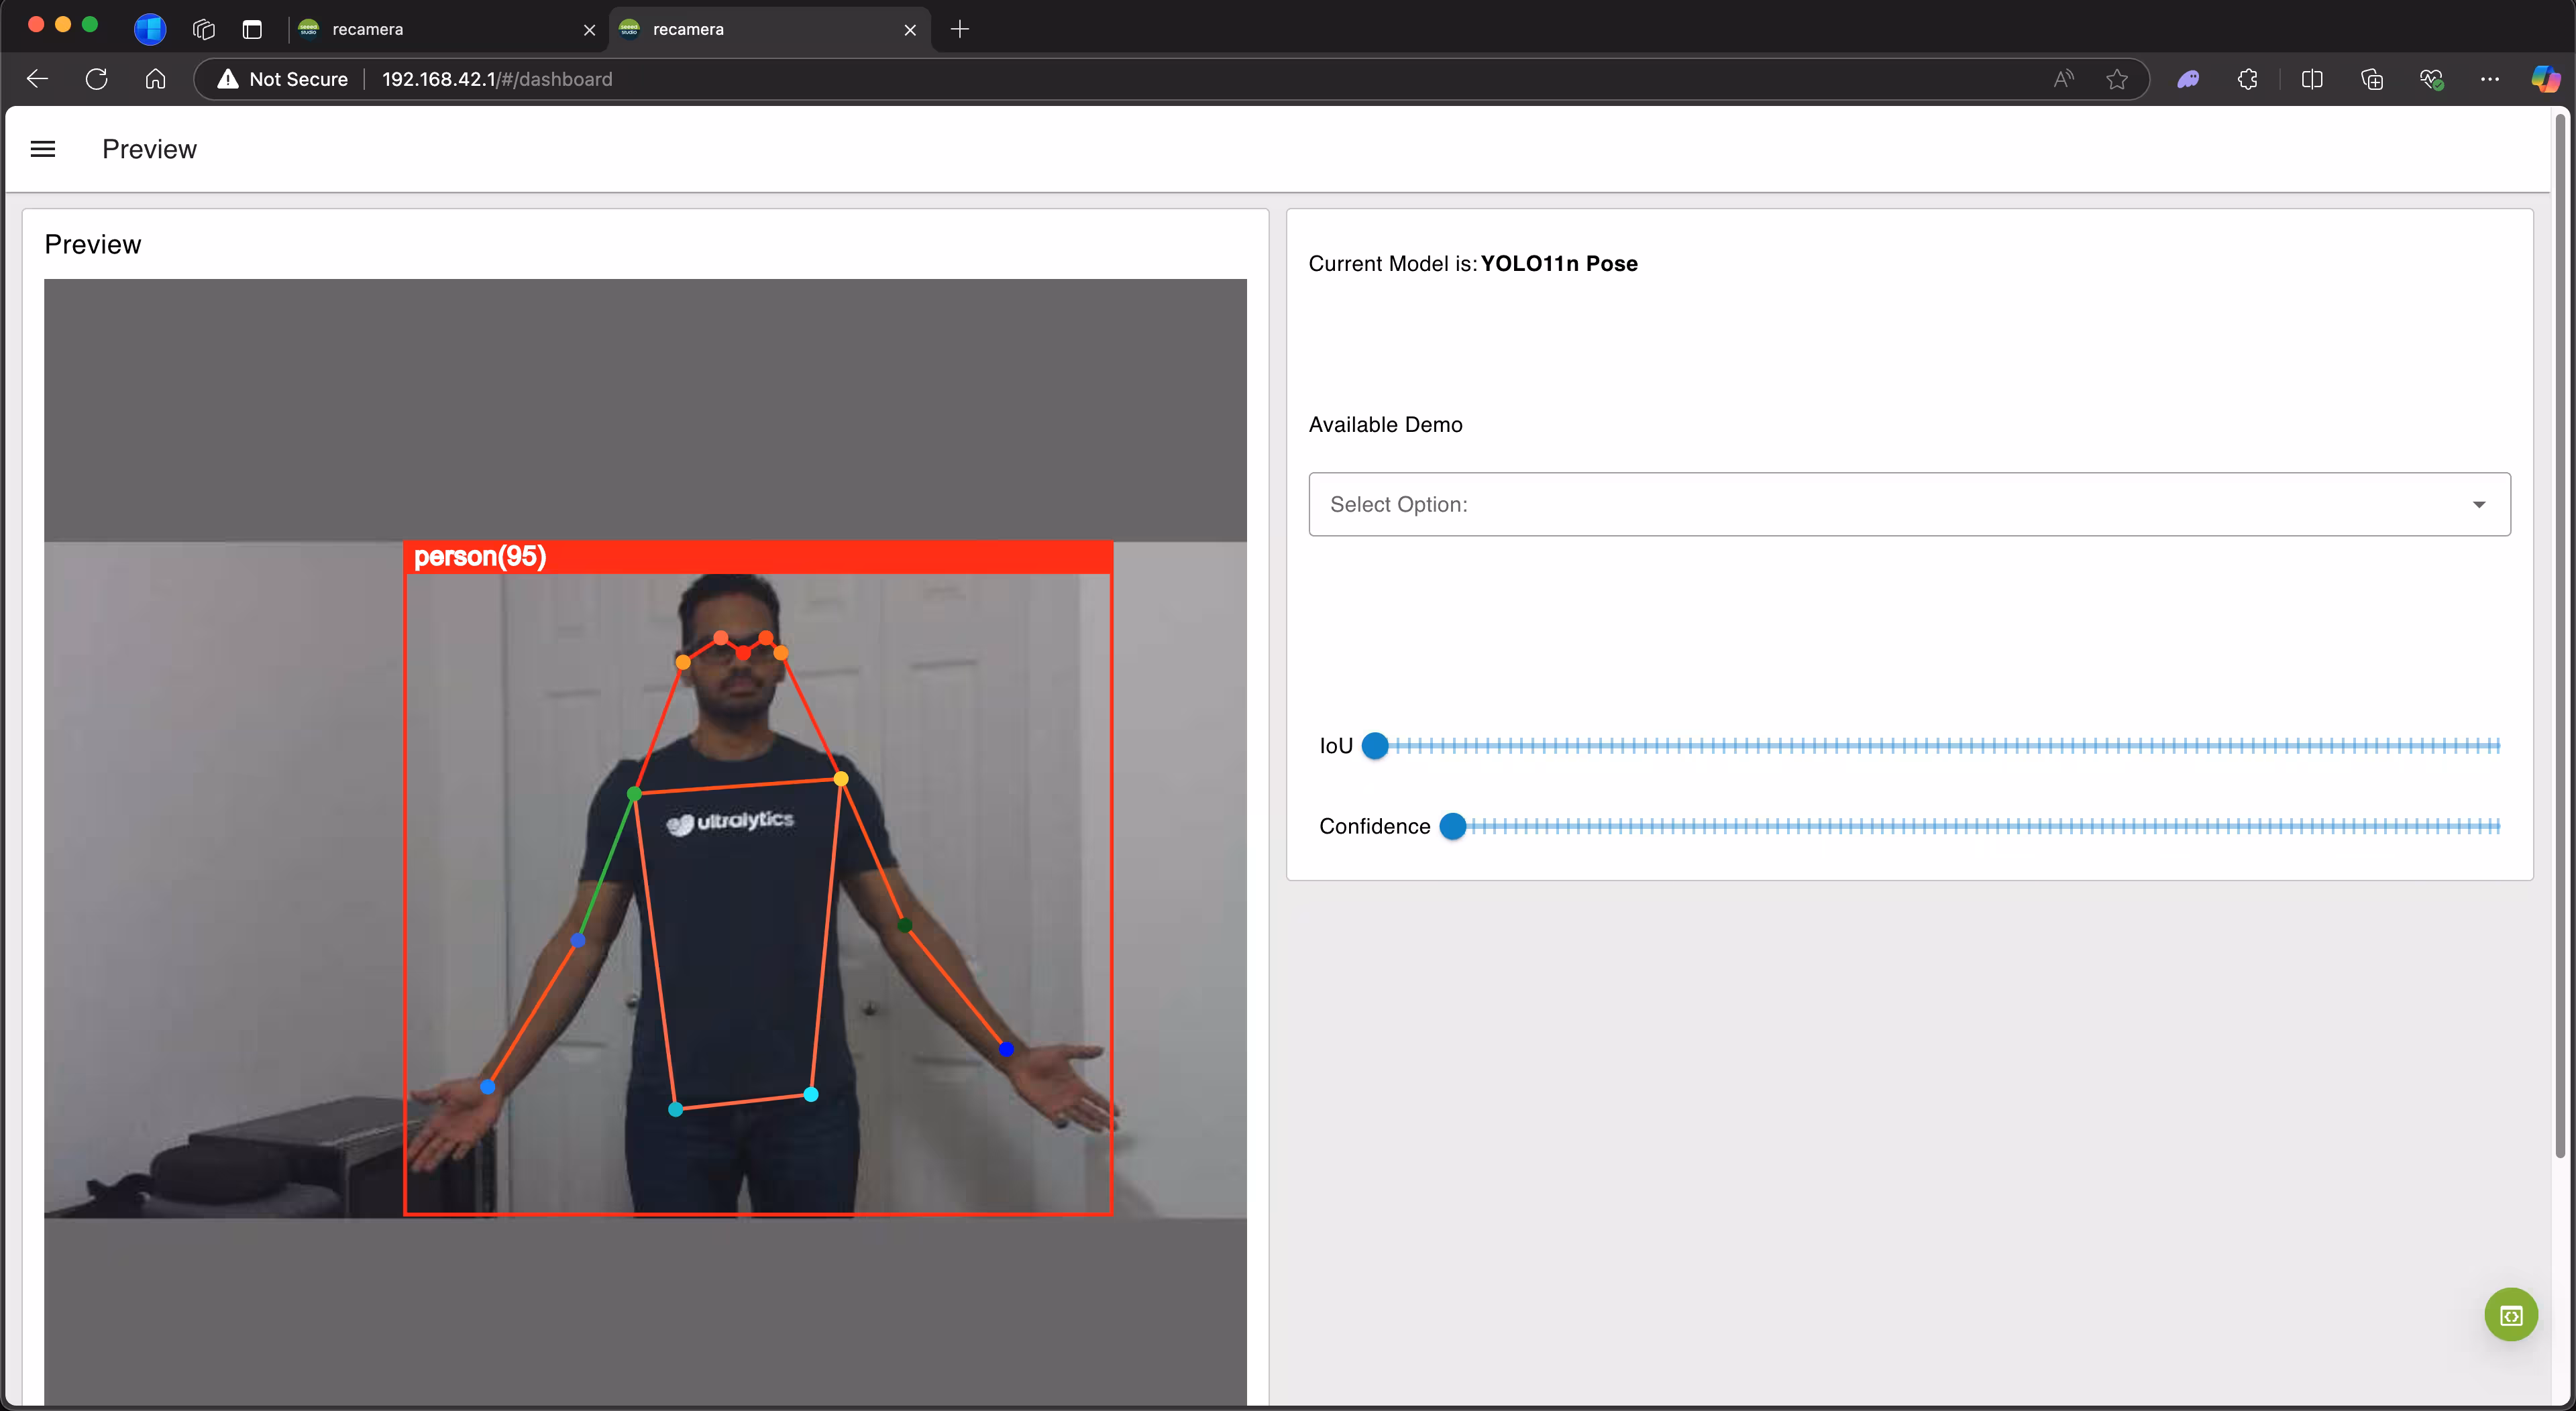
Step 1: If you have connected reCamera to a network, enter the IP address of reCamera on a web browser to open the Node-RED dashboard. If you have connected the reCamera to a PC via USB, you can enter 192.168.42.1. Here you will see YOLO26n detection model is loaded by default.
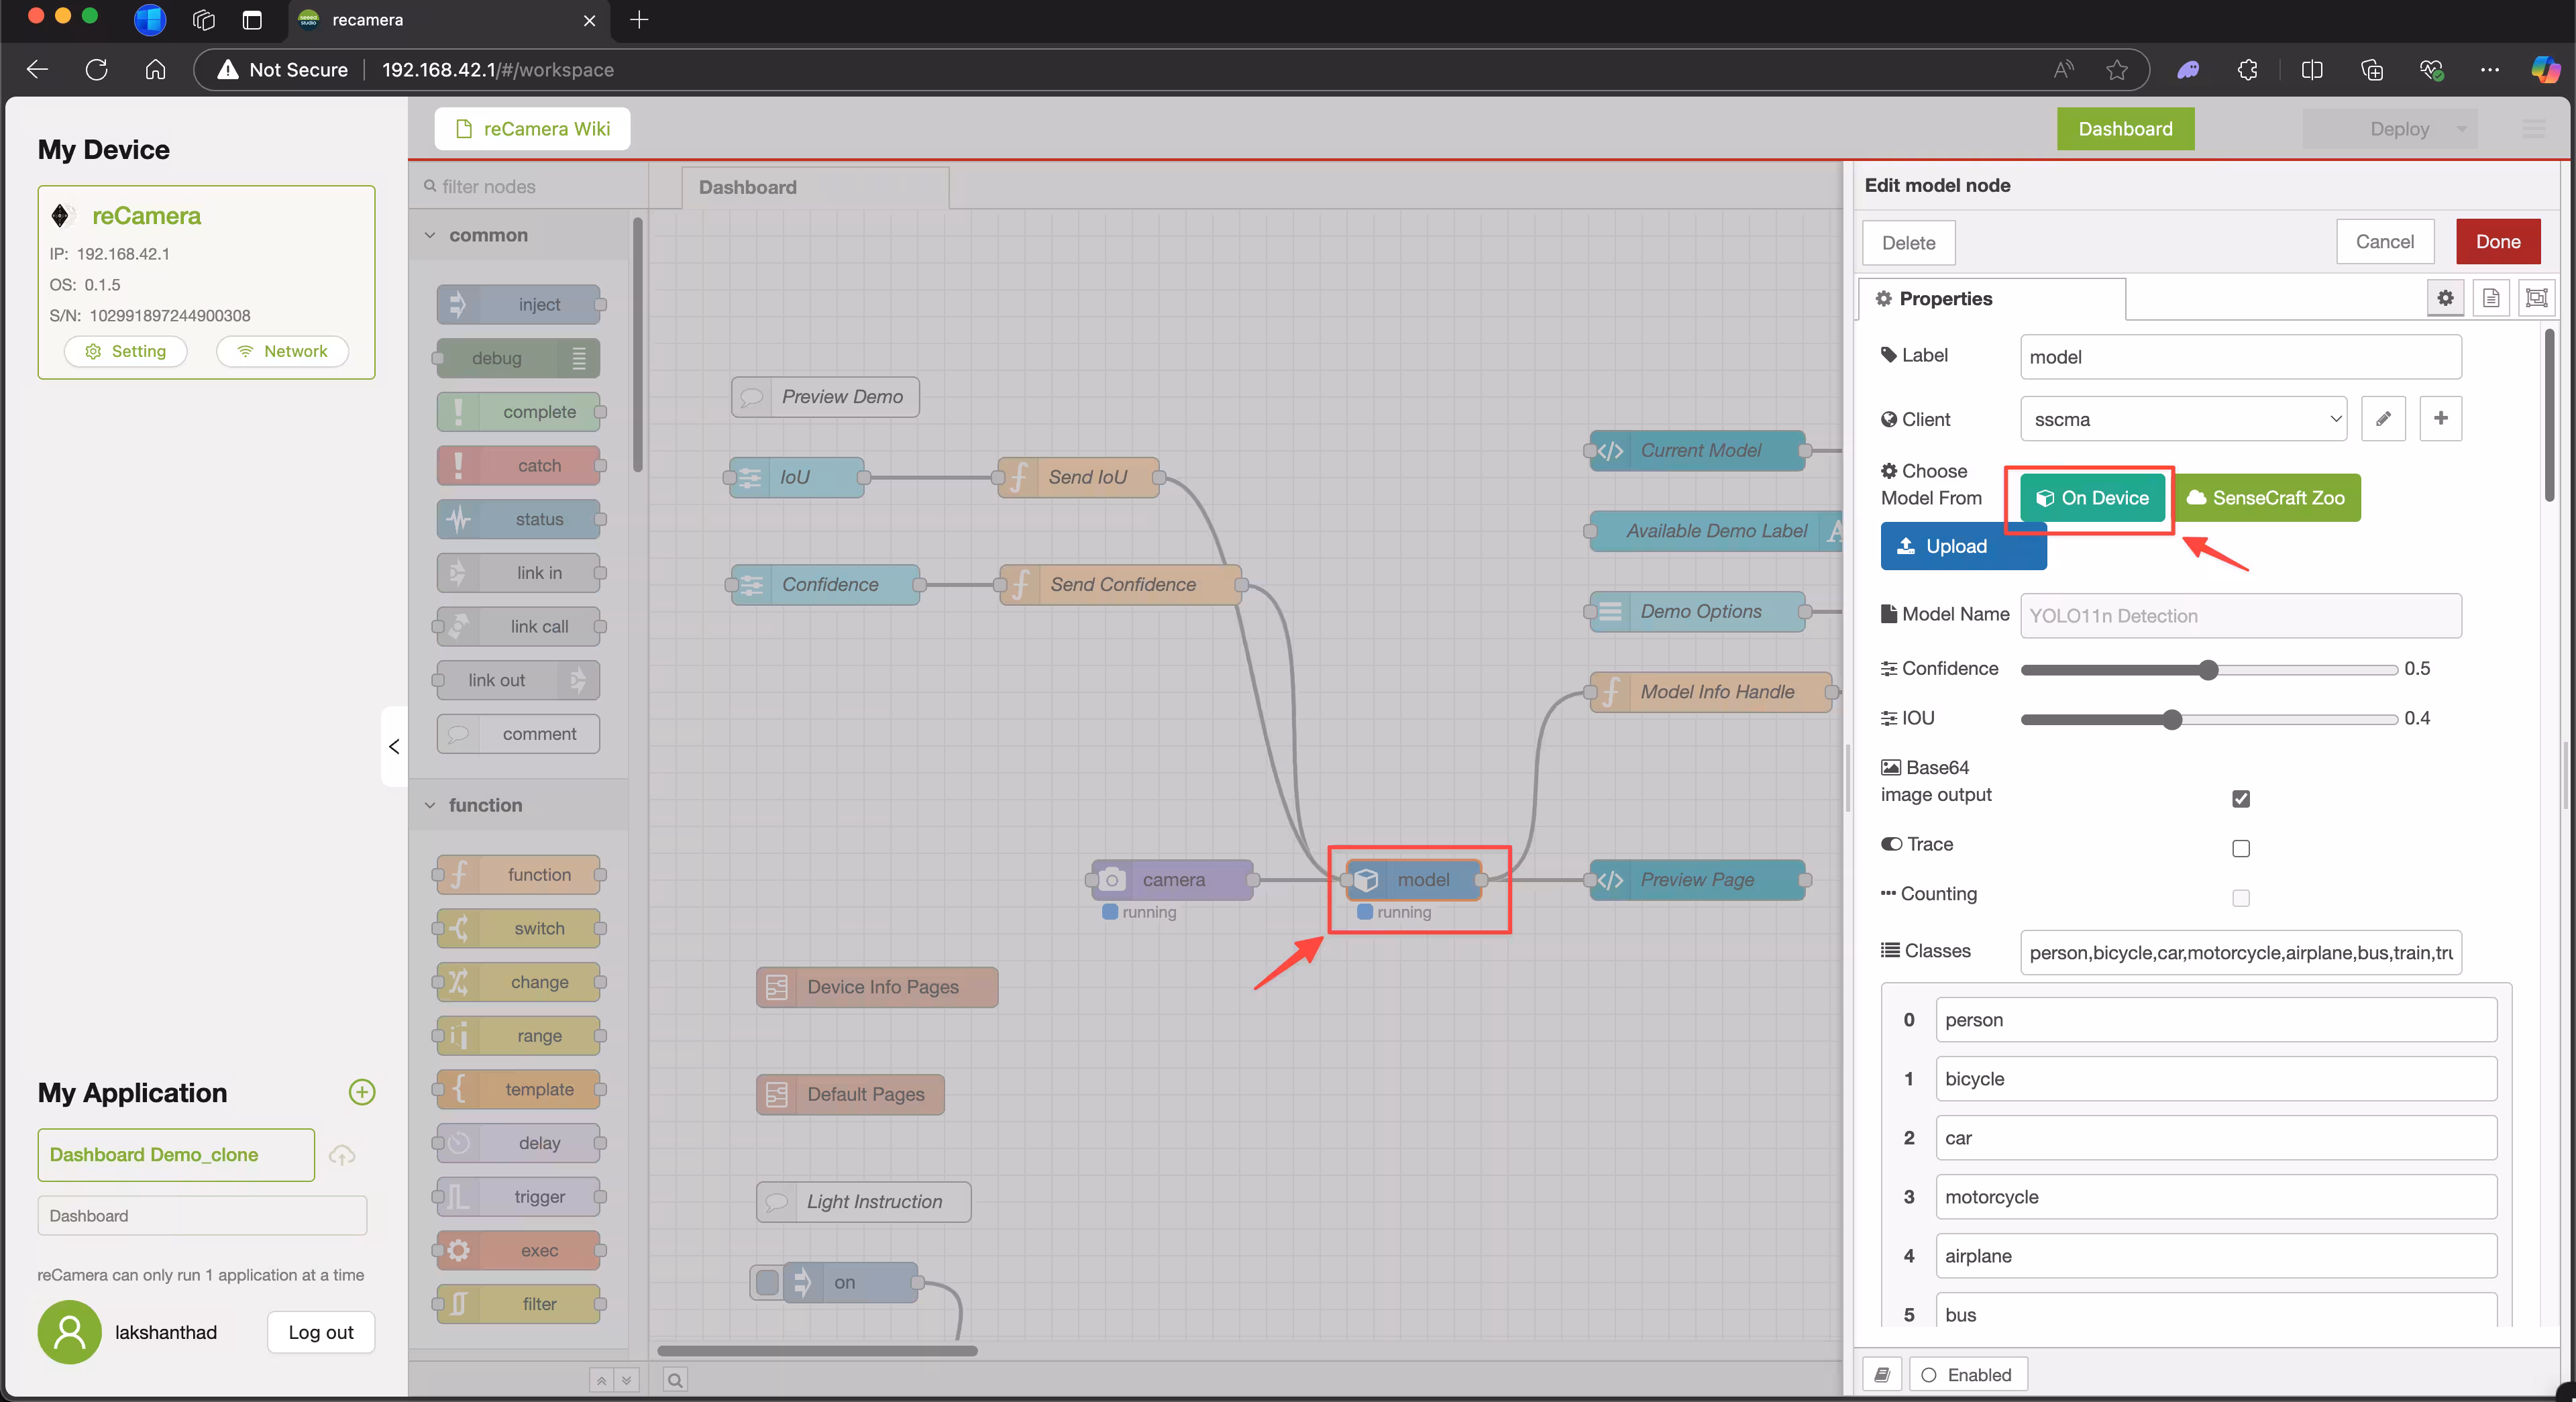
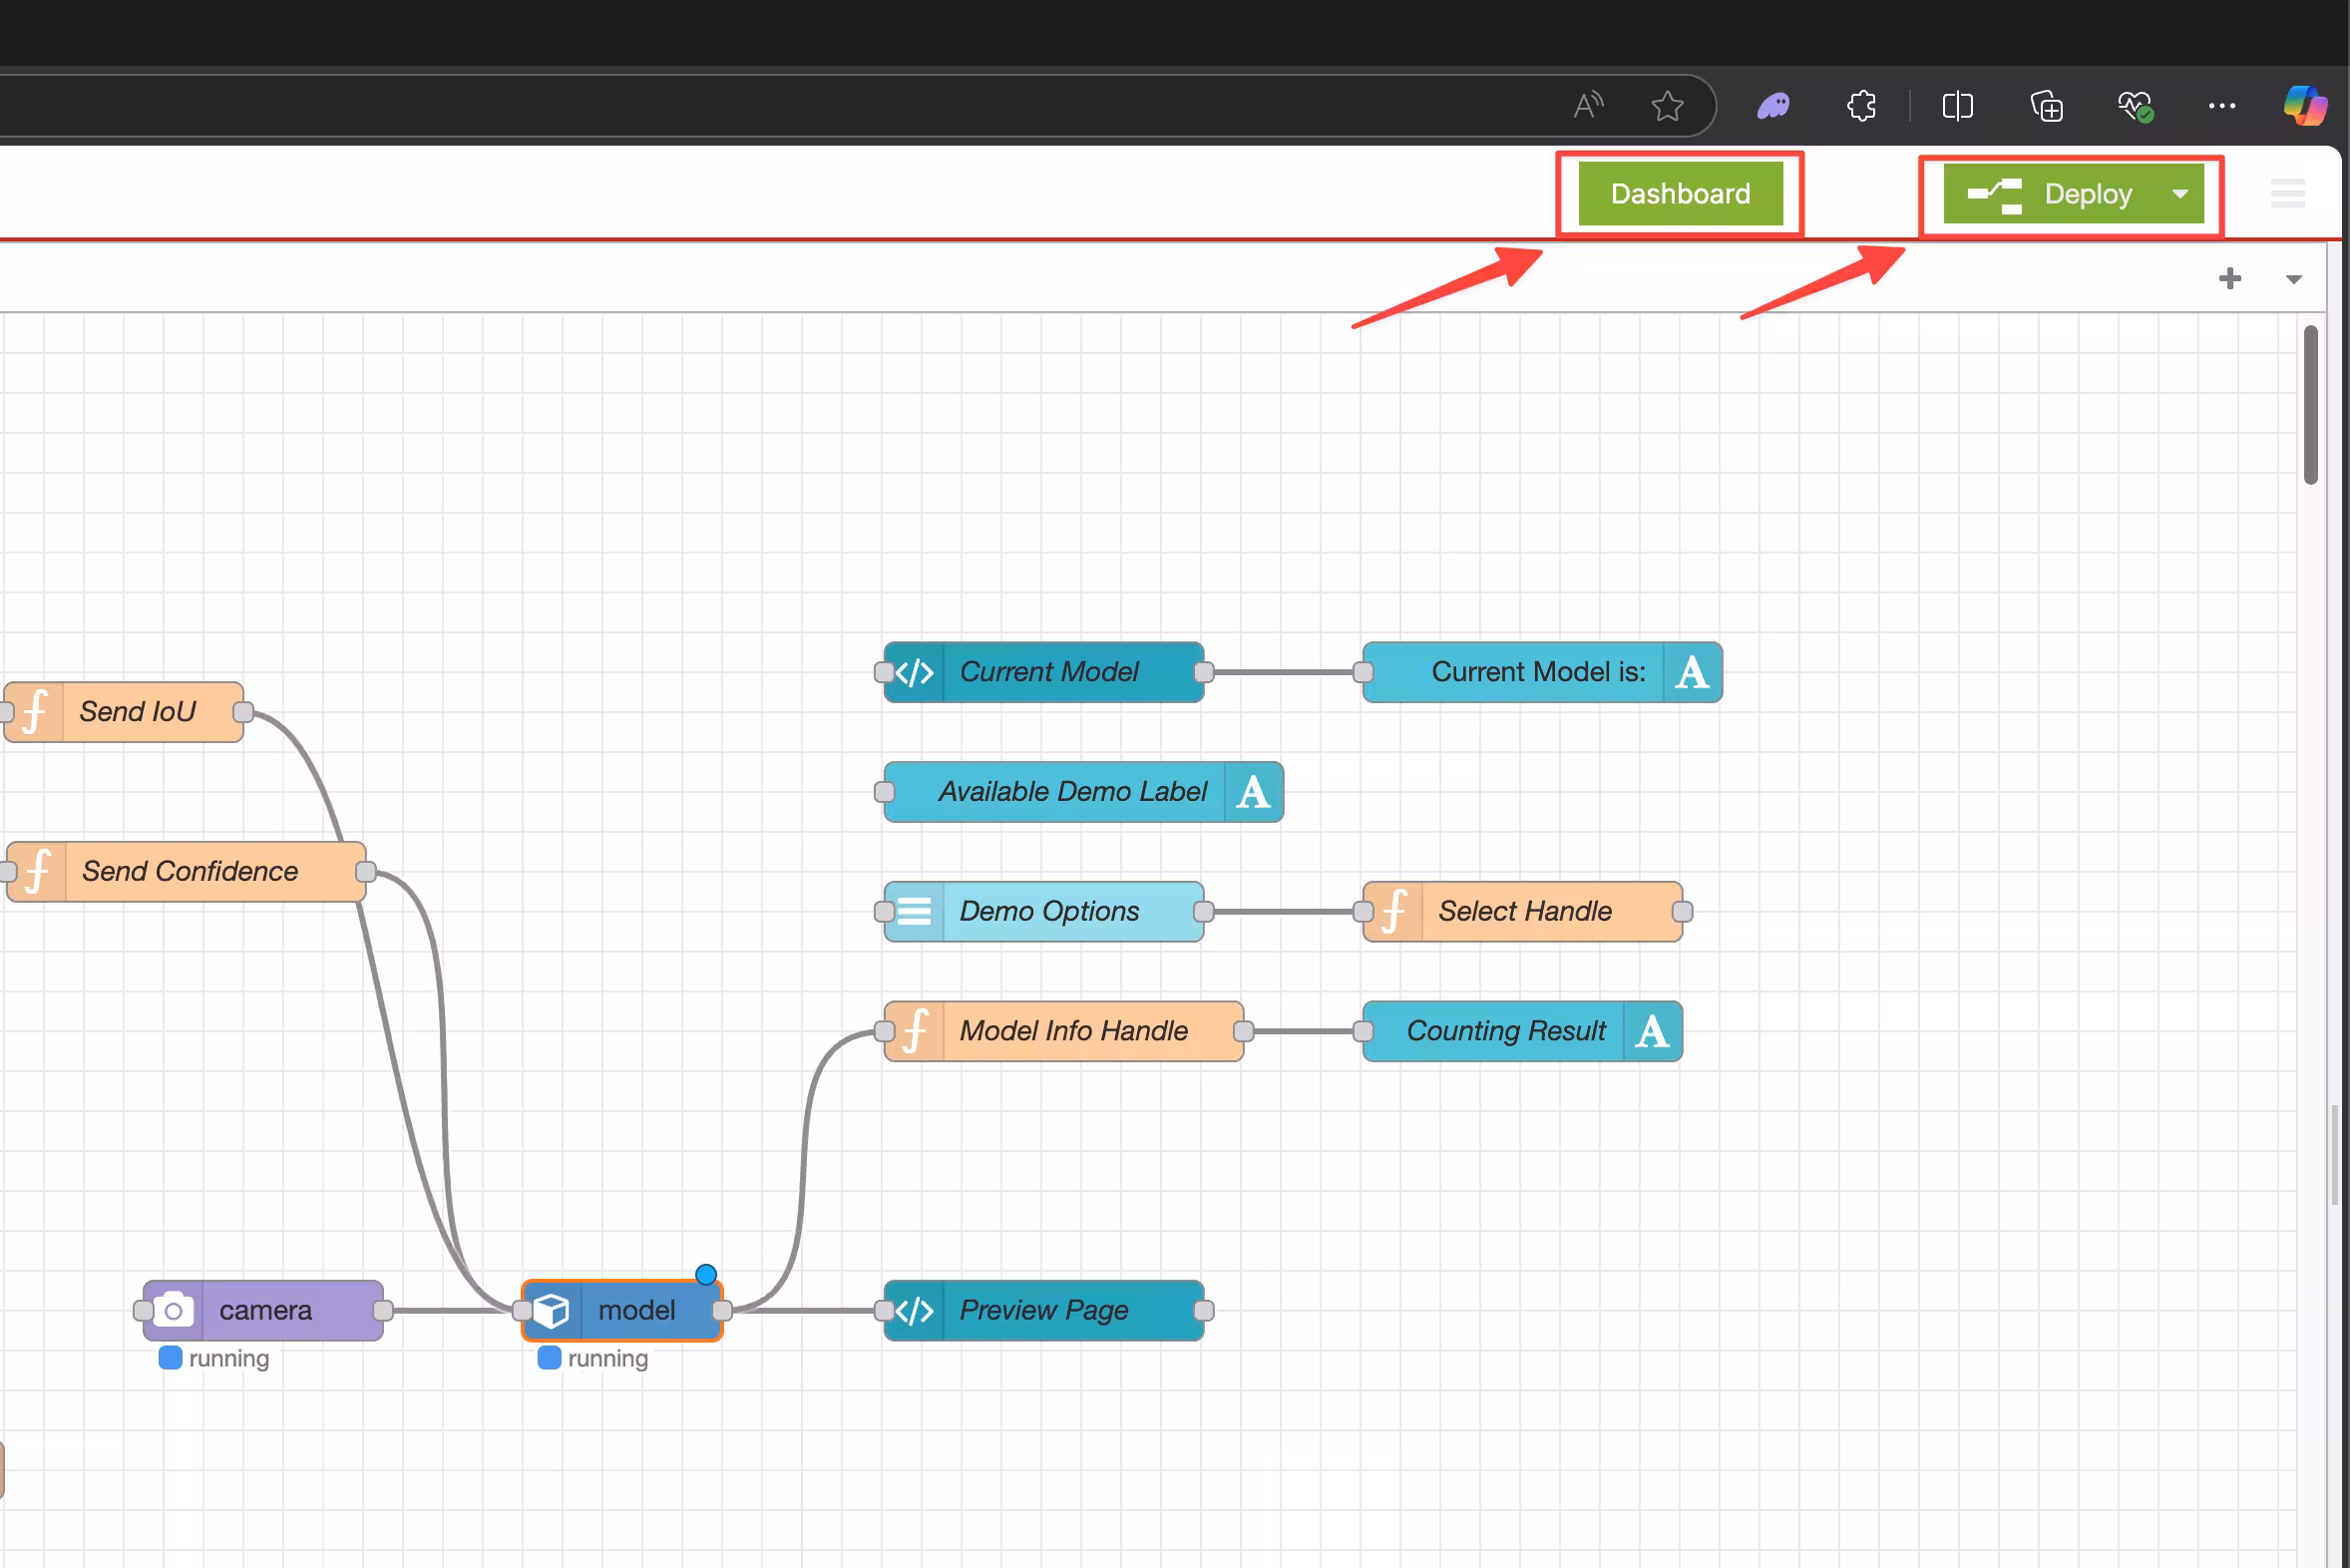
Step 2: Click the green color circle at the bottom right corner to access the Node-RED flow editor.
Step 3: Click the model node and click On Device.
Step 4: Choose one of the four different pre-installed YOLO26n models and click Done. For example, here we will select YOLO26n Pose
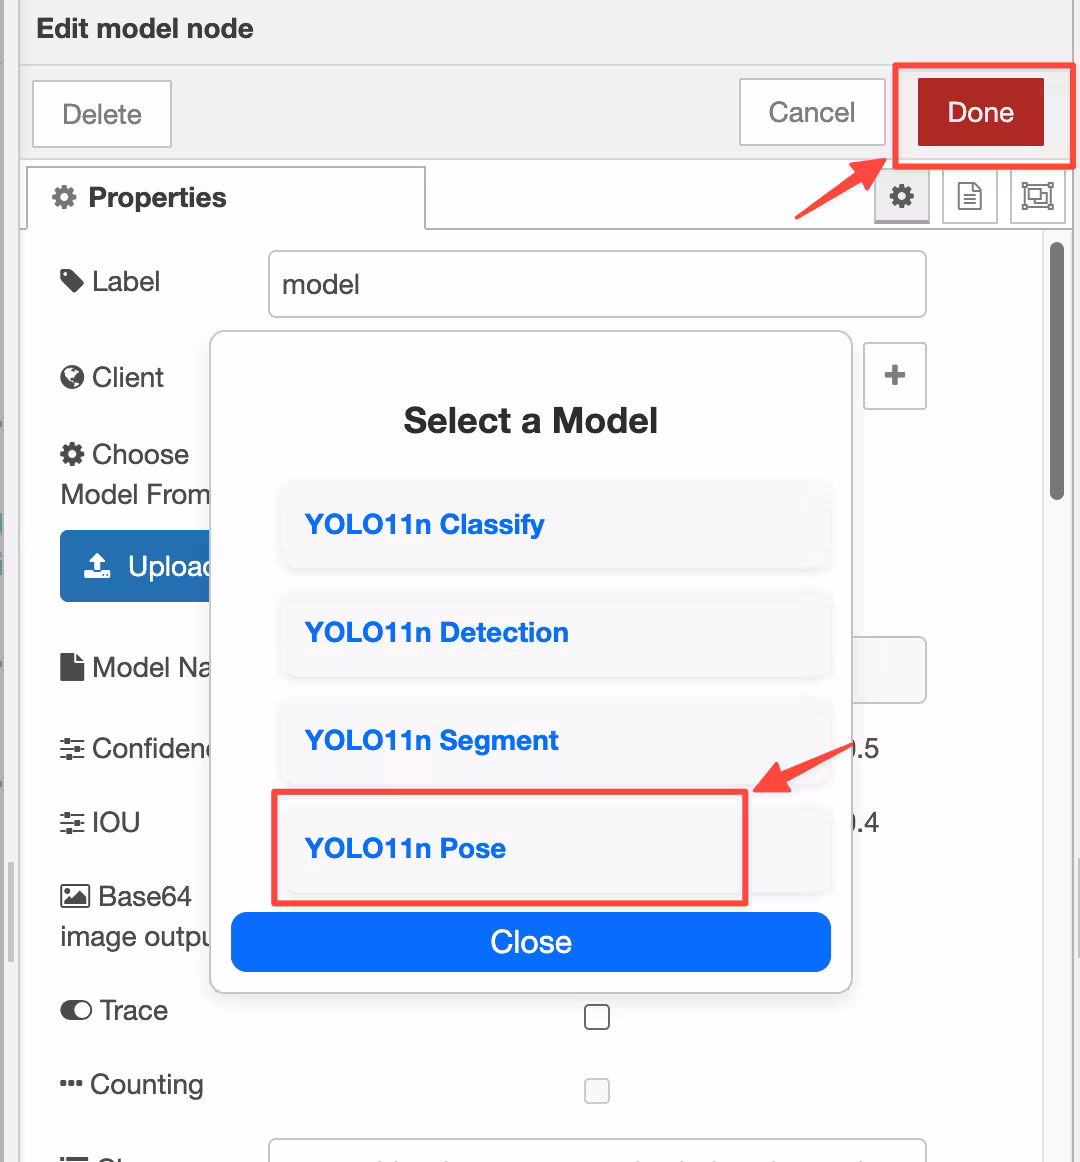
Step 5: Click Deploy and when it finishes deploying, click Dashboard.
Now you will be able to see YOLO26n pose estimation model in action!
Link to this sectionExport to cvimodel: Converting Your YOLO26 Model#
If you want to use a custom-trained YOLO26 model with reCamera, follow the steps below.
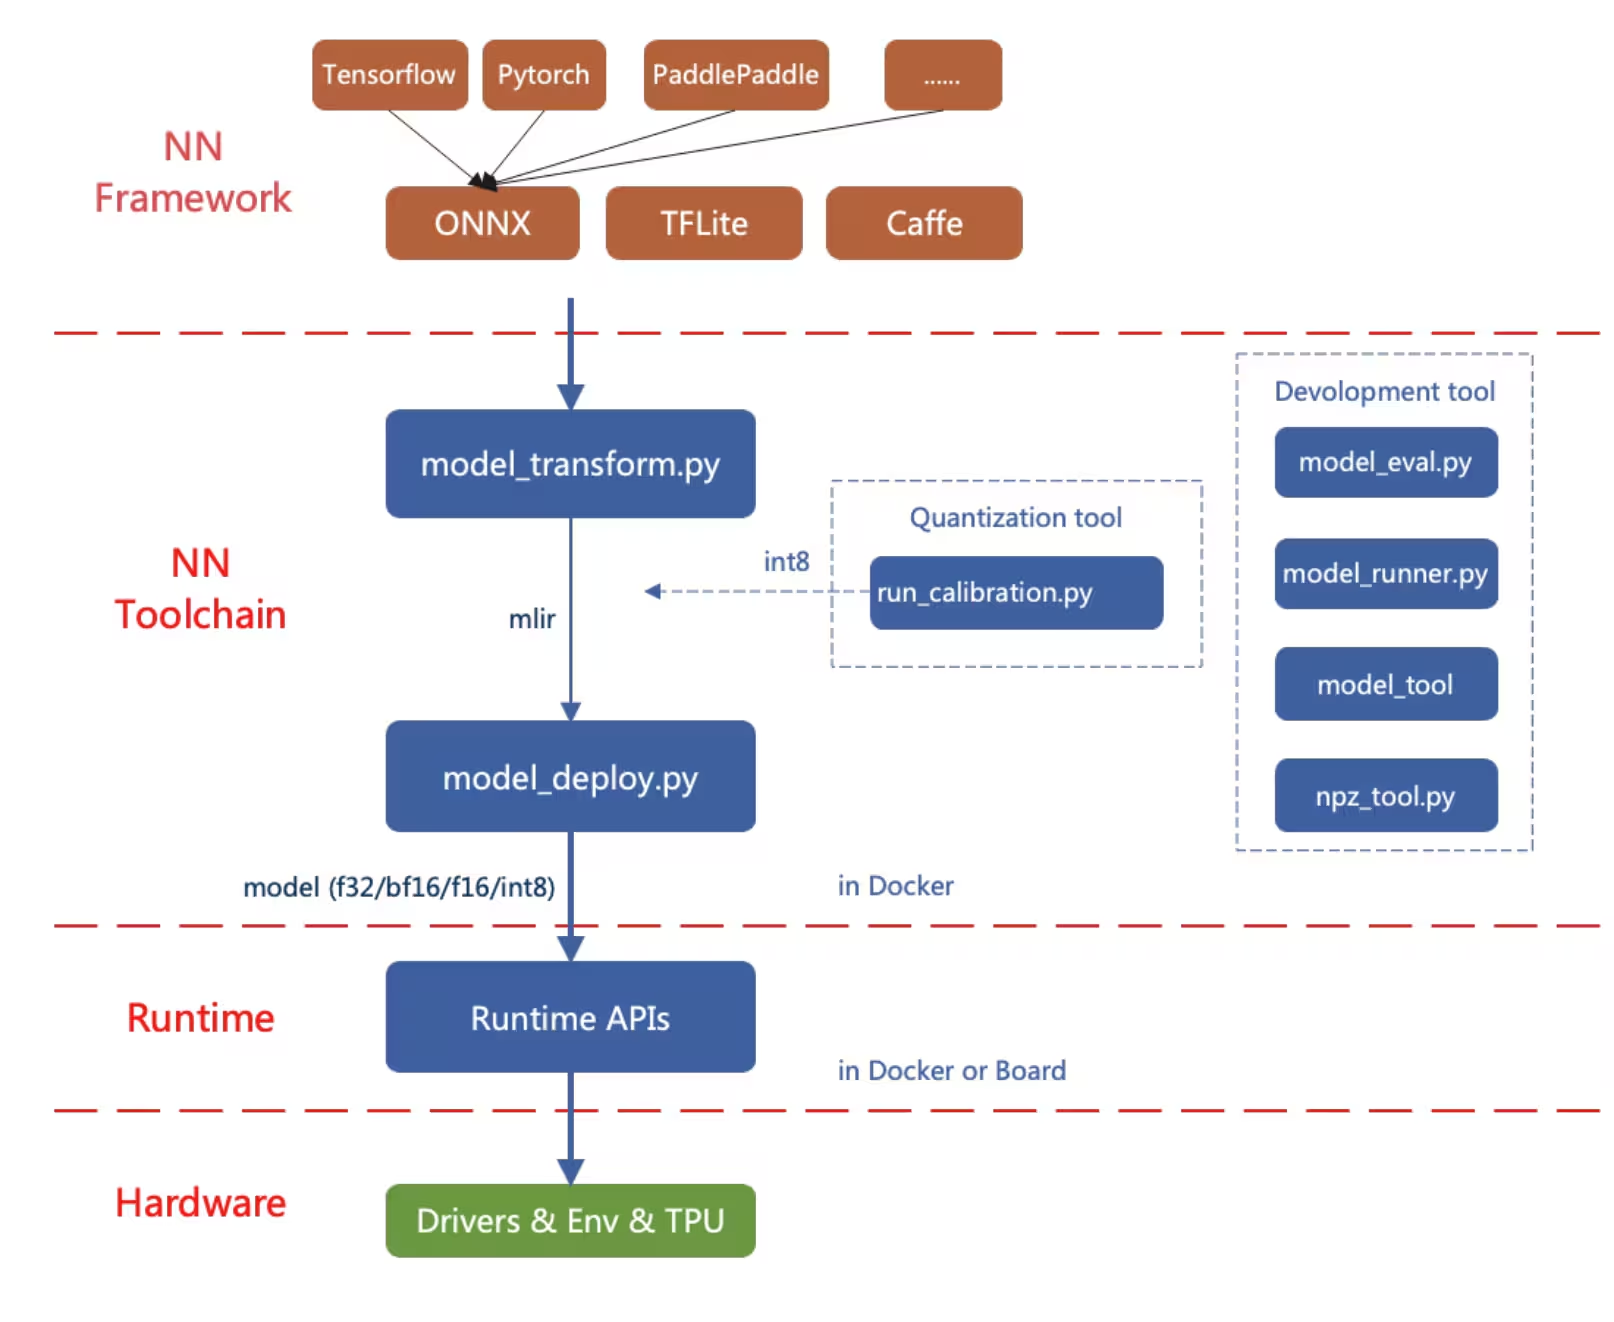
Here, we'll first convert a PyTorch model to ONNX and then convert it to the MLIR model format. Finally, MLIR will be converted to cvimodel to run inference on-device.
Link to this sectionExport to ONNX#
Export an Ultralytics YOLO26 model to ONNX model format.
Link to this sectionInstallation#
To install the required packages, run:
pip install ultralyticsFor detailed instructions and best practices related to the installation process, check our Ultralytics Installation guide. While installing the required packages for YOLO26, if you encounter any difficulties, consult our Common Issues guide for solutions and tips.
Link to this sectionUsage#
from ultralytics import YOLO

# Load a YOLO26 model
model = YOLO("yolo26n.pt")

# Export the model to ONNX format
model.export(format="onnx", opset=14)  # creates 'yolo26n.onnx'
For more details about the export process, visit the Ultralytics documentation page on exporting.
Link to this sectionExport ONNX to MLIR and cvimodel#
After obtaining an ONNX model, refer to Convert and Quantize AI Models page to convert the ONNX model to MLIR and then to cvimodel.
We're actively working on adding reCamera support directly into the Ultralytics package, and it will be available soon. In the meantime, check out our blog on Integrating Ultralytics YOLO Models with Seeed Studio's reCamera for more insights.
Link to this sectionBenchmarks#
Coming soon.
Link to this sectionReal-World Applications of reCamera#
reCamera advanced computer vision capabilities and modular design make it suitable for a wide range of real-world scenarios, helping developers and businesses tackle unique challenges with ease.
-
Fall Detection: Designed for safety and healthcare applications, the reCamera can detect falls in real-time, making it ideal for elderly care, hospitals, and industrial settings where rapid response is critical.
-
Personal Protective Equipment Detection: The reCamera can be used to ensure workplace safety by detecting PPE compliance in real-time. It helps identify whether workers are wearing helmets, gloves, or other safety gear, reducing risks in industrial environments.

-
Fire Detection: The reCamera's real-time processing capabilities make it an excellent choice for fire detection in industrial and residential areas, providing early warnings to prevent potential disasters.
-
Waste Detection: It can also be utilized for waste detection applications, making it an excellent tool for environmental monitoring and waste management.
-
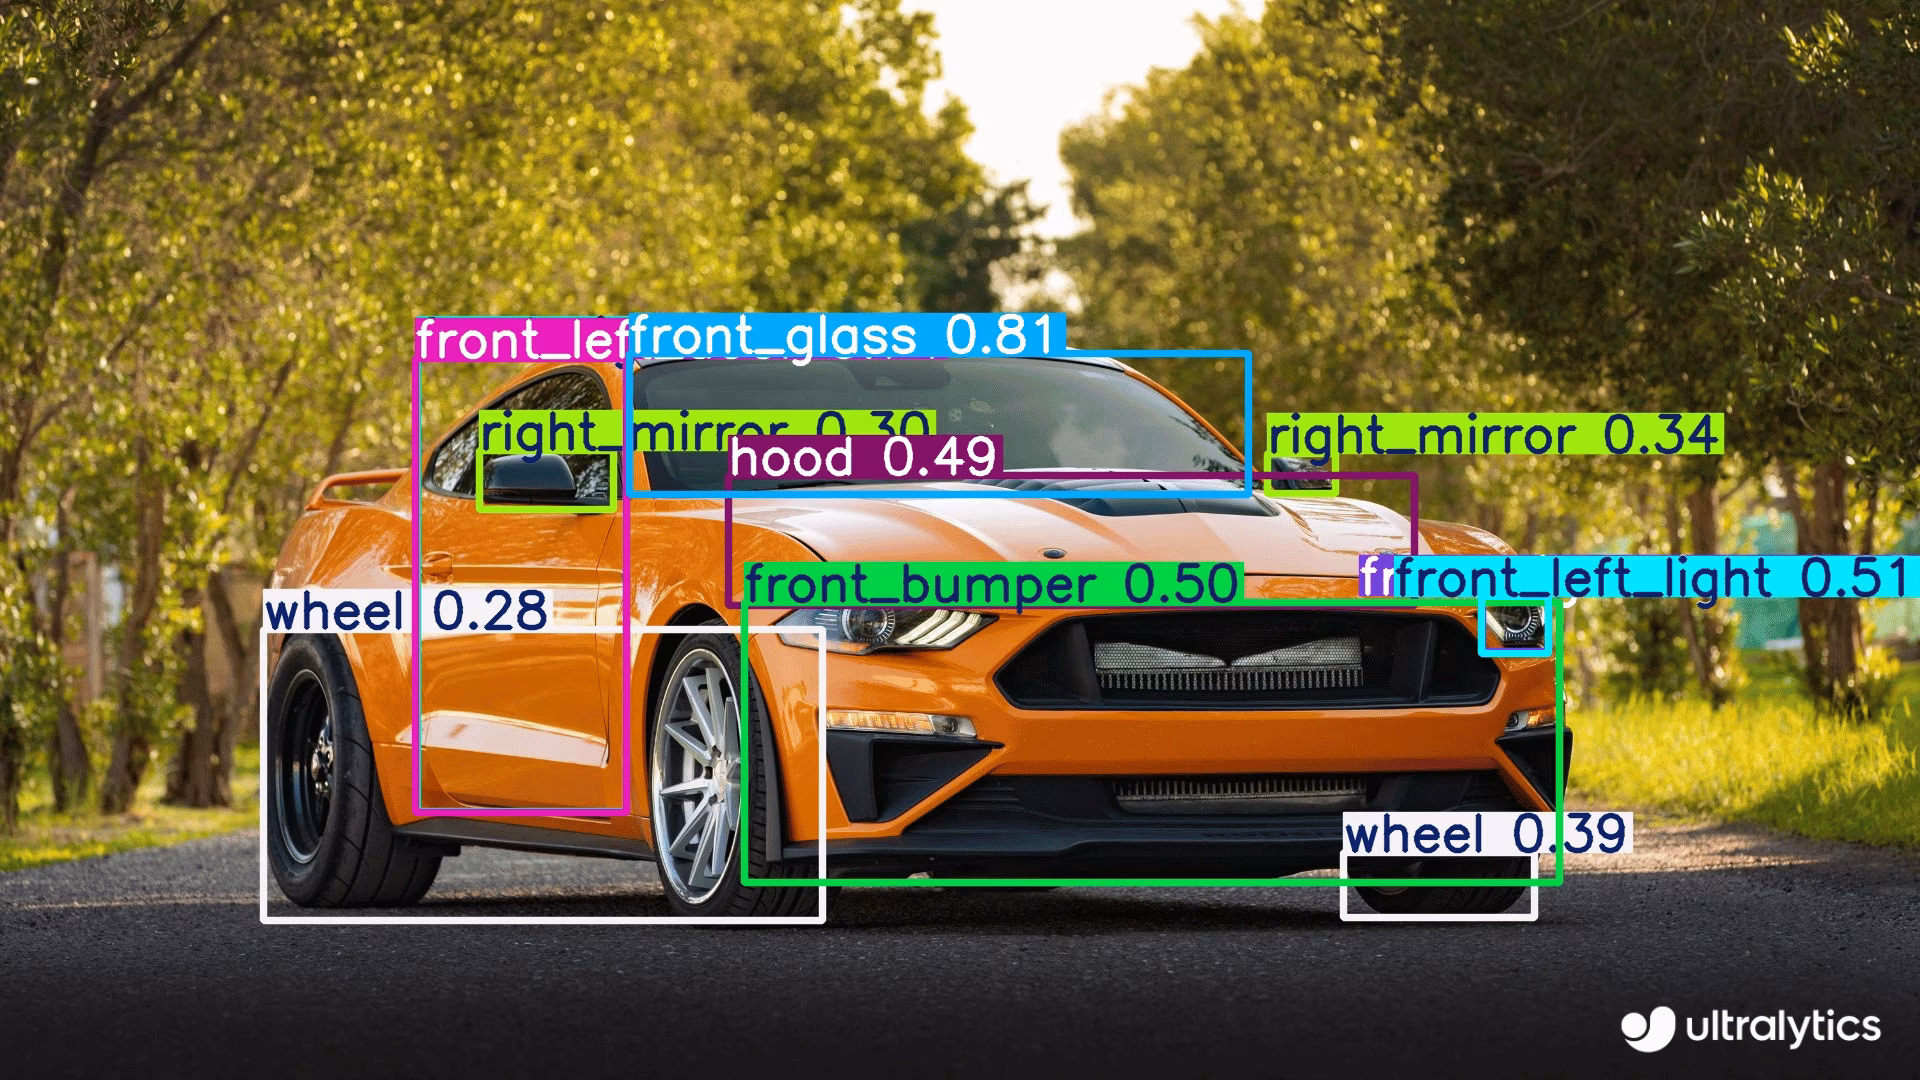
Car Parts Detection: In manufacturing and automotive industries, it aids in detecting and analyzing car parts for quality control, assembly line monitoring, and inventory management.
Link to this sectionFAQ#
Link to this sectionHow do I install and set up reCamera for the first time?#
To set up your reCamera for the first time, follow these steps:
- Connect the reCamera to a power source
- Connect it to your WiFi network using the reCamera Quick Start Guide
- Access the Node-RED web UI by entering the device's IP address in a web browser (or use
192.168.42.1if connected via USB) - Start using the pre-installed YOLO26 models immediately through the dashboard interface
Link to this sectionCan I use my custom-trained YOLO26 models with reCamera?#
Yes, you can use custom-trained YOLO26 models with reCamera. The process involves:
- Export your PyTorch model to ONNX format using
model.export(format="onnx", opset=14) - Convert the ONNX model to MLIR format
- Convert the MLIR to cvimodel format for on-device inference
- Load the converted model onto your reCamera
For detailed instructions, refer to the Convert and Quantize AI Models guide.
Link to this sectionWhat makes reCamera different from traditional IP cameras?#
Unlike traditional IP cameras that require external hardware for processing, reCamera:
- Integrates AI processing directly on the device with its RISC-V SG200X processor
- Offers 1 TOPS of computing power for real-time edge AI applications
- Features a modular design allowing for component upgrades and customization
- Supports advanced video technologies like H.264/H.265 compression, HDR imaging, and 3D noise reduction
- Comes pre-installed with Ultralytics YOLO26 models for immediate use
These features make reCamera a standalone solution for edge AI applications without requiring additional external processing hardware.