Come isolare gli oggetti segmentati con Ultralytics YOLO
La segmentazione di istanze produce una maschera precisa a livello di pixel per ogni oggetto rilevato, permettendoti di estrarre ogni singolo oggetto dall'immagine. Questa guida mostra come trasformare i risultati di segmentazione di Ultralytics YOLO in oggetti isolati usando la modalità Predict e OpenCV, con uno sfondo nero uniforme o trasparente per salvare l'immagine in formato PNG.
Guarda: Come isolare gli oggetti segmentati con Ultralytics YOLO26 | Tutorial Python | VisionAI 🚀
Perché isolare gli oggetti segmentati?#
Estrarre i singoli oggetti da un'immagine apre la strada a diversi flussi di lavoro successivi:
- Rimozione dello sfondo per foto di prodotti, cataloghi o modifiche creative.
- Ritagli per singolo oggetto per creare dataset di classificazione a partire dai rilevamenti.
- Elaborazione mirata, affinché le fasi successive, come OCR, analisi del colore o misurazione, considerino solo l'oggetto e non la scena circostante.
- Esportazione PNG trasparente per sovrapporre gli oggetti a nuovi sfondi.
La procedura funziona con qualsiasi modello di segmentazione Ultralytics YOLO e si articola in quattro fasi: esegui l'inferenza → estrai ogni contorno → isola l'oggetto → salva il risultato.
Esegui l'inferenza di segmentazione#
Installa le librerie richieste, quindi carica un modello di segmentazione come YOLO26n-seg (il suffisso -seg è necessario per generare le maschere) ed esegui la predizione sull'immagine sorgente:
from ultralytics import YOLO

# Carica un modello di segmentazione
model = YOLO("yolo26n-seg.pt")

# Esegui l'inferenza su una sorgente
results = model.predict(source="path/to/image.jpg")Se chiami model.predict() senza un source, Ultralytics usa le immagini di esempio incluse nel pacchetto (bus.jpg e zidane.jpg), una soluzione pratica per testare rapidamente il flusso di lavoro.
Estrai i contorni degli oggetti#
Ogni elemento in results corrisponde a un'immagine e scorrere un risultato restituisce un rilevamento alla volta. Per ogni rilevamento, copia l'immagine originale, leggi l'etichetta della classe e disegna il contorno della maschera dell'oggetto su una maschera binaria vuota. La regione bianca della maschera indica esattamente quali pixel appartengono all'oggetto.
Gli snippet di questa sezione e della successiva vengono eseguiti all'interno del ciclo di rilevamento qui sotto; lo script completo, pronto da copiare e incollare, si trova in Esempio completo.
from pathlib import Path

import cv2
import numpy as np

for r in results:
    img = np.copy(r.orig_img)
    img_name = Path(r.path).stem  # nome base dell'immagine sorgente

    # Itera su ogni oggetto rilevato nell'immagine
    for ci, c in enumerate(r):
        label = c.names[c.boxes.cls.tolist().pop()]  # nome della classe

        # Crea una maschera binaria e disegnaci sopra il contorno dell'oggetto
        b_mask = np.zeros(img.shape[:2], np.uint8)
        contour = c.masks.xy[0].astype(np.int32).reshape(-1, 1, 2)
cv2.drawContours(b_mask, [contour], -1, (255, 255, 255), cv2.FILLED)c.masks.xy[0]restituisce il contorno della maschera come coordinate dei punti(x, y)dell'oggetto in questo risultato con un singolo rilevamento..astype(np.int32)converte i punti difloat32, chedrawContours()di OpenCV non accetta..reshape(-1, 1, 2)rimodella i punti nel formato[N, 1, 2]previsto dadrawContours(), doveNè il numero di punti del contorno.
Passare [contour] con l'indice -1 disegna tutti i punti del contorno fornito, mentre cv2.FILLED riempie di bianco ogni pixel racchiuso.
Isola l'oggetto#
Una volta pronta la maschera binaria, combinala con l'immagine originale. Puoi scegliere tra due modalità comuni, a seconda dello sfondo desiderato:
Converti la maschera in tre canali e mantieni solo i pixel che si sovrappongono all'oggetto. Tutto ciò che si trova fuori dal contorno diventa nero:
# Isola l'oggetto con uno sfondo nero
mask3ch = cv2.cvtColor(b_mask, cv2.COLOR_GRAY2BGR)
isolated = cv2.bitwise_and(mask3ch, img)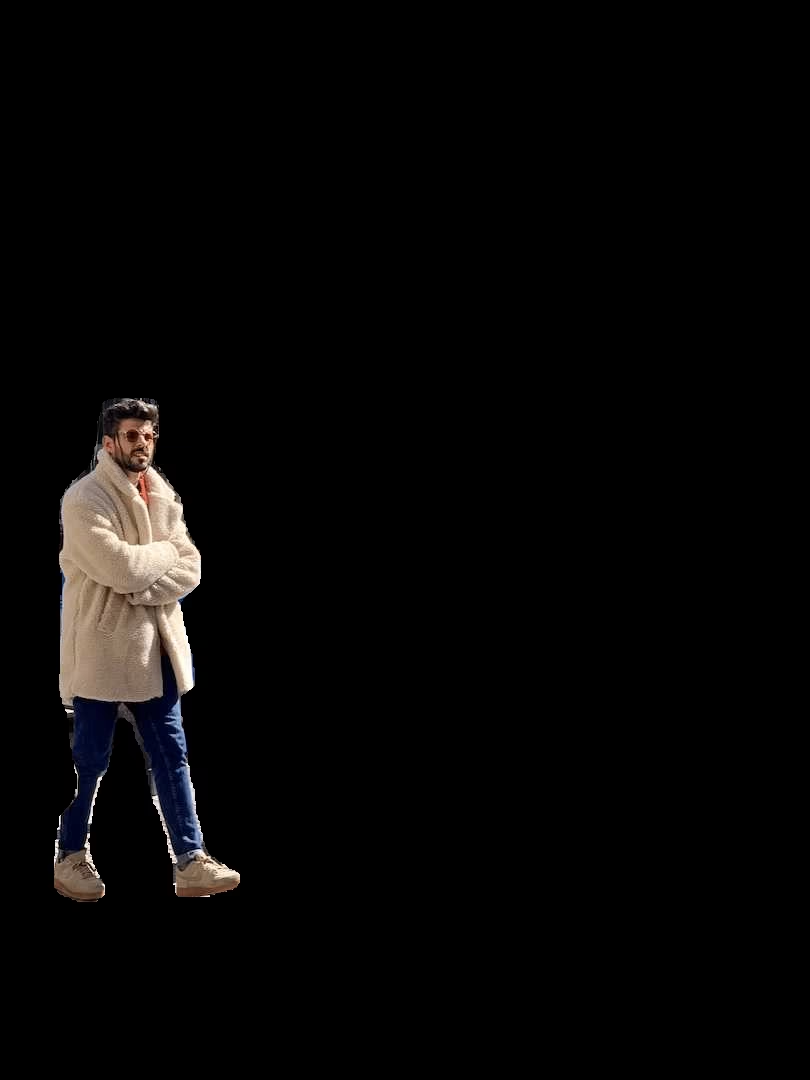
Per mantenere solo la regione dell'oggetto invece dell'immagine a dimensione intera, ritagliala sul riquadro di delimitazione del rilevamento:
# Coordinate del riquadro di delimitazione
x1, y1, x2, y2 = c.boxes.xyxy.cpu().numpy().squeeze().astype(np.int32)
# Ritaglia l'immagine isolata per mantenere la regione dell'oggetto
iso_crop = isolated[y1:y2, x1:x2]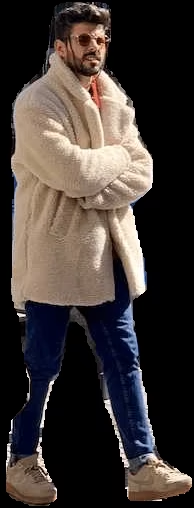
La funzione è integrata. Passa save_crop=True a predict() e Ultralytics salverà automaticamente i ritagli dei riquadri di delimitazione, senza bisogno di maschere.
Salva il risultato (facoltativo)#
Decidi tu cosa fare con ogni oggetto isolato. Un passaggio successivo comune consiste nello scriverlo su disco per utilizzarlo in seguito:
# Save the isolated object to file
cv2.imwrite(f"{img_name}_{label}-{ci}.png", isolated)
Qui img_name è il nome base dell'immagine sorgente, label è il nome della classe e ci è l'indice del rilevamento, così le diverse istanze della stessa classe ottengono nomi di file univoci. Sostituisci isolated con iso_crop se hai applicato il ritaglio facoltativo descritto sopra.
Esempio completo#
Lo script qui sotto riunisce tutti i passaggi in un unico blocco eseguibile. Per impostazione predefinita usa uno sfondo nero; modifica l'unica riga contrassegnata impostando np.dstack([img, b_mask]) per ottenere invece un PNG trasparente:
from pathlib import Path

import cv2
import numpy as np

from ultralytics import YOLO

model = YOLO("yolo26n-seg.pt")
results = model.predict(source="path/to/image.jpg")

for r in results:
    img = np.copy(r.orig_img)
    img_name = Path(r.path).stem

    for ci, c in enumerate(r):
        label = c.names[c.boxes.cls.tolist().pop()]

        # Build a binary mask from the object contour
        b_mask = np.zeros(img.shape[:2], np.uint8)
        contour = c.masks.xy[0].astype(np.int32).reshape(-1, 1, 2)
        cv2.drawContours(b_mask, [contour], -1, (255, 255, 255), cv2.FILLED)

        # Isolate the object (black background)
        mask3ch = cv2.cvtColor(b_mask, cv2.COLOR_GRAY2BGR)
        isolated = cv2.bitwise_and(mask3ch, img)  # transparent PNG: isolated = np.dstack([img, b_mask])

        # Save or add your custom post-processing here
        cv2.imwrite(f"{img_name}_{label}-{ci}.png", isolated)

        # Optional: crop to the bounding box before saving
        # x1, y1, x2, y2 = c.boxes.xyxy.cpu().numpy().squeeze().astype(np.int32)
        # cv2.imwrite(f"{img_name}_{label}-{ci}.png", isolated[y1:y2, x1:x2])
Se vuoi riutilizzarlo, racchiudi il corpo del ciclo in una funzione per poterla chiamare su molte immagini.
Conclusione#
Ora hai una procedura completa per isolare gli oggetti segmentati con Ultralytics YOLO: esegui l'inferenza, crea una maschera binaria a partire da ogni contorno, quindi estrai l'oggetto su uno sfondo nero o trasparente e, facoltativamente, ritaglialo sul relativo riquadro di delimitazione. Consulta la documentazione completa di Attività di segmentazione e Modalità Predict per adattare il flusso di lavoro alle tue classi.
Domande frequenti#
Carica un modello di segmentazione, esegui l'inferenza, crea una maschera binaria a partire dal contorno di ogni rilevamento e combinala con l'immagine originale:
import cv2
import numpy as np

from ultralytics import YOLO

model = YOLO("yolo26n-seg.pt")
results = model.predict(source="path/to/your/image.jpg")

img = np.copy(results[0].orig_img)
b_mask = np.zeros(img.shape[:2], np.uint8)
contour = results[0].masks.xy[0].astype(np.int32).reshape(-1, 1, 2)
cv2.drawContours(b_mask, [contour], -1, (255, 255, 255), cv2.FILLED)

mask3ch = cv2.cvtColor(b_mask, cv2.COLOR_GRAY2BGR)
isolated = cv2.bitwise_and(mask3ch, img)
Consulta l'Esempio completo per vedere il ciclo completo per ogni rilevamento.
Ci sono due modalità principali. Per uno sfondo nero, converti la maschera in tre canali e usa
cv2.bitwise_and(). Per uno sfondo trasparente (quando salvi come PNG), aggiungi la maschera come quarto canale alfa connp.dstack([img, b_mask]). Entrambe le modalità sono illustrate in Isola l'oggetto.Leggi le coordinate del riquadro di delimitazione dal rilevamento e ritaglia l'immagine isolata:
x1, y1, x2, y2 = results[0].boxes.xyxy[0].cpu().numpy().astype(np.int32)
iso_crop = isolated[y1:y2, x1:x2]
Scopri di più sui risultati dei riquadri di delimitazione nella documentazione della modalità Predict.
Ultralytics YOLO offre una segmentazione delle istanze rapida e in tempo reale, con generazione accurata di maschere e riquadri di delimitazione, oltre a una semplice API Python che trasforma i risultati dell'inferenza in oggetti isolati con poche righe di codice OpenCV.
Sì. Usa l'argomento
save_cropinpredict()per salvare i ritagli dei riquadri di delimitazione con lo sfondo originale:results = model.predict(source="path/to/your/image.jpg", save_crop=True)Leggi di più nella sezione Argomenti di inferenza della modalità di previsione.


Commenti16
Fai una domanda, condividi i tuoi risultati o aiuta qualcun altro.
cordonballas
wow thanx that's exactly what i've been looking for.
 Glenn JocherUltralytics
@cordonballas thank you for your positive feedback! We're glad the segmentation isolation guide was helpful. If you have any further questions, feel free to ask—the YOLO community and our team are here to help. 😊
For continued support, check our Segment Task documentation and Predict Mode guide.
AbdulGhofur23
How can I extract a mask from a TIFF (Tag Image File Format) so that the mask's coordinates align with the projection of the TIFF image?
- Glenn JocherUltralytics
To extract masks from a TIFF image while aligning the mask's coordinates with the image's projection, you can use the segmentation results from Ultralytics YOLO. Generate the mask using
results.masks.xyfor contour points and overlay it on the TIFF image. Ensure alignment by maintaining the original image dimensions during processing. For more, refer to the Isolating Segmentation Objects Guide. Let us know if you need further assistance!1
vedhanayagan9626
I used yolo v11n seg model , i got a segmented image as output with bounding boxes in those some of predictions are overlapped like a bounding box on two items as single so i try to remove a rectangle and associated segmentation from an image and add new rectangle by hold and drag functionality its looks likw working but i cant get optimized result. Is there any way to remove and add new bounding boxes after a segmentation result?
- Glenn JocherUltralytics
@vedhanayagan9626 to address overlapping predictions, you can manually refine results by manipulating masks and bounding boxes post-inference. Use the mask and bounding box coordinates from
results[0].masksandresults[0].boxesto remove or modify specific predictions. For new bounding boxes, you might need to create and integrate them into your results structure manually. Refer to the Isolating Segmentation Objects guide for detailed steps. For optimized results, ensure adequate data quality and model tuning.
SerhiiPostupaiev
Hello, can you please explain how the YOLOv8 performs upscaling? For example, my input images are 854x480, YOLOv8 scales them up to 864x512. How does it exactly performs upscaling? Does it use padding or some other approaches?
 Paula DerrengerUltralytics
@SerhiiPostupaiev hello! In YOLOv8, images are scaled up or down to a specific model input size, optimally a square format (like 640x640) or a dimension supported by the model (such as 864x512 in your case). The upscaling for images that do not exactly match the input dimensions typically involves:
- Resizing the image to the closest dimension that maintains the aspect ratio.
- Padding the resized image to reach the required input size, ensuring that the aspect ratio is preserved.
For instance, for an image of 854x480, YOLOv8 may:
- Resize the image to fit the model's width of 864 while maintaining the aspect ratio, which adjusts the height accordingly.
- Pad the height to the nearest model-supported dimension (like 512), adding pixel values (usually zeros) to the top and bottom or sides of the image to reach the required size.
Here’s a rough example in Python using OpenCV for how padding might be handled:
import cv2
import numpy as np

# Example image load
image = cv2.imread('input.jpg')
# Resizing the image
resized_image = cv2.resize(image, (864, keep_aspect_ratio_height))  # Example variable for illustration

# Padding the resized image
top_padding = (512 - resized_image.shape[0]) // 2
bottom_padding = 512 - resized_image.shape[0] - top_padding
padded_image = cv2.copyMakeBorder(resized_image, top_padding, bottom_padding, 0, 0, cv2.BORDER_CONSTANT, value=[0, 0, 0])
This ensures the entire image is used during prediction without distorting its original aspect ratio. 😊
EnricoMendez
Hello, I run this code example but it only display one object's mask, is it posible to join all the objects' masks in a single frame?
- Glenn JocherUltralytics
Hey there! 😊 Absolutely, you can combine all the objects' masks into a single frame. Just modify the section where you're drawing the contours onto the mask. Instead of creating a new binary mask
b_maskfor each object, you initialize one common mask before iterating through the objects and draw every object's contour on this common mask. Here's a quick example to illustrate:# Initialize one common binary mask for all objects b_mask_all = np.zeros(img.shape[:2], np.uint8) for ci, c in enumerate(r): # Your contour extraction remains the same contour = c.masks.xy.pop().astype(np.int32).reshape(-1, 1, 2) # Draw each contour onto the common mask cv2.drawContours(b_mask_all, [contour], -1, (255, 255, 255), cv2.FILLED) # After the loop, you can use `b_mask_all` which contains all objects' masksJust keep in mind, with
b_mask_all, you'll have all the detected objects' masks on one mask. If the objects overlap in your image, their masks will also overlap inb_mask_all. Hope this helps! Let us know if you have more questions. 😊
mariamg03
hi is there a way I can apply the edits on the binary image then revert back to the original with the mask part edited?
- Paula DerrengerUltralytics
Hey there! 👋 Yes, you can certainly make edits on a binary mask and then apply those changes back to the original image, essentially modifying only the parts that the mask covers. Here's a quick outline of how you could achieve this with an example focusing on segmentation tasks:
-
After segmenting your image and obtaining the binary mask (let's say
b_mask), you can perform any edits you like on this mask. For example, inverting the mask, dilating, or eroding. -
To apply the edited mask back to the original image (
orig_img), you would use the mask to isolate the area of interest in the original image and then apply your edits.
Here's a code snippet demonstrating this with a simple inversion edit:
import cv2
import numpy as np

# Assuming 'b_mask' is your binary mask and 'orig_img' is your original image
# Let's say you inverted the binary mask
edited_mask = 255 - b_mask  # Inverting mask

# Convert the single channel binary mask to a 3 channel mask to match the original image
edited_mask_3ch = cv2.cvtColor(edited_mask, cv2.COLOR_GRAY2BGR)

# Apply the edited mask back to the original image
# This line performs bitwise-and operation to only keep parts of the image where the mask is white
edited_image = cv2.bitwise_and(orig_img, edited_mask_3ch)

# At this point, 'edited_image' contains the original image with edits applied to the segmented part
This is a simplified example to show the concept. Depending on the edits you've made to
b_mask, you might need to adjust how you applyedited_maskback toorig_img.Remember, after editing the mask, you can always revert it back to its original form if you've kept a copy before editing, or you can apply the inverse of your edits.
I hope this helps! Let me know if you have more questions. Happy coding! 😊
-
Safiislamian
Hi sir, thanku for your response does load dataset will work or not. As the dataset is in yolo form where we have different folders and subfolders like train having images and labels etc
On Wed, Mar 27, 2024, 7:03 AM Glenn Jocher @.***> wrote:
Hey there! 👋 Glad to see you're interested in applying YOLOv8 for instance segmentation with a dataset from Roboflow. Below is a quick guide to help you get started with applying YOLOv8 for detection and then using masks for the dataset based on class. Step 1: Install Ultralytics YOLO
First, ensure you have Ultralytics installed:
pip install ultralytics
Step 2: Load Your Model
from ultralytics import YOLOmodel = YOLO('yolov8n-seg.pt') # Use yolov8n-seg.pt for segmentation models
Step 3: Predict and Isolate Objects
Now, for predicting and isolating objects based on their classes, you'll dive into the prediction results to access and manipulate the segmentation masks:
results = model.predict(source='path/to/your/dataset')for result in results: for detection in result: class_name = detection.names[detection.boxes.cls.tolist().pop()] # Create a binary mask from detection binary_mask = np.zeros(result.orig_img.shape[:2], np.uint8) contour = detection.masks.xy.pop().astype(np.int32).reshape(-1, 1, 2) cv2.drawContours(binary_mask, [contour], -1, (255, 255, 255), cv2.FILLED) # Example to save or further process the mask
Note: Replace 'path/to/your/dataset' with the actual path to your images. Step 4: Saving or Processing the Masks
You may wish to save each mask based on its class for processing later. You can modify the loop to save each binary mask to a file using cv2.imwrite() method.
cv2.imwrite(f'{class_name}_mask.jpg', binary_mask)
This will save each mask with its respective class name as part of the filename, allowing for easy organization by class.
Hope this helps! 😊 Let us know if you need further assistance or have more questions. Happy coding!
— Reply to this email directly, view it on GitHub https://github.com/orgs/ultralytics/discussions/9334#discussioncomment-8922405, or unsubscribe https://github.com/notifications/unsubscribe-auth/AUP75TG3RFWAL7YRMWDR66DY2ILE5AVCNFSM6AAAAABFJ334B2VHI2DSMVQWIX3LMV43SRDJONRXK43TNFXW4Q3PNVWWK3TUHM4DSMRSGQYDK . You are receiving this because you commented.Message ID: @.*** com>
- Paula DerrengerUltralytics(modificato)
Hi there! 😄
Absolutely, loading a dataset structured in YOLO format (with separate folders for train/test images and labels) works well with YOLO26. You can specify the dataset structure in a YAML file and provide this file when initiating training or validation processes. Here's an example
data.yamlfile structure for your dataset:train: /path/to/dataset/train/images # path to images folder val: /path/to/dataset/val/images # path to validation images # Classes nc: 80 # number of classes names: ['class1', 'class2', ...] # class namesAnd here's how you might start training with your dataset:
yolo detect train data=data.yaml model=yolo26n.ptMake sure to replace
/path/to/dataset/train/imagesand/path/to/dataset/val/imageswith the actual paths to your dataset and similarly update thenc(number of classes) andnames(class labels) accordingly.If you have any more questions or need further assistance, feel free to ask. Happy to help! 🚀
There is a dataset on roboflow for instance segmentation, i want to apply first yolov8 and then masks for all the dataset arranged on the basis of their classes. please provide me details and code for that Thank you...
- Glenn JocherUltralytics(modificato)
Hey there! 👋 Glad to see you're interested in applying YOLO26 for instance segmentation with a dataset from Roboflow. Below is a quick guide to help you get started with applying YOLO26 for detection and then using masks for the dataset based on class.
Step 1: Install Ultralytics YOLO
First, ensure you have Ultralytics installed:
pip install ultralyticsStep 2: Load Your Model
from ultralytics import YOLO
model = YOLO('yolo26n-seg.pt')  # Use yolo26n-seg.pt for segmentation models
Step 3: Predict and Isolate Objects
Now, for predicting and isolating objects based on their classes, you'll dive into the prediction results to access and manipulate the segmentation masks:
results = model.predict(source='path/to/your/dataset')
for result in results:
    for detection in result:
        class_name = detection.names[detection.boxes.cls.tolist().pop()]
        # Create a binary mask from detection
        binary_mask = np.zeros(result.orig_img.shape[:2], np.uint8)
        contour = detection.masks.xy.pop().astype(np.int32).reshape(-1, 1, 2)
        cv2.drawContours(binary_mask, [contour], -1, (255, 255, 255), cv2.FILLED)
        # Example to save or further process the mask
Note: Replace
'path/to/your/dataset'with the actual path to your images.Step 4: Saving or Processing the Masks
You may wish to save each mask based on its class for processing later. You can modify the loop to save each binary mask to a file using
cv2.imwrite()method.cv2.imwrite(f'{class_name}_mask.jpg', binary_mask)This will save each mask with its respective class name as part of the filename, allowing for easy organization by class.
Hope this helps! 😊 Let us know if you need further assistance or have more questions. Happy coding!