VisDroneデータセット
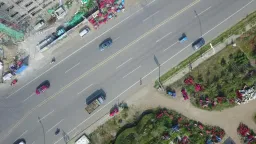
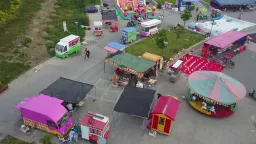
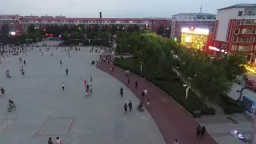
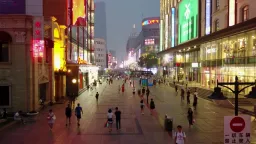
VisDroneデータセットは、大規模なドローン画像ベンチマークです。その検出サブセット(VisDrone2019-DET)は、物体検出用に10種類の物体クラスがアノテーションされた航空画像を8,629枚提供しており、その内訳はトレーニング用6,471枚、検証用548枚、test-dev用1,610枚です。中国の天津大学にある機械学習・データマイニング研究室のAISKYEYEチームが作成しました。
視聴: VisDrone データセットで Ultralytics YOLO をトレーニングする方法 | 空撮検出 | 完全ガイド 🚀
VisDroneベンチマーク全体は、動画クリップ288本(261,908フレーム)と静止画像10,209枚で構成されます。これらは、中国の14都市で、都市部と農村部、まばらな場面と混雑した場面、さまざまな天候や照明条件のもと、ドローン搭載カメラで撮影されました。フレームには260万件を超える手動アノテーション済みのバウンディングボックスが付与され、シーンの視認性、物体クラス、遮蔽などの属性も含まれています。UltralyticsのVisDrone.yaml設定では、このベンチマークの静止画像サブセットであるVisDrone2019-DETを使用します。
主な機能#
- 小さく密集した物体:航空視点では対象物が非常に小さく、密集します。検証用画像548枚だけでもラベル付きボックスが38,759個あり、1枚あたり平均約70個の物体が含まれています。
- シーンの多様性:中国の14都市の画像を含み、都市部と農村部、昼夜、さまざまな天候条件を網羅しています。
- 豊富なアノテーション:ベンチマーク全体で260万個を超えるボックスがあり、遮蔽や視認性の属性も含まれています。
- 事前定義された分割:一貫した評価のため、トレーニング/検証/test-devの分割(画像6,471枚/548枚/1,610枚)が固定されています。
データセットの構成#
UltralyticsのVisDrone設定では、VisDrone2019-DETの画像サブセットを次の3つに分割して使用します。
| 分割 | 画像 | 説明 |
|---|---|---|
| 学習 | 6,471 | 検出器のトレーニングに使用するラベル付き航空画像 |
| 検証 | 548 | 開発中の評価に使用する画像 |
| Test-dev | 1,610 | トレーニング済みモデルの最終評価に使用するホールドアウト画像 |
4つ目の分割であるtest-challenge(画像1,580枚)はVisDroneコンペティション用に非公開となっており、ダウンロードされません。そのため、DETセット全体の画像数は10,209枚です。
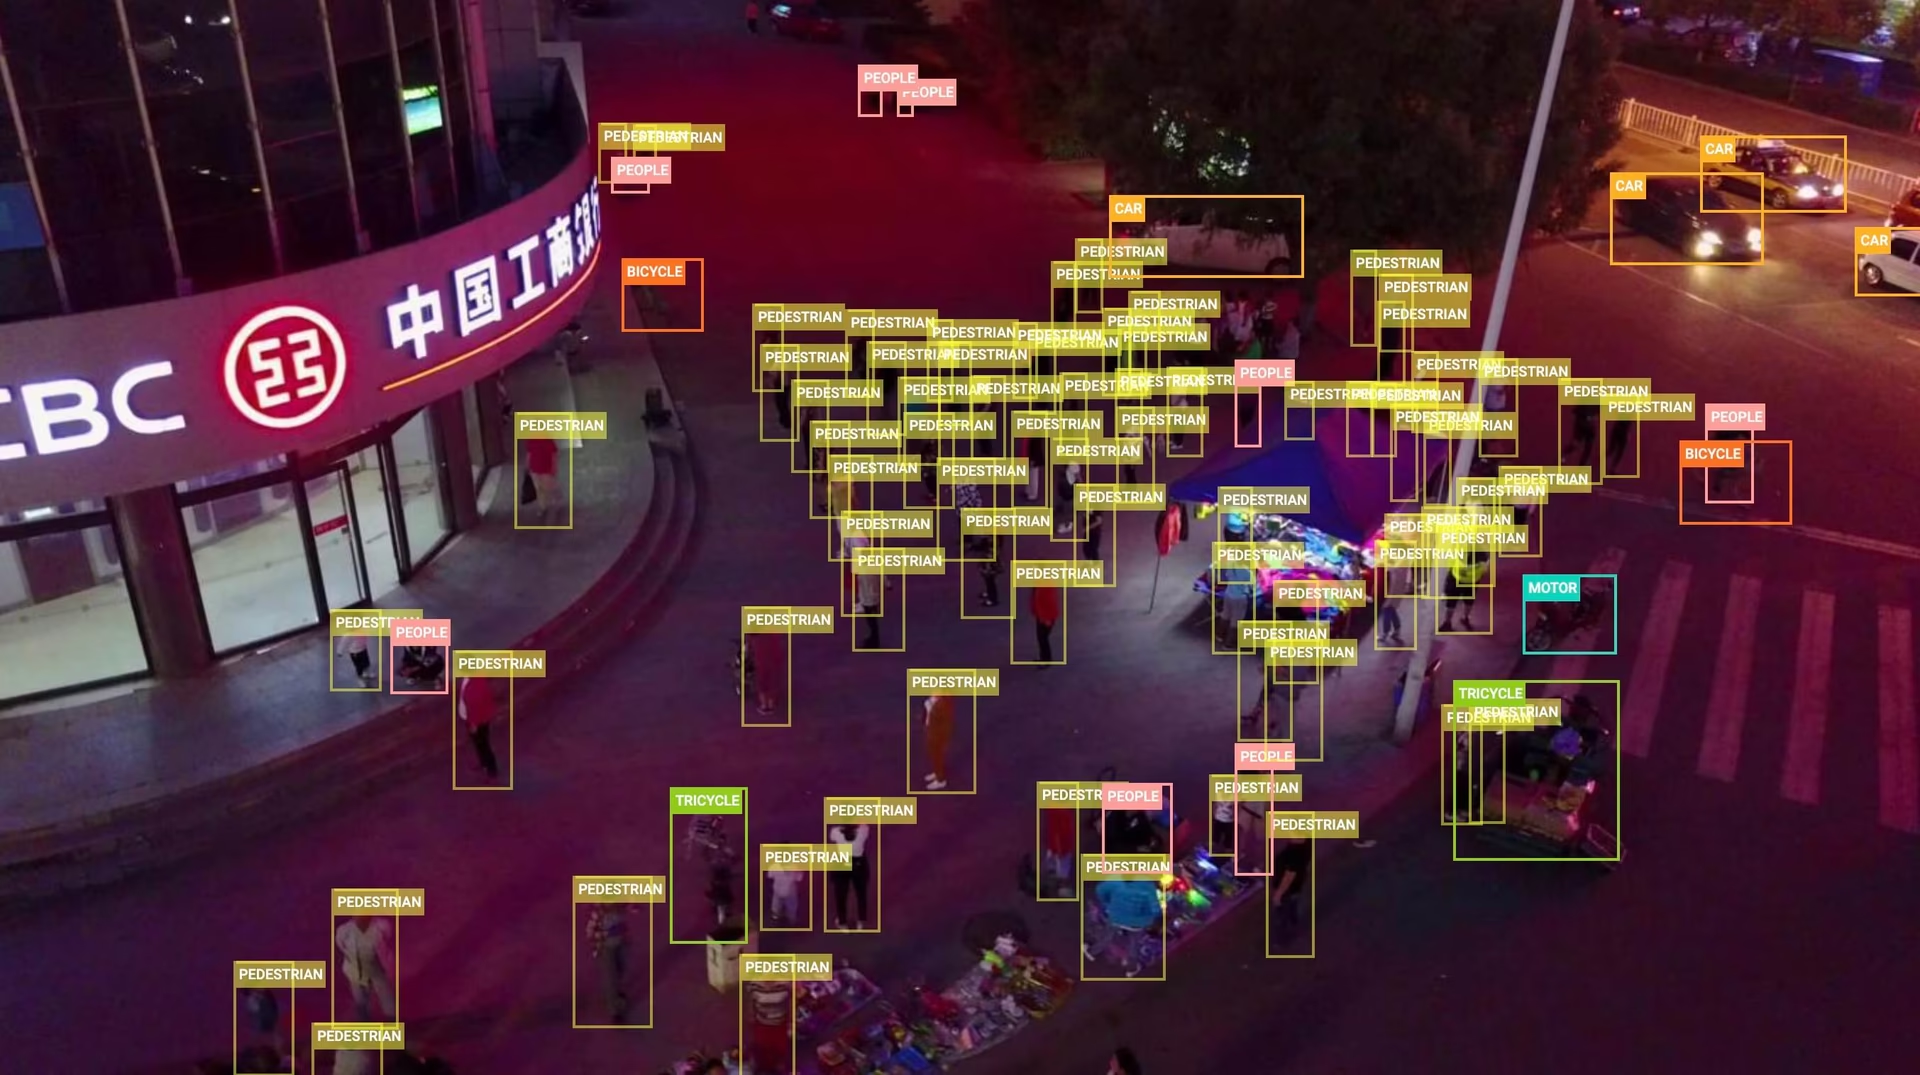
データセットでは、歩行者、人々、自転車、自動車、バン、トラック、三輪車、屋根付き三輪車、バス、バイクの10クラスにアノテーションを付けています。VisDroneでは、pedestrian(立っている、または歩いている人)とpeople(それ以外の姿勢の人)を区別します。
初回使用時に、ダウンロードスクリプトがVisDroneの元のアノテーションをYOLO形式に変換し、無視対象として指定された領域をスキップします(これにより未使用の「others」カテゴリも除外されます)。
用途#
VisDroneの高密度なシーンと小さな対象物は、航空視点からの小物体検出における標準的なベンチマークとなっています。一般的なドローンコンピュータービジョンのアプリケーションには、次のようなものがあります。
- UAVからの交通監視と車両カウント
- 群衆分析と公共安全のための監視
- インフラや建設現場の点検
- 複雑なシーンにおける小物体検出のためのコンピュータビジョン研究
その他の航空画像ベンチマークについては、衛星画像に特化したxViewデータセットや、方向付きボックスを扱うDOTA-v2データセットをご覧ください。
データセットYAML#
VisDrone.yamlファイルでは、データセットのパス、クラス名、自動ダウンロード・変換スクリプトなど、データセット設定を定義します。このファイルはUltralyticsリポジトリのhttps://github.com/ultralytics/ultralytics/blob/main/ultralytics/cfg/datasets/VisDrone.yamlで管理されています。
# Ultralytics 🚀 AGPL-3.0 License - https://ultralytics.com/license

# VisDrone2019-DET dataset https://github.com/VisDrone/VisDrone-Dataset by Tianjin University
# Documentation: https://docs.ultralytics.com/datasets/detect/visdrone
# Example usage: yolo train data=VisDrone.yaml
# parent
# ├── ultralytics
# └── datasets
#     └── VisDrone ← downloads here (~2 GB)

# Train/val/test sets as 1) dir: path/to/imgs, 2) file: path/to/imgs.txt, or 3) list: [path/to/imgs1, path/to/imgs2, ..]
path: VisDrone # dataset root dir
train: images/train # train images (relative to 'path') 6471 images
val: images/val # val images (relative to 'path') 548 images
test: images/test # test-dev images (optional) 1610 images

# Classes
names:
  0: pedestrian
  1: people
  2: bicycle
  3: car
  4: van
  5: truck
  6: tricycle
  7: awning-tricycle
  8: bus
  9: motor

# Download script/URL (optional) ---------------------------------------------------------------------------------------
download: |
  import os
  from pathlib import Path
  import shutil

  from ultralytics.utils.downloads import download
  from ultralytics.utils import ASSETS_URL, TQDM

  def visdrone2yolo(dir, split, source_name=None):
      """Convert VisDrone annotations to YOLO format with images/{split} and labels/{split} structure."""
      from PIL import Image

      source_dir = dir / (source_name or f"VisDrone2019-DET-{split}")
      images_dir = dir / "images" / split
      labels_dir = dir / "labels" / split
      labels_dir.mkdir(parents=True, exist_ok=True)

      # Move images to new structure
      if (source_images_dir := source_dir / "images").exists():
          images_dir.mkdir(parents=True, exist_ok=True)
          for img in source_images_dir.glob("*.jpg"):
              img.rename(images_dir / img.name)

      for f in TQDM((source_dir / "annotations").glob("*.txt"), desc=f"Converting {split}"):
          img_size = Image.open(images_dir / f.with_suffix(".jpg").name).size
          dw, dh = 1.0 / img_size[0], 1.0 / img_size[1]
          lines = []

          with open(f, encoding="utf-8") as file:
              for row in [x.split(",") for x in file.read().strip().splitlines()]:
                  if row[4] != "0":  # Skip ignored regions
                      x, y, w, h = map(int, row[:4])
                      cls = int(row[5]) - 1
                      # Convert to YOLO format
                      x_center, y_center = (x + w / 2) * dw, (y + h / 2) * dh
                      w_norm, h_norm = w * dw, h * dh
                      lines.append(f"{cls} {x_center:.6f} {y_center:.6f} {w_norm:.6f} {h_norm:.6f}\n")

          (labels_dir / f.name).write_text("".join(lines), encoding="utf-8")

  # Download (ignores test-challenge split)
  dir = Path(yaml["path"])  # dataset root dir
  urls = [
      f"{ASSETS_URL}/VisDrone2019-DET-train.zip",
      f"{ASSETS_URL}/VisDrone2019-DET-val.zip",
      f"{ASSETS_URL}/VisDrone2019-DET-test-dev.zip",
      # f"{ASSETS_URL}/VisDrone2019-DET-test-challenge.zip",
  ]
  download(urls, dir=dir, threads=4)

  # Convert
  splits = {"VisDrone2019-DET-train": "train", "VisDrone2019-DET-val": "val", "VisDrone2019-DET-test-dev": "test"}
  for folder, split in splits.items():
      visdrone2yolo(dir, split, folder)  # convert VisDrone annotations to YOLO labels
shutil.rmtree(dir / folder) # cleanup original directory使用方法#
VisDroneは初回のトレーニング時に自動ダウンロードされます。3つのアーカイブの合計サイズは約2 GBで、展開と変換には約4 GBの空きディスク容量が必要です。
以下のコードスニペットを使用すると、VisDroneデータセットで画像サイズ640、100エポックの条件でYOLO26nモデルをトレーニングできます。
from ultralytics import YOLO

# モデルを読み込む
model = YOLO("yolo26n.pt")  # 事前トレーニング済みモデルを読み込みます(トレーニングにはこちらを推奨します)

# モデルをトレーニングします - データセットは初回実行時に自動ダウンロードされます
results = model.train(data="VisDrone.yaml", epochs=100, imgsz=640)航空画像にラベルを付けたり、ブラウザーでVisDroneのトレーニング実行を管理したりするには、Ultralytics Platformをご利用ください。
サンプルデータとアノテーション#
以下のサンプルは、混雑した道路を上空から捉えた、典型的なVisDroneのシーンを示しています。歩行者や車両は小さく密集した対象物として写り、互いに一部が隠れているものも多数あります。
引用と謝辞#
VisDroneデータセットを研究または開発に使用する場合は、次の論文を引用してください。
@ARTICLE{9573394,
  author={Zhu, Pengfei and Wen, Longyin and Du, Dawei and Bian, Xiao and Fan, Heng and Hu, Qinghua and Ling, Haibin},
  journal={IEEE Transactions on Pattern Analysis and Machine Intelligence},
  title={Detection and Tracking Meet Drones Challenge},
  year={2022},
  volume={44},
  number={11},
  pages={7380-7399},
doi={10.1109/TPAMI.2021.3119563}}VisDroneデータセットを作成・維持している、中国の天津大学にある機械学習・データマイニング研究所のAISKYEYEチームに感謝いたします。詳細については、VisDroneデータセットのGitHubリポジトリをご覧ください。
よくある質問#
VisDroneは、対象物が小さく密集し、上空から撮影されるドローン画像を使った検出器のトレーニングとベンチマークに使用されます。航空視点、混雑したシーン、さまざまな撮影条件の組み合わせにより、UAVを使った交通監視、群衆分析、小物体検出研究の標準的なテスト環境となっています。
UltralyticsのVisDrone設定には8,629枚の画像が含まれています。内訳は、トレーニング用6,471枚、検証用548枚、テスト用(test-dev)1,610枚です。すべての分割で、歩行者、人々、自転車、自動車、バン、トラック、三輪車、屋根付き三輪車、バス、バイクの10クラスを共通して使用します。詳しい内訳はデータセット構成をご覧ください。
VisDroneは
data="VisDrone.yaml"を使った初回のトレーニング時に自動ダウンロードされるため、手動での操作は不要です。スクリプトはUltralytics GitHubのリリースアセットから3つのアーカイブ(合計約2 GB)を取得し、アノテーションをYOLO形式に変換します。コンペティション用の非公開test-challenge分割は含まれません。画像サイズ640、100エポックでVisDrone上のYOLO26nモデルをトレーニングします。
トレーニング例from ultralytics import YOLO # モデルを読み込む model = YOLO("yolo26n.pt") # 事前トレーニング済みモデルを読み込みます(トレーニングにはこちらを推奨します) # モデルをトレーニングする results = model.train(data="VisDrone.yaml", epochs=100, imgsz=640)詳しい設定については、トレーニングページとモデルのトレーニングのヒントをご覧ください。
VisDroneのオブジェクトはフレームに対して非常に小さく、多くの場合、わずか数十ピクセルしかありません。また、密集し、激しく遮蔽された状態で出現するため、地上から撮影した写真で調整された検出器には大きな負荷となります。より高い解像度(たとえば、より小さなバッチで
imgsz=1280を使用)でトレーニングと予測を行うと、小さなターゲットを捉えやすくなります。また、高解像度タイル分割では大きな画像を分割するため、小さなオブジェクトが各推論ウィンドウ内でより大きく表示されます。VisDroneベンチマーク全体では、画像内の物体検出、動画内の物体検出、単一物体追跡、複数物体追跡、群衆カウントの5つのタスクを扱い、動画クリップ288本と静止画像10,209枚を対象としています。Ultralyticsの
VisDrone.yaml設定は、画像内の物体検出タスク(VisDrone2019-DET)のみを対象とし、トレーニング用6,471枚、検証用548枚、test-dev用1,610枚をダウンロードします。論文「検出と追跡がドローンチャレンジに出会う」(IEEE TPAMI、第44巻、第11号、2022年、DOI 10.1109/TPAMI.2021.3119563)を引用してください。BibTeXの完全なエントリーは、上記の引用と謝辞セクションにあります。


コメント24
質問したり、結果を共有したり、ほかの人をサポートしたりできます。
arpithavkhanapur1226-collab
Thank you for the suggestions. I’ve tried the recommended changes and checked the dataset, including removing the degenerate bounding box, but I’m still facing the NaN issue around epoch 30. The best mAP I’m getting is only around 33.2%, which is far below the expected performance. I’ve tried several approaches already, but I’m not able to figure out what is causing the instability. Could you please help me identify what might be going wrong or suggest what I should specifically check next? ,I have attached my code and result below ,I would really appreciate your guidance.
visdrone2.ipynb
 Paula DerrengerUltralytics
Please rerun a clean baseline with the official
VisDrone.yaml, pretrained weights, and defaults; after correcting annotations, delete all*.cachefiles in the dataset’slabelsdirectories, and restart the notebook kernel if Ultralytics was upgraded. If NaNs persist, share the complete text training log/traceback, exactmodel.train(...)arguments, Ultralytics version, and output fromyolo checks; also try a smaller learning rate and higherimgszsuch as1280, since VisDrone contains many tiny objects.
I’m training YOLOv12 on the VisDrone dataset, but I faced NaN losses after around epoch 29. I found a degenerate bounding box with zero height and removed it, but the NaN issue still occurred. I then tried DDPNet on VisDrone, but the validation performance started plateauing around epoch 14. Training is also very slow on a T4 (~4 hours for 12 epochs). Could you suggest what I should check or change to improve the training performance?
- Paula DerrengerUltralytics
After correcting every invalid/non-finite label and ensuring normalized boxes have positive width/height, delete all
*.cachefiles inside thelabelsdirectories before retraining. Establish a baseline with a pretrained Ultralytics model atimgsz=640; then inspectresults.png, per-class AP, and the confusion matrix before changing augmentation or resolution. VisDrone contains many tiny, dense objects, so higher resolution may improve accuracy but will substantially slow a T4; use ann/smodel and the largest stable batch first. If NaNs persist, please share the exact training command, complete text logs around the first NaN, Ultralytics version, andyolo checksoutput; see the VisDrone training guide and fine-tuning troubleshooting.
mslabdelhak29
Hello can you offre a pretrained model i need it and i dont have source to entrain for 100 epochs
 Glenn JocherUltralytics(編集済み)
Hi, we don’t currently provide an official YOLO model pretrained specifically on VisDrone, so the usual workflow is to start from a generic checkpoint like
yolo26n.ptand fine‑tune it on VisDrone; you can safely reduceepochs(e.g. 10–20) or train on a subset of the data in Colab to keep compute low, and the YOLO train mode docs show how to adjust these arguments.
ysharvit
I am looking for drone photos in desert area ( in order to develop rescue detection system (I volunteer in SAR unit)) Can I filter only desert BG pictures in your dataset?
- Glenn JocherUltralytics(編集済み)
VisDrone doesn’t include scene/terrain metadata like “desert” (it’s largely urban/traffic), so there’s no built‑in way to filter for desert backgrounds; for SAR you’ll want to gather desert drone imagery and fine‑tune a COCO‑pretrained YOLO26 using the dataset setup in the Datasets Overview or manage it end‑to‑end with Ultralytics Platform datasets.
fardinabbasi
It would be very useful if someone could provide a list of pretrained YOLO models for the VisDrone dataset that are compatible with Ultralytics.
- Glenn JocherUltralytics(編集済み)
Ultralytics doesn’t currently maintain an official list of VisDrone‑trained checkpoints; the recommended path is to fine‑tune a COCO‑pretrained YOLO26 variant (e.g.,
yolo26s.pt)—see the available base weights on the YOLO26 models page.
lawyeh
Hello, the example and the yaml file pull from the object detection in images dataset (task 1). How can I train the model for object detection in video (task )?
- Glenn JocherUltralytics
For video object detection (Task 2) with VisDrone, you'll use the same YOLO training process but process video frames as individual images. Ensure your dataset paths in VisDrone.yaml point to the video task's frame sequences (organized as images), then train normally. Video inference can be done with
model.predict(source='video.mp4')after training. For video-specific annotations, verify they're converted to YOLO format per frame.1
SudhanshuBlaze
I trained yolov10x on VisDrone dataset with the below parameters, but I got the final
box_lossof1.97. I feel that model performed very poorly, do you know what might be the issue? Or what hyperparameters should I use?from ultralytics import YOLO # Load a model model = YOLO("yolov10x.pt") # load a pretrained model (recommended for training) # Train the model results = model.train(data="VisDrone.yaml", epochs=1000, imgsz=640, patience=250, project='visdrone', name='train', batch=-1)- Glenn JocherUltralytics
@SudhanshuBlaze it sounds like your model might be struggling with the complexity of the VisDrone dataset. First, ensure you're using the latest version of the Ultralytics package. You might also want to experiment with different learning rates, batch sizes, and augmentation techniques. Sometimes, reducing the learning rate or increasing the batch size can help stabilize training. Additionally, consider using early stopping to prevent overfitting. If the issue persists, reviewing the dataset for any inconsistencies or mislabeled data could also be beneficial. For more detailed guidance, you can refer to the VisDrone documentation.
mariem158
quelles sont les étapes pour télécharger roboflow100 sur google colab. je veux utiliser ce dataset pour faire la détection précise des véhicules filmés par des caméras ?
- Paula DerrengerUltralytics(編集済み)
@mariem158 bonjour!
Pour télécharger et utiliser le dataset Roboflow100 sur Google Colab pour la détection précise des véhicules, vous pouvez suivre les étapes ci-dessous. Cependant, il semble que vous ayez mentionné le dataset VisDrone dans votre commentaire, donc je vais également inclure des informations sur ce dataset.
Étapes pour télécharger Roboflow100 sur Google Colab
-
Installer les dépendances nécessaires:
!pip install roboflow -
Importer et configurer Roboflow:
from roboflow import Roboflow rf = Roboflow(api_key="YOUR_API_KEY") project = rf.workspace().project("roboflow100") dataset = project.version("1").download("yolov8") -
Configurer le dataset pour l'entraînement:
from ultralytics import YOLO

# Charger un modèle pré-entraîné
model = YOLO("yolo26n.pt")

# Entraîner le modèle
results = model.train(data=dataset.location + "/data.yaml", epochs=100, imgsz=640)
Utilisation du dataset VisDrone
Le dataset VisDrone est une excellente ressource pour la détection d'objets, le suivi d'objets et le comptage de foules dans des images et vidéos capturées par des drones. Voici comment vous pouvez l'utiliser avec YOLO26:
-
Télécharger et configurer le dataset VisDrone:
from ultralytics import YOLO # Charger un modèle pré-entraîné model = YOLO("yolo26n.pt") # Entraîner le modèle results = model.train(data="VisDrone.yaml", epochs=100, imgsz=640) -
YAML de configuration pour VisDrone:
# Ultralytics YOLO 🚀, AGPL-3.0 license
# VisDrone2019-DET dataset https://github.com/VisDrone/VisDrone-Dataset by Tianjin University
path: ../datasets/VisDrone
train: VisDrone2019-DET-train/images
val: VisDrone2019-DET-val/images
test: VisDrone2019-DET-test-dev/images
names:
  0: pedestrian
  1: people
  2: bicycle
  3: car
  4: van
  5: truck
  6: tricycle
  7: awning-tricycle
  8: bus
  9: motor
Pour plus de détails sur l'utilisation du dataset VisDrone, vous pouvez consulter la documentation complète ici : VisDrone Dataset Documentation.
N'hésitez pas à revenir vers nous si vous avez d'autres questions! 😊
Cordialement, L'équipe Ultralytics
-
comment intégrer visdataset sur google colab et l'intégrer dans mon code qui détecte seulement des véhicules par des drones situé verticalement au dessus de la route.
- Paula DerrengerUltralytics(編集済み)
Bonjour,
Merci pour votre question ! Pour intégrer le dataset VisDrone dans Google Colab et l'utiliser pour détecter uniquement des véhicules capturés par des drones, voici les étapes à suivre :
-
Configurer Google Colab:
- Assurez-vous d'avoir accès à un GPU pour accélérer l'entraînement. Allez dans
Runtime>Change runtime typeet sélectionnezGPU.
- Assurez-vous d'avoir accès à un GPU pour accélérer l'entraînement. Allez dans
-
Installer les dépendances:
- Installez les bibliothèques nécessaires, notamment
ultralyticspour YOLO26.
- Installez les bibliothèques nécessaires, notamment
-
Télécharger et préparer le dataset VisDrone:
- Utilisez le script de téléchargement et de conversion fourni dans le fichier
VisDrone.yaml.
- Utilisez le script de téléchargement et de conversion fourni dans le fichier
-
Entraîner le modèle:
- Chargez un modèle pré-entraîné YOLO26 et entraînez-le sur le dataset VisDrone en filtrant uniquement les classes de véhicules.
Voici un exemple de code pour chaque étape :
# Installer les dépendances
!pip install ultralytics

# Importer les bibliothèques nécessaires
from ultralytics import YOLO
import os
from pathlib import Path

# Télécharger et préparer le dataset VisDrone
def download_visdrone():
    from ultralytics.utils.downloads import download

    def visdrone2yolo(dir):
        from PIL import Image
        from tqdm import tqdm

        def convert_box(size, box):
            dw = 1. / size[0]
            dh = 1. / size[1]
            return (box[0] + box[2] / 2) * dw, (box[1] + box[3] / 2) * dh, box[2] * dw, box[3] * dh

        (dir / 'labels').mkdir(parents=True, exist_ok=True)
        pbar = tqdm((dir / 'annotations').glob('*.txt'), desc=f'Converting {dir}')
        for f in pbar:
            img_size = Image.open((dir / 'images' / f.name).with_suffix('.jpg')).size
            lines = []
            with open(f, 'r') as file:
                for row in [x.split(',') for x in file.read().strip().splitlines()]:
                    if row[4] == '0':
                        continue
                    cls = int(row[5]) - 1
                    box = convert_box(img_size, tuple(map(int, row[:4])))
                    lines.append(f"{cls} {' '.join(f'{x:.6f}' for x in box)}\n")
                with open(str(f).replace(f'{os.sep}annotations{os.sep}', f'{os.sep}labels{os.sep}'), 'w') as fl:
                    fl.writelines(lines)

    dir = Path('../datasets/VisDrone')
    urls = [
        'https://github.com/ultralytics/yolov5/releases/download/v1.0/VisDrone2019-DET-train.zip',
        'https://github.com/ultralytics/yolov5/releases/download/v1.0/VisDrone2019-DET-val.zip',
        'https://github.com/ultralytics/yolov5/releases/download/v1.0/VisDrone2019-DET-test-dev.zip',
        'https://github.com/ultralytics/yolov5/releases/download/v1.0/VisDrone2019-DET-test-challenge.zip'
    ]
    download(urls, dir=dir, curl=True, threads=4)
    for d in ['VisDrone2019-DET-train', 'VisDrone2019-DET-val', 'VisDrone2019-DET-test-dev']:
        visdrone2yolo(dir / d)

download_visdrone()

# Entraîner le modèle YOLO26 sur le dataset VisDrone
model = YOLO("yolo26n.pt")  # Charger un modèle pré-entraîné
results = model.train(data="VisDrone.yaml", epochs=100, imgsz=640)
Pour plus de détails sur la configuration du dataset et les options d'entraînement, vous pouvez consulter la documentation complète ici.
N'hésitez pas à revenir vers nous si vous avez d'autres questions. Bonne chance avec votre projet ! 🚀
Cordialement, L'équipe Ultralytics
-
comment je peux utiliser les modèles de visdrone et faire l'appel à ce dataset dans mon code pour faire la détection des véhicules par mon drone?
- Paula DerrengerUltralytics(編集済み)
Bonjour,
Merci pour votre question ! Pour utiliser le dataset VisDrone et détecter uniquement les véhicules capturés par des drones, voici comment procéder sur Google Colab :
-
Configurer Google Colab:
- Assurez-vous d'avoir accès à un GPU pour accélérer l'entraînement. Allez dans
Runtime>Change runtime typeet sélectionnezGPU.
- Assurez-vous d'avoir accès à un GPU pour accélérer l'entraînement. Allez dans
-
Installer les dépendances:
- Installez les bibliothèques nécessaires, notamment
ultralyticspour YOLO26.
- Installez les bibliothèques nécessaires, notamment
-
Télécharger et préparer le dataset VisDrone:
- Utilisez le script de téléchargement et de conversion fourni dans le fichier
VisDrone.yaml.
- Utilisez le script de téléchargement et de conversion fourni dans le fichier
-
Entraîner le modèle:
- Chargez un modèle pré-entraîné YOLO26 et entraînez-le sur le dataset VisDrone en filtrant uniquement les classes de véhicules.
Voici un exemple de code pour chaque étape :
# Installer les dépendances
!pip install ultralytics

# Importer les bibliothèques nécessaires
from ultralytics import YOLO
import os
from pathlib import Path

# Télécharger et préparer le dataset VisDrone
def download_visdrone():
    from ultralytics.utils.downloads import download

    def visdrone2yolo(dir):
        from PIL import Image
        from tqdm import tqdm

        def convert_box(size, box):
            dw = 1. / size[0]
            dh = 1. / size[1]
            return (box[0] + box[2] / 2) * dw, (box[1] + box[3] / 2) * dh, box[2] * dw, box[3] * dh

        (dir / 'labels').mkdir(parents=True, exist_ok=True)
        pbar = tqdm((dir / 'annotations').glob('*.txt'), desc=f'Converting {dir}')
        for f in pbar:
            img_size = Image.open((dir / 'images' / f.name).with_suffix('.jpg')).size
            lines = []
            with open(f, 'r') as file:
                for row in [x.split(',') for x in file.read().strip().splitlines()]:
                    if row[4] == '0':
                        continue
                    cls = int(row[5]) - 1
                    box = convert_box(img_size, tuple(map(int, row[:4])))
                    lines.append(f"{cls} {' '.join(f'{x:.6f}' for x in box)}\n")
                with open(str(f).replace(f'{os.sep}annotations{os.sep}', f'{os.sep}labels{os.sep}'), 'w') as fl:
                    fl.writelines(lines)

    dir = Path('../datasets/VisDrone')
    urls = [
        'https://github.com/ultralytics/yolov5/releases/download/v1.0/VisDrone2019-DET-train.zip',
        'https://github.com/ultralytics/yolov5/releases/download/v1.0/VisDrone2019-DET-val.zip',
        'https://github.com/ultralytics/yolov5/releases/download/v1.0/VisDrone2019-DET-test-dev.zip',
        'https://github.com/ultralytics/yolov5/releases/download/v1.0/VisDrone2019-DET-test-challenge.zip'
    ]
    download(urls, dir=dir, curl=True, threads=4)
    for d in ['VisDrone2019-DET-train', 'VisDrone2019-DET-val', 'VisDrone2019-DET-test-dev']:
        visdrone2yolo(dir / d)

download_visdrone()

# Entraîner le modèle YOLO26 sur le dataset VisDrone
model = YOLO("yolo26n.pt")  # Charger un modèle pré-entraîné
results = model.train(data="VisDrone.yaml", epochs=100, imgsz=640)
Pour plus de détails sur la configuration du dataset et les options d'entraînement, vous pouvez consulter la documentation complète ici.
N'hésitez pas à revenir vers nous si vous avez d'autres questions. Bonne chance avec votre projet ! 🚀
Cordialement, L'équipe Ultralytics
-
Elvis-Kiilu2
This is nice, but what's next after the detection? How do we send/retrieve the data to a given database? What further insights can we draw from the detected data? What other technologies can we intergrate to this to draw meaningful inferences??
- Paula DerrengerUltralytics(編集済み)
After detection, you have a few options to extend the functionality:
-
Data Storage: To send and store detections on a database:
import sqlite3 from datetime import datetime from ultralytics import YOLO # Connect to SQLite database connection = sqlite3.connect('my_detections.db') cursor = connection.cursor() # Create table cursor.execute('''CREATE TABLE IF NOT EXISTS detections (timestamp DATETIME, class TEXT, confidence REAL, x REAL, y REAL, width REAL, height REAL)''') # Example insertion from detection results = YOLO("yolo26n.pt")("image.jpg")[0] names = results.names timestamp = datetime.now().isoformat() for det in results.boxes: cursor.execute('''INSERT INTO detections (timestamp, class, confidence, x, y, width, height) VALUES (?, ?, ?, ?, ?, ?, ?)''', (timestamp, names[int(det.cls)], float(det.conf), *det.xywh[0].tolist())) connection.commit() connection.close() -
Further Analysis: Analyze the time series of detections to observe trends, detect anomalies, or aggregate counts over time.
-
Integration with Other Technologies: Integrate with IoT platforms for real-time alerts or incorporate AI-based services for enhanced image analysis and decision-making processes.
These steps help bridge the gap between raw detection outputs and actionable insights or responses in real-world applications.
-
Thanks @pderrenger for the reply. I wanted to implement this for my next project. Your insights are a good starting point. My aim is to extract/read data from the detected class/boxes. Then compare and match the read data with with those in a database that in a cloud data warehouse, Bigquery to be specific.
- Paula DerrengerUltralytics
Hey there! It's great to hear you're planning to use YOLOv8 for your project. To extract and compare data from detected objects with your BigQuery database, you can follow these steps:
-
Extract Data: After detection, extract the necessary details from each detection (like class, confidence, and bounding box coordinates).
-
Format Data: Convert this data into a suitable format (like JSON or CSV) that can be easily ingested into BigQuery.
-
Upload to BigQuery: Use the BigQuery API to upload your formatted data. Here’s a small Python snippet using
google-cloud-bigquery:from google.cloud import bigquery # Construct a BigQuery client object. client = bigquery.Client() # Define your table ID (dataset.table) table_id = "your-project.your_dataset.your_table" # Define the data to be inserted rows_to_insert = [ {u"class": detected_class, u"confidence": confidence, u"x_min": x_min, u"y_min": y_min, u"width": width, u"height": height} ] # Insert data into BigQuery errors = client.insert_rows_json(table_id, rows_to_insert) if errors == []: print("New rows have been added.") -
Query and Analyze: Once your data is in BigQuery, you can use SQL queries to compare, analyze, and draw insights based on your specific needs.
This workflow will help you leverage the power of cloud computing to analyze large datasets efficiently. If you need further assistance or have more specific requirements, feel free to ask! 🚀
-