Ultralytics VS Code 확장
참고: Ultralytics Visual Studio Code 확장 프로그램 사용 방법 | 즉시 사용 가능한 코드 스니펫 | Ultralytics YOLO 🎉
기능 및 이점
✅ Ultralytics로 컴퓨터 비전 애플리케이션을 구축하는 데이터 과학자 또는 머신 러닝 엔지니어이십니까?
✅ 동일한 코드 블록을 반복해서 작성하는 것을 싫어하십니까?
✅ export, predict, train, track, 또는 val 메서드의 인수나 기본값을 항상 잊어버리시나요?
✅ Ultralytics를 시작하고 싶지만 코드 예제를 참조하거나 실행하는 더 쉬운 방법이 있기를 바라십니까?
✅ Ultralytics를 사용할 때 개발 주기를 단축하고 싶으십니까?
Visual Studio Code를 사용하고 위의 질문에 '예'라고 답했다면, VS Code용 Ultralytics-snippets 확장이 도움이 될 것입니다! 확장 기능에 대한 자세한 내용, 설치 방법 및 사용법을 읽어보세요.
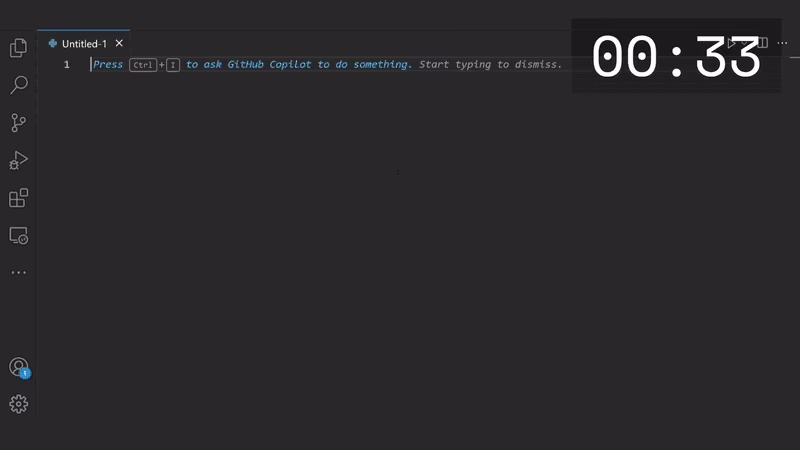
Ultralytics YOLO를 사용하여 20초 이내에 예제 코드를 실행하세요! 🚀
Ultralytics 커뮤니티에서 영감을 받았습니다.
이 확장 프로그램을 개발하게 된 영감은 Ultralytics 커뮤니티에서 얻었습니다. 유사한 주제와 사례에 대한 커뮤니티의 질문이 이 프로젝트의 개발 동력이 되었습니다. 또한, 많은 Ultralytics 팀원들이 자신의 작업 속도를 높이기 위해 VS Code를 사용합니다 ⚡.
VS Code를 사용하는 이유는 무엇입니까?
Visual Studio Code는 전 세계 개발자들에게 매우 인기가 있으며 2021, 2022, 2023 및 2024년 Stack Overflow 개발자 설문 조사에서 가장 인기 있는 것으로 선정되었습니다. VS Code의 높은 수준의 사용자 정의, 내장 기능, 광범위한 호환성 및 확장성으로 인해 많은 개발자가 이를 사용하는 것은 놀라운 일이 아닙니다. 더 넓은 개발자 커뮤니티와 Ultralytics Discord, Discourse, Reddit 및 GitHub 커뮤니티 내에서 인기를 감안할 때 워크플로를 간소화하고 생산성을 높이는 데 도움이 되는 VS Code 확장 프로그램을 구축하는 것이 합리적이었습니다.
코드 개발에 무엇을 사용하는지 알려주시겠습니까? Discourse 커뮤니티 설문 조사에 참여하여 알려주십시오! 참여하는 김에 저희가 가장 좋아하는 컴퓨터 비전, 머신 러닝, AI 및 개발자 밈을 확인하거나 좋아하는 밈을 게시해 보세요!
확장 프로그램 설치
참고
VS Code 확장을 설치할 수 있는 모든 코드 환경 여야 합니다 Ultralytics-snippets 확장 프로그램과 호환됩니다. 확장 프로그램을 게시한 후 다음과 같은 사실이 발견되었습니다. neovim VS Code 확장 프로그램과 호환되도록 만들 수 있습니다. 자세한 내용은 다음을 참조하십시오. neovim 설치 섹션 의 Readme Ultralytics-Snippets 저장소.
VS Code에 설치
VS Code의 확장 메뉴로 이동하거나 단축키 Ctrl+Shift ⇑+x를 사용하여 Ultralytics-snippets를 검색합니다.
Install 버튼을 클릭합니다.
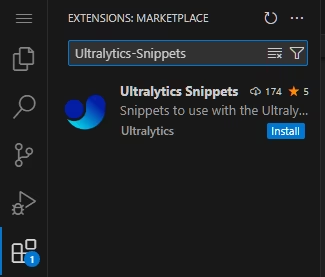
VS Code 확장 마켓플레이스에서 설치
VS Code Extension Marketplace를 방문하여 Ultralytics-snippets를 검색하거나 VS Code 마켓플레이스의 확장 페이지로 바로 이동하십시오.
Install 버튼을 클릭하고 브라우저에서 VS Code 세션을 시작하도록 허용합니다.
확장 프로그램을 설치하라는 메시지가 나타나면 지침에 따르세요.
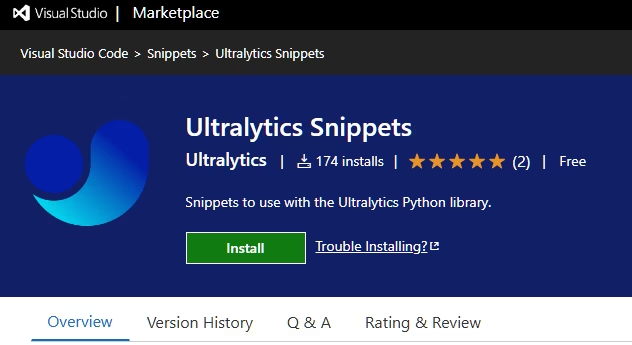
Visual Studio Code 확장 마켓플레이스 페이지: Ultralytics-Snippets
Ultralytics-Snippets 확장 프로그램 사용
🧠 지능형 코드 완성: Ultralytics API에 맞춰진 고급 코드 완성 제안으로 코드를 더 빠르고 정확하게 작성하세요.
⌛ 개발 속도 향상: 반복적인 코딩 작업을 제거하고 미리 빌드된 코드 블록 스니펫을 활용하여 시간을 절약하십시오.
🔬 향상된 코드 품질: 지능형 코드 완성으로 더 깔끔하고 일관성 있으며 오류 없는 코드를 작성하세요.
💎 간소화된 워크플로: 일반적인 작업을 자동화하여 프로젝트의 핵심 로직에 집중하세요.
개요
이 확장 프로그램은 다음의 경우에만 작동합니다. 언어 모드 Python 🐍용으로 구성되었습니다. 다른 파일 형식으로 작업할 때 스니펫이 삽입되는 것을 방지하기 위한 것입니다. 모든 스니펫의 접두사는 다음으로 시작합니다. ultra, 간단히 입력하면 됩니다. ultra 확장을 설치한 후 편집기에서 사용할 수 있는 스니펫 목록이 표시됩니다. VS Code를 열 수도 있습니다. 명령 팔레트 사용 Ctrl+이동 ⇑+p 명령을 실행합니다. Snippets: Insert Snippet.
코드 스니펫 필드
대부분의 스니펫에는 기본 자리 표시자 값 또는 이름이 있는 "필드"가 있습니다. 예를 들어 다음의 출력이 있습니다. predict 메서드를 라는 python 변수에 저장할 수 있습니다. r, results, detections, preds 또는 개발자가 선택하는 다른 모든 것. 이것이 스니펫에 "필드"가 포함된 이유입니다. 사용 탭 ⇥ 스니펫 삽입 후 키보드에서 Tab 키를 누르면 커서가 필드 사이를 빠르게 이동합니다. 필드가 선택되면 새 변수 이름을 입력하여 해당 인스턴스를 변경할 수 있을 뿐만 아니라 스니펫 코드에서 해당 변수의 다른 모든 인스턴스도 변경할 수 있습니다!
스니펫 삽입 후 이름 변경 model 다음과 world_model 모든 인스턴스를 업데이트합니다. 누르면 탭 ⇥ 다음 필드로 이동하면 드롭다운 메뉴가 열리고 모델 스케일을 선택할 수 있으며, 다음 필드로 이동하면 또 다른 드롭다운이 나타나 다음 중 하나를 선택할 수 있습니다. world 또는 worldv2 모델 변형입니다.
코드 스니펫 완성
훨씬 더 짧은 단축키
스니펫의 전체 접두사를 입력하거나 스니펫의 시작 부분부터 입력을 시작할 필요가 없습니다. 아래 이미지의 예시를 참조하십시오.
코드 조각은 가능한 한 가장 설명적인 방식으로 이름이 지정되지만, 이는 입력할 내용이 많을 수 있음을 의미하며 목표가 이동하는 것이라면 비생산적일 수 있습니다. 더 빠른. 다행히 VS Code에서는 사용자가 입력할 수 있습니다. ultra.example-yolo-predict, example-yolo-predict, yolo-predict, 또는 심지어 ex-yolo-p 여전히 의도한 스니펫 옵션에 도달할 수 있습니다! 의도한 스니펫이 실제로 ultra.example-yolo-predict-kwords, 키보드 화살표를 사용하면 됩니다. ↑ 또는 ↓ 원하는 스니펫을 강조 표시하고 다음을 누르려면 ↵ 입력 또는 탭 ⇥ 정확한 코드 블록을 삽입합니다.

입력 중 ex-yolo-p 다음을 수행합니다. still 정확한 스니펫에 도달합니다.
스니펫 카테고리
다음은 Ultralytics-snippets 확장 기능에서 사용할 수 있는 현재 스니펫 카테고리입니다. 앞으로 더 많은 카테고리가 추가될 예정이므로 업데이트를 확인하고 확장 기능에 대한 자동 업데이트를 활성화하십시오. 또한 누락된 부분이 있다고 생각되면 추가할 스니펫을 요청할 수도 있습니다.
| 범주 | 시작 접두사 | 설명 |
|---|---|---|
| 예제 | ultra.examples | Ultralytics를 시작하거나 학습하는 데 도움이 되는 예제 코드입니다. 예제는 문서 페이지의 코드와 동일하거나 유사합니다. |
| Kwargs | ultra.kwargs | 모든 키워드 인수와 기본값을 포함한 train, track, predict, val 메서드용 스니펫을 추가하여 개발 속도를 높이세요. |
| Import | ultra.imports | 일반적인 Ultralytics 객체를 빠르게 가져오는 스니펫입니다. |
| 모델 | ultra.yolo | 다양한 초기화를 위한 코드 블록을 삽입합니다. 모델 (yolo, sam, rtdetr, 등)을 포함하여 드롭다운 구성 옵션이 있습니다. |
| 결과 | ultra.result | 추론 결과 작업 시 일반적인 작업을 위한 코드 블록입니다. |
| 유틸리티 | ultra.util | Ultralytics 패키지에 내장된 일반적인 유틸리티에 대한 빠른 액세스를 제공하며, 이에 대한 자세한 내용은 간단한 유틸리티 페이지에서 확인할 수 있습니다. |
예제를 통한 학습
에 지정되어 있습니다. ultra.examples 스니펫은 Ultralytics YOLO를 사용하여 시작하는 기본 사항을 배우려는 모든 사람에게 매우 유용합니다. 예제 스니펫은 삽입되면 한 번 실행되도록 설계되었습니다 (일부에는 드롭다운 옵션도 있음). 이에 대한 예는 다음 애니메이션에서 볼 수 있습니다. 상위 이 페이지에서 스니펫을 삽입한 후 모든 코드를 선택하고 사용하여 대화식으로 실행합니다. 이동 ⇑+↵ 입력.
예시
애니메이션에서 보이는 것과 같이 상위 이 페이지에서 스니펫을 사용할 수 있습니다. ultra.example-yolo-predict 다음 코드 예제를 삽입합니다. 삽입 후 구성 가능한 유일한 옵션은 다음 중 하나일 수 있는 모델 스케일입니다. n, s, m, l또는 x.
from ultralytics import ASSETS, YOLO

model = YOLO("yolo26n.pt", task="detect")
results = model(source=ASSETS / "bus.jpg")

for result in results:
    print(result.boxes.data)
    # result.show()  # uncomment to view each result image
개발 가속화
다음 이외의 스니펫을 목표로 합니다. ultra.examples Ultralytics를 사용하여 작업할 때 개발을 더 쉽고 빠르게 하기 위한 것입니다. 많은 프로젝트에서 사용되는 일반적인 코드 블록은 목록을 반복하는 것입니다. Results 모델 사용으로부터 반환됨 predict 메서드입니다. 이 ultra.result-loop 스니펫이 이 작업을 도와줄 수 있습니다.
예시
다음을 사용하여 ultra.result-loop 다음 기본 코드(주석 포함)를 삽입합니다.
# reference https://docs.ultralytics.com/modes/predict/#working-with-results

for result in results:
    result.boxes.data  # torch.Tensor array
그러나 Ultralytics는 수많은 기능을 지원하므로 작업, 다음의 경우 추론 결과 작업 다른 것도 있습니다. Results 액세스할 수 있는 속성입니다. 스니펫 필드 강력해질 것입니다.
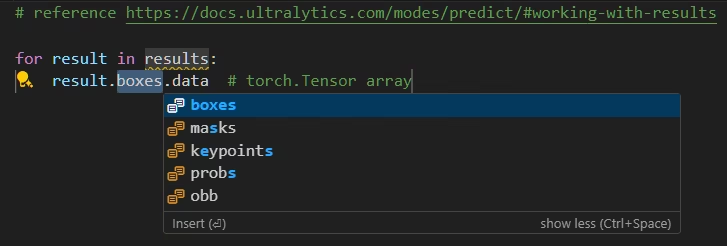
Tab 키를 눌러 boxes 필드에서 드롭다운 메뉴가 나타나면 필요한 다른 속성을 선택할 수 있습니다.
키워드 인수
다양한 Ultralytics에 대한 💯 키워드 인수가 있습니다. 작업 및 모드! 기억해야 할 내용이 너무 많고, 인수를 잊어버리기 쉽습니다. save_frame 또는 save_frames (확실히 save_frames 그런데). 여기가 바로 ultra.kwargs 스니펫이 도움이 될 수 있습니다!
예시
다음을 삽입하려면 predict 메서드를 포함하여 모든 추론 인수, 다음을 사용합니다. ultra.kwargs-predict, 다음 코드를 삽입합니다(주석 포함).
model.predict(
    source=src,  # (str, optional) source directory for images or videos
    imgsz=640,  # (int | list) input images size as int or list[w,h] for predict
    conf=0.25,  # (float) minimum confidence threshold
    iou=0.7,  # (float) intersection over union (IoU) threshold for NMS
    vid_stride=1,  # (int) video frame-rate stride
    stream_buffer=False,  # (bool) buffer incoming frames in a queue (True) or only keep the most recent frame (False)
    visualize=False,  # (bool) visualize model features
    augment=False,  # (bool) apply image augmentation to prediction sources
    agnostic_nms=False,  # (bool) class-agnostic NMS
    classes=None,  # (int | list[int], optional) filter results by class, i.e. classes=0, or classes=[0,2,3]
    retina_masks=False,  # (bool) use high-resolution segmentation masks
    embed=None,  # (list[int], optional) return feature vectors/embeddings from given layers
    show=False,  # (bool) show predicted images and videos if environment allows
    save=True,  # (bool) save prediction results
    save_frames=False,  # (bool) save predicted individual video frames
    save_txt=False,  # (bool) save results as .txt file
    save_conf=False,  # (bool) save results with confidence scores
    save_crop=False,  # (bool) save cropped images with results
    stream=False,  # (bool) for processing long videos or numerous images with reduced memory usage by returning a generator
    verbose=True,  # (bool) enable/disable verbose inference logging in the terminal
)
이 스니펫에는 모든 키워드 인수에 대한 필드가 있지만 다음에도 사용할 수 있습니다. model 및 src 코드에서 다른 변수를 사용한 경우, 키워드 인수를 포함하는 각 라인에는 참조를 위한 간략한 설명이 포함되어 있습니다.
모든 코드 스니펫
사용 가능한 스니펫을 찾는 가장 좋은 방법은 확장을 다운로드하여 설치하고 사용해 보는 것입니다! 궁금하고 미리 목록을 보고 싶다면 repo 또는 VS Code 마켓플레이스의 확장 페이지를 방문하여 사용 가능한 모든 스니펫에 대한 표를 볼 수 있습니다.
결론
VS Code용 Ultralytics-Snippets 확장은 데이터 과학자와 머신 러닝 엔지니어가 Ultralytics YOLO를 사용하여 컴퓨터 비전 애플리케이션을 보다 효율적으로 구축할 수 있도록 설계되었습니다. 미리 빌드된 코드 스니펫과 유용한 예제를 제공함으로써 혁신적인 솔루션을 만드는 데 집중할 수 있도록 지원합니다. VS Code 마켓플레이스의 확장 페이지를 방문하여 리뷰를 남겨 피드백을 공유해 주세요. ⭐
FAQ
새로운 스니펫을 어떻게 요청합니까?
Ultralytics-Snippets 저장소의 Issues를 사용하여 새로운 스니펫을 요청할 수 있습니다.
Ultralytics 확장 기능은 비용이 얼마나 드나요?
100% 무료입니다!
코드 스니펫 미리보기가 보이지 않는 이유는 무엇인가요?
VS Code는 Ctrl+Space 키 조합을 사용하여 미리보기 창에서 더 많은/적은 정보를 표시합니다. 코드 스니펫 접두사를 입력할 때 스니펫 미리보기가 표시되지 않으면 이 키 조합을 사용하여 미리보기를 복원해야 합니다.
Ultralytics에서 확장 추천을 어떻게 비활성화합니까?
VS Code를 사용 중이고 Ultralytics-snippets 확장 설치를 묻는 메시지가 표시되기 시작했으며 더 이상 메시지를 보고 싶지 않은 경우, 이 메시지를 비활성화하는 두 가지 방법이 있습니다.
Ultralytics-snippets를 설치하면 더 이상 메시지가 표시되지 않습니다 😆!
사용할 수 있습니다
yolo settings vscode_msg False확장 프로그램을 설치하지 않고 메시지가 표시되지 않도록 하려면. 자세한 내용은 다음에서 확인할 수 있습니다. Ultralytics 설정 에서 빠른 시작 페이지를 참조하십시오.
새로운 Ultralytics 코드 스니펫에 대한 아이디어가 있는데, 어떻게 추가할 수 있습니까?
Ultralytics-snippets 저장소를 방문하여 Issue 또는 Pull Request를 여십시오!
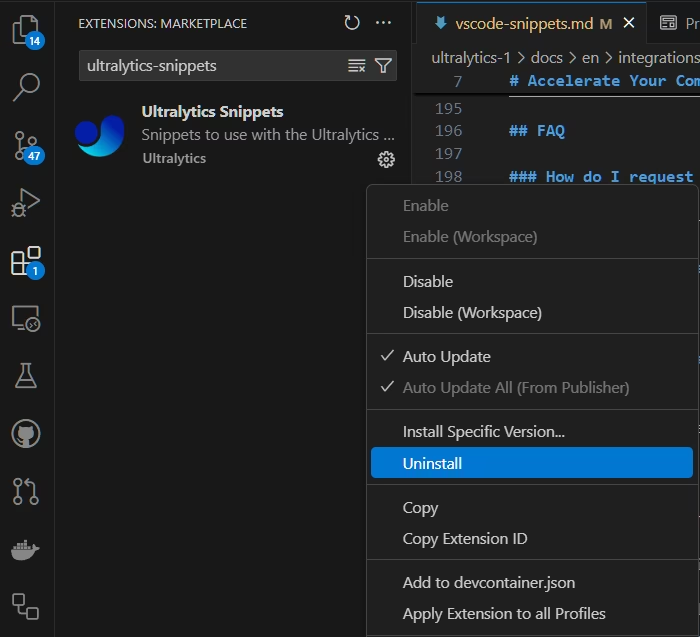
Ultralytics-Snippets 확장을 어떻게 제거하나요?
다른 VS Code 확장 프로그램과 마찬가지로 VS Code의 Extensions 메뉴로 이동하여 제거할 수 있습니다. 메뉴에서 Ultralytics-snippets 확장 프로그램을 찾아 톱니바퀴 아이콘(⚙)을 클릭한 다음 "제거"를 클릭하여 확장 프로그램을 제거합니다.
