旋转框(OBB)数据集概览
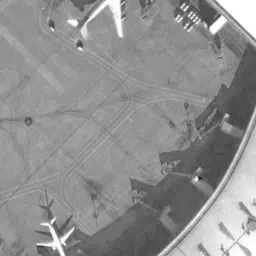
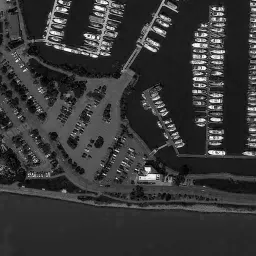
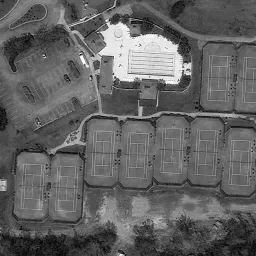
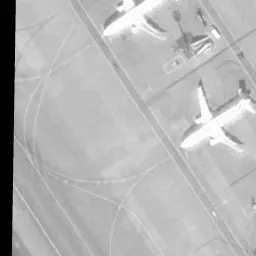
使用有向边界框 (OBB)训练精准的目标检测模型,需要完备的数据集。本指南介绍了与 Ultralytics YOLO 模型兼容的各种 OBB 数据集格式,并说明其结构、应用和格式转换方法。
支持的 OBB 数据集格式#
YOLO OBB 格式#
YOLO OBB 格式使用四个角点坐标来指定边界框,坐标归一化到 0 到 1 之间。其格式如下:
class_index x1 y1 x2 y2 x3 y3 x4 y4在内部,YOLO 使用 xywhr 格式处理损失和输出,该格式表示边界框的中心点 (xy)、宽度、高度和旋转角度。
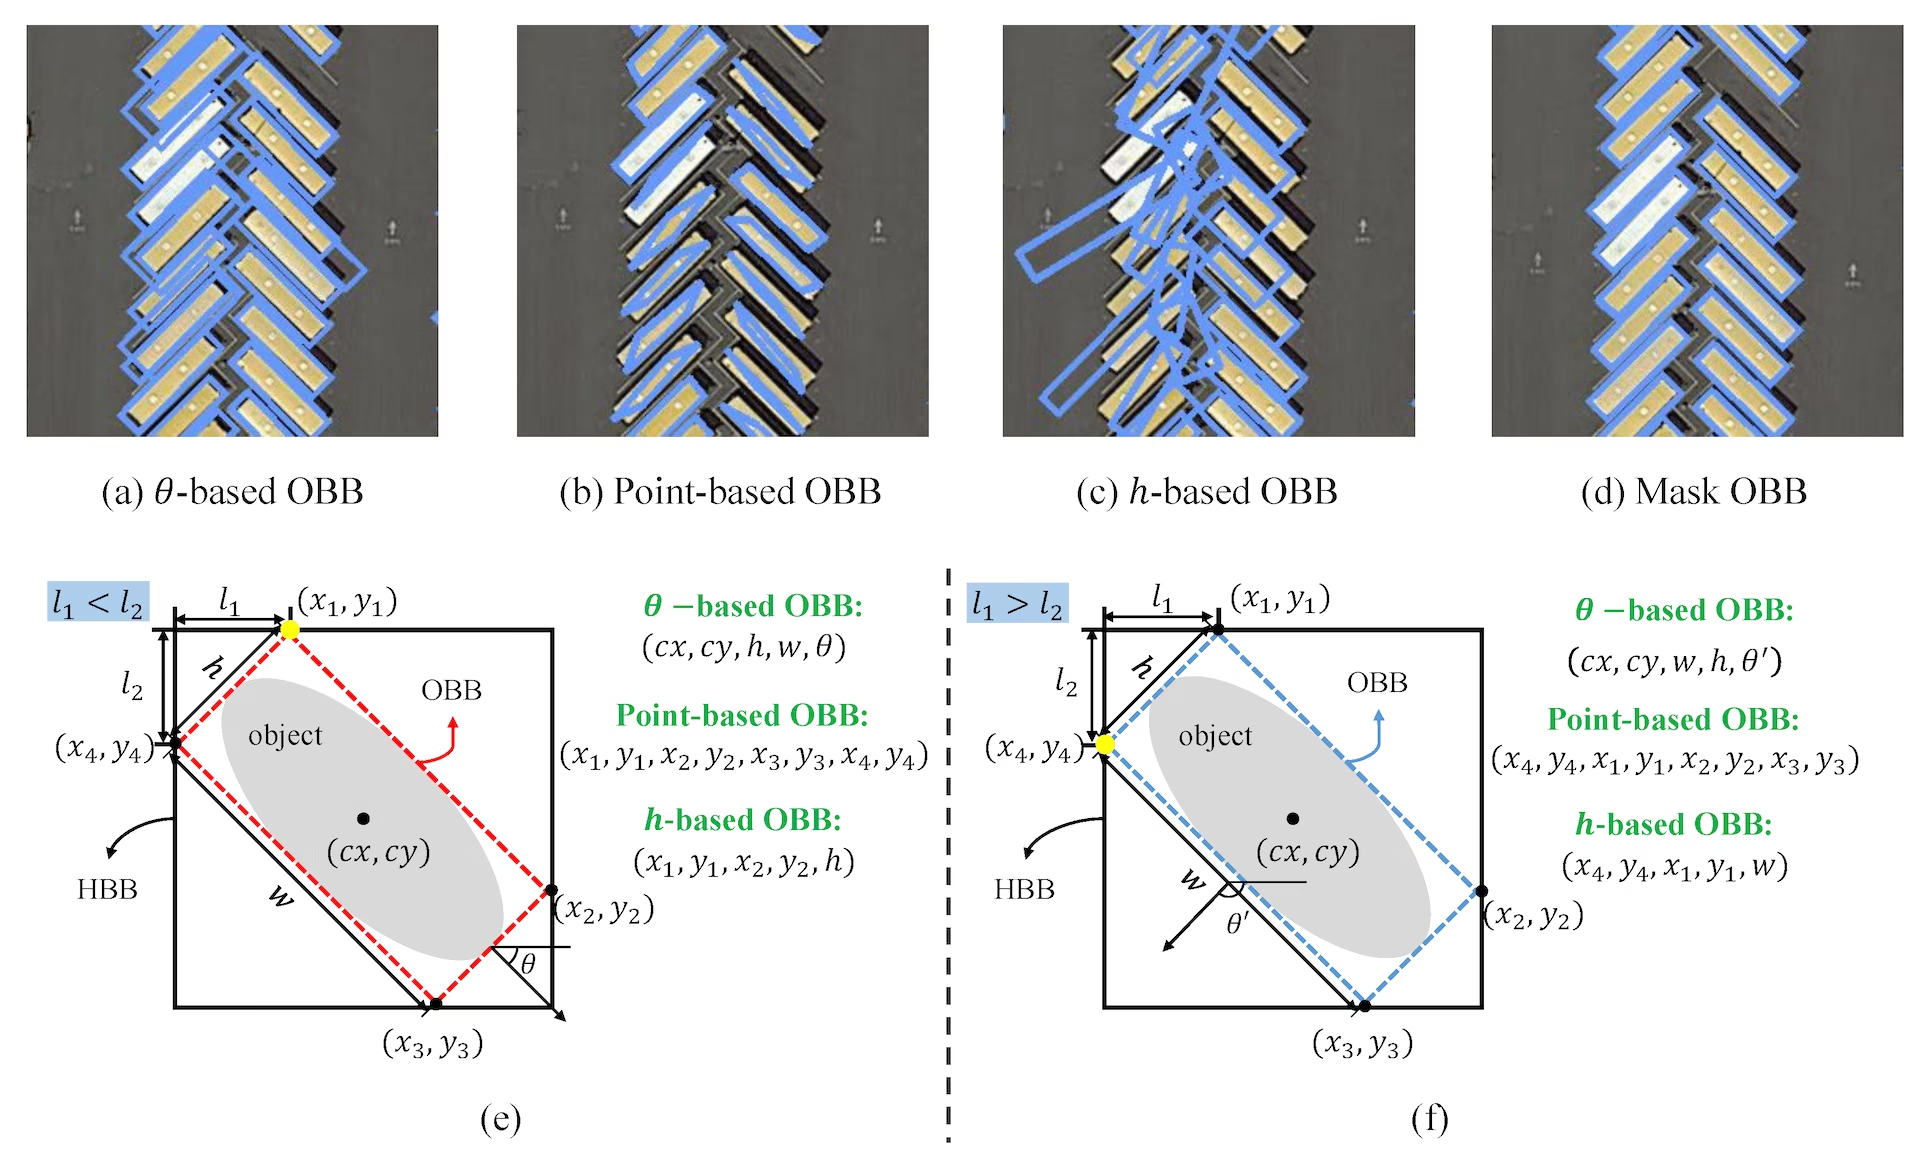
上述图像对应的 *.txt 标签文件示例中,包含一个类别为 0 的 OBB 格式对象,内容可能如下:
0 0.780811 0.743961 0.782371 0.74686 0.777691 0.752174 0.776131 0.749758数据集 YAML 格式#
Ultralytics 框架使用 YAML 文件格式定义用于训练 OBB 模型的数据集和模型配置。下面是定义 OBB 数据集时使用的 YAML 格式示例:
# Ultralytics 🚀 AGPL-3.0 License - https://ultralytics.com/license

# DOTA8 dataset (8 images from the DOTAv1 split) by Ultralytics
# Documentation: https://docs.ultralytics.com/datasets/obb/dota8
# Example usage: yolo train model=yolov8n-obb.pt data=dota8.yaml
# parent
# ├── ultralytics
# └── datasets
#     └── dota8 ← downloads here (1 MB)

# Train/val/test sets as 1) dir: path/to/imgs, 2) file: path/to/imgs.txt, or 3) list: [path/to/imgs1, path/to/imgs2, ..]
path: dota8 # dataset root dir
train: images/train # train images (relative to 'path') 4 images
val: images/val # val images (relative to 'path') 4 images

# Classes for DOTA 1.0
names:
  0: plane
  1: ship
  2: storage tank
  3: baseball diamond
  4: tennis court
  5: basketball court
  6: ground track field
  7: harbor
  8: bridge
  9: large vehicle
  10: small vehicle
  11: helicopter
  12: roundabout
  13: soccer ball field
  14: swimming pool

# Download script/URL (optional)
download: https://github.com/ultralytics/assets/releases/download/v0.0.0/dota8.ziptrain、val 和 test 均接受目录、图像文件、目录或图像文件列表,或 UTF-8 *.txt 文件;该文件每行列出一个图像路径(以 ./ 开头的路径将相对于 *.txt 文件解析)。使用 *.txt 文件可以基于目录的子集进行训练、跳过未标注的图像,或将来自多个来源的图像合并到一个数据集划分中。
path: datasets/dota8 # dataset root
train: train.txt # a directory, an image, a list e.g. [images/a, images/b], or a *.txt file
val: val.txt
names:
0: plane用法#
若要使用这些 OBB 格式训练模型:
from ultralytics import YOLO

# 加载预训练的 YOLO26n-OBB 模型
model = YOLO("yolo26n-obb.pt")

# 在 DOTAv1 数据集上训练模型
results = model.train(data="DOTAv1.yaml", epochs=100, imgsz=1024)支持的数据集#
目前支持以下带旋转框的数据集。这些数据集中的大多数也托管在 Ultralytics Platform 上,你可以浏览图像和标注、查看数据集统计信息,并克隆数据集以进行云端训练。
- DOTA-v1:DOTA 数据集的第一个版本,提供了全面的航拍图像及其旋转框标注,用于目标检测。
- DOTA-v1.5:DOTA 数据集的中间版本,与 DOTA-v1 相比提供了更多标注和改进,以增强目标检测任务的效果。
- DOTA-v2:DOTA(大规模航拍图像目标检测数据集)第 2 版,侧重于从航空视角进行检测,包含 1.7 百万个实例和 11,268 张图像,并提供旋转框标注。
- DOTA8:完整 DOTA 数据集的一个小型子集,包含 8 张图像,适用于测试工作流,以及在
ultralytics仓库中检查 OBB 训练的持续集成(CI)。 - DOTA8 Multispectral:一个包含 8 张图像、10 个通道的 TIFF 子集,用于在 Ultralytics Platform 上测试多光谱 OBB 训练。
- DOTA128:DOTA 数据集的一个 128 张图像子集,所有图像都位于 train 文件夹中(同时用于训练和验证),在大小和多样性之间取得了良好平衡,适合测试 OBB 模型。
- 场景文本:一个包含 65,325 张图像的数据集,整合了 COCO-Text 和 HierText,含有 129 万个清晰可辨的词语多边形标注,可用于场景文本 OBB 训练。
纳入你自己的 OBB 数据集#
如果你想加入自己的旋转框数据集,请确保其兼容上文提到的“YOLO OBB 格式”。将标注转换为所需格式,并在相应的 YAML 配置文件中详细列出路径、类别和类别名称。
转换标签格式#
将 DOTA 数据集格式转换为 YOLO OBB 格式#
可以使用以下脚本,将标签从 DOTA 数据集格式转换为 YOLO OBB 格式:
from ultralytics.data.converter import convert_dota_to_yolo_obb

convert_dota_to_yolo_obb("path/to/DOTA")
此转换可使 DOTA 格式的数据集兼容 Ultralytics YOLO OBB 格式。
训练前请确认转换后的数据集符合 YOLO OBB 格式规范;正确的数据集结构对于训练精准的有向边界框目标检测模型至关重要。
常见问题#
有向边界框 (OBB)是一种边界框标注形式,框可以旋转以更贴合被检测对象,而不是仅与坐标轴对齐。这在航空或卫星图像中特别有用,因为对象可能不会与图像坐标轴对齐。在 Ultralytics YOLO 模型中,OBB 以 YOLO OBB 格式的四个角点表示。边界框可以旋转以更好地贴合对象,从而实现更准确的目标检测。
你可以使用 Ultralytics 的
convert_dota_to_yolo_obb函数,将 DOTA 数据集标签转换为 YOLO OBB 格式。转换后的标签与 Ultralytics YOLO OBB 模型兼容。以下是一个快速示例:from ultralytics.data.converter import convert_dota_to_yolo_obb convert_dota_to_yolo_obb("path/to/DOTA")此脚本会将你的 DOTA 标注重新整理为兼容 YOLO 的格式。
使用 OBB 训练 YOLO26 模型,需要先确保你的数据集采用 YOLO OBB 格式,然后使用 Ultralytics API 训练模型。下面是 Python 和 CLI 示例:
示例from ultralytics import YOLO # 从头创建一个新的 YOLO26n-OBB 模型 model = YOLO("yolo26n-obb.yaml") # 使用自定义数据集训练模型 results = model.train(data="your_dataset.yaml", epochs=100, imgsz=640)使用 OBB 标注进行训练,可以让模型更贴合旋转对象,从而提高检测准确性。
目前,Ultralytics 支持以下用于 OBB 训练的数据集:
- DOTA-v1:DOTA 数据集的第一个版本,提供了全面的航拍图像及其旋转框标注,用于目标检测。
- DOTA-v1.5:DOTA 数据集的中间版本,与 DOTA-v1 相比提供了更多标注和改进,以增强目标检测任务的效果。
- DOTA-v2:该数据集包含 11268 张图像和 170 万个有向边界框实例,主要用于航空影像目标检测。
- DOTA8:DOTA 数据集的一个较小子集,仅含 8 张图像,用于测试和持续集成(CI)检查。
- DOTA128:一个包含 128 张图像的子集,所有图像均位于 train 文件夹(train 和 val 共用),比 DOTA8 更多样,同时仍便于开展初期 OBB 模型开发和实验。
- 场景文本:将 COCO-Text 和 HierText 合并为一个单类别场景文本数据集,包含旋转词语标注和多点词语标注。
这些数据集适用于 OBB 优势显著的场景,例如航空和卫星图像分析。


评论129
提出问题、分享结果,或帮助其他人。
hodat2608
Hi everyone! i have a question. As we know, when i use labelimg obb to labeling images, it will export xywhr coordinates, example : 0 88.000000 101.000000 141.785406 14.314282 89.065522 0 477.548407 102.450004 140.874897 13.174511 -89.889658 0 218.000000 102.500000 140.785539 14.297973 89.065522
but if i use this format for training it gives error, can not train, i think i need to convert this xywhr format to xyxyxyxy format. So I need to consult everyone, how to convert this format. thanks *note: we need to pay attention to the angle during labeling, because when we use label img obb, the angle will be output as negative and positive, which means if it is less than 90 degrees it is negative, if it is greater than 90 degrees it is positive. However, in YOLOv8 it will not be shown like that, it will output the result always positive, **for example : label img obb : -89 degrees < 90 degrees < 89 degrees yolov8 : 89 degrees < 90 degrees < 91 degrees i use this source : https://github.com/heshameraqi/labelImg_OBB
1Chen-chang-yu
Hi, I used roLabelImg-master to label and the output is xml file. Here is my convert code( from xml (xywhr fotmat) -> txt (xyxyxyxy format) ). For your reference.
import math import xml.etree.ElementTree as ET import os
def rotate_point(x, y, angle): """ Rotate point (x, y) by angle around origin (0, 0). """ x_rot = x * math.cos(angle) - y * math.sin(angle) y_rot = x * math.sin(angle) + y * math.cos(angle) return x_rot, y_rot
def convert_to_xyxyxyxy(cx, cy, w, h, angle): """ Convert rotated bounding box to xyxyxyxy format. """ # Half width and height half_w = w / 2 half_h = h / 2
# Corner points relative to center
corners = [
    (-half_w, -half_h),
    (half_w, -half_h),
    (half_w, half_h),
    (-half_w, half_h)
]

# Rotate corners and translate
rotated_corners = []
for corner in corners:
    x_rot, y_rot = rotate_point(corner[0], corner[1], angle)
    rotated_corners.append((cx + x_rot, cy + y_rot))

# Format as xyxyxyxy
xyxyxyxy = " ".join([f"{int(round(x))},{int(round(y))}" for x, y in rotated_corners])
return xyxyxyxy
def convert_annotation(xml_file_path, output_dir): tree = ET.parse(xml_file_path) root = tree.getroot()
# Get image dimensions
size = root.find('size')
if size is None:
    raise ValueError("Size element not found in XML")

width = int(size.find('width').text)
height = int(size.find('height').text)

class_id = int(root.find('segmented').text)

# Create output file path
base_name = os.path.splitext(os.path.basename(xml_file_path))[0]
txt_file_path = os.path.join(output_dir, f"{base_name}.txt")

with open(txt_file_path, 'w') as txt_file:
    for obj in root.findall('object'):
        robndbox = obj.find('robndbox')

        if robndbox is not None:
            cx = float(robndbox.find('cx').text)
            cy = float(robndbox.find('cy').text)
            w = float(robndbox.find('w').text)
            h = float(robndbox.find('h').text)
            angle = float(robndbox.find('angle').text)

            # Convert to OBB format
            result = convert_to_xyxyxyxy(cx, cy, w, h, angle)

            result = result.replace(",", " ")
            # print(len(result))

            # 分割字符串,去掉逗号并转换为浮点数,除以1024
            normalized_results = [float(x) / 1024 for x in result.split()]
            print(normalized_results)

            # 将列表转换为字符串,元素用逗号和空格分隔
            result_str = ' '.join(map(str, normalized_results))

            # Write to file
            txt_file.write(f"{class_id} {result_str}\n")

# print(f"Converted {xml_file_path} to {txt_file_path}")
Example usage
xml_dir = r'C:\Users\datasets_HTC\xmllabels' output_dir = r'C:\Users\datasets_HTC\labels_OBB_format'
Ensure the output directory exists
os.makedirs(output_dir, exist_ok=True)
Convert all XML files in the directory
for xml_file in os.listdir(xml_dir): if xml_file.endswith('.xml'): convert_annotation( xml_file_path=os.path.join(xml_dir, xml_file), output_dir=output_dir, )
1luo-ross
No matter what annotation software you use for annotation, in the end, you only need to focus on xywhr. If it's detect, focus on xywh. If it's obb, then focus on xywhr. With this data, you can directly use the encapsulated methods provided in ultralytics. utilities
from ultralytics.utils import ops
For example, ops. xywhr 2xyxyxy (xywhr)
You don't need to repeatedly make wheels and do so much work.
Thank you so such. I will try your way and get back to you soon.
For appropriation, here is ready-made code, hoping it will be helpful to you
from ultralytics import YOLO import time import torch import math import cv2 import numpy as np import ultralytics
from ultralytics.utils import ops
img=cv2.imread(r"yourfilename.png")
#4 points x1y1=[550.0,400.0] x2y2=[450.0,400.0] x3y3=[450.0,600.0] x4y4=[550.0,600.0]
Example bbox with rotation at 45 degrees (converted to radians if needed)
r1=0 * np.pi / 180 r2=-45 * np.pi / 180 bbox = [500, 500, 200, 100, r1] # Convert degrees to radians xyxyxyxy =ops. xywhr2xyxyxyxy(torch.tensor(bbox)) xywhr=ops.xyxyxyxy2xywhr(xyxyxyxy.reshape(1,-1,2))
rotate=xywhr[:,4]*180/np.pi #clockwise xywhr1=ops.xyxyxyxy2xywhr(torch.tensor([[x1y1,x2y2,x3y3,x4y4]])) xywhr2=ops.xyxyxyxy2xywhr(torch.tensor([[x2y2,x3y3,x4y4,x1y1]])) xywhr3=ops.xyxyxyxy2xywhr(torch.tensor([[x3y3,x4y4,x1y1,x2y2]])) xywhr4=ops.xyxyxyxy2xywhr(torch.tensor([[x4y4,x1y1,x2y2,x3y3]]))
#anticlockwise xywhr5=ops.xyxyxyxy2xywhr(torch.tensor([[x1y1,x4y4,x3y3,x2y2]])) xywhr6=ops.xyxyxyxy2xywhr(torch.tensor([[x4y4,x3y3,x2y2,x1y1]])) xywhr7=ops.xyxyxyxy2xywhr(torch.tensor([[x3y3,x2y2,x1y1,x4y4]])) xywhr8=ops.xyxyxyxy2xywhr(torch.tensor([[x2y2,x1y1,x4y4,x3y3]]))
r=[xywhr1[:,4],xywhr2[:,4],xywhr3[:,4],xywhr4[:,4],xywhr5[:,4],xywhr6[:,4],xywhr7[:,4],xywhr8[:,4]]
#xyxyxyxy=ops.xywhr2xyxyxyxy(torch.tensor([161,152,100,170,math.radians(0)]))
data_array=xyxyxyxy.to(torch.int32).cpu().numpy() cv2.drawContours(img, [data_array], -1, (255, 0, 0), 2)
x=data_array[0][0] y=data_array[0][1] x1y1=[data_array[0][0], data_array[0][1]] x2y2=[data_array[1][0], data_array[1][1]] x3y3=[data_array[2][0], data_array[2][1]] x4y4=[data_array[3][0], data_array[3][1]]
xywhr=ops.xyxyxyxy2xywhr(torch.tensor([[x1y1, x2y2,x3y3, x4y4]]).to(torch.float32))
cv2.line(img, (x - 10, y), (x + 10, y), (0, 255, 0), 2) cv2.line(img, (x, y - 10), (x, y + 10), (0, 255, 0), 2)
cv2.putText(img, "1", (data_array[0][0],data_array[0][1]), cv2.FONT_HERSHEY_SIMPLEX, 1, (0, 0, 255), 1, lineType=cv2.LINE_AA) cv2.putText(img, "2", (data_array[1][0],data_array[1][1]), cv2.FONT_HERSHEY_SIMPLEX, 1, (0, 0, 255), 1, lineType=cv2.LINE_AA) cv2.putText(img, "3", (data_array[2][0],data_array[2][1]), cv2.FONT_HERSHEY_SIMPLEX, 1, (0, 0, 255), 1, lineType=cv2.LINE_AA) cv2.putText(img, "4", (data_array[3][0],data_array[3][1]), cv2.FONT_HERSHEY_SIMPLEX, 1, (0, 0, 255), 1, lineType=cv2.LINE_AA) cv2.imshow('Rectangle', img) cv2.waitKey(0)
#[tensor([1.5708]), tensor([1.5708]), tensor([1.5708]), tensor([1.5708]), tensor([1.5708]), tensor([1.5708]), tensor([1.5708]), tensor([1.5708])]
sd2=ops.xywhr2xyxyxyxy(torch.tensor([500,500,200,100,math.radians(-90)]))
sd3=ops.xywhr2xyxyxyxy(torch.tensor([500,500,200,100,math.radians(180)])) sd4=ops.xywhr2xyxyxyxy(torch.tensor([500,500,200,100,math.radians(270)])) sd5=ops.xywhr2xyxyxyxy(torch.tensor([500,500,200,100,math.radians(360)]))
sd6=ops.xywhr2xyxyxyxy(torch.tensor([500,500,200,100,math.radians(45)]))
radians=math.radians(-90)
test1=ops.xyxyxyxy2xywhr(torch.tensor([[100, 100, 100, 461.999104, 911.0016, 272.999424, 1066.99776, 527.0016]])) test2=ops.xyxyxyxy2xywhr(torch.tensor([[ 640.999424, 461.999104, 911.0016, 272.999424, 1066.99776, 527.0016,797.999104, 706.999296]])) test3=ops.xyxyxyxy2xywhr(torch.tensor([[ 461.999104, 911.0016, 272.999424, 1066.99776, 527.0016,797.999104, 706.999296, 640.999424]])) test4=ops.xyxyxyxy2xywhr(torch.tensor([[706.999296, 640.999424,461.999104, 911.0016, 272.999424, 1066.99776, 527.0016,797.999104 ]]))
I have another question? I want to train with higher imgsz, so what size is best for practice? 832 or 1280 ?
@hodat2608 Unless your application scenario is microscopic, such as those captured under a microscope, requiring recognition of cells or bacteria, and requires precision at the pixel level. So when you train, you need to ensure the size of the image. For example, if a 2448 * 2048 size image is scaled to 640 * 640, it may not be able to recognize the target well. So you can use larger training sizes, such as twice, three times, or four times 640, or ensure that the size is a multiple of 2 for better results. Of course, the larger the size, the lower the efficiency. You need to use GPU for training and prediction.
 Glenn JocherUltralytics
The best image size depends on your specific use case and hardware capabilities. Generally, larger sizes like 1280 can improve accuracy but require more computational resources. If you're limited by hardware, 832 might be a more practical choice.
DeekshithaDPrakash
Hi everyone! i have a question. As we know, when i use labelimg obb to labeling images, it will export xywhr coordinates, example : 0 88.000000 101.000000 141.785406 14.314282 89.065522 0 477.548407 102.450004 140.874897 13.174511 -89.889658 0 218.000000 102.500000 140.785539 14.297973 89.065522
but if i use this format for training it gives error, can not train, i think i need to convert this xywhr format to xyxyxyxy format. So I need to consult everyone, how to convert this format. thanks *note: we need to pay attention to the angle during labeling, because when we use label img obb, the angle will be output as negative and positive, which means if it is less than 90 degrees it is negative, if it is greater than 90 degrees it is positive. However, in YOLOv8 it will not be shown like that, it will output the result always positive, **for example : label img obb : -89 degrees < 90 degrees < 89 degrees yolov8 : 89 degrees < 90 degrees < 91 degrees i use this source : https://github.com/heshameraqi/labelImg_OBB
@hodat2608 Did you solve this issue and train yolo model for OBB ? It would be of great help if you could share relevant materials
luckg6
Hello Ultralytics team,
I have a question regarding YOLO OBB (Oriented Bounding Box) object detection. I noticed that for predicted bounding boxes, the angle can be obtained via obb.xywhr. However, it seems that there is no direct way to get the angle of the ground-truth boxes in the dataset.
Does this mean that if I want to calculate the angle error, I must manually compute it by converting the 8-point coordinates of the ground-truth boxes into an angle?
Thank you for your clarification!
- Glenn JocherUltralytics
GT labels in YOLO OBB are stored as 8 normalized corner coords (
class x1 y1 ... x4 y4), so there’s no explicit angle field in the*.txt; if you want an angle/error metric, convert the GT corners toxywhrusing the same helper Ultralytics uses internally viaxyxyxyxy2xywhr(angle returned in radians), which matches howresults[0].obb.xywhris defined in theOBBresults API and follows the OBB conventions noted in the OBB task docs.import cv2 import math import torch from ultralytics.utils.ops import xyxyxyxy2xywhr img = cv2.imread("path/to/image.png") h, w = img.shape[:2] # label line: cls x1 y1 x2 y2 x3 y3 x4 y4 (all coords normalized 0-1) parts = open("path/to/label.txt").read().strip().split() pts = torch.tensor([float(x) for x in parts[1:]], dtype=torch.float32).view(1, 4, 2) pts[..., 0] *= w pts[..., 1] *= h gt_xywhr = xyxyxyxy2xywhr(pts.view(1, 8)) gt_theta = gt_xywhr[0, 4].item() # radians def angle_diff_rad(pred_theta, gt_theta): # smallest signed diff considering 90-degree periodicity used by OBB return (pred_theta - gt_theta + math.pi / 2) % math.pi - math.pi / 2If you have follow-ups on the exact angle convention for your evaluation, drop them here in this discussion so the team can see the context.
ahrendsen
Is it true that the YOLO implementation of OBB would report an identical result for objects that are rotated 180 degrees from each other? For example, if I wanted to detect planes flying through the air and wanted to determine the direction they were flying with the angle of the OBB, YOLO OBB would not be able to distinguish between the front and the back of the plane?
msocode
I work with coffee bean classification. Until now, I was using yolov8-seg. However, I wanted some way to combine yolov11-obb + seg. Is there any way to run both processes together? Or would I have to do obb and then train the seg based on the previous result?
- Glenn JocherUltralytics(已编辑)
Great question—YOLO26 doesn’t currently provide a single multitask head that outputs OBB and masks together; OBB and Seg are separate tasks. The simplest way to get both is to run a YOLO26 segmentation model and derive an OBB per instance mask with OpenCV’s
minAreaRect(one model, both outputs):from ultralytics import YOLO import numpy as np, cv2 seg = YOLO("yolo26s-seg.pt") results = seg("image.jpg")[0] for poly in results.masks.xy: # list of Nx2 polygons rect = cv2.minAreaRect(np.array(poly, dtype=np.float32)) # (cx,cy),(w,h),angle box = cv2.boxPoints(rect) # 4x2 OBB corners # use box or rect as your OBBIf you must use OBB first, a two-stage pipeline is fine: run
yolo26*-obb.pt, crop/rotate ROIs, then run ayolo26*-seg.ptmodel on each ROI. See the Segmentation task guide and YOLO26 model variants in the docs: Segmentation docs and YOLO26 models.1
eorroot
Hello, have you considered adding a new UAV Bounding Box (OBB) Datasets, CODrone (https://github.com/AHideoKuzeA/CODrone-A-Comprehensive-Oriented-Object-Detection-benchmark-for-UAV)?
UltralyticsAssistantUltralytics
👋 Olá, obrigado pelo seu interesse nos modelos Ultralytics 🚀! Recomendamos uma visita à Documentação para novos utilizadores, onde pode encontrar vários exemplos de uso em Python e na CLI, além de respostas para as perguntas mais frequentes.
Se este for um 🐛 Relatório de Bug, por favor forneça um exemplo mínimo reproduzível para nos ajudar a depurá-lo.
Se for uma dúvida sobre treinamento personalizado ❓, forneça o máximo de informações possível, incluindo exemplos do conjunto de dados e logs de treinamento, e verifique se está seguindo as nossas Dicas para Melhores Resultados de Treinamento.
Junte-se à comunidade Ultralytics onde preferir. Para conversas em tempo real, visite o Discord 🎧. Para discussões mais detalhadas, consulte o Discourse. Ou participe de discussões na nossa Subreddit para compartilhar conhecimento com outros membros.
Atualização
Atualize para a versão mais recente do pacote
ultralytics, incluindo todos os requisitos, em um ambiente Python>=3.8 com PyTorch>=1.8, para verificar se o problema já não foi resolvido:pip install -U ultralyticsAmbientes
O YOLO pode ser executado em qualquer um dos seguintes ambientes atualizados e verificados (com todas as dependências, incluindo CUDA/CUDNN, Python e PyTorch pré-instalados):
- Notebooks com GPU gratuita:


- Google Cloud Deep Learning VM. Veja o Guia de Início Rápido no GCP
- Amazon Deep Learning AMI. Veja o Guia de Início Rápido na AWS
- Imagem Docker. Veja o Guia de Início Rápido no Docker
Status

Se este badge estiver verde, todos os testes do Ultralytics CI estão a passar. Os testes CI verificam a operação correta de todos os Modos e Tarefas do YOLO em macOS, Windows e Ubuntu a cada 24 horas e a cada commit.
Este é um comentário automatizado 🤖, mas um engenheiro da Ultralytics irá responder em breve para ajudar mais!
- Notebooks com GPU gratuita:
jorgemarquesferreirajunior
Thank you so much! This article was very helpful for me. The OBB code works very well. Last year, I was trying to detect objects of my custom dataset and draw each oriented bounding box using OpenCV. It worked, but there were some issues with overlapping items. Using OBB perfomed by YOLO, my problems were solved.
r-isr
Hi, I'm working on reproducing MAP scores for YOLO OBB on DOTA 1.0 dataset. Despite experimenting with various batch sizes and nominal batch sizes on my 11GB GPU, the model's performance plateaus around MAP 60 on validation. The model:
Training Configuration:
- Used convert_dota_to_yolo_obb script for data preparation
- Model: yolov8n-obb.yaml
- Parameters:
- Initial training: 20 epochs
- Multiple additional 10-epoch iterations
- image size: 1024
- confidence threshold: 0.25
- fraction: 0.5
Despite trying different batch configurations and extending training through multiple iterations, the validation MAP consistently stalls at 60, well below the expected test score of 80.
Questions:
- Are these results expected for validation performance?
- Would class balancing improve the results?
- Are my hardware limitations (11GB GPU) affecting performance?
- What's a reasonable MAP score to expect on the validation set?
- Glenn JocherUltralytics(已编辑)
@r-isr thank you for your detailed question. Here's a concise response:
- Validation vs Test Scores: DOTA validation scores often trail test scores due to different splits and evaluation protocols. Ensure you're using the official DOTA evaluation tools for comparable metrics (DOTA Dataset Guide).
- Epochs: Extend training to 100 epochs as shown in our DOTA training example - shorter runs may underfit.
- Hardware: While 11GB GPUs work, larger batch sizes (via
batch=-1for auto-scaling) often help stabilize training. - Class Balance: DOTA's inherent class imbalance can impact results. Consider oversampling rare classes.
For precise benchmarking, compare against the DOTAv1 results listed on the OBB task page using identical settings (those are test-set scores, reproduced with
yolo obb val data=DOTAv1.yaml split=test nms=False save_json=Trueand the DOTA evaluation server). Let us know if you still observe discrepancies! 🚀
fcndata
With so much tools like SAM that allow us to better label, is it possible to train our model with polygons without transforming it into Bounding Boxes?
- Glenn JocherUltralytics
@fcndata currently, YOLO models require annotations to follow specific formats like the YOLO OBB format for training. While SAM and similar tools can assist in creating precise polygon-based labels, these would need to be converted to bounding box formats (e.g., OBB) for YOLO compatibility. For details on conversion, please refer to the OBB Dataset Guide.
I trust your expertise, but I came across a tutorial where they used polygon-based labels to train the model and the perform a comparison within different annotations formats on YOLOv8:
On this analysis, they also present the overall coding here:
In the tutorial, they use the following code snippet:
!yolo task=detect mode=train model=yolov8n.yaml data={polygon_dataset.location}/data.yaml epochs=80 imgsz=640
I reviewed the training dataset, and it follows the format of a dataset typically used for segmentation, where each annotation is structured as:
...
Having said that, how do the they train the model with polygons.
Thanks!
- Glenn JocherUltralytics
Thank you for sharing the references. The tutorial you mentioned likely uses a segmentation dataset with polygon annotations converted to bounding boxes or masks during preprocessing. YOLO models, including YOLOv8 and YOLO11, require annotations in specific formats (e.g., standard bounding boxes or YOLO OBB format) for training. For polygon data, you would need to preprocess and transform the annotations into an appropriate format like bounding boxes or masks. If you'd like to explore polygon-based tasks further, tools like SAM can assist with segmentation tasks, but adaptation for YOLO training is still necessary. Let me know if you need more guidance!
rihablahouar
Issue with Incorrect Predictions from Quantized YOLOv8m-obb Model (TFLite) in TensorFlow Framework
I have exported my YOLOv8m-obb model to TFLite format with INT8 quantization enabled, using an image size of 640x640 and a data.yaml for my dataset. When I use the quantized model for inference with the Ultralytics framework (Oriented Bounding Boxes), the predictions are correct. However, when I use the same model in the TensorFlow framework, I encounter several issues with the output:
Confidence scores are greater than 1, which is incorrect.
The class_id is either -1 or 0, but it should be 0 or 1 since I have only two classes.
The x and y coordinates have values of -1, which is wrong.
I suspect there might be an issue with how the quantization parameters (scale and zero-point) are being applied in TensorFlow, or possibly with the way I'm handling the model's output or the way I exported the model. I would appreciate guidance on how to correctly handle the quantized model in TensorFlow and resolve the issues with incorrect predictions.
- Glenn JocherUltralytics
@rihablahouar the issue likely arises due to differences in how TensorFlow interprets or handles the quantized TFLite model's outputs. Ensure that the post-processing operations (like decoding bounding boxes, confidence scores, and class indices) align with the model's export format and scale/zero-point quantization parameters. Additionally, verify the TensorFlow inference pipeline against the Ultralytics implementation for any discrepancies. For further debugging, you may find it useful to test the unquantized TFLite model in TensorFlow to isolate the quantization's impact.
