Ultralytics Docker 快速入门指南
本指南将介绍如何为 Ultralytics 项目设置 Docker 环境。Docker 是一个用于开发、交付和运行应用的平台,它通过容器确保软件无论部署到哪里都能以相同方式运行。


你将学到什么#
- 设置支持 NVIDIA 的 Docker
- 安装 Ultralytics Docker 镜像
- 在支持 CPU 或 GPU 的 Docker 容器中运行 Ultralytics
- 在 Docker 中使用显示服务器展示 Ultralytics 检测结果
- 将本地目录挂载到容器中
观看: 如何开始使用 Docker | 在 Docker 中使用 Ultralytics Python Package 的实时演示 🎉
前置条件#
- 确保你的系统已安装 Docker。如果尚未安装,可以从 Docker 网站下载并安装。
- 要使用 GPU 加速,请确保你的系统配备 NVIDIA GPU,并已安装 NVIDIA 驱动程序。CPU 镜像不需要 NVIDIA 硬件。
- 如果你使用 NVIDIA Jetson 设备,请确保已安装相应版本的 JetPack。更多详情请参阅 NVIDIA Jetson 指南。
设置支持 NVIDIA 的 Docker(可选)#
首先,运行以下命令,确认 NVIDIA 驱动程序已正确安装:
nvidia-smi安装 NVIDIA Container Toolkit#
安装 NVIDIA Container Toolkit,以在 Docker 容器中启用 GPU 支持:
curl -fsSL https://nvidia.github.io/libnvidia-container/gpgkey | sudo gpg --dearmor -o /usr/share/keyrings/nvidia-container-toolkit-keyring.gpg \
  && curl -s -L https://nvidia.github.io/libnvidia-container/stable/deb/nvidia-container-toolkit.list \
  | sed 's#deb https://#deb [signed-by=/usr/share/keyrings/nvidia-container-toolkit-keyring.gpg] https://#g' \
    | sudo tee /etc/apt/sources.list.d/nvidia-container-toolkit.list
更新软件包列表并安装 NVIDIA Container Toolkit:
sudo apt-get updatesudo apt-get install -y nvidia-container-toolkit使用 Docker 验证 CDI 设备#
运行 nvidia-ctk cdi list,确保 GPU CDI 设备可用(在 toolkit >= 1.18 时,toolkit 的 nvidia-cdi-refresh 服务会自动生成并维护规范):
nvidia-ctk cdi list你应该会看到 nvidia.com/gpu=0 和 nvidia.com/gpu=all 等条目。发现的 CDI 设备也会显示在 docker info 中。
安装 Ultralytics Docker 镜像#
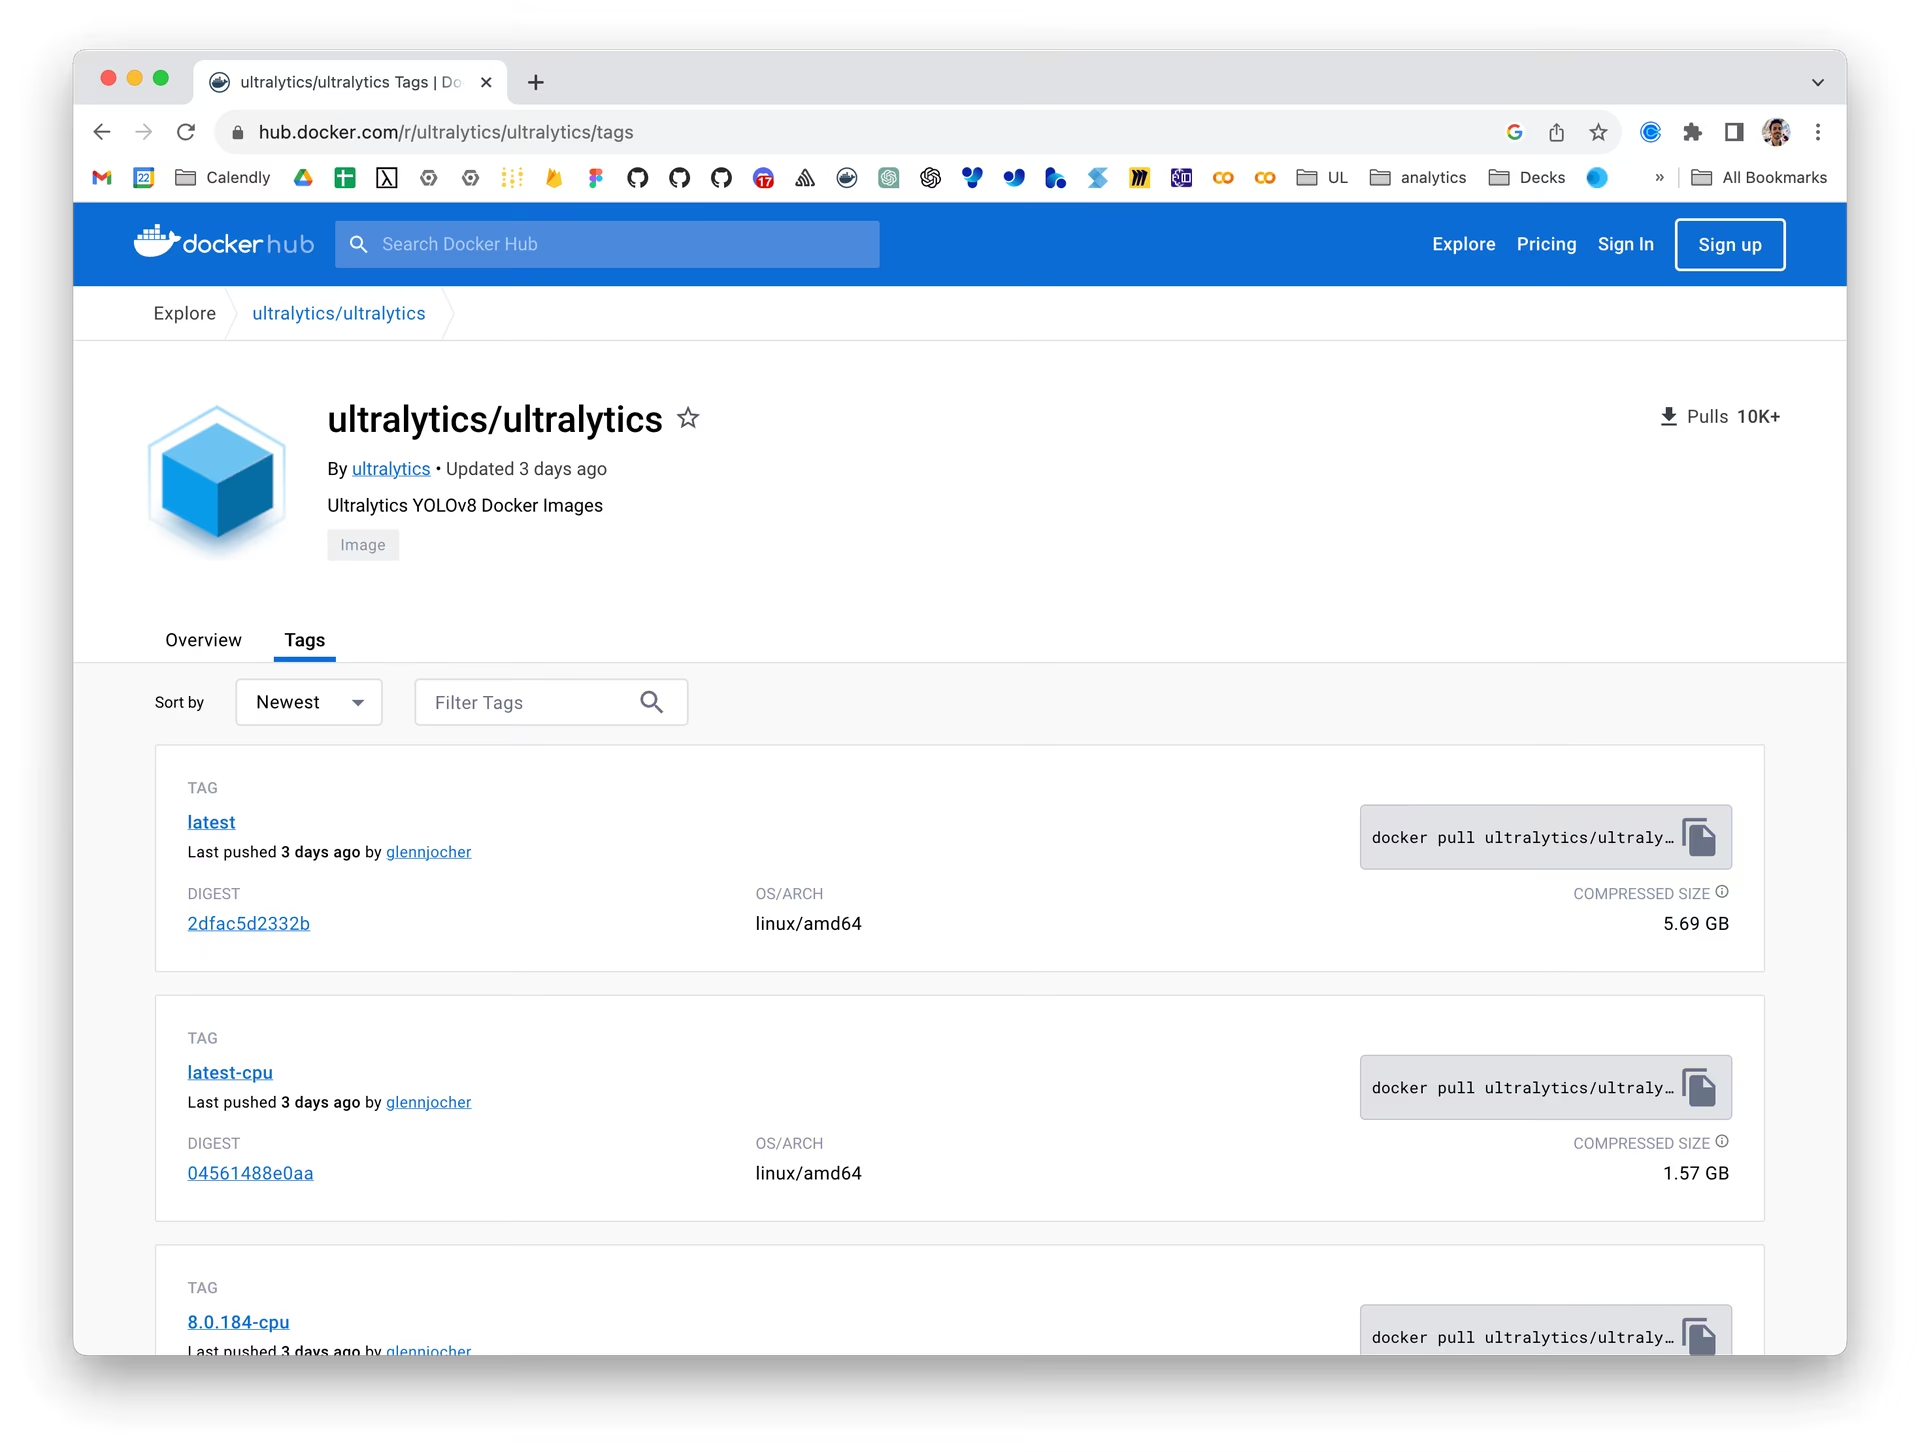
Ultralytics 在 Docker Hub 上发布了以下镜像。每个镜像都由Docker 发布工作流根据对应的 Dockerfile 构建。
| 标签 | 平台和用途 | 数据源 |
|---|---|---|
latest | Linux AMD64,支持 CUDA,用于 GPU 训练和推理 | Dockerfile |
latest-export | Linux AMD64,支持 CUDA 并包含导出依赖项,用于模型转换和基准测试 | Dockerfile-export |
latest-amd | Linux AMD64,支持 ROCm 和 MIGraphX,用于 AMD GPU 训练和推理 | Dockerfile-amd |
latest-python | 适用于 CPU 推理的轻量级 Linux AMD64 Python 3.14 镜像 | Dockerfile-python |
latest-python-export | 包含导出依赖项的 Linux AMD64 Python 3.13 CPU 镜像 | Dockerfile-python-export |
latest-cpu | Linux AMD64 CPU 镜像,默认命令为 Bash | Dockerfile-cpu |
latest-jupyter | Linux AMD64 CPU 镜像,包含 JupyterLab 和 Ultralytics 教程笔记本 | Dockerfile-jupyter |
latest-arm64 | 适用于 Apple 芯片、Raspberry Pi 和其他 ARM64 系统的 Linux ARM64 Python 3.13 CPU 镜像 | Dockerfile-arm64 |
latest-nvidia-arm64 | 适用于 DGX Spark(DGX OS)以及 Thor 上的 PyTorch(JetPack 7.1)的 Linux ARM64;随附的 TensorRT 不支持 JetPack | Dockerfile-nvidia-arm64 |
latest-jetson-jetpack6 | 适用于运行 JetPack 6 的 NVIDIA Jetson 设备的 Linux ARM64 镜像 | Dockerfile-jetson-jetpack6 |
latest-jetson-jetpack5 | 适用于运行 JetPack 5 的 NVIDIA Jetson 设备的 Linux ARM64 镜像 | Dockerfile-jetson-jetpack5 |
latest-jetson-jetpack4 | 适用于运行 JetPack 4 的 NVIDIA Jetson 设备的 Linux ARM64 镜像 | Dockerfile-jetson-jetpack4 |
latest-runner | 用于自托管 GitHub Actions GPU 运行器的 Linux AMD64 CUDA 镜像 | Dockerfile-runner |
latest-runner-cpu | 用于自托管 GitHub Actions CPU 运行器的 Linux AMD64 镜像 | Dockerfile-runner-cpu |
AMD64 GPU 镜像(latest、latest-export 和 latest-runner)使用 PyTorch 2.15 和 CUDA 13.2。启动镜像前,请使用 nvidia-smi 检查主机驱动程序对 CUDA 的支持情况;安装较新的容器不会升级主机驱动程序。CUDA 13 不再支持 Maxwell、Pascal 和 Volta GPU,包括 Tesla P100 和 V100。
NVIDIA ARM64 镜像使用 NVIDIA PyTorch 26.10,搭载 CUDA 13.4 和 TensorRT 11.4。它对 Thor 的 PyTorch 支持不包括 TensorRT:NVIDIA 不支持在 JetPack 上使用 TensorRT 11.4。对于 Jetson TensorRT 导出,请使用适用于你的 JetPack 版本且受支持的 TensorRT 10.x 运行时。请遵循 Jetson 指南或 DGX Spark 指南中的平台要求。JetPack 4、5 和 6 的镜像仍各自保留针对特定设备的软件栈。
Conda Dockerfile 可用于本地构建;latest-conda 的自动发布已停用,因此该仓库标签不包含这些更新。
Python、CPU、Jupyter 和 CPU runner 镜像使用 Python 3.14。Python 导出镜像使用 latest-python-3.13 基础镜像,该镜像由相同的 Dockerfile-python 和 --build-arg PYTHON_VERSION=3.13 构建,因为 TensorFlow、CoreML 和 PaddlePaddle 目前尚不支持 Python 3.14。
以 latest 开头的标签对应最近发布的主分支构建版本。带版本号的标签会将 latest 前缀替换为某个 Ultralytics 版本,例如 VERSION、VERSION-cpu 或 VERSION-jetson-jetpack6。若要获得可复现的环境,请使用带版本号的标签。
拉取最新镜像:
# Pull the latest Ultralytics image from Docker Hub
sudo docker pull ultralytics/ultralytics:latest
如果你想自行构建镜像,请克隆仓库,并从上表中选择匹配的 Dockerfile,同时将仓库根目录用作构建上下文:
# Build the CPU image locally from docker/Dockerfile-cpu
sudo docker build -t ultralytics/ultralytics:latest-cpu -f docker/Dockerfile-cpu .
在 Docker 容器中运行 Ultralytics#
以下是运行 Ultralytics Docker 容器的方法:
仅使用 CPU#
# Run without GPU
sudo docker run -it --ipc=host ultralytics/ultralytics:latest-cpu
使用 GPU#
# Run with all GPUs
sudo docker run -it --ipc=host --device nvidia.com/gpu=all ultralytics/ultralytics:latest

# Run specifying which GPUs to use
sudo docker run -it --ipc=host --device nvidia.com/gpu=2 --device nvidia.com/gpu=3 ultralytics/ultralytics:latest
-it 标志会分配伪 TTY 并保持标准输入打开,从而允许你与容器交互。--ipc=host 标志会启用对主机 IPC 命名空间的共享,这对进程间共享内存至关重要。对于 NVIDIA GPU,--device nvidia.com/gpu=... 标志会通过 CDI 授予访问权限。对于 AMD GPU,--device 标志会授予对 GPU 内核驱动程序(/dev/kfd)和显示渲染节点(/dev/dri)的访问权限。
在 Linux 上,CDI 设备请求需要 Docker >= 28.2.0(默认启用 CDI)和 nvidia-container-toolkit >= 1.18(自动生成 CDI 规范)。运行 GPU 容器前,请升级较旧的 Linux 主机。旧版 --gpus all 标志可能会在主机于常规软件包更新期间重新加载 systemd 时丢失 GPU 访问权限(Failed to initialize NVML: Unknown Error)(nvidia-container-toolkit#48)。CDI --device 请求会将设备节点包含在容器配置中,因此训练工作进程或 CI 运行器等长时间运行的容器在重新加载后仍可访问 GPU。
Windows 上的 Docker Desktop GPU 支持目前在 WSL 2 后端使用 --gpus all,因为 NVIDIA CDI 设备在此不可用。Windows 不使用 Linux systemd,因此上述守护进程重新加载失败的问题不适用。
关于文件访问的说明#
若要在容器中处理本地计算机上的文件,可以使用 Docker 卷:
# Mount a local directory into the container
sudo docker run -it --ipc=host --device nvidia.com/gpu=all -v /path/on/host:/path/in/container ultralytics/ultralytics:latest
将 /path/on/host 替换为本地计算机上的目录路径,并将 /path/in/container 替换为 Docker 容器内所需的路径。
持久化训练输出#
默认情况下,训练输出会保存在容器内的 /ultralytics/runs/<task>/<name>/。如果未挂载主机目录,容器移除后输出也会丢失。
要持久化训练输出:
# Recommended: mount workspace and specify project path
sudo docker run --rm -it -v "$(pwd)":/w -w /w ultralytics/ultralytics:latest \
  yolo train model=yolo26n.pt data=coco8.yaml project=/w/runs
这会将所有训练输出保存到主机上的 ./runs。
在 Docker 容器中运行图形用户界面(GUI)应用程序#
以下说明具有实验性质。与 Docker 容器共享 X11 套接字会带来潜在的安全风险。因此,建议只在受控环境中测试此方案。
Docker 主要用于将后台应用和 CLI 程序容器化,但也可以运行图形程序。在 Linux 环境中,有两种主要的图形显示服务器:X11(也称为 X Window System)和 Wayland。开始之前,必须先确定你当前使用的是哪种图形服务器。运行以下命令进行查看:
env | grep -E -i 'x11|xorg|wayland'X11 或 Wayland 显示服务器的设置和配置不在本指南的讨论范围内。如果上述命令没有返回任何内容,你需要先为系统启动其中一种显示服务器,然后才能继续。
使用 GUI 运行 Docker 容器#
使用 GPU
如果你正在使用 GPU,可以在命令中添加 --device nvidia.com/gpu=all 标志。
如果你使用 X11,可以运行以下命令,让 Docker 容器访问 X11 套接字:
xhost +local:docker && docker run -e DISPLAY=$DISPLAY \
  -v /tmp/.X11-unix:/tmp/.X11-unix \
  -v ~/.Xauthority:/root/.Xauthority \
  -it --ipc=host ultralytics/ultralytics:latest
此命令会将 DISPLAY 环境变量设置为主机的显示器,挂载 X11 套接字,并将 .Xauthority 文件映射到容器中。xhost +local:docker 命令允许 Docker 容器访问 X11 服务器。
在 GUI 中使用 Docker#
Ultralytics 镜像预装无头版 OpenCV,因此请先在容器内安装 OpenCV 的 GUI 版本及其系统库:
apt-get update && apt-get install -y --no-install-recommends libgl1 libglib2.0-0 libsm6
pip uninstall -y opencv-python-headless && pip install opencv-python
现在,你可以在 Docker 容器中显示图形应用。例如,你可以运行以下 CLI 命令,可视化 YOLO26 模型的 预测结果:
yolo predict model=yolo26n.pt show=True测试
使用完 Docker GUI 后#
无论哪种情况,完成后都别忘了撤销 Docker 组的访问权限。
xhost -local:docker想直接在终端中查看图像结果吗?
在 Linux 和 macOS 上,你可以使用 sixel 协议在 VSCode 集成终端中显示图像结果。
现在,你已经可以通过 Docker 使用 Ultralytics了。要自行托管 Ultralytics Web 应用,请参阅平台本地部署指南。
常见问题#
要通过 Docker 配置 Ultralytics,先确认系统已安装 Docker。如果你有 NVIDIA GPU,请安装 NVIDIA Container Toolkit 以启用 GPU 支持。然后使用以下命令从 Docker Hub 拉取最新的 Ultralytics Docker 镜像:
sudo docker pull ultralytics/ultralytics:latest使用 Ultralytics Docker 镜像可以在不同机器间保持环境一致,复现相同的软件和依赖项。这对于团队协作、在各种硬件上运行模型以及确保模型部署具有可复现性尤其有用。一般的 NVIDIA GPU 训练可使用
latest;NVIDIA Jetson 设备则应选择与你的 JetPack 版本匹配的镜像。首先,确保已安装并配置 NVIDIA Container Toolkit。然后,使用以下命令运行支持 GPU 的 Ultralytics YOLO:
sudo docker run -it --ipc=host --device nvidia.com/gpu=all ultralytics/ultralytics:latest # all GPUs此命令会创建一个具有GPU 访问权限的 Docker 容器,你可以将权限限制为特定 GPU,也可以切换到 AMD ROCm。
要在 Docker 容器中通过 GUI 可视化 YOLO 预测结果,你需要允许 Docker 访问显示服务器。对于运行 X11 的系统,命令如下:
xhost +local:docker && docker run -e DISPLAY=$DISPLAY \
  -v /tmp/.X11-unix:/tmp/.X11-unix \
  -v ~/.Xauthority:/root/.Xauthority \
  -it --ipc=host ultralytics/ultralytics:latest
对于运行 Wayland 的系统,请使用:
xhost +local:docker && docker run -e DISPLAY=$DISPLAY \
  -v $XDG_RUNTIME_DIR/$WAYLAND_DISPLAY:/tmp/$WAYLAND_DISPLAY \
  --net=host -it --ipc=host ultralytics/ultralytics:latest
在容器内,使用
show=True之前,请先安装 OpenCV 的 GUI 版本,具体说明请参阅在 Docker 容器中运行图形用户界面 (GUI) 应用程序部分。可以,你可以使用
-v标志,将本地目录挂载到 Ultralytics Docker 容器中:sudo docker run -it --ipc=host --device nvidia.com/gpu=all -v /path/on/host:/path/in/container ultralytics/ultralytics:latest将
/path/on/host替换为本地计算机上的目录,并将/path/in/container替换为容器内所需的路径。这样,你就可以在容器中使用本地文件。更多信息请参阅文件访问说明部分。


评论14
提出问题、分享结果,或帮助其他人。
 Letícia Rama
Hello,
Is this workflow suitable for other YOLO families, such as YOLO26?
 Glenn JocherUltralytics
Yes, the same workflow supports YOLO26 and other model families available in the
ultralyticspackage—use an up-to-date official image and specify the appropriate weights, such asmodel=yolo26n.pt. See the Docker Quickstart Guide for current image options, and feel free to drop any follow-up questions here so the Ultralytics team can help.1- Letícia Rama
Right Glenn, thanks
lauravchrobak
It looks like the, "Running Ultralytics in Docker Container" section is duplicated here
HellaPinot
Hello! I have been testing running yolov8 inside a container, things seem to work well however after a somewhat random amount of time the inference hangs with no error output.
I know the container hasn't crashed as I am reading events from a processing queue and I can see new partitions are being allocated on another thread.
I'm running two models one after the other (different sizes and detection classes), so I'm wondering if this could be the root of the issue? At no point would they be running at the same time.
I believe it is happening exactly when I call predict. Its hard to debug as again it happens very randomly and there is not output from the container, it seems like there might be an infinite loop somewhere thats stopping it from continuing.
Curious if anything like this has been encountered before?
- Glenn JocherUltralytics
Hello! 👋
It sounds like a tricky issue, especially since it occurs randomly. Here are a few suggestions that might help you isolate or resolve the problem:
-
Logging and Monitoring: Enhance the logging within your container. Consider logging the input sizes and other relevant data before the prediction call, and make sure you're logging any exceptions that could be silently caught.
-
Resource Checks: Ensure that there are no resource starvation issues, such as GPU memory not being freed up properly. Tools like
nvidia-smican help monitor GPU usage. -
Sequential Model Loading: Although the models are run sequentially and not in parallel, it could be beneficial to explicitly clear the memory after each model's predictions are done. This can be done by deleting model objects and calling
torch.cuda.empty_cache()if you are using PyTorch. -
Hardware Testing: Run your container pointing the inference to CPU only for a time to see if the problem persists. This could help determine if the issue is related to GPU computation or not.
-
Reproducibility Tactic: Since the issue is sporadic, try to determine if there’s a specific type of input or specific conditions under which this occurs more frequently.
If these suggestions don't help, please provide more details or code snippets, and I’d be happy to dive deeper into this!
Let me know how it goes!
-
HWKevinhwk
I want to install ultralytics using docker on top of NVIDIA TX2, is there a detailed procedure? The reason for this question is that after entering the command nvidia-smi in the TX2 terminal, the output is command not found, and I'm worried that the steps in the document above are not applicable to TX2.
 Paula DerrengerUltralytics(已编辑)
@HWKevinhwk hey there! 🚀 Setting up Ultralytics on NVIDIA TX2 with Docker can be a bit tricky if
nvidia-smiis missing, but no worries.For NVIDIA Jetson platforms like TX2,
nvidia-smiis typically not available, and you'll usetegrastatsinstead to monitor the GPU. The Jetson TX2 is supported on JetPack 4, so install JetPack 4 first, as it includes the NVIDIA drivers and libraries needed for GPU acceleration. Jetson devices use the Docker integration provided through JetPack with--runtime=nvidiarather than--gpus all. Then pull and run the Ultralytics Docker image for JetPack 4:t=ultralytics/ultralytics:latest-jetson-jetpack4 sudo docker pull $t && sudo docker run -it --ipc=host --runtime=nvidia $tSee the NVIDIA Jetson guide for details. If you encounter any specific issues, feel free to drop them here. Happy detecting! 🎉
Is there a detailed tutorial on deploying yolov8 on jetson TX2 using docker? I am pulling images docker pull ultralytics/ultralytics:latest-jetson terminal will downloading pause, long time pulling images unsuccessful, repeated attempts still so, any solution please?
- Paula DerrengerUltralytics(已编辑)
@HWKevinhwk hey there! 😊
It sounds like you're facing issues with the Docker image pull for the Jetson TX2. This might be due to network issues or Docker Hub delays, or to using a tag that does not exist.
Here's a simplified breakdown to get you started on the TX2 using Docker:
-
Ensure JetPack is installed: The TX2 is supported on JetPack 4, which includes the GPU drivers necessary for Docker integration with the Jetson GPU.
-
Install Docker:
sudo apt-get install docker.io -
NVIDIA runtime support (JetPack should handle this):
nvidia-smidoesn't work on Jetson, so verify thenvidiaruntime withdocker info | grep -i runtime. -
Pull the Docker image for Jetson. Pulling large Docker images can be challenging on slower networks:
sudo docker pull ultralytics/ultralytics:latest-jetson-jetpack4If you keep facing issues while pulling the image, try restarting your Docker service or check your network settings. Sometimes, using a different network can help too!
-
Run the Image:
sudo docker run -it --ipc=host --runtime=nvidia ultralytics/ultralytics:latest-jetson-jetpack4
This should set you on the right path to running Ultralytics YOLO on your Jetson TX2. If the problem persists, it might be worth checking Docker's log or discussing this issue further with your network admin or on Docker forums! 😄
Happy coding! 🚀
-
Peter-coding
Hey! I trained a YOLOv8 model on my local computer. I have the best.pt file, and I can use it in CLI (conda) for predict. I want to make a python app, which uses this best.pt file, and I want to containerize it. Is it possible to write the full python app (it is just a few lines of code, which runs the detection, then writes the detection result to a database), then containerize it, and able to use it anywhere? Thank you! :D
- Paula DerrengerUltralytics
Hey there! 😊
Absolutely, you can absolutely containerize your Python app that uses the
best.ptmodel! Here's a quick guide:-
Create Your Python App: Just like you mentioned, write your Python code that performs the detection and interacts with the database.
-
Dockerize Your Application:
-
Dockerfile: Create a Dockerfile in your project directory. Here's a simple example that uses Ultralytics' Docker image as a base:
FROM ultralytics/ultralytics:latest WORKDIR /app COPY . /app RUN pip install -r requirements.txt # Assuming you have a requirements.txt CMD ["python", "your_script.py"] -
Build Your Docker Image: Run the following command in your project directory:
sudo docker build -t your-app-name . -
Run Your Container: To run your container, especially if you're planning to use GPU, you might want to specify
--gpus all:sudo docker run -it --ipc=host --gpus all your-app-nameFor accessing local files, consider mounting a volume as described in the Docker Quickstart Guide.
-
-
Deployment: With your Docker image built, you can now deploy and run it anywhere that Docker is supported. If using a GPU, ensure the host machine supports NVIDIA GPUs and has the necessary drivers and Docker configured correctly.
That's it! You should be able to use your model within a containerized app now. If you hit any snags, double-check the Docker Quickstart Guide for Ultralytics for more details. Happy coding! 😄
-
udayzee05
DEPRECATION NOTICE The nvidia-docker wrapper is no longer supported, and the NVIDIA Container Toolkit has been extended to allow users to configure Docker to use the NVIDIA Container Runtime. For further instructions, see the NVIDIA Container Toolkit documentation and specifically the install guide.22 Jan 2024
- Paula DerrengerUltralytics(已编辑)
Hey there! 👋 Thanks for bringing up the deprecation notice regarding the nvidia-docker wrapper. You're right; use the NVIDIA Container Toolkit for GPU support in Docker containers. Here's how to set it up on Ubuntu/Debian, as described in our Docker Quickstart Guide:
# Add the NVIDIA Container Toolkit repository
curl -fsSL https://nvidia.github.io/libnvidia-container/gpgkey | sudo gpg --dearmor -o /usr/share/keyrings/nvidia-container-toolkit-keyring.gpg \
  && curl -s -L https://nvidia.github.io/libnvidia-container/stable/deb/nvidia-container-toolkit.list \
  | sed 's#deb https://#deb [signed-by=/usr/share/keyrings/nvidia-container-toolkit-keyring.gpg] https://#g' \
    | sudo tee /etc/apt/sources.list.d/nvidia-container-toolkit.list

# Install the NVIDIA Container Toolkit
sudo apt-get update
sudo apt-get install -y nvidia-container-toolkit
And to verify that the GPU devices are available to Docker:
nvidia-ctk cdi listThis should list entries such as
nvidia.com/gpu=all, indicating that your Docker setup can leverage GPU acceleration. 🚀For more detailed instructions and tips on using Ultralytics with Docker, including mounting local directories and running containers, check out our Docker Quickstart Guide. Happy coding!