使用 Ultralytics YOLO26 生成目标跟踪热力图

热力图解决方案可通过 Ultralytics YOLO26 跨视频帧跟踪目标,并将目标累积的运动强度叠加到每一帧上,因此繁忙区域会呈现暖色,安静区域则保持冷色。该方案基于 YOLO26目标跟踪,只需调用一次 Python 或 CLI 命令,即可将任意视频转换为空间活动图,显示交通流、人群移动和停留区域。
观看: 如何使用 Ultralytics YOLO26 创建热力图 | 可视化目标活动 | 零售行业 VisionAI 🚀
为什么要使用热力图进行视频分析?#
- 一眼发现活动模式: 跟踪目标停留的区域会累积强度,因此无需逐帧人工查看,就能显现交通繁忙的车道、热门货架或人群拥堵点。
- 内置跟踪功能: 该解决方案会在内部运行 YOLO26 检测和跟踪,因此无需单独搭建跟踪流水线。
- 一次运行即可计数: 传入
region,即可在生成热力图的同时统计进入和离开区域的目标数量,一次运行完成两项分析任务。
实际应用#
| 交通运输 | 零售 |
|---|---|
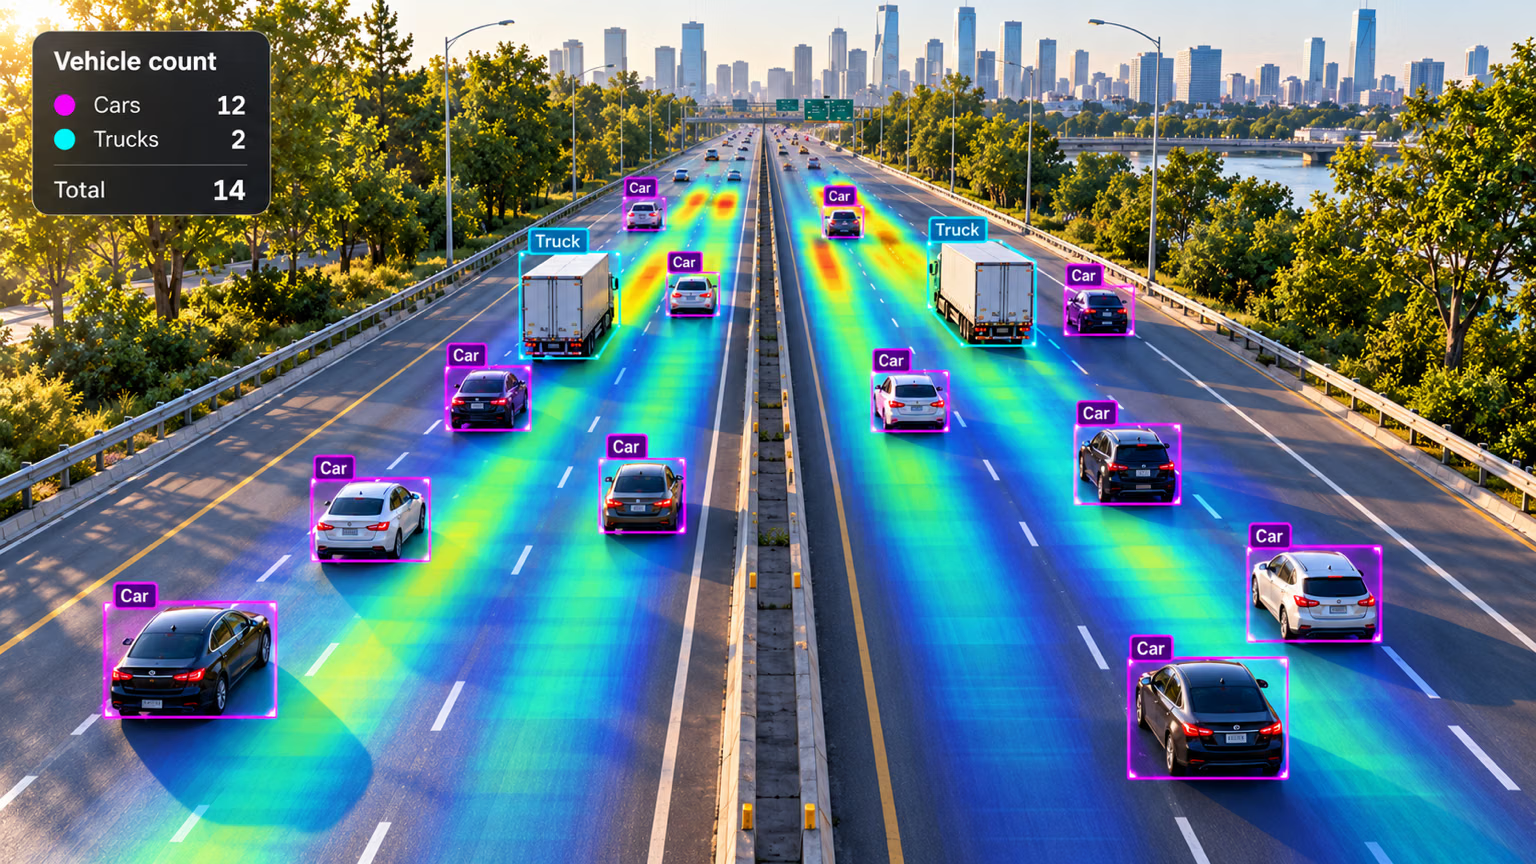 | 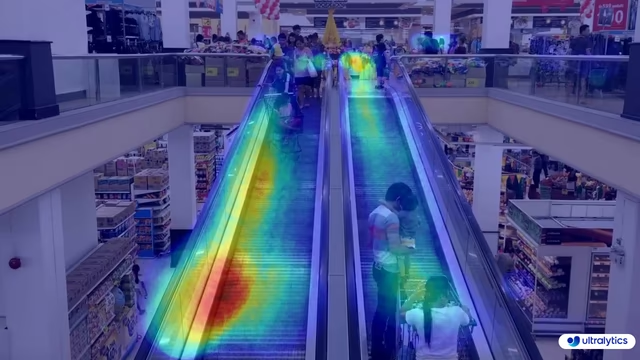 |
| Ultralytics YOLO 交通热力图 | Ultralytics YOLO 零售热力图 |
如何使用 Ultralytics YOLO 生成热力图#
通过 CLI 或 Python 对视频源运行热力图解决方案。下面的 Python 示例会将处理后的帧写入输出视频文件:
# Run a heatmap example
yolo solutions heatmap show=True

# Pass a source video
yolo solutions heatmap source="path/to/video.mp4"

# Pass a custom colormap
yolo solutions heatmap colormap=cv2.COLORMAP_INFERNO

# Heatmaps + object counting
yolo solutions heatmap region="[(20, 400), (1080, 400), (1080, 360), (20, 360)]"
Heatmap() 参数#
下面是 Heatmap 参数表:
| 参数 | 类型 | 默认值 | 说明 |
|---|---|---|---|
model | str | None | Ultralytics YOLO 模型文件的路径。 |
colormap | int | cv2.COLORMAP_DEEPGREEN | 要用于热力图的颜色映射。 |
show_in | bool | True | 控制是否在视频流中显示流入计数的标志。 |
show_out | bool | True | 控制是否在视频流中显示流出计数的标志。 |
region | list 或 dict | None | 定义感兴趣区域的点,可以是 (x, y) 元组列表,也可以是将区域名称映射到点列表的字典(仅支持多个 RegionCounter 区域)。如果为 None,则需要区域的解决方案会退回到预定义的默认区域。 |
line_width | int | 2 | 解决方案绘制的框、关键点和计数的线条粗细。 |
verbose | bool | True | 启用逐帧日志,记录输入形状、类别计数和处理速度。跟踪调用本身始终不会输出日志。 |
你也可以在 Heatmap 解决方案中使用不同的 track 参数。
| 参数 | 类型 | 默认值 | 说明 |
|---|---|---|---|
tracker | str | 'tracktrack.yaml' | 指定要使用的跟踪算法。内置选项:botsort.yaml、bytetrack.yaml、ocsort.yaml、deepocsort.yaml、fasttrack.yaml、tracktrack.yaml。 |
conf | float | 0.25 | 设置检测的置信度阈值;较低的值允许跟踪更多物体,但可能会包含误检。 |
iou | float | 0.5 | 设置用于筛除重叠检测结果的交并比 (IoU) 阈值。 |
classes | list | None | 按类别索引筛选结果。例如,classes=[0, 2, 3] 只跟踪指定类别。 |
device | str | None | 指定推理设备(例如 cpu、cuda:0 或 0)。用户可以选择 CPU、特定 GPU 或其他计算设备来运行模型。 |
imgsz | int or tuple | 640 | 目标推理图像尺寸:正方形图像使用整数,或使用 (height, width) 对。图像尺寸会调整为模型步幅的整数倍。 |
max_det | int | 300 | 跟踪前每帧保留的最大检测数量,用于限制解决方案在密集场景中处理的物体数量。 |
quantize | int or str | None | 推理精度:对于非 CPU 上运行的 PyTorch 和 TorchScript 模型,使用 16 (FP16) 或 32/unset (FP32) 进行选择;其他格式使用其模型文件和运行时所选的精度。此参数替代已弃用的 half 参数。 |
此外,支持的可视化参数如下:
| 参数 | 类型 | 默认值 | 说明 |
|---|---|---|---|
show | bool | False | 如果 True,则在窗口中显示带标注的图像或视频。适用于在开发或测试期间即时查看结果。 |
show_conf | bool | True | 在每个检测结果的标签旁显示置信度分数,帮助了解模型对该检测结果的确信程度。 |
show_labels | bool | True | 在可视化输出中显示每个检测结果的标签,便于立即了解检测到的对象。 |
热力图颜色映射#
colormap 参数接受任何 OpenCV 颜色映射。传入 cv2 模块中的常量,例如 colormap=cv2.COLORMAP_INFERNO:
| 颜色映射名称 | 说明 |
|---|---|
cv2.COLORMAP_AUTUMN | 秋季颜色映射 |
cv2.COLORMAP_BONE | 骨骼颜色映射 |
cv2.COLORMAP_JET | Jet 颜色映射 |
cv2.COLORMAP_WINTER | Winter 颜色映射 |
cv2.COLORMAP_RAINBOW | Rainbow 颜色映射 |
cv2.COLORMAP_OCEAN | Ocean 颜色映射 |
cv2.COLORMAP_SUMMER | Summer 颜色映射 |
cv2.COLORMAP_SPRING | Spring 颜色映射 |
cv2.COLORMAP_COOL | Cool 颜色映射 |
cv2.COLORMAP_HSV | 色相、饱和度、明度(HSV)颜色映射 |
cv2.COLORMAP_PINK | Pink 颜色映射 |
cv2.COLORMAP_HOT | Hot 颜色映射 |
cv2.COLORMAP_PARULA | Parula 颜色映射 |
cv2.COLORMAP_MAGMA | Magma 颜色映射 |
cv2.COLORMAP_INFERNO | Inferno 颜色映射 |
cv2.COLORMAP_PLASMA | Plasma 颜色映射 |
cv2.COLORMAP_VIRIDIS | Viridis 颜色映射 |
cv2.COLORMAP_CIVIDIS | Cividis 颜色映射 |
cv2.COLORMAP_TWILIGHT | Twilight 颜色映射 |
cv2.COLORMAP_TWILIGHT_SHIFTED | Shifted Twilight 颜色映射 |
cv2.COLORMAP_TURBO | Turbo 颜色映射 |
cv2.COLORMAP_DEEPGREEN | Deep Green 颜色映射 |
热力图的工作原理#
热力图解决方案扩展了ObjectCounter类。处理第一帧时,它会创建一个与帧尺寸相同的空白强度层。随后,每帧都会经过两个步骤处理:
- YOLO26 跟踪会检测并追踪帧中的每个对象
- 对于每个被跟踪的对象,热力图强度会在其边界框中心的圆形区域内增加
每帧处理一次时,系统会对累积的强度层进行归一化,使用所选颜色映射着色,并与原始帧混合。至少跟踪到一个对象后,叠加层才会显示;在此之前,帧会以未叠加热力图的形式显示。
生成的动态图像会随着时间推移逐渐累积,展现视频数据中的交通模式、人群移动或其他空间行为。设置 region 后,该解决方案还会在热力图逐渐形成的同时,统计进入和离开该区域的对象。
结论#
Ultralytics YOLO26 热力图解决方案只需几行代码,就能将对象跟踪结果转换为直观的活动叠加层。你可以进一步将它与对象计数结合,探索其他 Ultralytics 解决方案,或阅读底层的跟踪模式。
常见问题#
Ultralytics YOLO26 会跟踪视频帧中的对象,在每个被跟踪对象的位置累积强度值,然后为结果着色并与原始帧混合,从而生成热力图。对象频繁出现或停留较久的区域会累积更高的强度,并以更暖的颜色呈现。配置选项请参阅
Heatmap()参数部分。如主示例所示,使用 OpenCV 的
cv2.VideoWriter,并为每个处理后的帧写入results.plot_im。plot_im属性中保存的是已应用热力图叠加层的帧。可以。将
region参数传给Heatmap(),并提供线段、矩形或多边形的点;该解决方案会在热力图逐渐形成的同时统计进入和离开该区域的对象。返回结果包括in_count、out_count和各类别的计数。有关区域配置的详细信息,请参阅对象计数指南。将
classes参数传给Heatmap(),并指定你想保留的类别索引。例如,classes=[0, 2]仅根据人和汽车生成热力图(COCO 类别索引 0 和 2):import cv2 from ultralytics import solutions cap = cv2.VideoCapture("path/to/video.mp4") heatmap = solutions.Heatmap(show=True, model="yolo26n.pt", classes=[0, 2]) while cap.isOpened(): success, im0 = cap.read() if not success: break results = heatmap(im0) cap.release() cv2.destroyAllWindows()


评论65
提出问题、分享结果,或帮助其他人。
RizwanMunawar
🎉 Big News Alert! 🚀 Ultralytics Solutions CLI is here from ultralytics>=8.3.28! Now, you can easily harness the power of advanced YOLO solutions straight from the command line. Simplify your workflow, and streamline object detection, tracking, counting, and more—all with just a few commands! Get ready to experience a whole new level of efficiency! 💥
CLI Usage Overview
yolo SOLUTIONS SOLUTION_NAME ARGS- SOLUTIONS is a mandatory keyword.
- SOLUTION_NAME (optional): Choose from ['count', 'heatmap', 'queue', 'speed', 'workout', 'analytics'].
- ARGS (optional): Use custom
arg=valuepairs, likeshow_in=True, to customize settings.
Examples
yolo solutions heatmap show=True  # For object counting

yolo solutions heatmap source="path/to/video/file.mp4"  # Specify a video file path
Start exploring now and let Ultralytics Solutions CLI power up your projects!
4Arjunpixel28
Has any one applied heatmap on instance segmentation ?
2 Glenn JocherUltralytics(已编辑)
Yes, applying heatmaps to instance segmentation is feasible and offers a vivid way to visualize the density and distribution of detected objects across video frames 🌈. The
Heatmapsolution runs tracking itself with whatever model you give it, including a segmentation model, and accumulates intensity around each tracked object's bounding box (the masks themselves are not used). Here's a simplified example:import cv2 from ultralytics import solutions cap = cv2.VideoCapture("path/to/video.mp4") assert cap.isOpened(), "Failed to open video file or stream!" w, h, fps = (int(cap.get(x)) for x in (cv2.CAP_PROP_FRAME_WIDTH, cv2.CAP_PROP_FRAME_HEIGHT, cv2.CAP_PROP_FPS)) video_writer = cv2.VideoWriter("heatmap_output.avi", cv2.VideoWriter_fourcc(*"mp4v"), fps, (w, h)) # Initialize your heatmap object with a segmentation model heatmap = solutions.Heatmap(show=True, model="yolo26n-seg.pt", colormap=cv2.COLORMAP_PARULA) # Process video frames while cap.isOpened(): success, frame = cap.read() if not success: break # Exit loop if no more frames results = heatmap(frame) video_writer.write(results.plot_im) cap.release() video_writer.release() cv2.destroyAllWindows()This snippet performs tracking with an instance segmentation model on video frames and overlays the accumulated heatmap. Remember, the success of applying heatmaps heavily relies on the quality of your model, so ensure it has been adequately trained or fine-tuned for your instance segmentation task. Happy visualizing! 🚀
 Paula DerrengerUltralytics(已编辑)
Yes, applying heatmaps to instance segmentation is feasible and offers a vivid way to visualize the density and distribution of detected objects across video frames 🌈. The
Heatmapsolution tracks objects with the model you provide, including a segmentation model, and overlays the accumulated activity on each frame. It builds the heatmap from the tracked objects' bounding boxes rather than the masks.Here's a simplified example:
import cv2

from ultralytics import solutions

# Initialize video capture
cap = cv2.VideoCapture("path/to/your/video.mp4")
assert cap.isOpened(), "Error reading video file"

# Video writer setup
w, h, fps = (int(cap.get(x)) for x in (cv2.CAP_PROP_FRAME_WIDTH, cv2.CAP_PROP_FRAME_HEIGHT, cv2.CAP_PROP_FPS))
video_writer = cv2.VideoWriter("segmentation_heatmap.avi", cv2.VideoWriter_fourcc(*"mp4v"), fps, (w, h))

# Initialize heatmap with a segmentation model
heatmap = solutions.Heatmap(show=True, model="yolo26n-seg.pt", colormap=cv2.COLORMAP_JET)

while cap.isOpened():
    success, im0 = cap.read()
    if not success:
        break

    # Track objects and generate the heatmap overlay
    results = heatmap(im0)

    # Write heatmap output
    video_writer.write(results.plot_im)

# Cleanup
cap.release()
video_writer.release()
cv2.destroyAllWindows()
Feel free to experiment with different configurations, such as
colormap, to meet your specific visualization needs. Happy coding! 🚀Hi ,
heatmap_obj = heatmap.Heatmap(view_img=False, imw=w, imh=h, heatmap_alpha=0.5, colormap=cv2.COLORMAP_JET)
TypeError: Heatmap.__init__() got an unexpected keyword argument 'view_img'
when i tried to run this i got this error !
- Paula DerrengerUltralytics(已编辑)
Hey there! 👋 It looks like you encountered an unexpected
view_imgargument error. I'm here to help!This happens because the
view_imgargument no longer exists in theHeatmapsolution; it was replaced byshow. Update your Ultralytics library and use the current arguments:heatmap = solutions.Heatmap(show=True, model="yolo26n-seg.pt", colormap=cv2.COLORMAP_JET)To update the library, run:
pip install ultralytics --upgradeThat should do the trick! Keep us posted if you run into any more issues or need further assistance. Happy coding! 🚀
I Tried upgrading the ultralytics also its giving same attribute error heatmap_obj = heatmap.Heatmap(imw=w, imh=h, heatmap_alpha=0.5, colormap=cv2.COLORMAP_JET) TypeError: Heatmap.init() got an unexpected keyword argument 'imw'
- Paula DerrengerUltralytics(已编辑)
@Arjunpixel28 hi there! 👋 It seems there's a mix-up with the initialization arguments for the
Heatmapclass. You don't need to specifyimwandimh, because the frame size is taken from the frames you process. In current versions, initialize it like this:heatmap = solutions.Heatmap(model="yolo26n.pt", colormap=cv2.COLORMAP_JET, show=True) results = heatmap(frame) # annotated image is in results.plot_imSee the Heatmaps guide for the full list of arguments. This setup should work without errors. Should you face any more issues or have further questions, feel free to reach out! 🚀
Hi Paula Derrenger,
in the earlier response you had only given the parameters of imw and imh and now your saying it should not be used and even now its not working still have issue with that.
heatmap_obj = heatmap.Heatmap(colormap=cv2.COLORMAP_JET, heatmap_alpha=0.5) TypeError: Heatmap.init() got an unexpected keyword argument 'colormap'
I just asked a simple thing to apply heat map on instance segmentation since so many days you guys have not sloved that
- Paula DerrengerUltralytics(已编辑)
@Arjunpixel28 hey there! I understand your concern and appreciate your patience. The
Heatmapsettings are now passed when you create the object (there is no separateset_args()), and the object is called directly on each frame, running tracking itself:import cv2 from ultralytics import solutions cap = cv2.VideoCapture("path/to/video.mp4") assert cap.isOpened(), "Error reading video file" # Settings such as colormap are set at initialization heatmap = solutions.Heatmap(model="yolo26n.pt", colormap=cv2.COLORMAP_PARULA) while cap.isOpened(): success, frame = cap.read() if not success: break results = heatmap(frame) cv2.imshow("Heatmap", results.plot_im) if cv2.waitKey(1) & 0xFF == ord("q"): break cap.release() cv2.destroyAllWindows()See the Heatmaps guide for all available arguments. If you encounter other issues, please let us know! 🚀
frame_with_heatmap = heatmap_obj.generate_heatmap(frame, tracks) File "/usr/local/lib/python3.10/dist-packages/ultralytics/solutions/heatmap.py", line 163, in generate_heatmap self.heatmap *= self.decay_factor # decay factor TypeError: unsupported operand type(s) for *=: 'NoneType' and 'float' and again i got this error Type error
- Paula DerrengerUltralytics(已编辑)
@Arjunpixel28 hey there! 👋 It looks like you're encountering a TypeError related to the initialization of the
Heatmapobject. Sorry for the confusion caused by previous responses. TheHeatmapclass lives inultralytics.solutions(it is not importable fromultralyticsdirectly), and arguments such ascolormapandshoware passed when you create it. The object is then called on each frame:import cv2 from ultralytics import solutions cap = cv2.VideoCapture("path/to/your/video.mp4") assert cap.isOpened(), "Failed to open video." heatmap = solutions.Heatmap(model="yolo26n.pt", colormap=cv2.COLORMAP_JET) while True: ret, frame = cap.read() if not ret: break # Exit loop if no more frames results = heatmap(frame) # tracking and heatmap overlay in one call cv2.imshow("Heatmap Visual", results.plot_im) if cv2.waitKey(10) == ord("q"): break cap.release() cv2.destroyAllWindows()If you're still facing issues, check your Ultralytics version with
pip show ultralyticsand upgrade withpip install -U ultralytics. Thanks for your patience, and we're here to help get you through this! from ultralytics import YOLO, Heatmap ImportError: cannot import name 'Heatmap' from 'ultralytics' (/home/safepro/.local/lib/python3.10/site-packages/ultralytics/init.py)
- Paula DerrengerUltralytics(已编辑)
Hey there! 🌟 It looks like you've encountered an import error when trying to use
Heatmapfrom theultralyticspackage.The heatmap functionality is part of the
ultralytics.solutionsmodule. The current import is:from ultralytics import solutions heatmap = solutions.Heatmap(model="yolo26n.pt", show=True)If
solutionsis not recognized, your installed version is likely too old. Update to the latest version using pip:pip install ultralytics --upgradeSee the Heatmaps guide for a full example. Thanks for your understanding, and feel free to reach out with any more questions! 🚀
hariouat
Hello everyone,
Please, how to generate heatmaps for classification model with yolov11?
Thanks in advance for your reply.
1@hariouat Hi, thanks for reaching out! At the moment, we don’t support heatmaps for the classification model. However, you can explore our heatmap implementation and adapt it to fit your specific requirements: https://github.com/ultralytics/ultralytics/blob/main/ultralytics/solutions/heatmap.py
Thank you!
- Glenn JocherUltralytics
Thank you for your question! Currently, heatmap generation in Ultralytics YOLO11 is supported for object detection tasks and not directly for classification models. If you're specifically looking to visualize classification results, you might need to adapt custom visualization techniques using libraries like Matplotlib or OpenCV. For more details on heatmap usage, visit the documentation.
hnyll
tips pls on how to generate heatmaps for single images with yolo11 model?
1also is it possible to choose what "class" or thing i want to create a heatmap of?
- Glenn JocherUltralytics(已编辑)
@hnyll to generate a heatmap for a single image with a YOLO model, create the
Heatmapsolution with your model and call it on the image, then use the annotated result:import cv2 from ultralytics import solutions heatmap = solutions.Heatmap(model="yolo26n.pt", show=False) results = heatmap(cv2.imread("path/to/image.jpg")) cv2.imwrite("heatmap_result.jpg", results.plot_im)Heatmaps build up intensity over time, so a single image gives only a snapshot of the detected objects. To restrict it to specific classes, pass
classes=[...]when creatingHeatmap. For more details, please refer to the Ultralytics heatmap guide. thanks for the reply. i found out how to do heatmap on single images. i just wasnt looking carefully enough. do you happen to know where i can find more information about what the classes represent? im not sure that i could find it on the Ultralytics heatmap guide. for example what classes 12 and 18 when i do
heatmap = solutions.Heatmap( show=True, model="yolo11n.pt", colormap=cv2.COLORMAP_PARULA, classes=[12,18] )also is there any way that i can add a class by training a model or something? i wanted to create heatmaps on something that probably isnt in the list of classes in the pretrained yolo model.
- Glenn JocherUltralytics
For class information, you can refer to the dataset's YAML file used during training, which lists all class names. To add a new class, you'll need to retrain the model with a dataset that includes the new class.
Jaykhokhara
Have you ever tried tracking short video segments (for example, 10-minute chunks) from the same camera based on timestamps, and then combining the heatmaps using those timestamps — such as merging 6 chunks (10 minutes each) to create a 1-hour heatmap? I tried saving the heatmap data in JSON, but the file becomes very large and slow to load. Storing the data in .npy works, but using it at scale or in a larger platform isn’t very practical. Do we have any recommended approach or solution for this in Ultralytics?
- Glenn JocherUltralytics
Yes—rather than JSON, the scalable approach is to persist the underlying accumulated raster (
heatmap.heatmap, a NumPy array) and merge by summing arrays (same camera/resolution), then normalize/visualize once at the end; you can either keep a singlesolutions.Heatmapinstance alive across your 10‑minute chunks, or save/load the array between runs (see the Heatmaps guide and the Heatmap solution reference).import numpy as np import cv2 from ultralytics import solutions heatmap = solutions.Heatmap(model="yolo26n.pt", show=False, colormap=cv2.COLORMAP_PARULA) # ...process a 10-min chunk... # results = heatmap(im0) # call per-frame # save compactly (much smaller than JSON) np.savez_compressed("cam1_2026-01-18T1200Z.npz", heatmap=heatmap.heatmap.astype(np.float32)) # later: merge multiple chunks (1-hour heatmap) merged = None for f in ["cam1_2026-01-18T1200Z.npz", "cam1_2026-01-18T1210Z.npz", "cam1_2026-01-18T1220Z.npz"]: h = np.load(f)["heatmap"] merged = h if merged is None else (merged + h)If you share what “at scale” means for your platform (e.g., cloud object storage, DB constraints, expected camera count), reply here in this discussion with a bit more detail and we can suggest the best storage format (e.g., chunked
zarr/HDF5 vs compressednpz).
wisrovi
tendrias el video de ejemplo que has usado?
- Glenn JocherUltralytics
Los videos de ejemplo específicos mostrados en la documentación no están disponibles para descarga directa. Sin embargo, puedes usar cualquier video para probar la funcionalidad de heatmaps con YOLO11:
# Usar tu propio video
yolo solutions heatmap source="path/to/tu_video.mp4" show=True

# O usar videos de ejemplo disponibles públicamente
# Prueba con videos de tráfico, multitudes, o cualquier escena con movimiento
También puedes encontrar videos de prueba gratuitos en sitios como Pixabay o usar tu cámara web con
source=0para testing en tiempo real.
haiyuou
Is there a heatmap module compatible with YOLO v11 for image detection?
I am a beginner from China. If you are willing to answer my questions, please contact me via email. Thank you very much. 1636705028@qq.com
- Glenn JocherUltralytics
@haiyuou thanks for your interest in YOLO11! The current heatmap implementation is designed for video tracking applications, but you can adapt it for single image detection by using the same Heatmap solution with static images. Please continue the discussion here on GitHub rather than via email so the entire community can benefit from the solutions.
reigngers15
how to generate the heatmap visualization just for a specific image?
- Glenn JocherUltralytics(已编辑)
@reigngers15 To generate a heatmap visualization for a specific image, you can adapt the solutions approach with a few modifications:
import cv2

from ultralytics import solutions

# Load your image
image = cv2.imread("path/to/your/image.jpg")

# Initialize heatmap object
heatmap = solutions.Heatmap(
    show=True,
    model="yolo26n.pt",
    colormap=cv2.COLORMAP_PARULA,
    # classes=[0, 2],  # Optional: specify classes for heatmap
)

# Process the image with the heatmap (runs the model internally)
results = heatmap(image)

# Display or save the result
cv2.imshow("Heatmap", results.plot_im)
cv2.waitKey(0)
cv2.imwrite("heatmap_result.jpg", results.plot_im)
Since heatmaps typically build up intensity over time across video frames, for a single image you'll get a snapshot visualization of detected objects. If you need more visualization control, you can find additional information in our heatmaps documentation.
how about in this code, can i add or change the size of heatmap?
Initialize heatmap object
heatmap = solutions.Heatmap( show=True, model=model, # Pass the model directly colormap=cv2.COLORMAP_PARULA, # classes=[0, 2], # Optional: specify classes for heatmap size=15 (if px) )
or is it possible to change it square instead of circle?
- Glenn JocherUltralytics
@reigngers15 Currently, the
Heatmapclass in YOLO11 doesn't have direct parameters for changing the size or shape of the heatmap points from circles to squares. The heatmap implementation uses a radius-based approach to create circular effects around detected objects.If you need to customize the size or shape of the heatmap, you would likely need to modify the
heatmap_effectmethod in the source code. This method is responsible for calculating the area of effect for each detection.Here's what you could potentially do:
-
For changing the size: You might need to fork the repository and modify the calculation in the
heatmap_effectmethod to adjust the radius used. -
For changing to a square shape: You would need to replace the circular distance calculation with a square boundary check.
For advanced customizations like these, I recommend checking out the source code in the ultralytics/solutions/heatmap.py file and making your own modified version.
If you need further guidance on specific implementation details, feel free to ask!
1 -
fangyuZ1025
That just track task , if i want do some detect, classify,segement task? how can i modify the code?
- Glenn JocherUltralytics(已编辑)
@fangyuZ1025 the
Heatmapsolution accumulates the locations of tracked objects, so it needs a model that outputs bounding boxes: a detection model (for exampleyolo26n.pt) or a segmentation model (for exampleyolo26n-seg.pt), which you pass asmodel=when you createsolutions.Heatmap(...). Classification models (-cls) produce no object locations, so a heatmap can't be built from them. Refer to the Heatmaps guide for detailed examples and configurations. Let me know if you need further clarification! Sorry, I think I didn't express what I meant. I am working on the heat map of yolov8 to explain the interpretability of the model. This code is doing the heat map of the video tracking task, and I want to implement my image heat map feature detection based on it. I wonder if there is any relevant code. Thanks again for your reply
- Glenn JocherUltralytics(已编辑)
Thank you for clarifying! To produce a heatmap for static images, you can use the same
Heatmapsolution and call it on an image:results = heatmap(image)returns a results object with the overlay inresults.plot_im. Note thatgenerate_heatmapno longer exists. For further guidance, refer to theheatmap.pyimplementation. Let us know if you need further assistance!
Halibo01
Hello, I'm trying to apply a heatmap using a classification model in YOLOv8, but I'm encountering an issue. The error message I receive is: 'AttributeError: 'NoneType' object has no attribute 'cpu'. Is there a known solution to this?
- Glenn JocherUltralytics
@Halibo01 it seems like the error might be due to an issue with the tracking results. Please ensure you are using the latest version of the Ultralytics package. If the issue persists, double-check that the model and input data are correctly loaded and processed. For more detailed guidance, refer to the Heatmaps Guide.
- Glenn JocherUltralytics
@Halibo01 it looks like you're encountering an issue with the classification model in YOLOv8. The error 'AttributeError: 'NoneType' object has no attribute 'cpu'' typically indicates that a variable expected to hold a tensor is actually
None. Please ensure that your model's output is correctly assigned and notNonebefore calling.cpu(). Additionally, verify that you are using the latest version of the Ultralytics package. For further details on heatmaps, you can refer to the Ultralytics Heatmaps Guide.