Ultralytics YOLOv5 🚀 on AWS Deep Learning Instance: Your Complete Guide
Setting up a high-performance deep learning environment can seem daunting, especially for newcomers. But fear not! 🛠️ This guide provides a step-by-step walkthrough for getting Ultralytics YOLOv5 up and running on an AWS Deep Learning instance. By leveraging the power of Amazon Web Services (AWS), even those new to machine learning (ML) can start quickly and cost-effectively. The scalability of the AWS platform makes it ideal for both experimentation and production deployment.
Other quickstart options for YOLOv5 include our Google Colab Notebook ![]() , Kaggle environments
, Kaggle environments  , GCP Deep Learning VM, and our pre-built Docker image available on Docker Hub
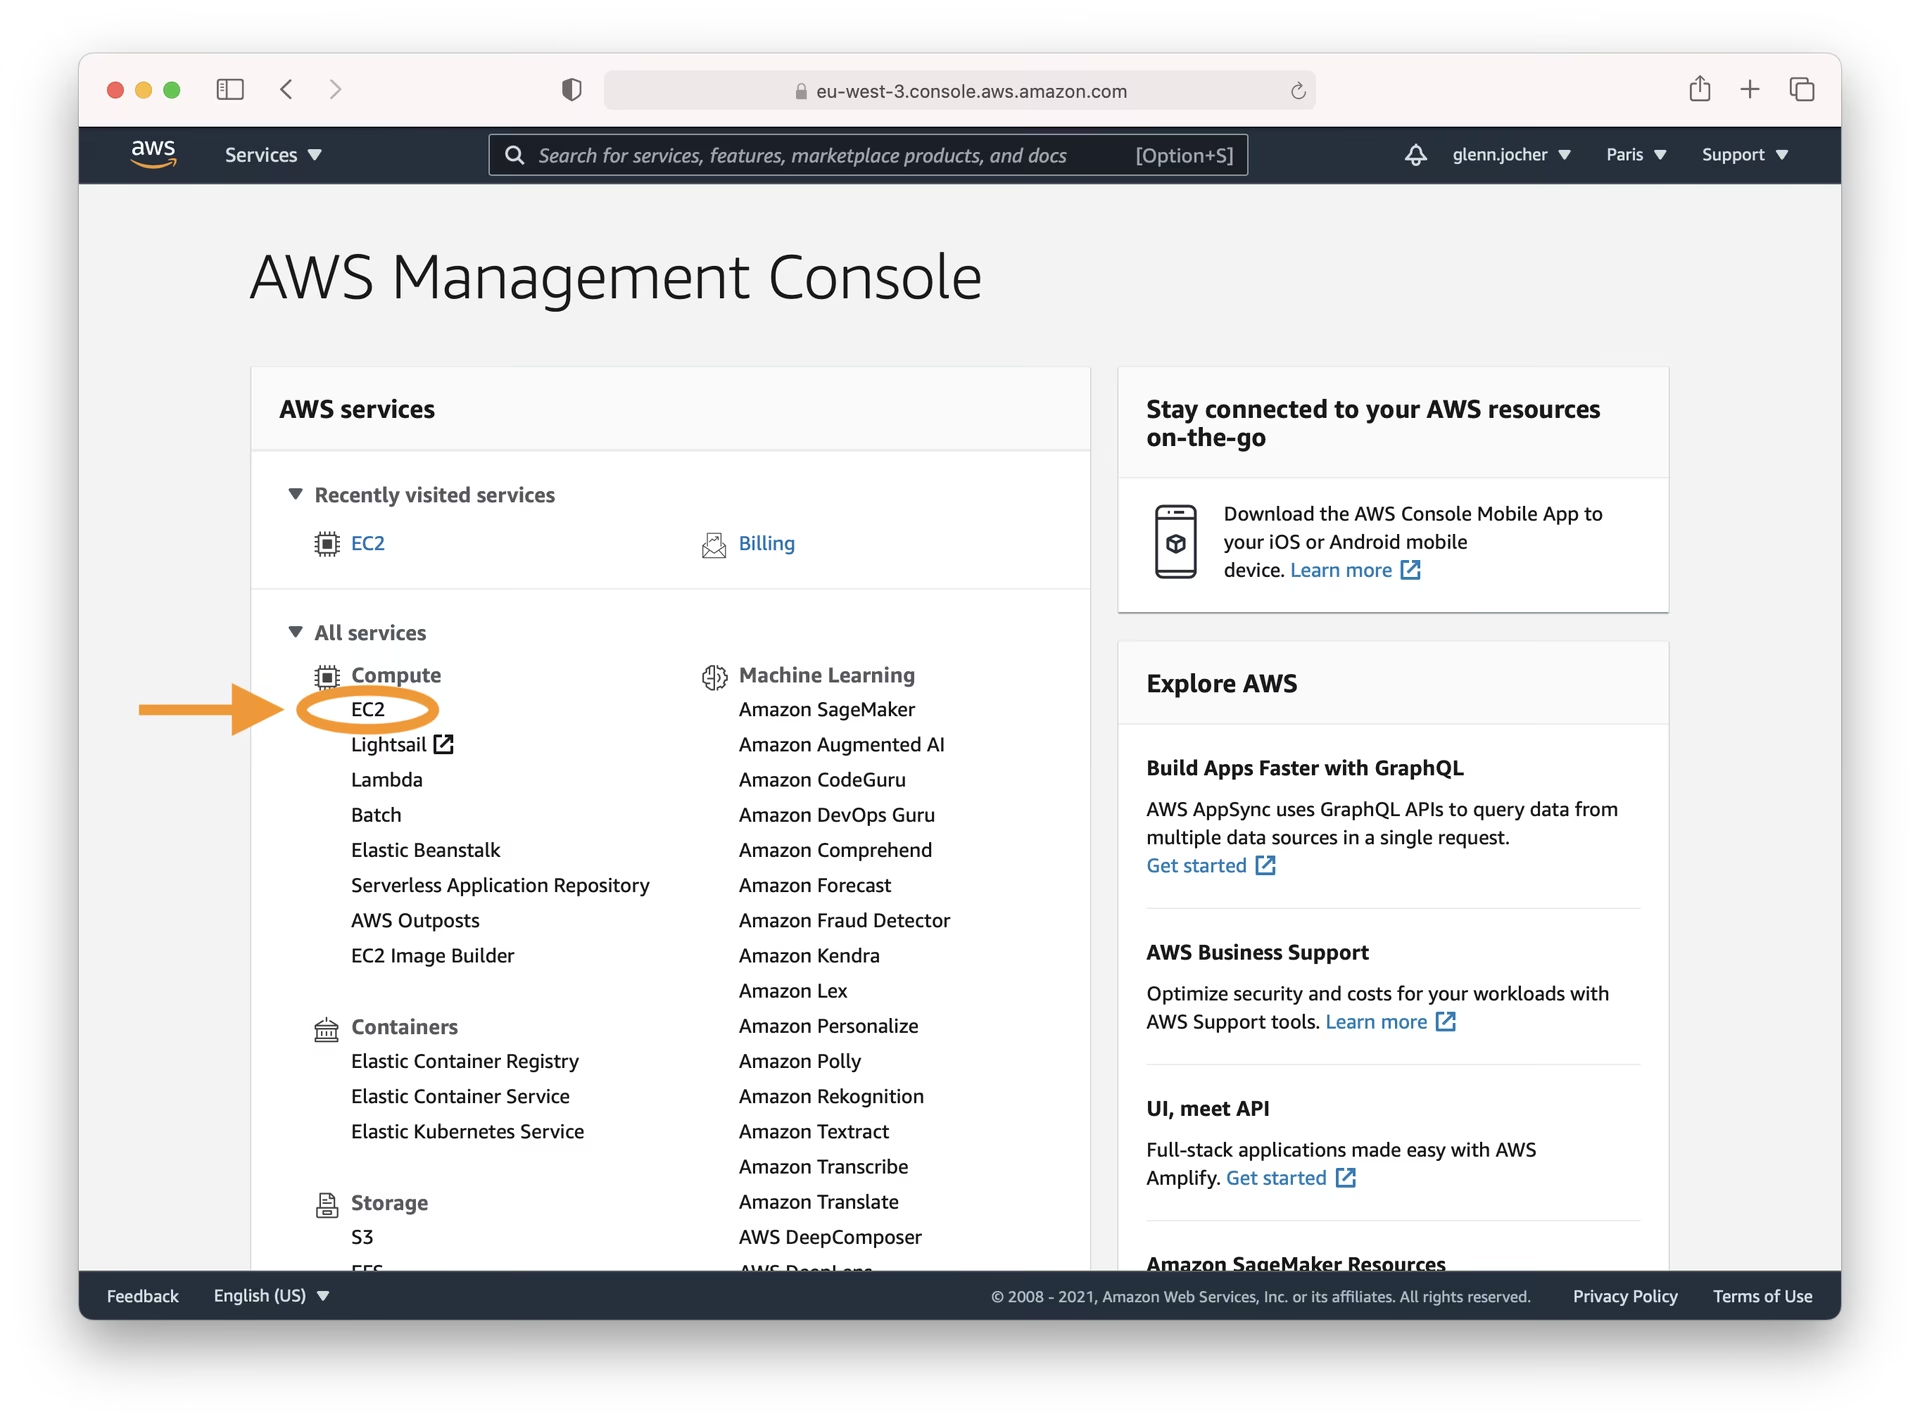
Step 1: AWS Console Sign-In
Begin by creating an account or signing in to the AWS Management Console. Once logged in, navigate to the EC2 service dashboard, where you can manage your virtual servers (instances).
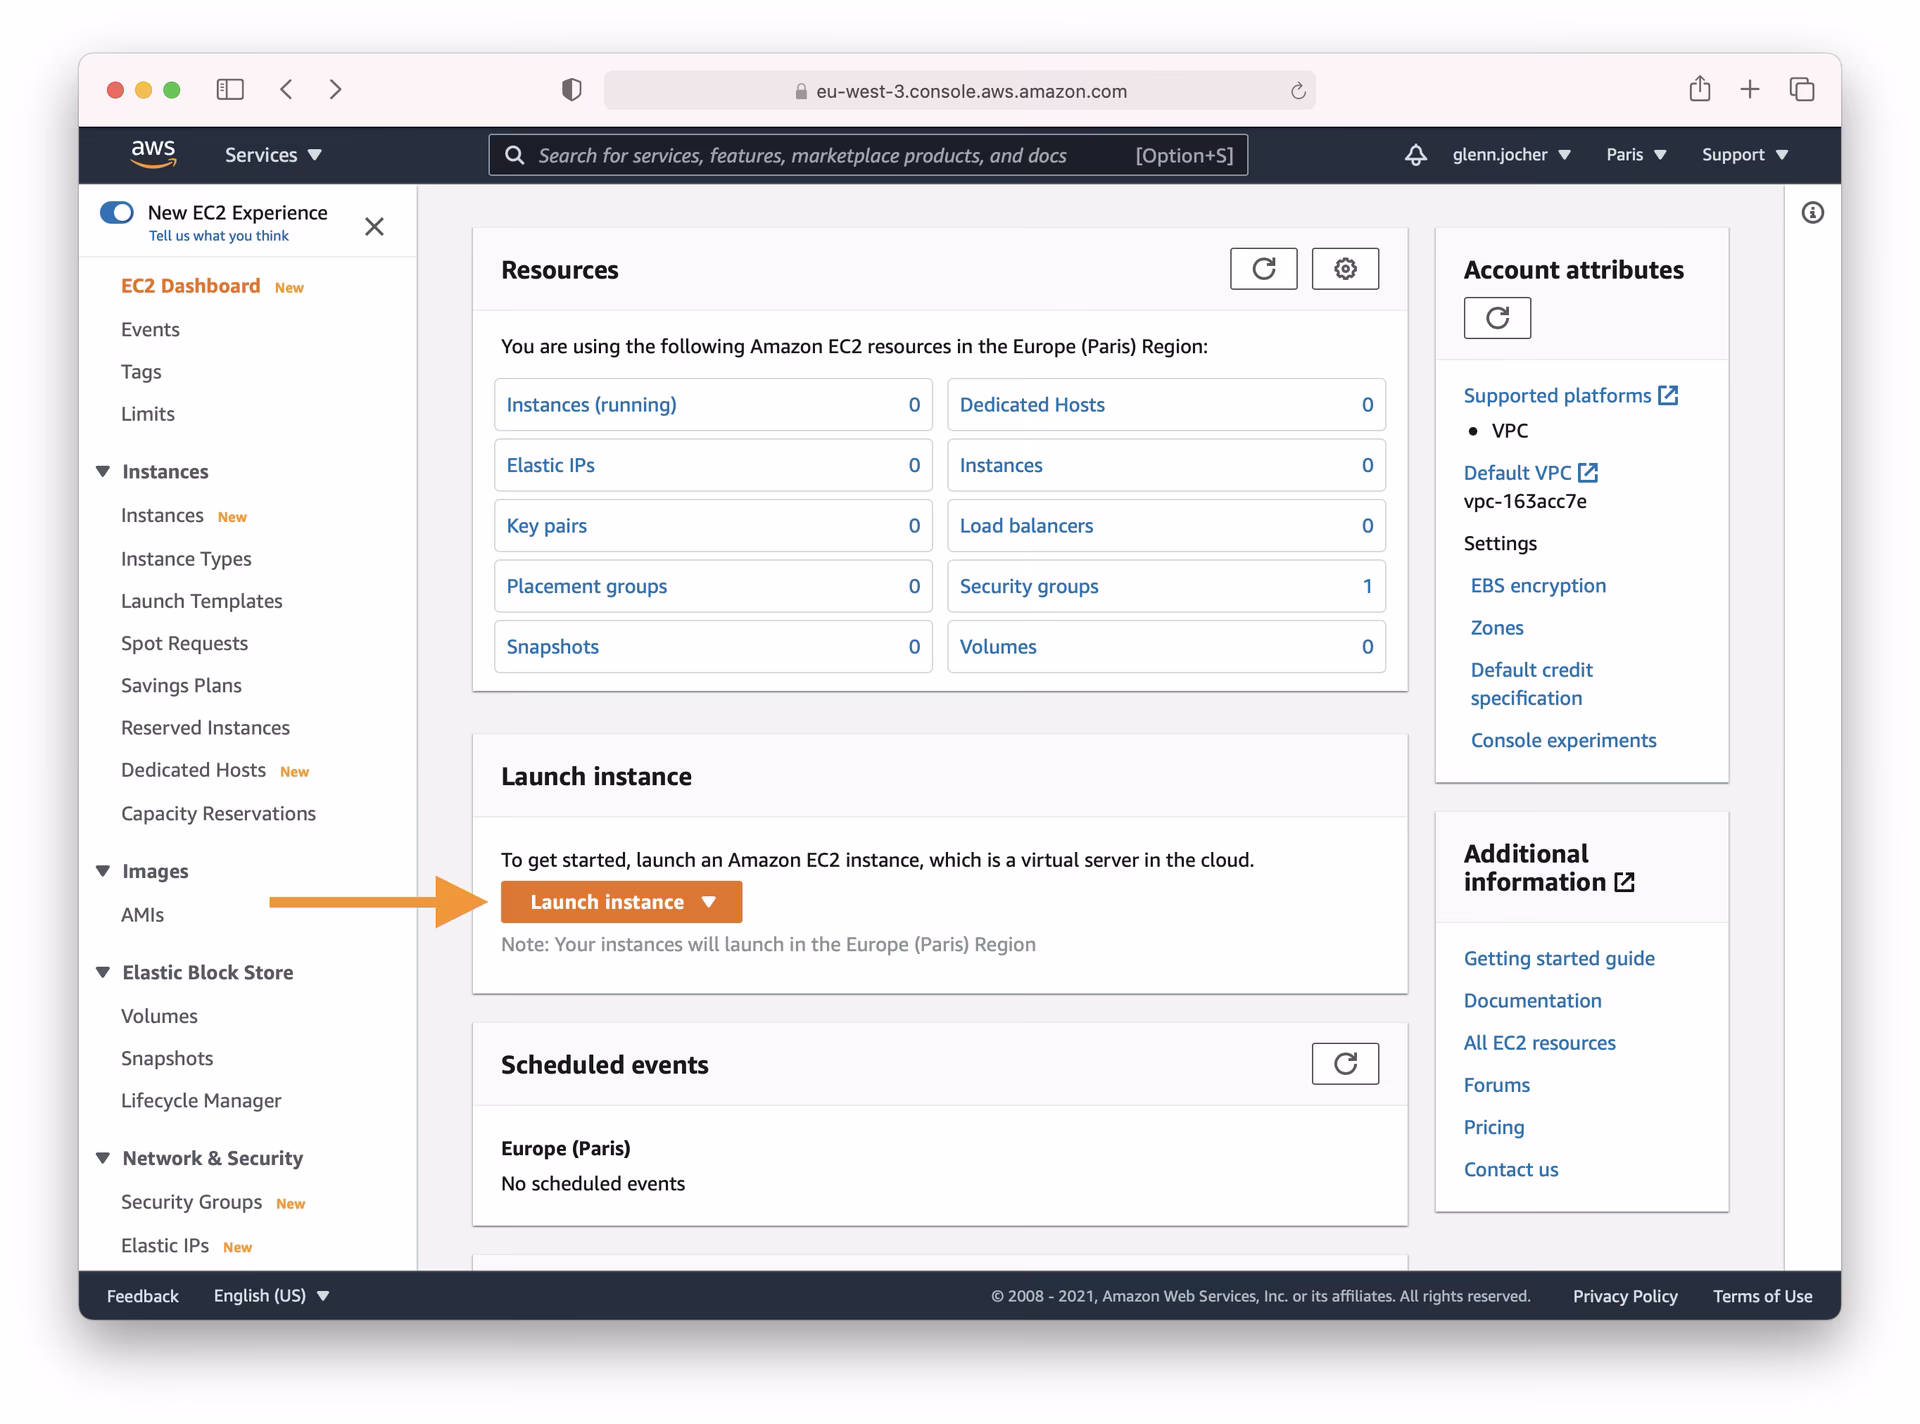
Step 2: Launch Your Instance
From the EC2 dashboard, click the Launch Instance button. This initiates the process of creating a new virtual server tailored to your needs.
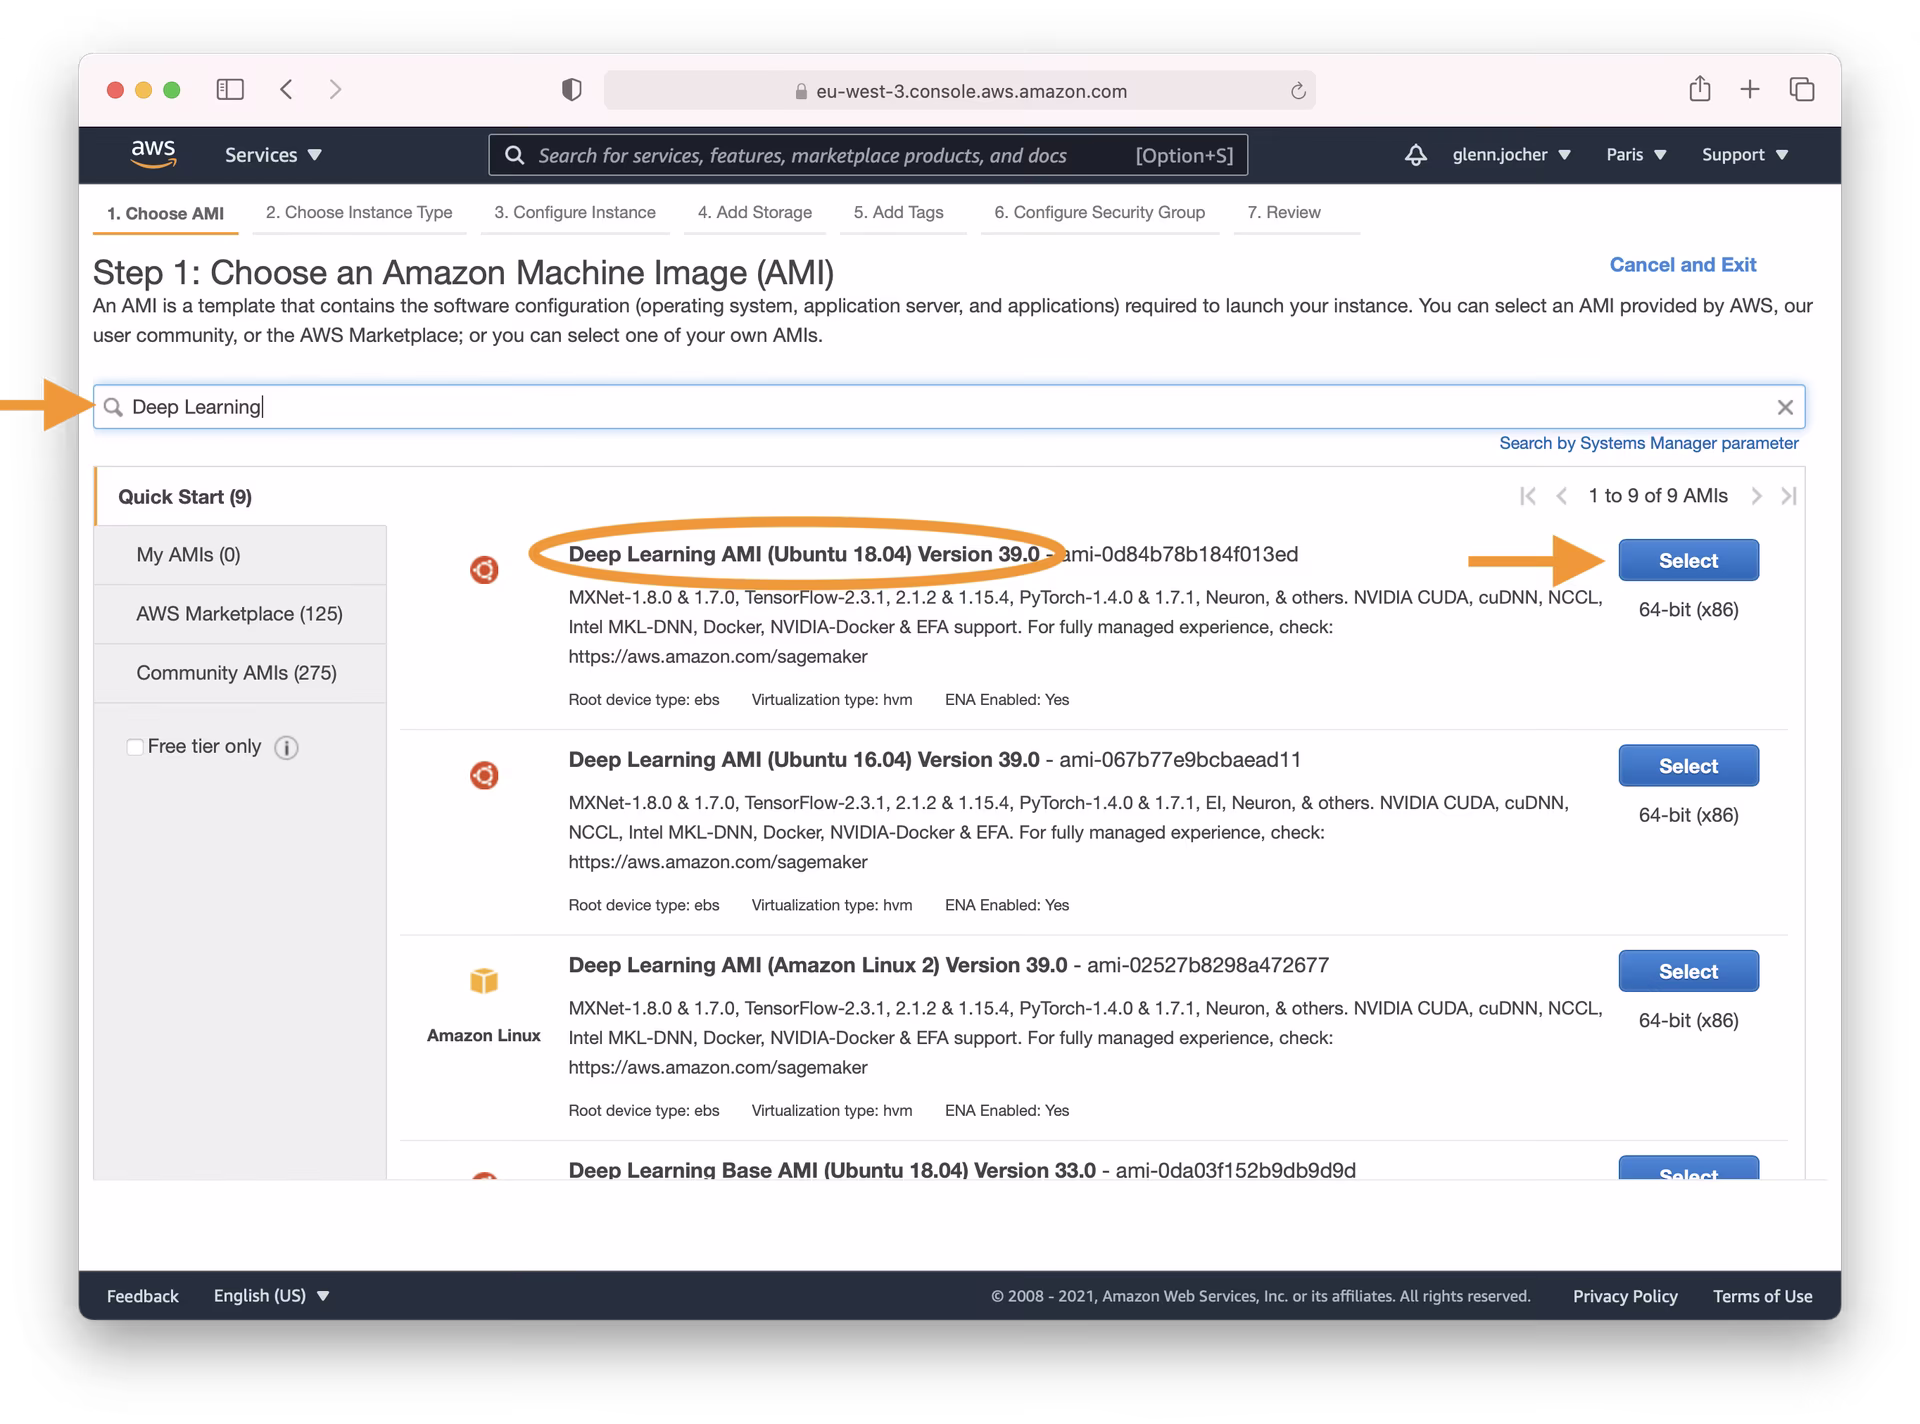
Selecting the Right Amazon Machine Image (AMI)
Choosing the correct AMI is crucial. This determines the operating system and pre-installed software for your instance. In the search bar, type 'Deep Learning' and select the latest Ubuntu-based Deep Learning AMI (unless you have specific requirements for a different OS). Amazon's Deep Learning AMIs come pre-configured with popular deep learning frameworks (like PyTorch, used by YOLOv5) and necessary GPU drivers, significantly streamlining the setup process.
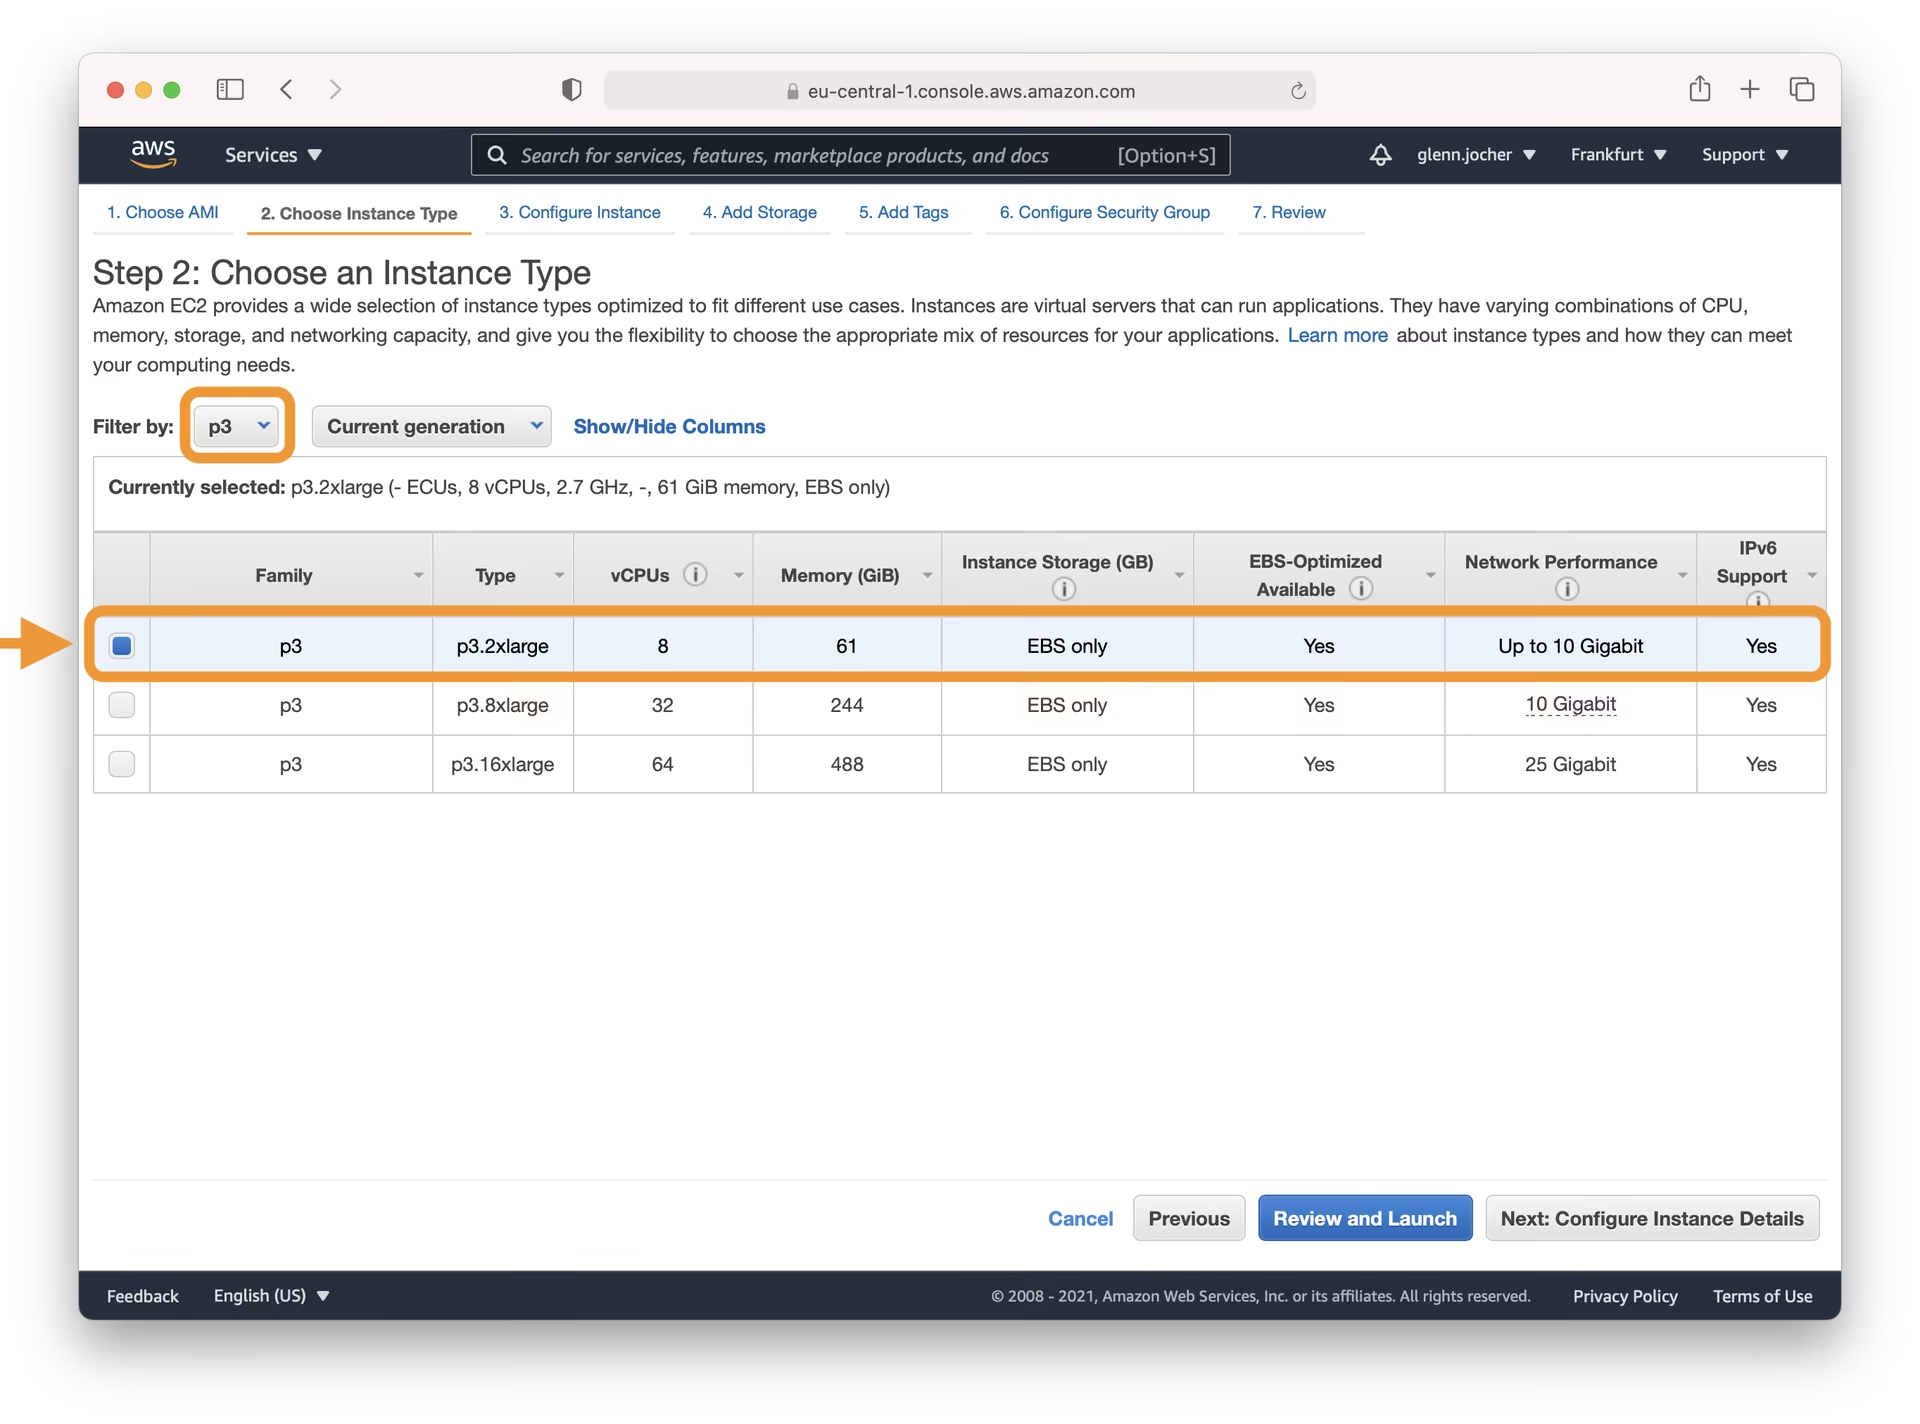
Picking an Instance Type
For demanding tasks like training deep learning models, selecting a GPU-accelerated instance type is highly recommended. GPUs can dramatically reduce the time required for model training compared to CPUs. When choosing an instance size, ensure its memory capacity (RAM) is sufficient for your model and dataset.
Note: The size of your model and dataset are critical factors. If your ML task requires more memory than the selected instance provides, you'll need to choose a larger instance type to avoid performance issues or errors.
Explore the available GPU instance types on the EC2 Instance Types page, particularly under the Accelerated Computing category.
For detailed information on monitoring and optimizing GPU usage, refer to the AWS guide on GPU Monitoring and Optimization. Compare costs using On-Demand Pricing and explore potential savings with Spot Instance Pricing.
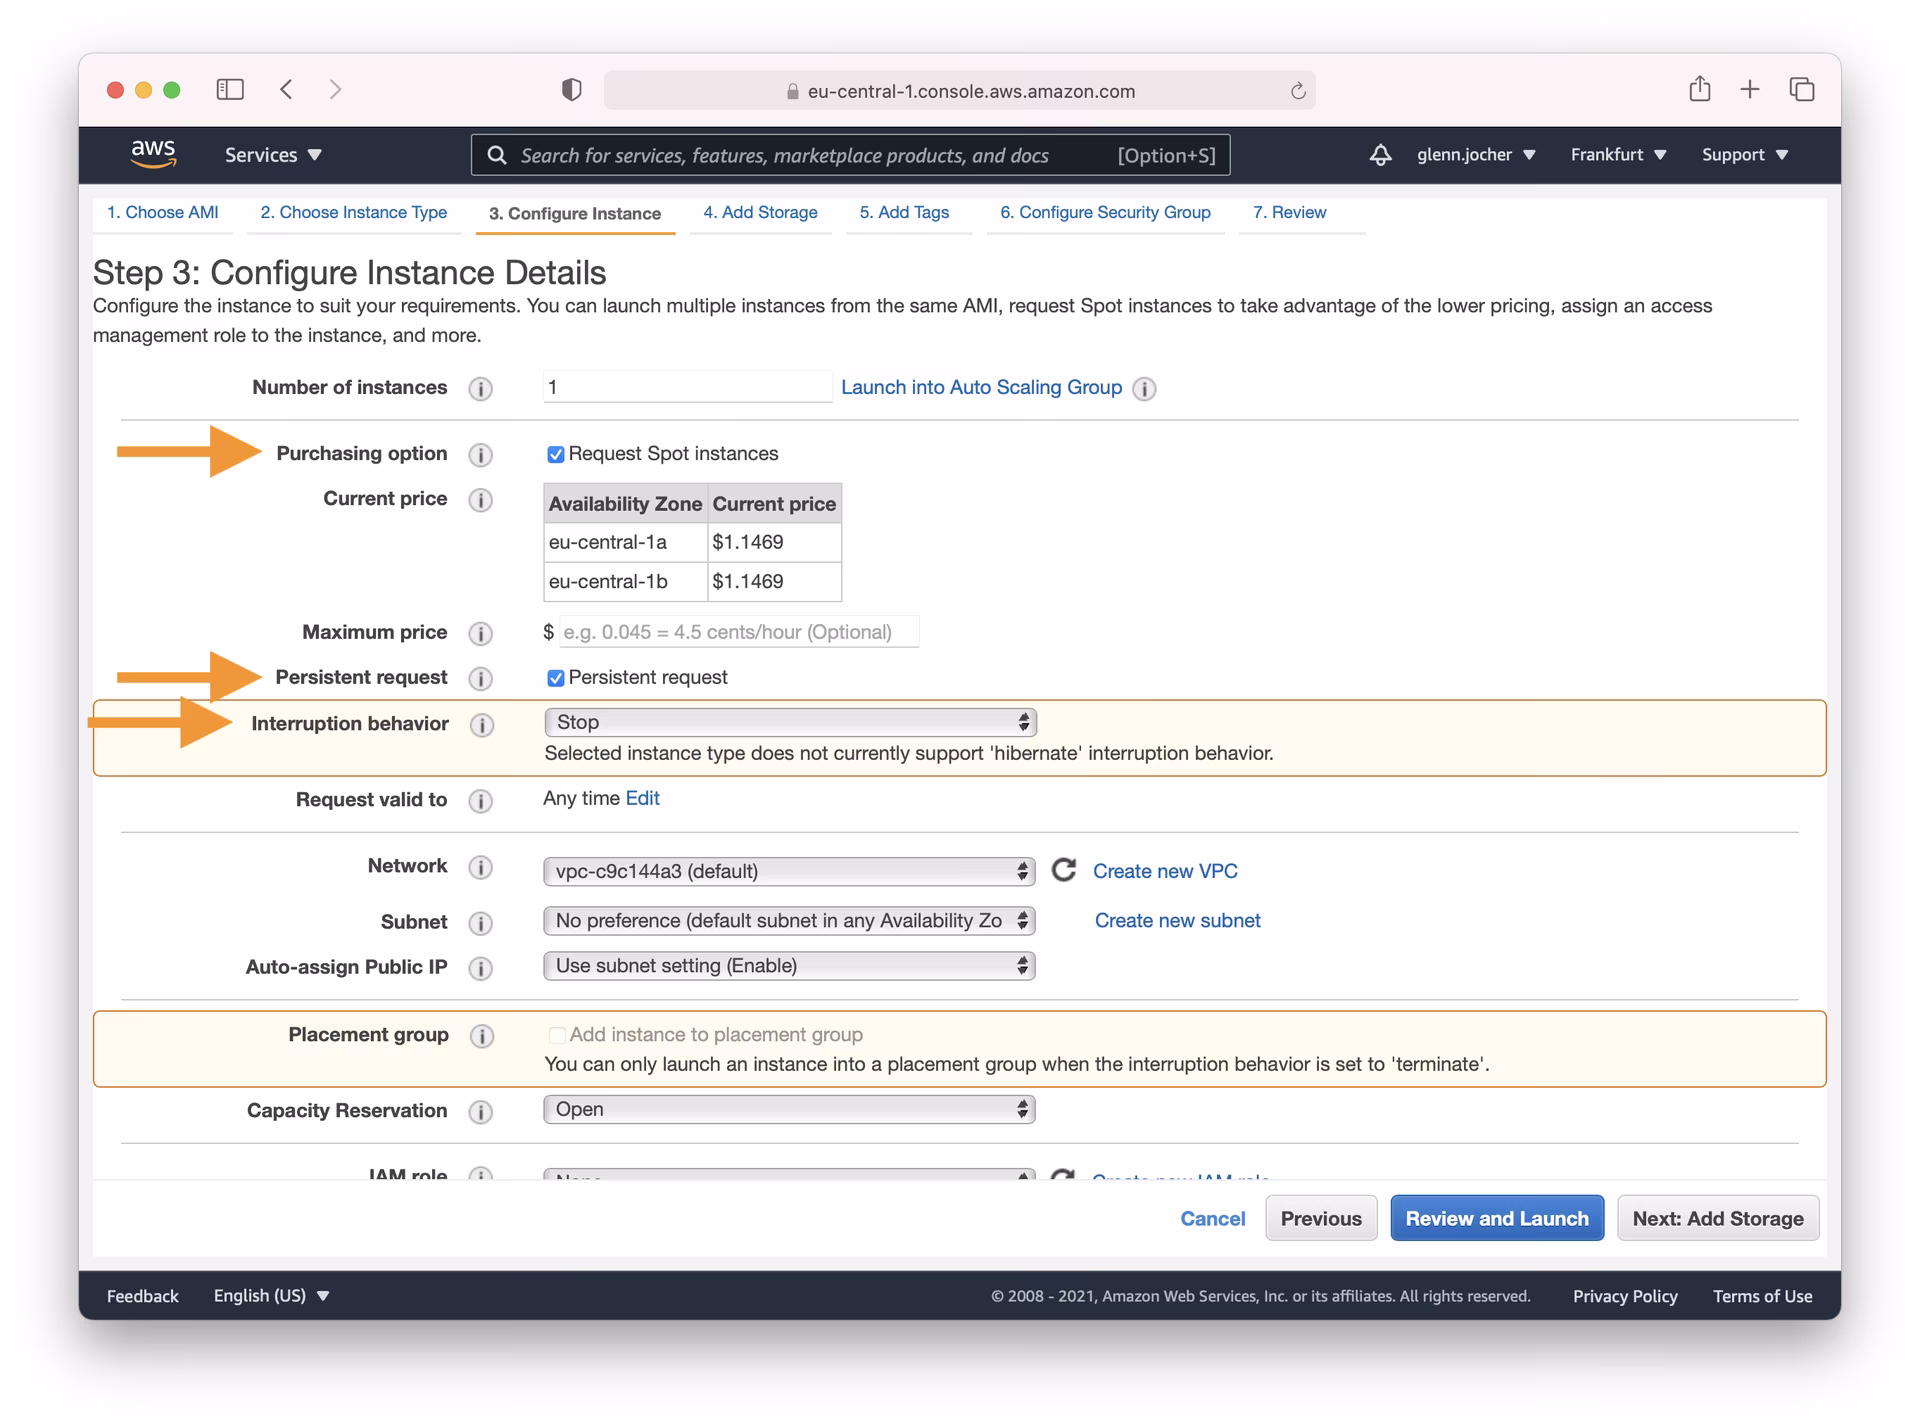
Configuring Your Instance
Consider using Amazon EC2 Spot Instances for a more cost-effective approach. Spot Instances allow you to bid on unused EC2 capacity, often at a significant discount compared to On-Demand prices. For tasks that require persistence (saving data even if the Spot Instance is interrupted), choose a persistent request. This ensures your storage volume persists.
Proceed through Steps 4-7 of the instance launch wizard to configure storage, add tags, set up security groups (ensure SSH port 22 is open from your IP), and review your settings before clicking Launch. You'll also need to create or select an existing key pair for secure SSH access.
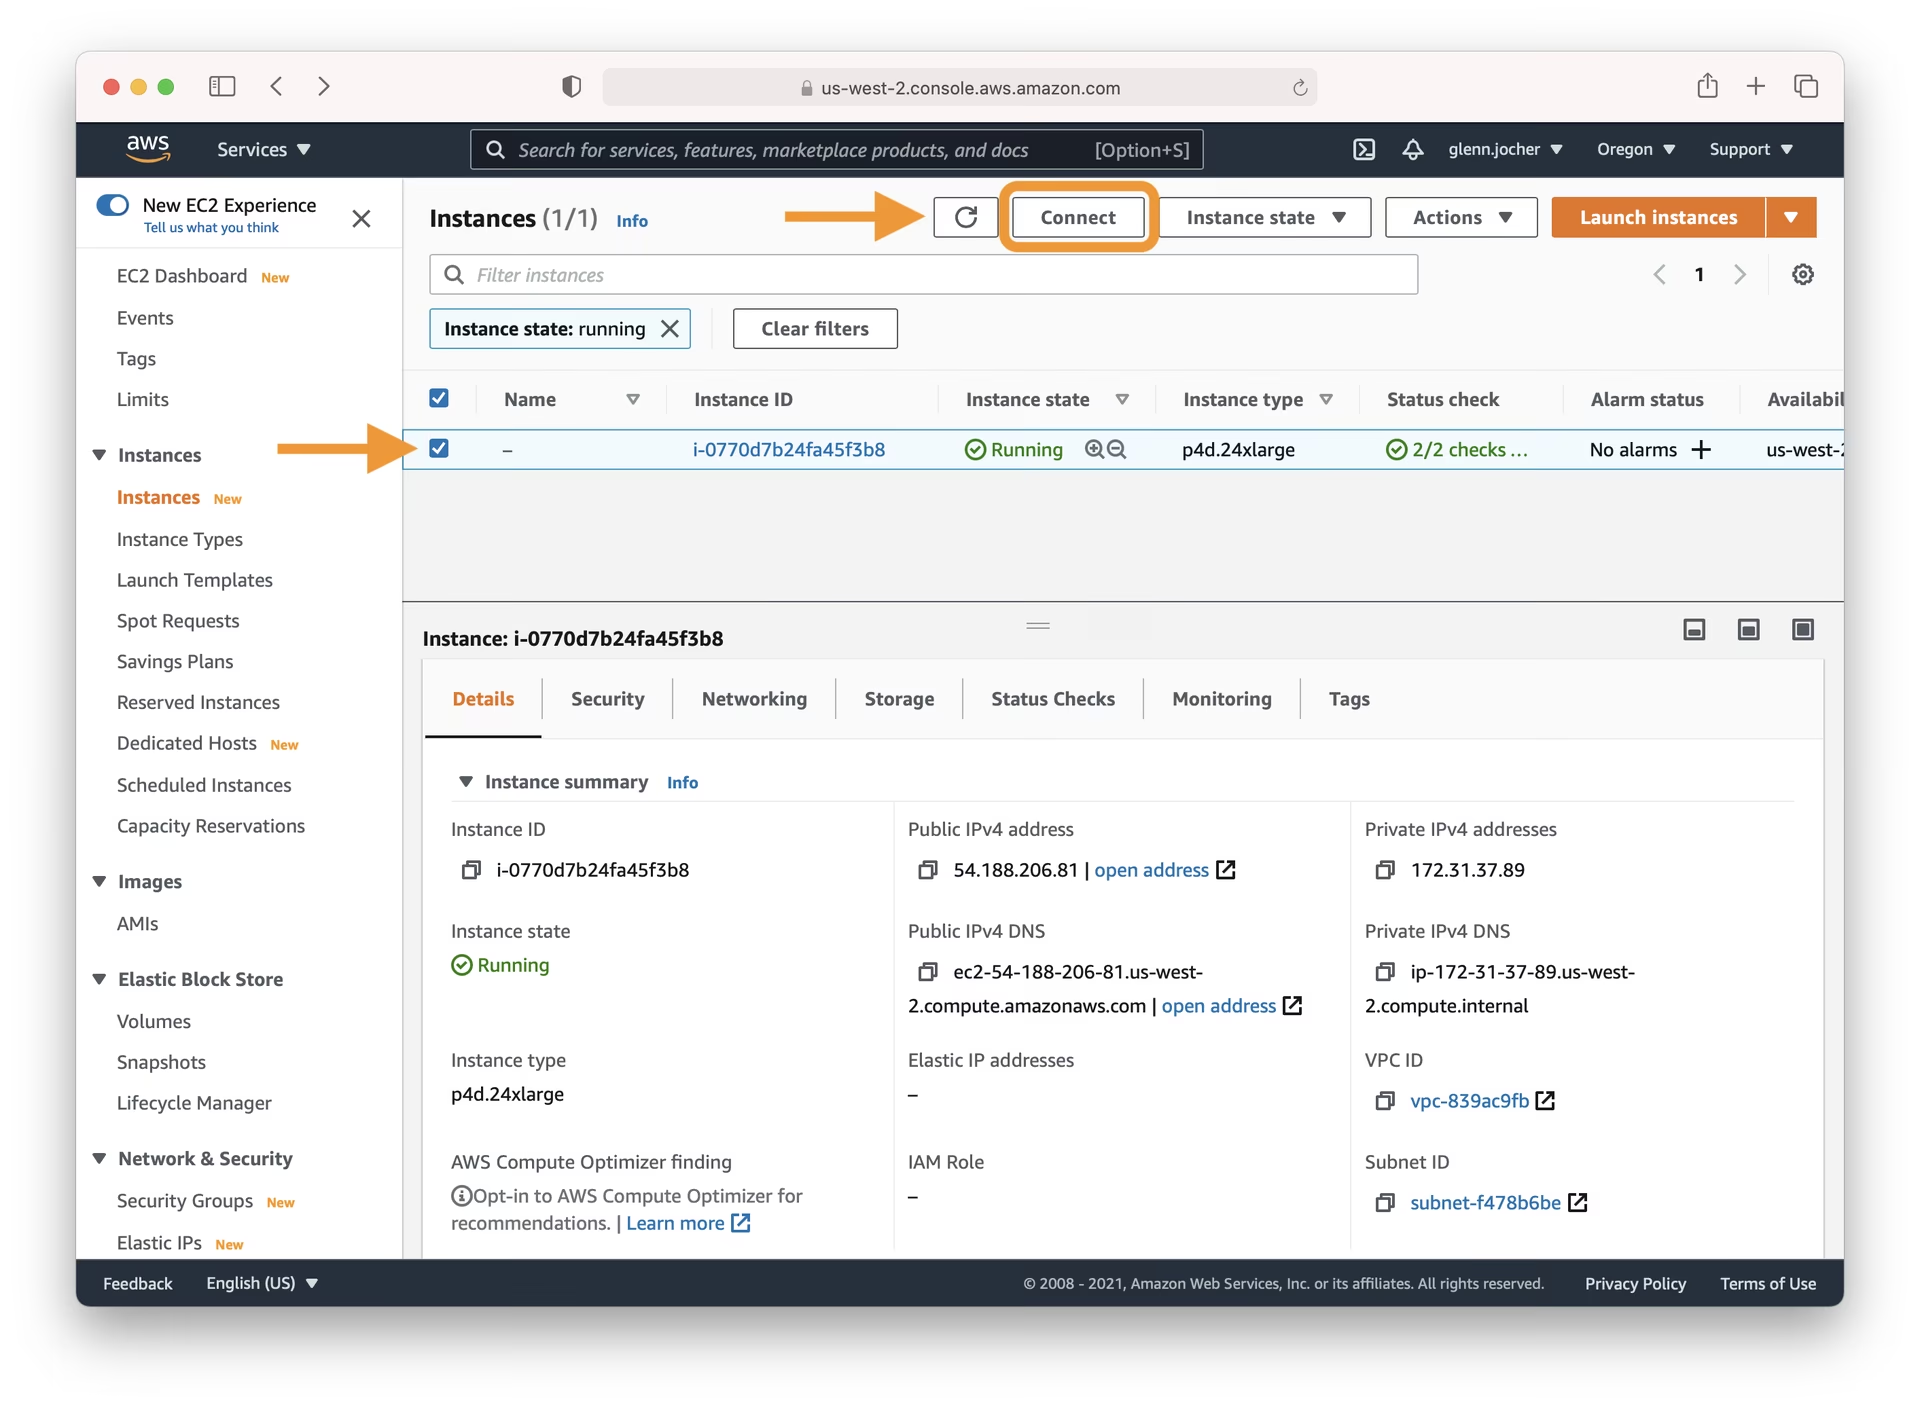
Step 3: Connect to Your Instance
Once your instance state shows as 'running', select it from the EC2 dashboard. Click the Connect button to view connection options. Use the provided SSH command example in your local terminal (like Terminal on macOS/Linux or PuTTY/WSL on Windows) to establish a secure connection. You'll need the private key file (.pem) you created or selected during launch.
Step 4: Running Ultralytics YOLOv5
Now that you're connected via SSH, you can set up and run YOLOv5. First, clone the official YOLOv5 repository from GitHub and navigate into the directory. Then, install the required dependencies using pip. It's recommended to use a Python 3.8 environment or later. The necessary models and datasets will be downloaded automatically from the latest YOLOv5 release when you run commands like training or detection.
# Clone the YOLOv5 repository
git clone https://github.com/ultralytics/yolov5
cd yolov5

# Install required packages
pip install -r requirements.txt
With the environment ready, you can start using YOLOv5 for various tasks:
# Train a YOLOv5 model on a custom dataset (e.g., coco128.yaml)
python train.py --data coco128.yaml --weights yolov5s.pt --img 640

# Validate the performance (Precision, Recall, mAP) of a trained model (e.g., yolov5s.pt)
python val.py --weights yolov5s.pt --data coco128.yaml --img 640

# Run inference (object detection) on images or videos using a trained model
python detect.py --weights yolov5s.pt --source path/to/your/images_or_videos/ --img 640

# Export the trained model to various formats like ONNX, CoreML, TFLite for deployment
# See https://docs.ultralytics.com/modes/export/ for more details
python export.py --weights yolov5s.pt --include onnx coreml tflite --img 640
Refer to the Ultralytics documentation for detailed guides on Training, Validation, Prediction (Inference), and Exporting.
Optional Extras: Increasing Swap Memory
If you're working with very large datasets or encounter memory limitations during training, increasing the swap memory on your instance can sometimes help. Swap space allows the system to use disk space as virtual RAM.
# Allocate a 64GB swap file (adjust size as needed)
sudo fallocate -l 64G /swapfile

# Set correct permissions
sudo chmod 600 /swapfile

# Set up the file as a Linux swap area
sudo mkswap /swapfile

# Enable the swap file
sudo swapon /swapfile

# Verify the swap memory is active
free -h
Congratulations! 🎉 You have successfully set up an AWS Deep Learning instance, installed Ultralytics YOLOv5, and are ready to perform object detection tasks. Whether you're experimenting with pretrained models or training on your own data, this powerful setup provides a scalable foundation for your computer vision projects. Should you encounter any issues, consult the extensive AWS documentation and the helpful Ultralytics community resources like the FAQ. Happy detecting!