Link to this sectionYOLOv5 中的模型剪枝与稀疏化#
📚 本指南介绍了如何对 YOLOv5 🚀 模型进行 剪枝,以在保持性能的同时创建更高效的网络。
Link to this section什么是模型剪枝?#
模型剪枝 是一种通过移除不太重要的参数(权重和连接)来减小神经网络规模和复杂度的技术。此过程可创建更高效的模型,并带来以下几点优势:
- 减小模型体积,便于在资源受限的设备上部署
- 更快的推理速度,且对精度的影响微乎其微
- 更低的内存占用和能耗
- 提升实时应用的整体效率
剪枝的工作原理是识别并移除对模型性能贡献极小的参数,从而得到一个精度相当且更轻量化的模型。
Link to this section在你开始之前#
Clone repo and install requirements.txt in a Python>=3.8.0 environment, including PyTorch>=1.8. Models and datasets download automatically from the latest YOLOv5 release.
git clone https://github.com/ultralytics/yolov5 # clone
cd yolov5
pip install -r requirements.txt # install
Link to this section测试基准性能#
在进行剪枝之前,先建立一个基准性能以进行对比。此命令在 COCO val2017 数据集上以 640 像素的图像尺寸测试 YOLOv5x。yolov5x.pt 是现有模型中最大且最精确的一个。其他选项包括 yolov5s.pt、yolov5m.pt 和 yolov5l.pt,或者你训练自定义数据集得到的 checkpoint ./weights/best.pt。有关所有可用模型的详细信息,请参阅 README 表格。
python val.py --weights yolov5x.pt --data coco.yaml --img 640 --half输出:
val: data=/content/yolov5/data/coco.yaml, weights=['yolov5x.pt'], batch_size=32, imgsz=640, conf_thres=0.001, iou_thres=0.65, task=val, device=, workers=8, single_cls=False, augment=False, verbose=False, save_txt=False, save_conf=False, save_json=True, project=runs/val, name=exp, exist_ok=False, half=True, dnn=False
YOLOv5 🚀 v6.0-224-g4c40933 torch 1.10.0+cu111 CUDA:0 (Tesla V100-SXM2-16GB, 16160MiB)

Fusing layers...
Model Summary: 444 layers, 86705005 parameters, 0 gradients
val: Scanning '/content/datasets/coco/val2017.cache' images and labels... 4952 found, 48 missing, 0 empty, 0 corrupt: 100% 5000/5000 [00:00<?, ?it/s]
               Class     Images     Labels          P          R     mAP@.5 mAP@.5:.95: 100% 157/157 [01:12<00:00,  2.16it/s]
                 all       5000      36335      0.732      0.628      0.683      0.496
Speed: 0.1ms pre-process, 5.2ms inference, 1.7ms NMS per image at shape (32, 3, 640, 640)  # <--- base speed

Evaluating pycocotools mAP... saving runs/val/exp-2/yolov5x_predictions.json...
...
 Average Precision  (AP) @[ IoU=0.50:0.95 | area=   all | maxDets=100 ] = 0.507  # <--- base mAP
 Average Precision  (AP) @[ IoU=0.50      | area=   all | maxDets=100 ] = 0.689
 Average Precision  (AP) @[ IoU=0.75      | area=   all | maxDets=100 ] = 0.552
 Average Precision  (AP) @[ IoU=0.50:0.95 | area= small | maxDets=100 ] = 0.345
 Average Precision  (AP) @[ IoU=0.50:0.95 | area=medium | maxDets=100 ] = 0.559
 Average Precision  (AP) @[ IoU=0.50:0.95 | area= large | maxDets=100 ] = 0.652
 Average Recall     (AR) @[ IoU=0.50:0.95 | area=   all | maxDets=  1 ] = 0.381
 Average Recall     (AR) @[ IoU=0.50:0.95 | area=   all | maxDets= 10 ] = 0.630
 Average Recall     (AR) @[ IoU=0.50:0.95 | area=   all | maxDets=100 ] = 0.682
 Average Recall     (AR) @[ IoU=0.50:0.95 | area= small | maxDets=100 ] = 0.526
 Average Recall     (AR) @[ IoU=0.50:0.95 | area=medium | maxDets=100 ] = 0.731
 Average Recall     (AR) @[ IoU=0.50:0.95 | area= large | maxDets=100 ] = 0.829
Results saved to runs/val/exp
Link to this section对 YOLOv5x 应用剪枝(30% 稀疏度)#
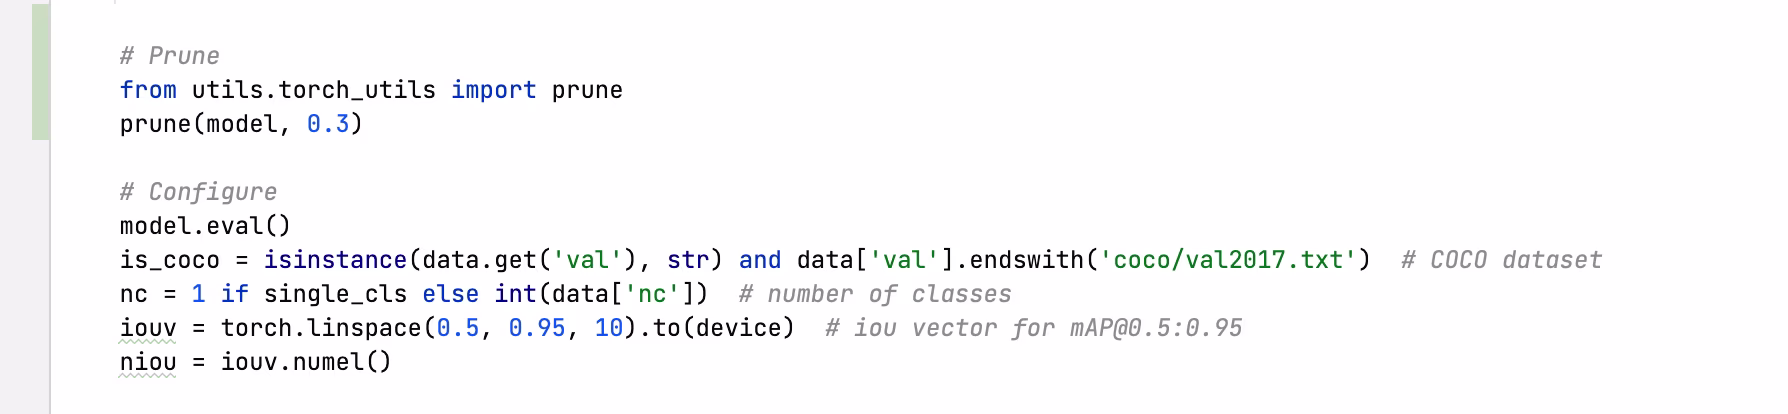
We can apply pruning to the model using the torch_utils.prune() command defined in utils/torch_utils.py. To test a pruned model, we update val.py to prune YOLOv5x to 0.3 sparsity (30% of weights set to zero):
30% 剪枝后的输出:
val: data=/content/yolov5/data/coco.yaml, weights=['yolov5x.pt'], batch_size=32, imgsz=640, conf_thres=0.001, iou_thres=0.65, task=val, device=, workers=8, single_cls=False, augment=False, verbose=False, save_txt=False, save_conf=False, save_json=True, project=runs/val, name=exp, exist_ok=False, half=True, dnn=False
YOLOv5 🚀 v6.0-224-g4c40933 torch 1.10.0+cu111 CUDA:0 (Tesla V100-SXM2-16GB, 16160MiB)

Fusing layers...
Model Summary: 444 layers, 86705005 parameters, 0 gradients
Pruning model...  0.3 global sparsity
val: Scanning '/content/datasets/coco/val2017.cache' images and labels... 4952 found, 48 missing, 0 empty, 0 corrupt: 100% 5000/5000 [00:00<?, ?it/s]
               Class     Images     Labels          P          R     mAP@.5 mAP@.5:.95: 100% 157/157 [01:11<00:00,  2.19it/s]
                 all       5000      36335      0.724      0.614      0.671      0.478
Speed: 0.1ms pre-process, 5.2ms inference, 1.7ms NMS per image at shape (32, 3, 640, 640)  # <--- prune speed

Evaluating pycocotools mAP... saving runs/val/exp-3/yolov5x_predictions.json...
...
 Average Precision  (AP) @[ IoU=0.50:0.95 | area=   all | maxDets=100 ] = 0.489  # <--- prune mAP
 Average Precision  (AP) @[ IoU=0.50      | area=   all | maxDets=100 ] = 0.677
 Average Precision  (AP) @[ IoU=0.75      | area=   all | maxDets=100 ] = 0.537
 Average Precision  (AP) @[ IoU=0.50:0.95 | area= small | maxDets=100 ] = 0.334
 Average Precision  (AP) @[ IoU=0.50:0.95 | area=medium | maxDets=100 ] = 0.542
 Average Precision  (AP) @[ IoU=0.50:0.95 | area= large | maxDets=100 ] = 0.635
 Average Recall     (AR) @[ IoU=0.50:0.95 | area=   all | maxDets=  1 ] = 0.370
 Average Recall     (AR) @[ IoU=0.50:0.95 | area=   all | maxDets= 10 ] = 0.612
 Average Recall     (AR) @[ IoU=0.50:0.95 | area=   all | maxDets=100 ] = 0.664
 Average Recall     (AR) @[ IoU=0.50:0.95 | area= small | maxDets=100 ] = 0.496
 Average Recall     (AR) @[ IoU=0.50:0.95 | area=medium | maxDets=100 ] = 0.722
 Average Recall     (AR) @[ IoU=0.50:0.95 | area= large | maxDets=100 ] = 0.803
Results saved to runs/val/exp-3
Link to this section结果分析#
从结果中我们可以观察到:
- 达到 30% 稀疏度:
nn.Conv2d层中 30% 的模型权重参数现在为零 - 推理时间保持不变:尽管进行了剪枝,处理速度基本相同
- 性能影响极小:mAP 从 0.507 略微下降至 0.489(仅下降 3.6%)
- 模型体积减小:剪枝后的模型存储所需的内存更少
这表明剪枝可以在仅对性能产生微小影响的情况下显著降低模型复杂度,使其成为在资源受限环境中进行部署的一种有效优化技术。
Link to this section微调剪枝后的模型#
为获得最佳效果,剪枝后的模型应在剪枝后进行微调以恢复精度。这可以通过以下方式完成:
- 应用所需的稀疏度级别进行剪枝
- 以较低的学习率对剪枝后的模型进行几个 epoch 的训练
- 将微调后的剪枝模型与基准进行评估对比
此过程有助于剩余参数进行调整以补偿已移除的连接,通常能恢复大部分甚至全部原始精度。
Link to this section支持的环境#
Ultralytics 提供了一系列开箱即用的环境,每个环境都预装了 CUDA、CUDNN、Python 和 PyTorch 等关键依赖项,助你快速启动项目。
- 免费 GPU Notebooks:


- Google Cloud: GCP 快速入门指南
- Amazon: AWS 快速入门指南
- Azure: AzureML 快速入门指南
- Docker: Docker 快速入门指南

Link to this section项目状态#
![]()
此徽章表示所有 YOLOv5 GitHub Actions 持续集成 (CI) 测试均成功通过。这些 CI 测试严格检查 YOLOv5 在各个关键方面的功能和性能:训练、验证、推理、导出和基准测试。它们确保了在 macOS、Windows 和 Ubuntu 上的一致且可靠的运行,测试每 24 小时以及在每次新提交时进行。